Category: Main Course

  • The Secret Game-Changer: BBQ Sauce in Your Chicken Marinade

    The Secret Game-Changer: BBQ Sauce in Your Chicken Marinade

    Why add BBQ sauce?

    Forget the usual lemon and herbs. I started tossing a little smoky barbecue sauce into my marinade just to see what happened. Turns out, it’s a freakishly good combo. The tangy, sweet, slightly charred flavor sweeps through every bite, making every piece taste like it just came off a grill with a real flame. Honestly, I didn’t expect it to work so well, but it elevates good chicken to something I’d actually eat again and again, especially when I’m craving that missing smoky punch.

    And right now — with grilling season kicking into high gear and everyone hunting for quick, no-fuss dinners — this marinade is a total lifesaver. It’s one of those ideas that feels brilliant at midnight when I’m thinking about dinner, and I find myself wondering why I didn’t do this earlier.

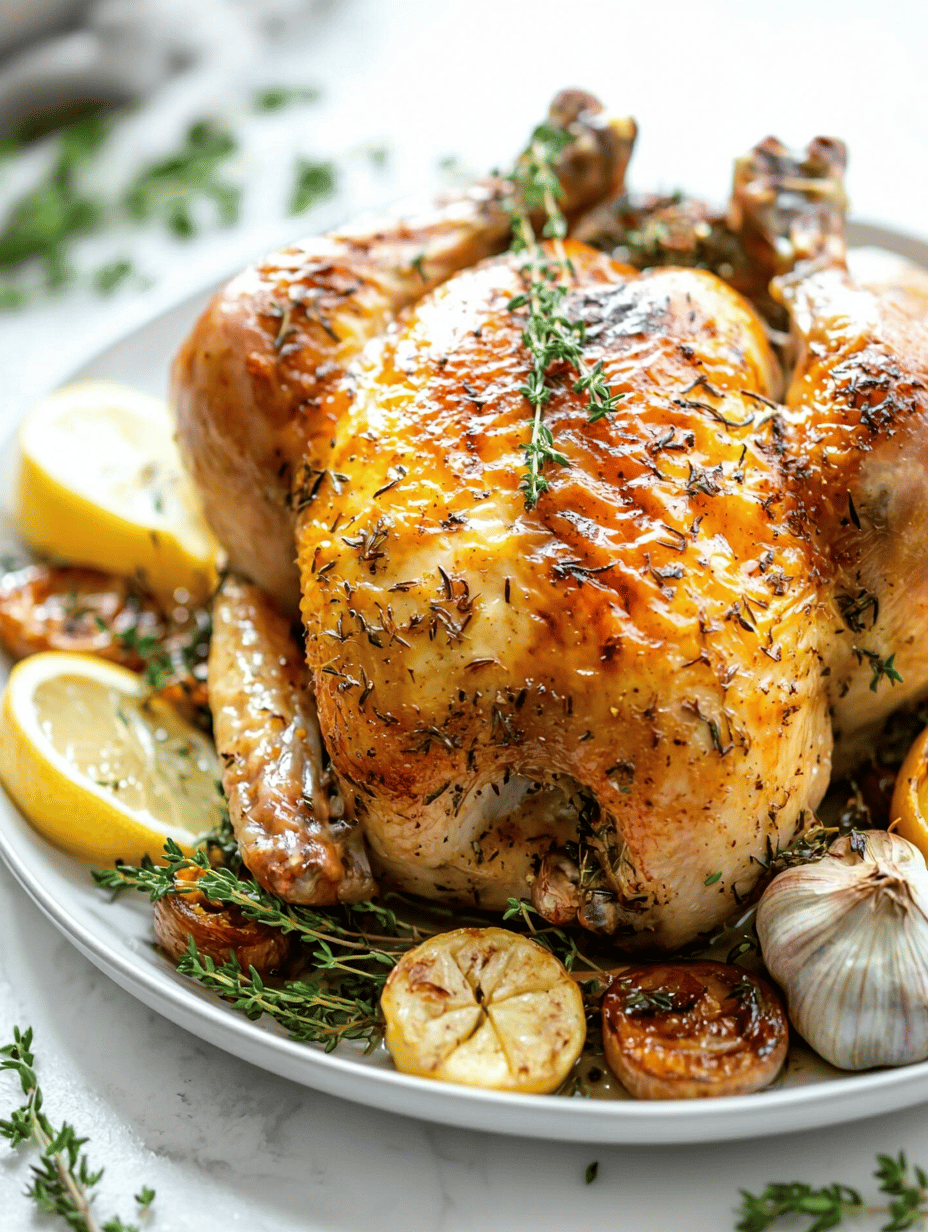
    BBQ Sauce Marinated Chicken

    This dish involves marinating chicken pieces in a mixture that includes smoky barbecue sauce, soy sauce, and seasonings, then grilling or roasting until cooked through. The final result has a caramelized exterior with a tender, juicy interior, showcasing a glossy, flavorful coating from the marinade.
    Prep Time 10 minutes
    Cook Time 25 minutes
    Total Time 35 minutes
    Servings: 4
    Course: Main Course
    Cuisine: American
    Calories: 320

    Ingredients
      

    • 4 pieces bone-in chicken thighs skin-on preferred
    • 1/2 cup smoky barbecue sauce preferably a thick, flavorful one
    • 2 tablespoons soy sauce for depth and umami
    • 1 teaspoon garlic powder
    • 1/2 teaspoon black pepper
    • 1 tablespoon olive oil for marinade and brushing

    Equipment

    • Mixing bowl
    • Grill or Oven
    • Tongs
    • Basting brush

    Method
     

    1. Combine barbecue sauce, soy sauce, garlic powder, black pepper, and olive oil in a mixing bowl. Whisk until well blended to form the marinade.
    2. Pat the chicken thighs dry with paper towels. Place them in a large resealable plastic bag or shallow dish.
    3. Pour the marinade over the chicken, ensuring each piece is coated evenly. Seal the bag or cover the dish with plastic wrap. Refrigerate for at least 2 hours or up to 4 hours for maximum flavor infusion.
    4. Preheat the grill to medium-high heat (around 375-400°F / 190-200°C). Remove chicken from the marinade, letting excess drip off, and place on the grill grates.
    5. Grill the chicken, turning occasionally with tongs, until the outside is caramelized and the internal temperature reaches 165°F (75°C). This typically takes about 20-25 minutes. Baste with additional marinade or olive oil during grilling for extra gloss and flavor.
    6. Remove the chicken from the grill and let rest for 5 minutes. Serve hot, garnished with optional herbs if desired, with a shiny, charred exterior and juicy interior.

    Notes

    Adjust grilling time based on chicken thickness. Marinating longer enhances flavor. For oven cooking, bake at 400°F (200°C) for 25-30 minutes, turning halfway through.

    Sometimes the simplest tricks make the biggest difference. No fuss, no fancy ingredients. Just good chicken, a splash of barbecue sauce, and a grill. That’s all it takes. Whatever you end up making, I bet it’ll taste like you’ve snuck a little summer into your weeknight.

  • Cider Braised Pot Roast: The Unexpected Spark in Comfort Food

    Cider Braised Pot Roast: The Unexpected Spark in Comfort Food

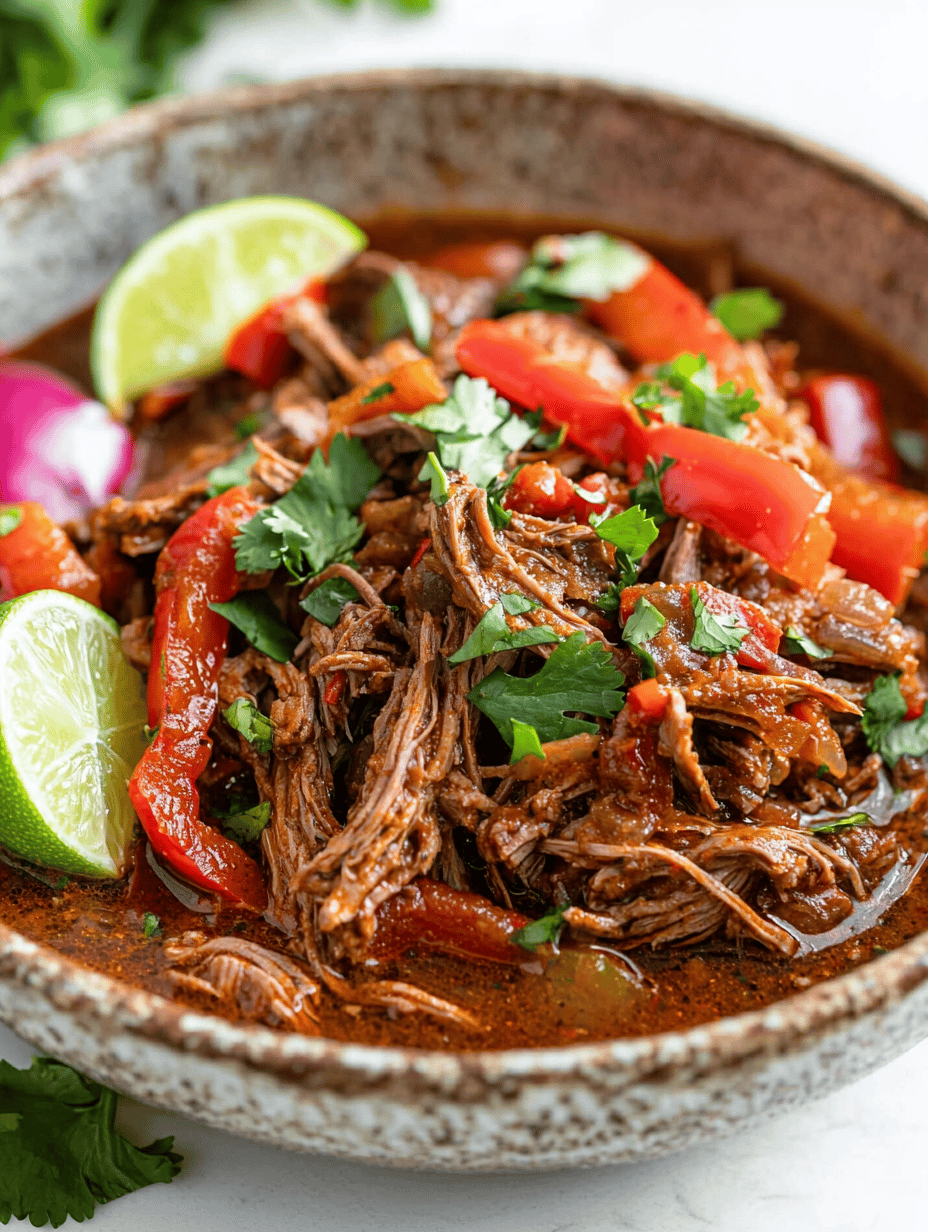
    So I was thinking about how winter mornings smell—cold air, coffee, and that faint whiff of apple cider simmering away. Honestly, I wasn’t planning to use cider for a roast, but I guess I wanted something that felt a little surprising, a little different. It’s not just about the tender meat melting apart, but that sharp, slightly sweet aroma that hits you as soon as the lid lifts. No fancy ingredients needed—just good beef, a bottle of cider, and a few pantry staples. This dish kind of sneaks up on you, like, oh, this is just pot roast, and then suddenly you’re caught off guard by how much that apple tang makes the beef feel lighter, brighter. It’s exactly the kind of thing I want when I need a meal that makes me forget the cold outside for a while.

    Apple Cider Pot Roast

    This pot roast is cooked with beef, vegetables, and apple cider, resulting in a tender, fall-apart meat with a slightly sweet and tangy sauce. The dish is prepared using browning, slow simmering, and gentle braising to develop rich flavors and a juicy texture, with the final appearance featuring shredded meat and glazed vegetables in a flavorful broth.
    Prep Time 15 minutes
    Cook Time 3 hours
    Total Time 3 hours 15 minutes
    Servings: 6
    Course: Main Course
    Cuisine: American
    Calories: 480

    Ingredients
      

    • 3 pounds beef chuck roast trimmed and cut into large chunks
    • 2 cups apple cider preferably unfiltered for more flavor
    • 2 carrots carrots peeled and sliced thickly
    • 2 stalks celery sliced
    • 1 onion yellow onion quartered
    • 3 cloves garlic minced
    • 2 tablespoons olive oil
    • 1 teaspoon salt
    • 1/2 teaspoon black pepper
    • 1 tablespoon flour for thickening sauce

    Equipment

    • Dutch oven or large heavy-bottomed pot
    • Chef’s knife

    Method
     

    1. Heat the Dutch oven over medium-high heat and add olive oil. Once shimmering, add beef chunks and sear until all sides are golden brown, about 4-5 minutes per batch. Remove beef and set aside.
    2. Add chopped onion, carrots, and celery to the same Dutch oven. Sauté until vegetables are softened and onions are translucent, about 5-7 minutes. Stir in minced garlic and cook for another minute until fragrant.
    3. Sprinkle flour over the vegetables and stir to combine. Cook for 1-2 minutes to eliminate raw flour taste. Pour in apple cider, scraping the bottom of the pot to deglaze and incorporate browned bits, until the mixture begins to thicken slightly.
    4. Return the browned beef to the pot, along with any accumulated juices. Season with salt and black pepper. Cover the Dutch oven with a lid and reduce heat to low. Let it simmer gently for 2.5 to 3 hours, until the beef is tender and falling apart, with vegetables soft and flavorful.
    5. Remove the lid and increase heat slightly to allow the sauce to reduce and thicken further, about 10-15 minutes. Stir occasionally, and check for desired consistency. Taste and adjust seasonings as needed.
    6. Serve the pot roast hot, with shredded meat and vegetables on a plate, spooning over the rich cider sauce. Garnish with fresh herbs if desired.

    That cider really does something, doesn’t it? I don’t know. Just feels like a small rebellion against the usual, especially when you’re craving something hearty but not heavy. And with so little fuss, I might end up making this more than I should admit. Sometimes the best ideas are accidental.

  • Irish Baked Salmon with a Twist of Seaweed and Cider

    Irish Baked Salmon with a Twist of Seaweed and Cider

    I never thought about how the smell of baked fish could stir up memory like a whiff of salty air hitting your face. This Irish baked salmon isn’t just about the taste, but that quiet moment when you open the oven and catch a whiff of smoked seaweed mingling with the zesty pop of cider glaze.

    It’s odd, really, how this dish captures the Atlantic in a few simple ingredients. No fancy herbs, no elaborate sauce—just salmon, a splash of cider, and that crunch of toasted seaweed on top. I made it during a rainy afternoon, feeling like I needed something grounding, something that’d remind me of the coast and lazy weekends in Ireland shouting over the waves.

    It feels new but also too familiar—like an old story wrapped in a fresh coat of flavor. It’s funny how a meal can do that.

    Irish Baked Salmon with Seaweed and Cider Glaze

    This baked salmon dish is prepared by marinating the fish in a cider-based glaze, then baking it until flaky with a golden crust. The topping of toasted seaweed adds a smoky crunch, and the final presentation features a glossy, caramelized surface with vibrant serving colors.
    Prep Time 15 minutes
    Cook Time 20 minutes
    Total Time 35 minutes
    Servings: 4
    Course: Main Course
    Cuisine: Irish
    Calories: 360

    Ingredients
      

    • 4 fillets salmon fillets skin-on preferred
    • 1/2 cup cider preferably dry apple cider
    • 2 tablespoons soy sauce for depth of flavor
    • 1 teaspoon honey to enhance glaze caramelization
    • 1 sheet dried seaweed (nori or kelp) for toasting and topping
    • 2 teaspoons olive oil for coating salmon
    • to taste salt
    • to taste black pepper

    Equipment

    • Baking sheet
    • Small saucepan
    • Basting brush
    • Cooking thermometer
    • Toasting pan or skillet

    Method
     

    1. Begin by preparing the cider glaze: in a small saucepan, combine cider, soy sauce, and honey. Bring to a gentle simmer over medium heat, stirring occasionally, until the mixture thickens slightly and becomes syrupy, about 10 minutes. Remove from heat and set aside.
      1/2 cup cider, 2 tablespoons soy sauce, 1 teaspoon honey
    2. Preheat the oven to 400°F (200°C). Lightly brush the salmon fillets with olive oil, then season with salt and black pepper. Place them on a baking sheet lined with parchment paper or a silicone mat.
      4 fillets salmon fillets, 2 teaspoons olive oil, to taste salt, to taste black pepper
    3. Brush each fillet generously with the prepared cider glaze, ensuring an even coat. Reserve some glaze for later basting during baking.
      1/2 cup cider, 2 tablespoons soy sauce, 1 teaspoon honey
    4. Place the salmon in the oven and bake for 15-20 minutes. During the last 5 minutes, baste again with the remaining cider glaze. The fish is done when it flakes easily with a fork and reaches an internal temperature of 145°F (63°C).
    5. Meanwhile, toast the dried seaweed: break the sheet into smaller pieces and toast in a dry skillet over medium heat for 1-2 minutes until crispy and fragrant. Remove from heat and chop into smaller bits if desired.
      1 sheet dried seaweed (nori or kelp)
    6. Once the salmon is baked, transfer it to serving plates, sprinkle the toasted seaweed on top, and spoon any extra glaze over the fish. Garnish as desired and serve immediately.
      1 sheet dried seaweed (nori or kelp)

    Sometimes, it’s all about those small surprises—the bites that catch you, unexpected but right. Would probably burn my tongue if I didn’t wait a bit, but honestly, I like that burn better than the perfect, cool bite. Maybe I’ve just been craving a little wildness—something raw and real, cooked right under my nose.

  • The Midnight Comfort of Irish Cottage Pie

    The Midnight Comfort of Irish Cottage Pie

    I never thought a simple dish like cottage pie could hold so much subconscious weight. It’s midnight, the house is quiet, and I find myself craving that unmistakable aroma—meaty beef simmered with thyme, whispering of long Irish evenings. Sometimes, I wonder if the key ingredient isn’t just the mashed potatoes or the beef—maybe it’s the memory you hide between each layer, the quiet hope that dinner will somehow anchor you. No fancy tricks here—just sturdy beef, a splash of Guinness, a bit of veg, and enough mashed potatoes to sink into. It’s familiar, but tonight, when the wind howls outside, it feels like the only thing that makes sense. A reminder that comfort doesn’t need to be complicated. Just good enough to quiet the noise, even if only for a little while.

    Cottage Pie

    This dish consists of a savory filling of ground beef cooked with vegetables, herbs, and a splash of Guinness, topped with a layer of creamy mashed potatoes. The assembled pie is baked until golden and bubbling, resulting in a hearty, layered casserole with a tender meat mixture and a smooth potato crust.
    Prep Time 20 minutes
    Cook Time 45 minutes
    Total Time 1 hour 5 minutes
    Servings: 4
    Course: Main Course
    Cuisine: Irish
    Calories: 450

    Ingredients
      

    • 2 lbs ground beef preferably lean
    • 1 large onion finely chopped
    • 2 carrots carrots diced
    • 2 cloves garlic minced
    • 1 cup Guinness or other stout
    • 1 tablespoon tomato paste
    • 1 teaspoon thyme dried or fresh
    • 2 cups vegetables mixed peas and corn
    • 4 large potatoes peeled and cut into chunks
    • 3 tablespoons butter for mashed potatoes
    • 0.5 cup milk for mashed potatoes
    • to taste salt and pepper

    Equipment

    • Large skillet or frying pan
    • Saucepan for potatoes
    • Masher or mixer
    • Oven-safe baking dish

    Method
     

    1. Prepare the mashed potatoes by boiling peeled potato chunks in a large saucepan of salted water until tender, about 15-20 minutes. Drain well, then mash with butter and milk until smooth and creamy. Set aside.
      3 tablespoons butter, 4 large potatoes, 0.5 cup milk
    2. Heat the large skillet over medium-high heat. Add the ground beef and cook, breaking it apart with a spatula, until browned and cooked through, about 8-10 minutes. Remove excess fat if necessary.
      2 lbs ground beef
    3. Add the chopped onion and diced carrots to the skillet with the beef. Cook until the vegetables soften, about 5 minutes, until onions are translucent and carrots are slightly tender.
      1 large onion, 2 carrots carrots
    4. Stir in the minced garlic, tomato paste, and thyme. Cook for another minute until fragrant. Pour in the Guinness and bring the mixture to a simmer. Cook until the liquid reduces and the mixture thickens, about 10 minutes, stirring occasionally.
      2 cloves garlic, 1 cup Guinness, 1 tablespoon tomato paste, 1 teaspoon thyme
    5. Add the frozen mixed vegetables to the skillet and stir to combine. Season with salt and pepper to taste. Cook for another 5 minutes until heated through and thickened. Remove from heat.
      2 cups vegetables
    6. Preheat the oven to 400°F (200°C). Spread the beef and vegetable mixture evenly in an oven-safe baking dish. Top with the prepared mashed potatoes, smoothing the surface with a spatula for an even layer.
    7. Bake in the preheated oven until the top is golden brown and bubbling around the edges, about 20-25 minutes. Optional: broil for 2 minutes for extra crispness on top.

    Notes

    You can prepare the filling ahead of time and assemble just before baking. For a vegetarian version, substitute the beef with lentils or mushrooms.

    When I make this, I think about how some meals are more than food, they’re stories you keep coming back to. Nothing flashy, just honest, grounding, and quiet. That’s what this pie is for me—more than a dish, it’s a moment. Maybe you’ll see it that way too.

  • The Secret History of Tuscan Gnocchi: Made with Pasta Water and Old Stories

    The Secret History of Tuscan Gnocchi: Made with Pasta Water and Old Stories

    Why this gnocchi feels like a family story, not just a recipe

    Honestly, I never expected a bite of gnocchi to secretly taste like a memory. This version gets its fluffiness from pasta water. That starchy, glossy liquid you usually dump down the drain. Turns out, it’s the magic ingredient that makes these little dumplings cling to each other and feel lighter in your hand. Made this way, it’s like each bite carries a breath of Italy’s countryside, not because of fancy ingredients but because of old pots and shared stories simmering long ago. Sitting down with a plate of these feels like stealing a moment from the past—when meals meant gathering around with a splash of laughter and maybe a little extra salt. No fancy techniques, just simple ingredients, a little patience, and a pinch of nostalgia that’s more relevant now than ever.

    Gnocchi with Starchy Pasta Water

    This gnocchi recipe uses starchy pasta water to achieve a light and tender texture. The dough is formed by combining mashed potatoes, flour, and egg, then boiled until they float to indicate doneness. The final dish features pillowy gnocchi with a glossy finish, ready to be served with your favorite sauce.
    Prep Time 20 minutes
    Cook Time 10 minutes
    Total Time 30 minutes
    Servings: 4
    Course: Main Course
    Cuisine: Italian
    Calories: 220

    Ingredients
      

    • 2 cups mashed potatoes cooled
    • 1 1/2 cups all-purpose flour plus extra for surface
    • 1 large egg
    • 1 teaspoon salt
    • 4 cups pasta water starchy cooking water

    Equipment

    • Large pot for boiling
    • Mixing bowls
    • Fork or potato ricer
    • Slotted spoon
    • Baking sheet or plate for shaping gnocchi

    Method
     

    1. Fill a large pot with water and add a generous pinch of salt. Bring to a rolling boil over high heat.
    2. Add the pasta and cook until al dente, about 8-10 minutes. Carefully ladle out 1 to 1 1/2 cups of starchy pasta water and set aside; drain the pasta.
    3. In a mixing bowl, combine the cooled mashed potatoes with the egg and salt. Mix until smooth and well combined.
    4. Gradually add the flour to the potato mixture, alternating with the reserved pasta water, beginning to form a soft, slightly sticky dough. Knead gently until cohesive but avoid overworking, about 2-3 minutes.
    5. Divide the dough into 4 portions. Roll each portion into a long rope about ¾ inch thick on a floured surface. Using a sharp knife, cut each rope into 1-inch pieces, then roll each piece slightly with a fork or against a gnocchi board to create ridges and shape them uniformly.
    6. Bring the remaining pasta water back to a boil. Carefully drop the gnocchi into the boiling water in batches. Once they float to the surface, about 2-3 minutes, use a slotted spoon to transfer them to a serving dish.

    Notes

    For extra flavor, serve with sautéed sage, browned butter, or your favorite sauce.

    So maybe it’s not about perfect gnocchi, but about the faint smell of flour and stories in the air. Sometimes that’s enough to make dinner feel like a quiet rebellion against all the noise out there. Plus, who can resist that little nudge of Italy coming alive in your own kitchen?

  • The BBQ That Won’t Burn Out: Cilantro Lime Chicken for Lazy Summer Nights

    The BBQ That Won’t Burn Out: Cilantro Lime Chicken for Lazy Summer Nights

    Chasing the scent of grilled cilantro in the dark

    Last night, I caught a whiff of something fresh and green as the grill cooled. Not just the usual smoky hints, but something brighter, sharper—like cilantro and lime colliding in the air. It’s weird how a simple smell can pull you back to summer nights when the grill was a centerpiece, not a chore. This recipe isn’t about fancy techniques or fancy ingredients. It’s about catching that fleeting moment of clarity when raw garlic, zesty lime, and fresh cilantro come together—almost like a secret handshake. Right now, with fresh herbs flooding the markets and everyone wanting quick ways to spice things up after months indoors, it feels like the perfect thing to keep on hand. I dunno, maybe it’s the smell that makes me pause, or just craving something that reminds me I’m still doing okay, even if I forget the broccoli occasionally.

    Cilantro Lime Marinade

    This marinade combines fresh cilantro, lime juice, garlic, and other seasonings to create a vibrant, herbaceous mixture used to flavor grilled meats or vegetables. It results in a bright, slightly tangy finish with a fresh green appearance and tender texture after marinating. The marinade is typically blended and applied before grilling for maximum flavor infusion.
    Prep Time 10 minutes
    Cook Time 5 minutes
    Total Time 15 minutes
    Servings: 4
    Course: Main Course
    Cuisine: Mexican
    Calories: 120

    Ingredients
      

    • 1 cup fresh cilantro leaves roughly chopped
    • 2 cloves garlic minced
    • 1/4 cup lime juice freshly squeezed
    • 1 teaspoon salt to taste
    • 1/2 teaspoon black pepper freshly ground
    • 1/4 cup olive oil optional, for blending

    Equipment

    • Blender or food processor
    • Measuring cups and spoons
    • Knife and cutting board
    • Bowl or zip-top bag for marinating

    Method
     

    1. Measure out and roughly chop the fresh cilantro leaves; set aside.
      1 cup fresh cilantro leaves
    2. Peel and mince the garlic cloves; place in the blender along with cilantro, lime juice, salt, and black pepper.
      2 cloves garlic, 1/4 cup lime juice, 1 teaspoon salt, 1/2 teaspoon black pepper
    3. Blend the mixture until smooth, gradually adding olive oil if desired to achieve a slightly thinner consistency and brighter color. Continue until the mixture is fully combined and vibrant green.
      1 cup fresh cilantro leaves, 2 cloves garlic, 1/4 cup lime juice, 1 teaspoon salt, 1/2 teaspoon black pepper, 1/4 cup olive oil
    4. Transfer the marinade to a bowl or directly pour into a zip-top bag. Use a spoon or brush to coat your choice of meat or vegetables evenly.
    5. Marinate the food for at least 10 minutes to allow flavors to meld. Then, grill or cook as desired until the meat or vegetables are tender and have a slightly charred exterior, about 5 minutes per side.

    Anyway, if you’re looking for something that smells like summer long after it’s gone, this chicken might do it. No fuss, no waiting around for complicated marinades. Just a squeeze of lime, a handful of cilantro, and somehow everything comes together fast enough to be part of the nightly chaos. I keep telling myself I’ll double the batch, but it never lasts that long. That’s probably the best part.

  • The Surprising Power of a 5-Ingredient Prime Rib

    The Surprising Power of a 5-Ingredient Prime Rib

    I never thought a roast could be so simple yet so eye-wateringly flavorful. I’ve always fussed over marinades, fancy rubs, all these steps that seem necessary. But here’s the kicker. This prime rib? Just salt, pepper, garlic, a touch of rosemary, and that’s it. No fancy ingredients, no complicated steps.

    What really changed my mind was the smell. The kind that makes your neighbor peek over the fence, asking what’s baking. It’s that rich, beefy aroma, with just a whisper of garlic and herbs. And the meat. The crust is crispy, almost shattering at first bite, but inside? Juicy, tender, pink at the center. It’s the kind of thing that makes you go, ‘Maybe I don’t need a sous vide to get this right.’

    Right now, with everyone going back to casual get-togethers, this feels like the best way to impress without stress. So yeah, I was surprised too—how such simple ingredients can make something special.

    Simple Prime Rib Roast

    This dish features a beef prime rib roast seasoned primarily with salt, pepper, garlic, and rosemary, cooked to achieve a crispy crust and juicy, medium-rare interior. The roast is seared at high heat and then roasted slowly, resulting in a tender, pink center with a flavorful bark.
    Prep Time 10 minutes
    Cook Time 1 hour 30 minutes
    Total Time 1 hour 40 minutes
    Servings: 6
    Course: Main Course
    Cuisine: American
    Calories: 650

    Ingredients
      

    • 4-5 lbs prime rib roast bone-in or boneless
    • 2 tablespoons coarse salt
    • 1 tablespoon fresh ground black pepper
    • 4 cloves garlic minced
    • 1 teaspoon fresh rosemary chopped

    Equipment

    • Roasting pan
    • Meat thermometer
    • Kitchen tongs
    • Baking rack

    Method
     

    1. Pat the prime rib roast dry with paper towels, then evenly rub all over with salt, pepper, minced garlic, and chopped rosemary. Place it on a baking rack set inside a roasting pan, uncovered, and let sit at room temperature for 30 minutes to an hour for even cooking.
      4-5 lbs prime rib roast, 2 tablespoons coarse salt, 1 tablespoon fresh ground black pepper, 4 cloves garlic, 1 teaspoon fresh rosemary
    2. Preheat the oven to 450°F (230°C). Insert a meat thermometer into the thickest part of the roast. Place the roasting pan in the oven and roast for 20 minutes or until the exterior is deeply browned and the surface feels firm to the touch.
    3. Reduce the oven temperature to 325°F (160°C). Continue roasting until the internal temperature reaches about 130°F (54°C) for medium-rare, approximately 60-70 minutes, or use the meat thermometer for precise doneness. The meat should be pink and juicy inside.
    4. Remove the roast from the oven and transfer it to a cutting board. Tent loosely with aluminum foil and let rest for at least 15 minutes. During this resting period, the juices redistribute and the internal temperature may rise slightly.
    5. Slice the roast across the grain into thick, even pieces. Serve immediately, showcasing the crispy crust and tender, pink interior.

    Sometimes I think the best recipes are the ones that remind us how little we need. No overthinking, just letting the primal flavors do the work. And honestly, I keep thinking about that crust — how it’s almost crunchy, how the meat stays so tender. Maybe next time I’ll double the garlic. Or skip the herbs entirely. Who knows. That’s part of the joy, right?

  • Abraham Lincoln’s Chicken Fricassee: When History Gets Comforting

    Abraham Lincoln’s Chicken Fricassee: When History Gets Comforting

    Here’s the thing

    I’ve been thinking about how Lincoln’s life wasn’t just politics and speeches. It was also about the little moments. The quiet, everyday stuff. Like sitting down to something simple and honest. I stumbled on this old recipe, Chicken Fricassee—supposedly Lincoln loved it. Maybe because it’s not fancy. It’s just chicken, simmered with a pale, silky sauce that smells faintly of thyme and onion. It’s the kind of dish you picture in a cramped:kitchen, a family gathered around, no screens, no fuss. It’s a reminder that some of the best moments—maybe the only ones worth remembering—are in these plain, honest meals. That desperate need for comfort now feels not so different from then. Some recipes just stick around for a reason—reminding us of what keeps us human.

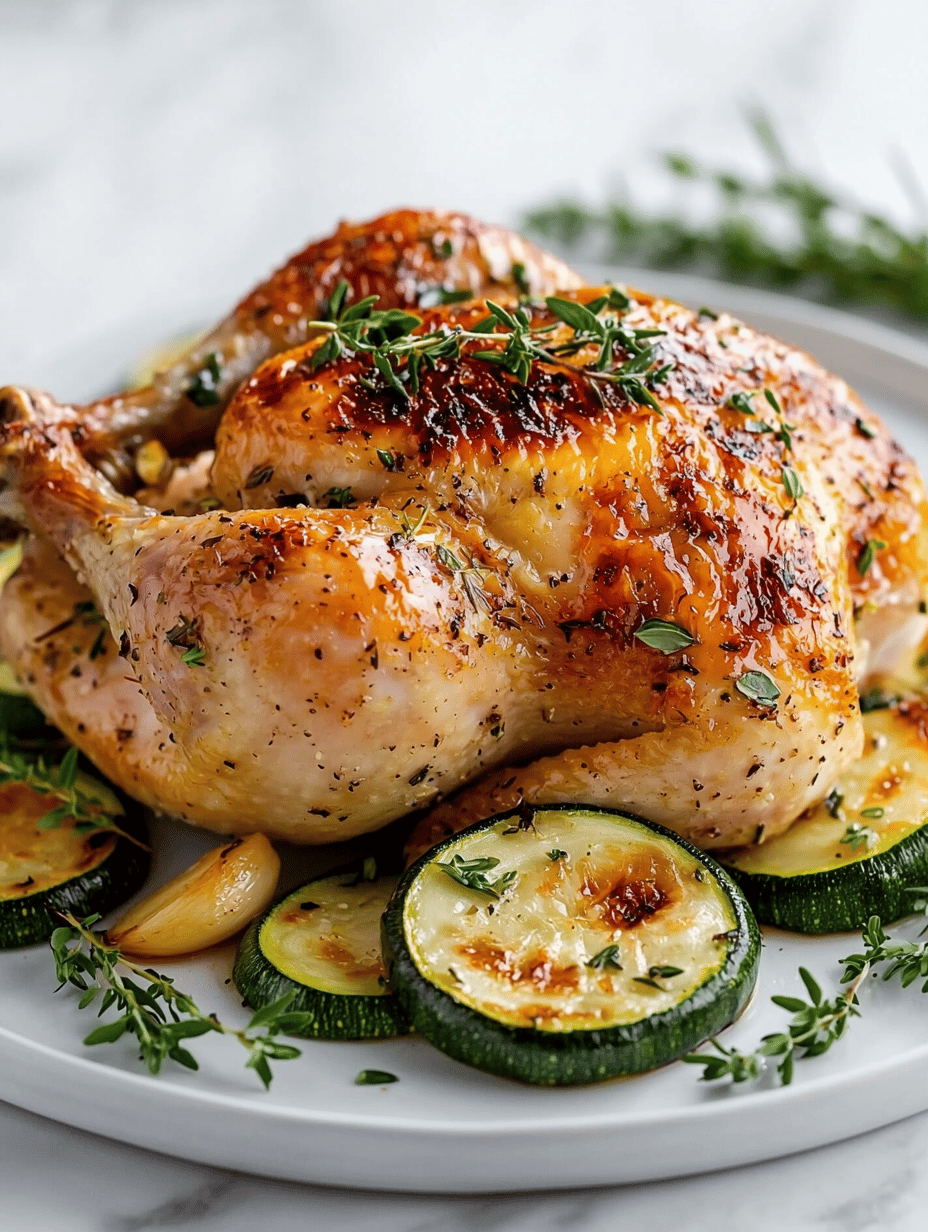
    Chicken Fricassee

    Chicken Fricassee is a classic dish featuring tender chicken simmered in a pale, creamy sauce seasoned with thyme and onions. The dish has a silky texture with a light appearance, resulting in a comforting yet simple centerpiece. It involves braising the chicken in a gentle liquid until fully cooked and the sauce is smooth.
    Prep Time 15 minutes
    Cook Time 45 minutes
    Total Time 1 hour
    Servings: 4
    Course: Main Course
    Cuisine: American
    Calories: 420

    Ingredients
      

    • 1.5 pounds bone-in, skinless chicken thighs or chicken breasts if preferred
    • 2 tablespoons olive oil
    • 1 medium onion finely chopped
    • 2 cloves garlic minced
    • 1 teaspoon dried thyme
    • 2 tablespoons all-purpose flour for thickening
    • 2 cups chicken stock
    • 1 cup milk or cream
    • Salt and pepper to taste

    Equipment

    • Heavy-bottomed pot or Dutch oven
    • Chef’s knife
    • Chopping board
    • Measuring cups and spoons
    • Wooden spoon or silicone spatula
    • Whisk

    Method
     

    1. Pat the chicken thighs dry with paper towels, then season with salt and pepper. Heat the heavy-bottomed pot over medium heat, add olive oil, and brown the chicken thighs on both sides until golden brown, about 5 minutes per side. Remove the chicken and set aside.
      1.5 pounds bone-in, skinless chicken thighs
    2. Add chopped onion to the same pot and sauté until translucent and fragrant, about 3-4 minutes. Stir in minced garlic and cook for another 30 seconds until fragrant.
      1 medium onion, 2 cloves garlic
    3. Sprinkle flour over the onion mixture and stir well to form a roux. Cook for 1-2 minutes, stirring constantly, until the flour loses its raw smell.
      2 tablespoons all-purpose flour
    4. Gradually pour in chicken stock while whisking to prevent lumps, then add milk or cream. Bring the mixture to a gentle simmer, allowing it to thicken slightly and develop a smooth, pale sauce. Add thyme and season with salt and pepper to taste.
      2 cups chicken stock, 1 cup milk or cream, 1 teaspoon dried thyme, 1.5 pounds bone-in, skinless chicken thighs
    5. Return the browned chicken thighs to the pot, submerging them partially in the sauce. Cover and simmer over low heat for 30-35 minutes, until the chicken is cooked through and tender, and the sauce has thickened further.
      1.5 pounds bone-in, skinless chicken thighs
    6. Remove the chicken from the pot and place on a serving dish. Increase heat slightly and cook the sauce uncovered for a few minutes until it reaches your desired consistency. Pour sauce over the chicken and serve hot.

    Notes

    Adjust seasoning as needed. Serve with bread or rice for a complete meal.

    The best part? It’s ridiculously easy. That’s the irony. Simple can be enough, especially when history, memory, and a good chicken stew are all you really need to feel a little more grounded tonight.

  • The Secret Sauce to Perfect Baked Cod — It’s Not What You Think

    The Secret Sauce to Perfect Baked Cod — It’s Not What You Think

    Why Baked Cod? Not Just a Fish, Think Relics of the Past

    Forget everything you know about fish. The smell of baked cod—mild, slightly sweet, with just a hint of buttery flake—won’t hit you over the head. It’s subtle but complex in a quiet way. I’ve been playing around, trying to find a version that doesn’t hide behind overused herbs or sauces. Instead, I let the fish shine. It’s about patience, and a bit of old school technique. No fancy ingredients, no overthinking.

    The Moment We All Need This

    Right now, comfort feels heavily weighted with flashiness. This dish—simple, straightforward, honest—reminds you of something that’s been there all along, waiting quietly. Plus, it’s actually pretty forgiving for weeknights. No drama, just a taste of something genuinely clean and honest, kind of like a secret update from the kitchen that’s been around forever.

    Baked Cod

    Baked cod is a simple preparation that involves seasoning and baking the fish until it has a tender, flaky texture with a pale, opaque appearance. The dish highlights the natural sweetness and mild flavor of the fish, resulting in a clean, delicate final presentation. It is achieved through gentle oven baking to preserve moisture and tenderness.
    Prep Time 10 minutes
    Cook Time 15 minutes
    Total Time 25 minutes
    Servings: 4
    Course: Main Course
    Cuisine: Comfort Food
    Calories: 150

    Ingredients
      

    • 4 fillets cod fillets preferably skinless
    • 2 tablespoons olive oil for drizzling
    • to taste salt salt preferably sea salt
    • to taste pepper black pepper freshly ground

    Equipment

    • Baking sheet
    • Parchment paper

    Method
     

    1. Preheat the oven to 375°F (190°C). Line a baking sheet with parchment paper to prevent sticking.
    2. Pat the cod fillets dry with paper towels, then place them on the prepared baking sheet. Drizzle olive oil evenly over the fillets.
    3. Sprinkle salt and freshly ground black pepper evenly over the fillets. Gently press the seasonings into the fish to adhere.
    4. Bake in the preheated oven for 12-15 minutes, or until the fillets are opaque and easily flake apart with a fork. The surface should be lightly golden and the fish firm but tender.
    5. Remove from oven and let rest for 2 minutes. Serve immediately with your choice of sides.

    And honestly, I think that’s what really matters—finding these tiny moments of peace in a plate. Sometimes it’s just the smell of that gentle, flaky fish that makes you pause. Like remembering something you forgot you missed. Or not. Whatever. Just good to have around.