Category: Appetizers

  • Caramelized French Onion Dip That’s Basically a Chefs’ Secret

    Caramelized French Onion Dip That’s Basically a Chefs’ Secret

    Ever notice how the scent of slowly caramelizing onions ripples through the house? It’s not just flavor. It’s a whole mood shift, kind of like whispering in onion language. No fancy ingredients here—just onions, butter, and a little patience. It’s strange how a simple process can turn a humble dip into a soulful snack.

    This dip isn’t trendy because it’s flashy. It’s trending because it makes you nostalgic for dinners long past, with a twist that feels unexpectedly luxurious. Perfect for those weekends when you want something rich yet familiar, with an aroma that lingers and makes everyone stop what they’re doing. The way the sweet onions get jammy and meld into creamy sour cream? You won’t forget it anytime soon.

    Why I Love This Recipe (And You Will Too)

    • It reminds me of my grandma’s kitchen, only faster and better for a quick game-day snack.
    • It’s ridiculously easy to throw together when friends are dropping by last minute.
    • The aroma alone makes everyone’s stomach growl—no joke.
    • It feels a little like cheating, because it’s so simple but tastes like you spent hours fussing over it.
    • And honestly, I keep craving just one more spoonful—deep, sweet, and salty all at once.

    Some recipes just sneak up on you. This one’s got a little secret: a layer of caramelized love tucked inside.

    Caramelized Onion Dip

    This dip is made by slowly caramelizing onions until they develop a rich, jammy sweetness, then mixing them with creamy sour cream. The final result has a smooth, velvety texture with a deep, sweet onion flavor and a slightly golden appearance, perfect for spreading or dipping.
    Prep Time 10 minutes
    Cook Time 30 minutes
    Total Time 40 minutes
    Servings: 4
    Course: Main Course
    Cuisine: Comfort Food
    Calories: 150

    Ingredients
      

    • 3 large yellow onions thinly sliced
    • 2 tablespoons unsalted butter
    • 1/2 cup sour cream
    • to taste salt
    • to taste pepper

    Equipment

    • Large skillet or frying pan
    • Spatula or wooden spoon
    • Mixing bowl

    Method
     

    1. Heat a large skillet over medium heat and add the butter, letting it melt and shimmer.
    2. Add the thinly sliced onions to the skillet and cook, stirring frequently, until they start to soften and turn translucent, about 5 minutes.
    3. Reduce the heat to medium-low and continue cooking the onions, stirring occasionally. Let them caramelize slowly, stirring every few minutes, until they develop a rich, golden-brown color and become jammy, about 20-25 minutes.
    4. Remove the skillet from the heat and let the caramelized onions cool slightly for a few minutes.
    5. Transfer the caramelized onions to a mixing bowl and fold in the sour cream until well combined and smooth.
    6. Season the dip with salt and pepper to taste, adjusting the flavors as needed.
    7. Stir the mixture until everything is evenly combined, then transfer to a serving bowl.
    8. Serve immediately with chips, vegetable sticks, or as a spread for bread, enjoying the rich, sweet onion flavor and creamy texture.

    Maybe I’ll add a splash of sherry next time, or a handful of thyme. Who knows. It’s stuck with me since I first made it, thinking about how simple things can be so unexpectedly good. Sometimes, it’s just about the onions, melting into that creamy dip, and wondering how something so humble can steal the show.

  • Bacon Jalapeno Popper Cheese Balls: The Unlikely Snack You Need

    Bacon Jalapeno Popper Cheese Balls: The Unlikely Snack You Need

    I used to think cheese balls were just cheesy blobs perfect for parties. But then, I dropped a jalapeno into the mix—an accidental swirl of heat I wasn’t prepared for. That pop of spicy heat hits your nose right as you bite through crispy bacon and gooey cheese.

    Why I love this recipe (And You Will Too)

    • It’s the kind of snack that surprises you — crispy, cheesy, spicy, all at once.
    • Perfect for those nights when you want to impress without too much fuss.
    • Weirdly satisfying to roll into tiny balls, like mini projects in food form.
    • Will make your kitchen smell like a smoky jalapeno dream—wholly intoxicating.
    • This dish feels like rebellion, but in the most comforting way.

    Sometimes, I think food should be a little unpredictable. No scripts, no rules. Just a mishmash of flavors that somehow work perfectly.

    Whatever your week looks like, I guarantee biting into one of these cheesy bombs will be a tiny act of defiance. Or maybe just pure indulgence—I haven’t decided yet.

    Spicy Jalapeno Cheese Balls

    This dish consists of cheesy cheese balls infused with chopped jalapeno peppers and wrapped in crispy bacon. The cheese mixture is shaped into small balls, then baked or fried until golden, with a crunchy exterior and gooey, spicy interior. The combination offers a crispy, cheesy, and spicy snack with a visually appealing, bite-sized form.
    Prep Time 20 minutes
    Cook Time 15 minutes
    Total Time 35 minutes
    Servings: 8
    Course: Main Course
    Cuisine: American
    Calories: 150

    Ingredients
      

    • 8 oz cream cheese softened at room temperature
    • 1 cup shredded cheddar cheese
    • 2 pcs jalapeno peppers finely chopped, seeds removed if less heat desired
    • 8 slices bacon cut in half lengthwise
    • 1 cup breadcrumbs for coating
    • to taste salt and pepper

    Equipment

    • Mixing bowl
    • Baking sheet
    • Cooking parchment
    • Bacon scissors or knife
    • Skillet or oven-safe pan

    Method
     

    1. Combine the softened cream cheese and shredded cheddar in a mixing bowl, stirring until smooth and well blended.
    2. Fold the finely chopped jalapenos into the cheese mixture, evenly distributing the spicy bits throughout.
    3. Use a small cookie scoop or spoon to portion out the mixture, then roll each into a tight ball between your palms, creating uniform mini cheese spheres.
    4. Wrap each cheese ball with a half slice of bacon, stretching gently if needed to cover the entire surface, and secure with a toothpick if necessary.
    5. Preheat your oven to 400°F (200°C). Line a baking sheet with parchment paper and arrange the bacon-wrapped cheese balls on it, spacing them evenly.
    6. Bake in the oven for about 15 minutes, or until the bacon is crispy and golden brown, and the cheese inside is starting to melt.
    7. Remove from oven and let cool slightly — the cheese will be hot and gooey. Optionally, sprinkle with breadcrumbs for extra crunch.
    8. Serve the spicy cheese balls warm, letting each bite deliver crispy bacon, melty cheese, and fiery jalapeno flavor.

    Honestly, once you get the hang of shaping them, it’s almost meditative. Plus, the way the cheese oozes out when you bite is… yeah. Worth every minute of mess. This isn’t just a snack — it’s a little rebellion in every bite.

  • A No-Fuss Antipasto Platter That Looks Like You Slaved Away

    A No-Fuss Antipasto Platter That Looks Like You Slaved Away

    So, I accidentally discovered that the best antipasto platter doesn’t need a fancy cheese shop or hours of prep. It’s just about looking around your kitchen and pulling out whatever’s lingering in the fridge. No one cares if the artful arrangement isn’t perfect. Honestly, the secret is in the little surprises—like that jar of roasted peppers that’s been sitting there forever or a handful of salty olives.

    What makes this platter matter right now? It’s not just how quickly it comes together; it’s that it’s imperfect, real, and honestly kind of charming. Especially when you’re trying to keep things low-stress but still want a spread that makes people stop and go, “Wow, okay, I see what you did there.” Plus, I’ve found it’s the kind of thing that starts actual conversations. And that’s basically the point, right?

    Why I Love This Recipe (And You Will Too)

    Because it’s flexible — you use whatever’s in your fridge, not some scripted list. Because it feels more fun than cooking a whole meal. Because it’s so much easier than managing a complicated dinner, but still makes you look kinda fancy. And honestly, seeing friends gather around a mess of cured meats and cheeses makes me smile, even when life’s chaos is all around.

    Plus, I’ve learned that it’s one of those things that works in almost any situation. No stress, no fuss, just good food + good company. And between you and me, it’s kind of a relief not to overthink this—but to have a table that makes people think you put some effort in. Life’s too short to settle for boring cheese plates, right?

    Impromptu Antipasto Platter

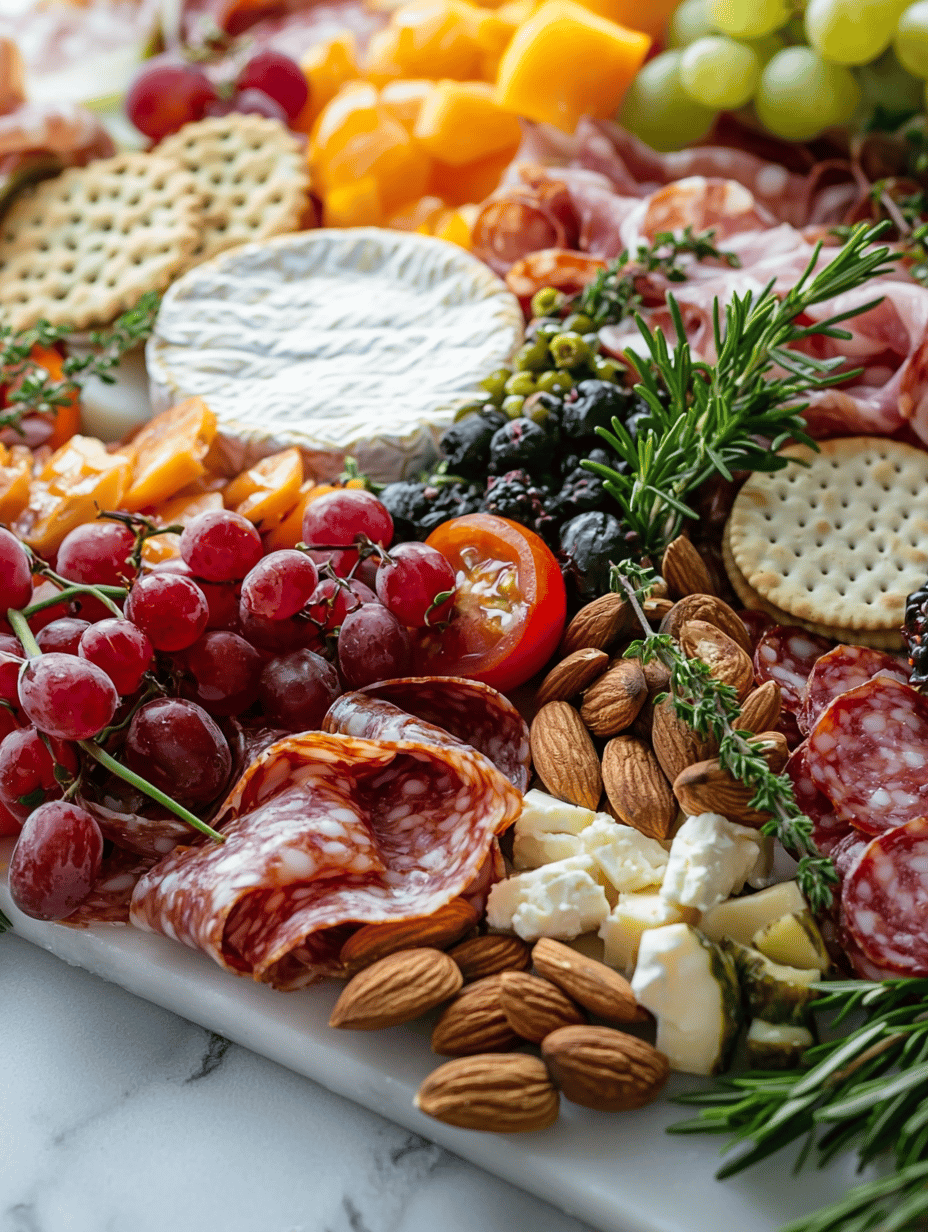
    This antipasto platter features a variety of cured meats, cheeses, marinated vegetables, and savory snacks arranged casually on a platter. It combines different textures and flavors, creating an inviting and colorful display with a mix of chewy, creamy, and crunchy elements. No cooking is required—just assembling and presentation make it special.
    Prep Time 10 minutes
    Total Time 10 minutes
    Servings: 4
    Course: Main Course
    Cuisine: Universal

    Ingredients
      

    • various none Cured meats (e.g., salami, prosciutto, pepperoni) sliced thinly
    • various none Cheeses (e.g., cheddar, brie, mozzarella) cut into cubes or slices
    • a handful none Olives pitted, assorted types
    • a handful none Marinated roasted peppers drained
    • a handful none Crackers or crusty bread for serving
    • optional none Nuts (e.g., almonds, walnuts) for added crunch

    Equipment

    • Large serving platter or board
    • Small bowls or jars (for olives, marinated peppers, etc.)

    Method
     

    1. Begin by gathering your cured meats and slicing them thinly, then arrange them in small piles on your platter to create visual interest.
    2. Place slices or chunks of cheese sporadically around the platter, filling in gaps and adding color and texture.
    3. Add small bowls or jars with olives and marinated peppers, placing them in accessible spots for easy picking.
    4. Fill in spaces with crackers or slices of crusty bread, stacking or fanning them out for visual appeal.
    5. If desired, sprinkle some nuts around the spread for added crunch and variety.
    6. Step back and review your platter, adjusting pieces to balance colors and shapes for an inviting look.

    Notes

    Feel free to customize with whatever ingredients you have on hand. The charm lies in the imperfect, relaxed presentation.

    There’s a weird satisfaction in throwing this together at the last minute, knowing it’s gonna be weirdly better than some polished, overly curated charcuterie board. It’s about the little wins, like realizing I actually had everything I needed in the fridge already. That moment of, “Oh, I’m not totally failing at dinner today.”

    And honestly, I don’t think I’ll ever get tired of how easy it is to keep it fresh and kind of spontaneous. Because sometimes the best moments are just snagging a handful of prosciutto and calling it a day. That’s the real secret—making it work with what’s already in your life.

  • Crab Imperial: A Hidden Gem in a Sea of Recipes

    Crab Imperial: A Hidden Gem in a Sea of Recipes

    One thing I don’t hear enough about Crab Imperial is how it smells like a crest of melted butter, sharp Worcestershire, and braised garlic all coming together in a pan. It’s a smell that hits. Not sweet, not floral—just a deep, savory invitation that makes you want to dive right in.

    This dish feels like a secret kept for special occasions—like it’s been sitting in a family cook’s back pocket for years, waiting for the right moment. With summer grilling kicking in and seafood making a resurgence, it’s suddenly trendy again, even if it’s a 70s throwback. You can’t ignore that rich, crumbly topping layering on top of soft crab meat.

    Most days I don’t crave some complicated thing that takes all afternoon. But Crab Imperial? It feels luxurious without needing four hours. It’s that rare dish that’s fancy, but I can also whip up at the last minute for friends or family. It’s oddly comforting. Or maybe just the smell of melting butter gets me.

    Why I Love This Recipe (And You Will Too)

    • It’s super forgiving—mess it up, it still tastes great.
    • Perfect for when you want to impress, but without stressing out.
    • The smell alone makes the house feel like a coastal retreat.
    • It’s nostalgic, but with a fresh twist every time.
    • Honestly, I’ve made it more times than I can count, and I still get surprised by how quick it is.

    Maybe it’s just the fact that crab feels like a small luxury that anyone can get behind. Or maybe I just like breaking out of the usual midweek routine with something a little special. Whatever it is, Crab Imperial isn’t going anywhere in my kitchen.

    Crab Imperial

    Crab Imperial is a baked seafood dish featuring lump crab meat combined with a rich, butter-based sauce accented by Worcestershire and garlic, topped with a crumbly mixture before baking. The final appearance is a golden-brown crust over a flaky, tender crab filling with a luscious, creamy interior. Its aroma melds butter, garlic, and savory spices into a tempting scent.
    Prep Time 15 minutes
    Cook Time 20 minutes
    Total Time 35 minutes
    Servings: 4
    Course: Main Course
    Cuisine: American
    Calories: 340

    Ingredients
      

    • 1 pound lump crab meat preferably fresh or high-quality canned
    • 4 tablespoons unsalted butter melted
    • 2 cloves garlic finely minced
    • 1 tablespoon Worcestershire sauce
    • 1/2 cup panko breadcrumbs for the topping, optional for crunch
    • 1 teaspoon Old Bay seasoning
    • 0.5 cup mayonnaise adds creaminess
    • 1 small lemon juiced, for freshness
    • to taste salt and pepper for seasoning

    Equipment

    • Mixing bowls
    • Baking Dish
    • Cooking spoon
    • Oven

    Method
     

    1. Preheat your oven to 375°F (190°C). Lightly grease a baking dish to hold the crab mixture.
    2. Gently fold the lump crab meat into a mixing bowl, taking care to keep it as whole as possible for texture.
    3. In a separate bowl, melt the butter and sauté the minced garlic until fragrant and just starting to turn golden, about 30 seconds.
    4. Pour the garlic butter mixture over the crab, then add Worcestershire sauce, mayonnaise, and lemon juice. Gently mix everything until evenly combined, avoiding breaking up the crab too much.
    5. Season the mixture with Old Bay, salt, and pepper, then give it a final gentle fold to distribute the seasoning evenly.
    6. Transfer the crab mixture into the prepared baking dish, spreading it into an even layer.
    7. Sprinkle the panko breadcrumbs over the top of the crab mixture, creating a crumbly, golden layer that will crisp as it bakes.
    8. Bake in the preheated oven until the top is golden brown and bubbling around the edges, about 20 minutes.
    9. Remove from the oven and let it rest for a few minutes; the aroma of garlic, butter, and seasoned crab will fill the air.
    10. Serve the Crab Imperial hot, with crusty bread or lemon wedges on the side for an extra burst of freshness.

    There’s a weird satisfaction in pulling this together fast, knowing it hits all the right notes—crisp top, tender crab, and that burst of lemon on the finish. It’s a reminder that sometimes the best dishes don’t need long prep, just a little good instinct and some butter.

    Plus, it’s wild how a simple combination of ingredients—old school, maybe, but never boring—can make everyone smile in the middle of a hectic week. I keep thinking about how I’ll tweak the next batch, maybe add a sprinkle of old Bay, or swap the bread crumbs for thin potato slices.

    Anyway. Sometimes I think food is just about those small moments—standing in the kitchen, stirring, smelling, tasting. That’s what makes this dish stick around for me.

  • The Secret Spice That Turns KFC Cole Slaw Into a Memory

    The Secret Spice That Turns KFC Cole Slaw Into a Memory

    I never thought a simple cabbage salad could pack such a punch of smell. There’s this moment when you open the fridge and catch a whiff of vinegar, cream, and a pinch of mustard seed. It’s like a little secret you keep during summer cookouts, not just the taste but that sharp, tangy fragrance that hits your nose so unexpectedly.

    Making this cole slaw feels more like time traveling than just blending ingredients. It’s a dish that reminds me of sticky fingers and family dinners, a quiet nostalgia that sneaks up on you. Why it matters right now? Because sometimes, the simplest things—like this tangy crunch—are what make a week feel more manageable. Or at least a little brighter.

    Why I Love This Recipe (And You Will Too)

    • It’s easy to toss together, even on those ‘I-have-no-idea-what-to-make’ nights.
    • The smell of freshly grated cabbage with a hint of vinegar makes the whole house feel alive.
    • It’s a no-fuss side that’s better than store-bought, and sure beats the sad, limp bag in the fridge.
    • It pulls me back to childhood backyard barbecues, even when I’m just trying to get through a busy week.

    It’s funny how something so small can carry so much memory, almost like a secret handshake with the past.

    Tangy Cabbage Slaw

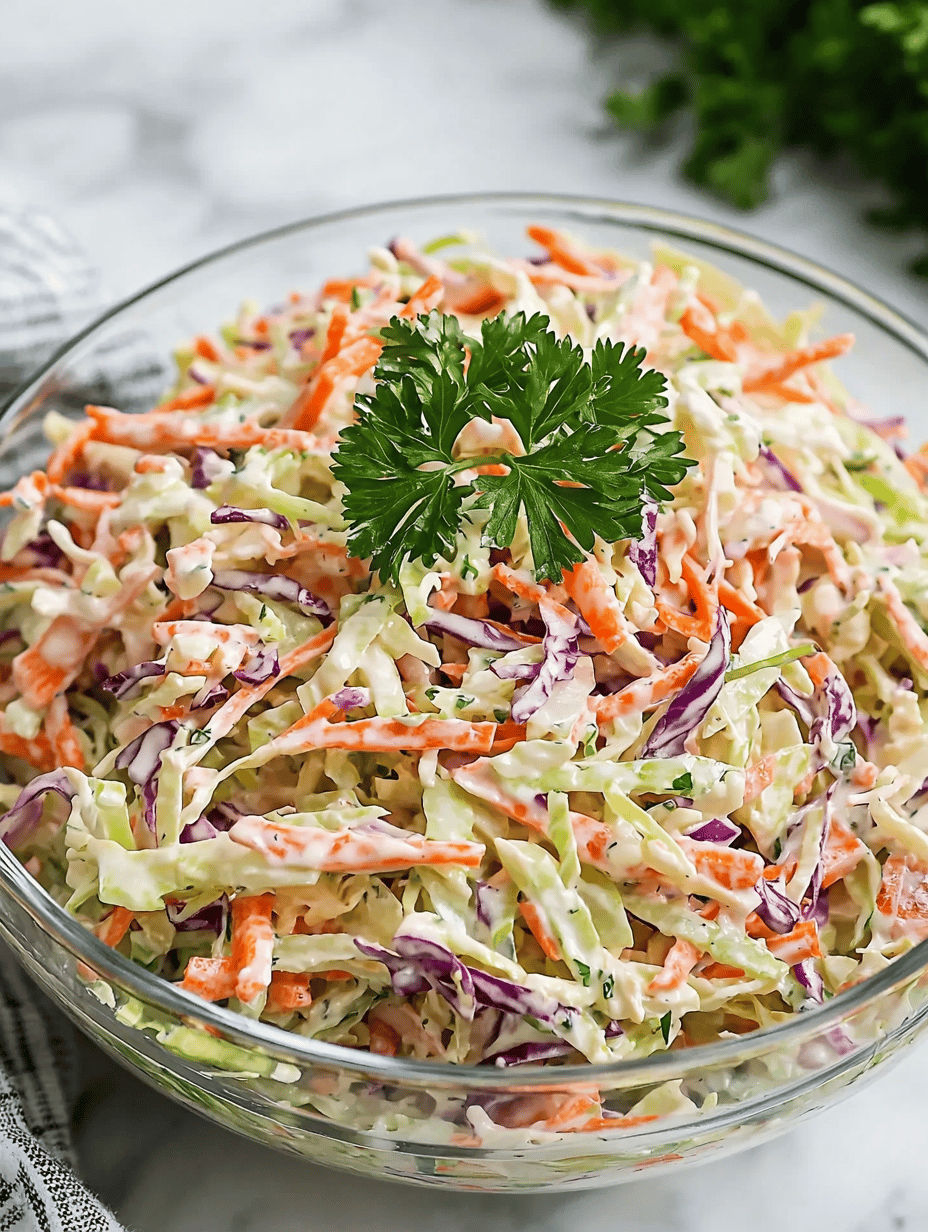
    This cabbage slaw combines shredded raw cabbage with a tangy dressing made from vinegar, cream, and mustard seeds. The salad has a crisp texture and a bright, pungent aroma, with the flavors developing as the ingredients meld together. It is served as a fresh, crunchy side dish, ideal for summer cookouts or casual family meals.
    Prep Time 15 minutes
    Total Time 15 minutes
    Servings: 4
    Course: Main Course
    Cuisine: American
    Calories: 150

    Ingredients
      

    • 1 small head green cabbage shredded finely
    • 2 tablespoons vinegar apple cider or white vinegar
    • 2 tablespoons cream full-fat or light
    • 1 teaspoon mustard seed crushed or ground
    • to taste black pepper freshly ground

    Equipment

    • Chef’s knife
    • Cutting board
    • Mixing bowl
    • Grater
    • Measuring spoons

    Method
     

    1. Use a chef’s knife to carefully shred the cabbage into thin, uniform strips on a cutting board.
    2. Add the shredded cabbage to a large mixing bowl.
    3. In a small bowl, whisk together the vinegar and cream until well combined—this creates a tangy, creamy dressing.
    4. Pour the dressing over the shredded cabbage, then sprinkle with crushed mustard seeds and salt.
    5. Use a spoon or tongs to toss everything together thoroughly, ensuring the cabbage is evenly coated in the dressing.
    6. Season the slaw with freshly ground black pepper to taste, then give it one last gentle toss.
    7. Let the cabbage sit for about 10 minutes to allow the flavors to meld, and the cabbage to soften slightly.
    8. Give the slaw a final toss before serving to distribute the dressing evenly.

    Notes

    For extra crunch, add thinly sliced red cabbage or carrots. Adjust the vinegar and cream to suit your tanginess preference.

    Honestly, I keep thinking about how much this simple slaw can make a regular burger feel like a little celebration. Or how the zing from the mustard seeds sneaks up on you in the best way. It’s not fancy, but somehow, that’s exactly what I need right now. Like a little reminder that the good stuff is often just a few ingredients away from being perfect.

  • Mini Pizza Bagels: Topping Your Day with Simplicity and Snack-ability

    Mini Pizza Bagels: Topping Your Day with Simplicity and Snack-ability

    I used to think pizza was an all-or-nothing kind of deal. Either the whole pizza or nothing at all. So when I found myself craving something small and crispy, I started experimenting with bits and pieces—bagels here, cheese there, bits of pepperoni. Turns out, these tiny pizza bites can be absolutely addictive, especially when you’re multitasking and don’t want to wait for a whole pie.

    Right now, these mini pizza bagels matter because they’re perfect for late-night snacks, quick lunchboxes, and those moments when you crave comfort but don’t want leftovers. The smell of melting cheese mixed with that toasty bagel crunch—nothing beats it. And in a world that feels increasingly hurried, these little bites remind me that good things don’t have to take hours.

    Why I Love This Recipe (And You Will Too)

    • They’re ready in about 10 minutes, no fuss or special skills needed.
    • Impressingly customizable—whatever toppings you love, slap ‘em on.
    • They turn a simple snack into a snack that actually feels a little special.
    • Perfect for throwing together when friends pop in unannounced or when you just want a quick treat for yourself.
    • It’s a tiny victory. Nothing fancy, just straightforward satisfying food when you need it.

    Honestly, I keep a stash in the freezer for those nights I forget dinner or just need something salty and cheesy. Sometimes the best ideas come from craving randomness and then realizing you’ve actually hit on something good.

    Mini Pizza Bagels

    Mini pizza bagels are small, crispy snacks made by topping bagel halves with cheese and various toppings, then baking until the cheese melts and turns golden. They are characterized by a crunchy bagel crust with gooey melted cheese and flavorful toppings, offering a handheld, snackable pizza bite.
    Prep Time 5 minutes
    Cook Time 5 minutes
    Total Time 10 minutes
    Servings: 4
    Course: Main Course
    Cuisine: American
    Calories: 150

    Ingredients
      

    • 4 pieces bagels sliced in half
    • 1 cup shredded cheese mozzarella or cheddar blend
    • 1/2 cup pepperoni slices optional
    • to taste pizza sauce or marinara

    Equipment

    • Baking sheet
    • Fork or spoon
    • Oven

    Method
     

    1. Preheat your oven to 375°F (190°C).
    2. Lay the bagel halves cut side up on a baking sheet in a single layer.
    3. Spread a small dollop of pizza sauce on each bagel half, guiding it toward the edges to avoid overflow.
    4. Sprinkle the shredded cheese evenly over the sauce, covering the surface completely.
    5. Add pepperoni slices or your favorite toppings over the cheese, arranging them to ensure each bite has some flavor.
    6. Place the baking sheet in the oven and bake for about 5 minutes, or until the cheese has melted and is bubbling with a golden edge.
    7. Take the tray out of the oven and let the mini pizza bagels cool for a minute so you don’t burn your fingers or mouth.
    8. Use tongs or a spatula to transfer the mini pizza bagels onto a serving plate, ready to enjoy.

    Nothing like a handful of these to make you forget about the fact that dinner was a whole other story. Honestly, they’re the kind of thing you can turn to when life feels busy and standard and you just want a little boost. They may be humble, but damn, they make the day feel a bit more manageable.

  • The Quiche Bagel Mashup You Didn’t Know You Needed

    The Quiche Bagel Mashup You Didn’t Know You Needed

    One thing I realized while making these is how satisfying it is to combine two breakfast worlds—bagels and quiche—into one messy, glorious bite. It’s kind of like patching up a favorite bagel with a creamy, cheesy, vegetable-packed filling that tastes like slowly waking up on a weekend morning.

    The smell of baked eggs mingling with toasted bagel crust is surprisingly intoxicating. It’s not pretty, but it’s honest—crusty edges, soft insides, and that gooey cheese pulling apart. This feels like summer’s lazy mornings in a breakfast sandwich, but elevated without effort or fuss.

    Right now, I think we’re all craving comfort food that still feels like a little act of rebellion. Something that’s not just toast or scramble but feels a bit wild, like you’re sneaking a secret breakfast into the middle of your day. And honestly, these bagels are perfect for that.

    Why I Love This Recipe (And You Will Too)

    • It’s a mess but in the best way—no perfect slices, just tasty, uneven bites.
    • Major nostalgia with a twist. I remember stealing bites of my mom’s quiche, but now I get my hands dirty making it myself.
    • Super flexible for whatever’s in the fridge—spinach, bacon, roasted peppers, you name it.
    • Every bite feels like a tiny celebration of brunch, even if it’s 9 am on a Tuesday.
    • It’s easy to make ahead if you’re planning a brunch or just want cheesy goodness after a long day.

    Honestly, I keep thinking about these until I run out, which is maybe a problem. But isn’t that what food’s supposed to do?

    Bagel Quiche Bites

    This dish combines the hearty crust of a bagel with a creamy, egg-based quiche filling loaded with vegetables and cheese. The ingredients are assembled and baked until the edges are crispy and golden, with a soft, custardy interior and gooey cheese pull. The result is a messy, satisfying brunch treat with a rustic appearance and rich flavor.
    Prep Time 15 minutes
    Cook Time 25 minutes
    Total Time 40 minutes
    Servings: 4
    Course: Main Course
    Cuisine: American
    Calories: 350

    Ingredients
      

    • 2 pieces bagels sliced in half
    • 4 large eggs beaten
    • 1 cup milk
    • 1 cup shredded cheese cheddar or a blend
    • 1 cup chopped vegetables spinach, peppers, or your choice
    • 1 teaspoon salt
    • 0.5 teaspoon black pepper
    • 2 tablespoons butter melted

    Equipment

    • Mixing bowls
    • Baking Dish
    • Whisk
    • Cutting board
    • Knife
    • Measuring cups

    Method
     

    1. Preheat your oven to 375°F (190°C) and lightly grease a baking dish.
    2. Slice the bagels in half horizontally and lay the cut sides facing up in the baking dish.
    3. In a mixing bowl, whisk together the eggs and milk until smooth and slightly frothy, which will give a light custard texture.
    4. Add the shredded cheese, chopped vegetables, salt, and pepper to the egg mixture, folding gently to combine.
    5. Pour the egg mixture evenly over the bagel halves, making sure each half is well coated and starts to soak up the custard.
    6. Drizzle the melted butter over the top of the soaked bagels for extra flavor and crispness.
    7. Bake in the preheated oven for about 20-25 minutes, until the edges of the bagels are golden brown and the filling is set and bubbling.
    8. Remove from the oven and let cool for a few minutes. The filling should be firm with gooey cheese and crusty edges.
    9. Cut into irregular, messy pieces that show the crispy edges and soft interior, then serve warm.

    Notes

    Feel free to add your favorite breakfast vegetables or meats for variation.

    Sometimes I think about how weird it is to put quiche in a bagel, but then I remember the best food often comes from wild ideas. Like, why not mash up two familiar foods and see what sticks? That’s the magic here. It’s messy. It’s imperfect. And it somehow makes a regular morning feel a little more special.

    Anyway, I’ll probably keep playing with this idea, but for now, it’s enough to know that I have these bagels in my fridge and a craving that’s hard to shake. Maybe next time I’ll toss in some sun-dried tomatoes or switch up the cheeses. But for today, I’m happy with the chaos.

  • The Surprising Pivot: Spinach and Feta Quesadillas as Your Morning Wake-Up Call

    The Surprising Pivot: Spinach and Feta Quesadillas as Your Morning Wake-Up Call

    I didn’t mean to make these quesadillas special. Just a quick breakfast, and somehow I ended up noticing the way the melted feta drips into the crispy tortilla, how the spinach still has a faint, earthy scent even after cooking. It’s not a perfect, pretty dish, but something about the combination makes it feel like a secret snack you sneak after midnight.

    Usually I think about tacos or breakfast burritos when I want something fast. But lately, flipping open the fridge and finding those wilted spinach leaves, plus a chunk of feta, made me realize how often I overlook simple ingredients that turn into something oddly satisfying. It’s easy, almost lazy, but every bite feels like a little rebellion against the usual breakfast chaos.

    This is not about perfect plating or fancy ingredients. It’s about how a dish can resurface in your life when you’re not looking for it. A reminder that not every meal needs to be planned. Sometimes, it just happens—kind of like this.

    Why I Love This Recipe (And You Will Too)

    • Because it’s a quick fix when I’ve got no plan but a craving for something savory.
    • It makes leftovers feel more exciting—feta leftovers are rarely exciting on their own.
    • The smell of toasted tortillas and melting cheese is oddly calming during busy mornings.
    • It’s flexible. Spinach, cheese, wrap, done—no stress about fancy ingredients.
    • Surprisingly good cold, so it’s perfect for making in advance and grabbing on the go.

    Spinach and Feta Breakfast Quesadilla

    This quesadilla is made by filling a tortilla with wilted spinach and crumbled feta cheese, then folding and toasted until crispy and melted. The dish features a crispy exterior with gooey cheese and tender spinach inside, resulting in a rustic, satisfying snack or breakfast on the go.
    Prep Time 5 minutes
    Cook Time 10 minutes
    Total Time 15 minutes
    Servings: 2
    Course: Main Course
    Cuisine: American
    Calories: 320

    Ingredients
      

    • 4 small flour tortillas large and pliable
    • 2 cups fresh spinach roughly chopped
    • 1/2 cup feta cheese crumbled
    • 1 tablespoon olive oil for sautéing

    Equipment

    • Non-stick skillet
    • Spatula
    • Cutting board
    • Knife

    Method
     

    1. Warm a non-stick skillet over medium heat and add a splash of olive oil.
    2. Add the chopped spinach to the skillet and cook for about 2 minutes until wilted, stirring occasionally. Remove from pan and set aside.
    3. Lay a tortilla flat on a cutting board and spoon a quarter of the cooked spinach evenly over half of it.
    4. Sprinkle crumbled feta over the spinach, distributing it evenly for maximum flavor in every bite.
    5. Fold the tortilla in half, pressing gently to help the filling settle inside.
    6. Carefully place the folded tortilla into the preheated skillet and cook for about 2-3 minutes until the bottom is golden brown and crispy.
    7. Flip the quesadilla with a spatula and cook the other side for another 2-3 minutes until golden and the cheese begins to melt.
    8. Remove the quesadilla from the skillet and let it rest for a minute to settle.
    9. Slice the quesadilla into wedges and serve immediately, or let it cool for a quick, portable snack.

    Sometimes the best ideas come from what’s left in the fridge and a moment of not caring too much about perfection. Like these quesadillas—you won’t believe how a little feta and some spinach can punch up something so simple. Anyway, I should probably stop writing before I start craving a second one.

  • The Quiet Power of Spinach Balls that Actually Make Sense at Midnight

    The Quiet Power of Spinach Balls that Actually Make Sense at Midnight

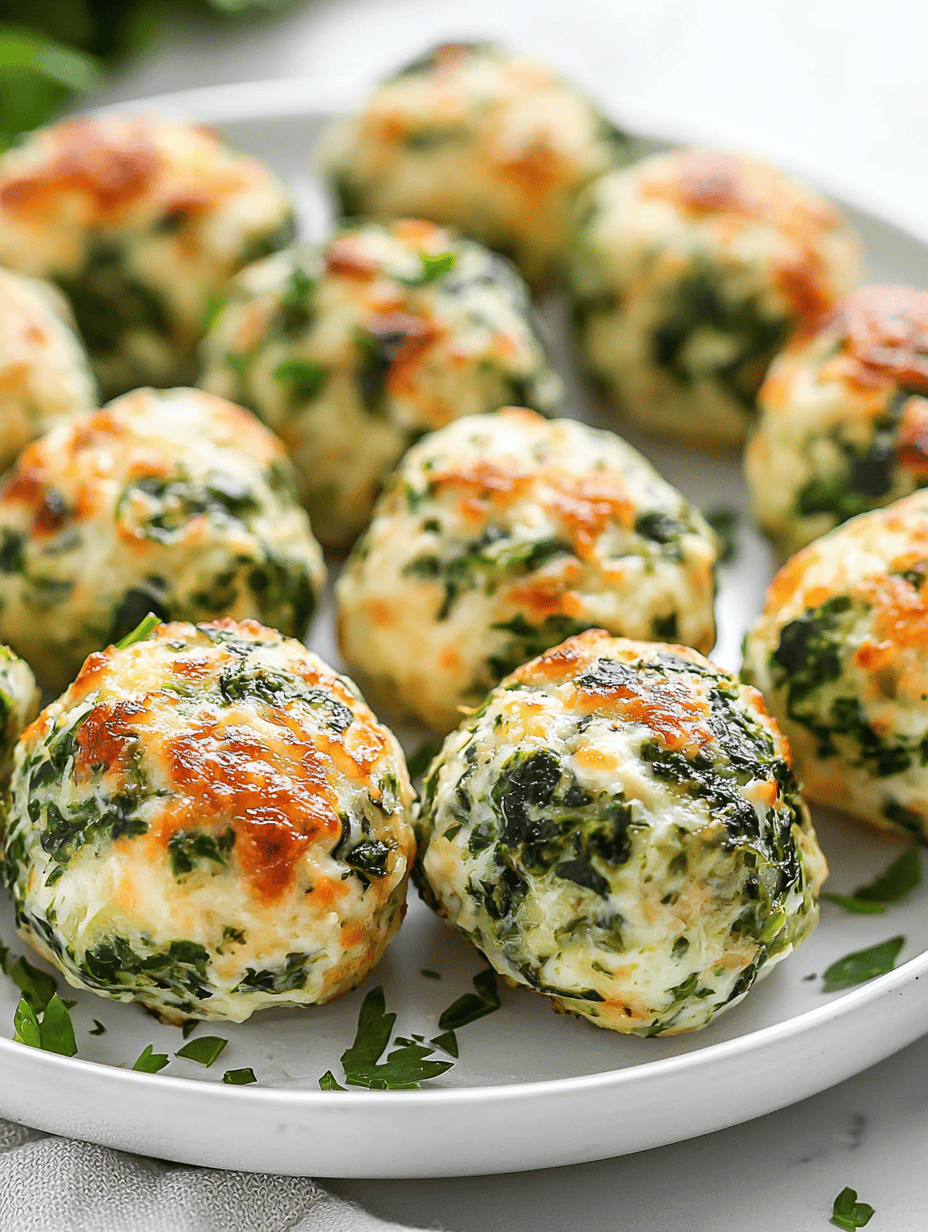
    I started making these because I found myself hungry at midnight, craving something savory but not wanting to cook. The weird thing is, I didn’t expect these little spinach balls to be a comfort, but they kinda are. Crunchy on the outside, with this soft, cheesy, herb-flecked center that feels like a secret snack—who knew spinach could pull that off?

    What makes these worth the space in my fridge? It’s the way they vanish fast. I’ll toss a handful into my bag for work, or sneak them into the oven after the kids are asleep. They’re stupid simple, and honestly, sometimes that’s the only kind of meal I want in my life right now.

    Why I Love This Recipe (And You Will Too)

    • They’re insanely easy for nights when I just don’t want to pretend to be fancy.
    • Perfect snack for when I forget to meal prep but still want some greens.
    • They remind me of my grandma’s weird little kitchen, where everything was thrown together but somehow perfect.
    • It’s one of those recipes I keep coming back to when I need a tiny bit of joy that’s not complicated.
    • Also, they’re genuinely good even if you’re not a spinach person—don’t ask me how.

    Anyway, I guess I just really like how these balls remind me combining two things I love—spinach and cheese—can be both quick and satisfying.

    Maybe I’ll make more tonight. Or maybe I’ll just eat the leftovers plain. Who knows. That’s how these things go.

    Spinach Cheese Balls

    These spinach cheese balls are small, bite-sized snacks with a crispy exterior and a soft, cheesy interior flecked with herbs. They are made by mixing cooked spinach with cheese and herbs, shaping the mixture into balls, and baking until golden and crunchy.
    Prep Time 10 minutes
    Cook Time 15 minutes
    Total Time 25 minutes
    Servings: 8
    Course: Main Course
    Cuisine: American
    Calories: 150

    Ingredients
      

    • 4 cups fresh spinach roughly chopped
    • 1 cup shredded cheese cheddar or mozzarella work well
    • 1/2 cup herbs chopped parsley or basil
    • 1 cup cooked breadcrumbs for binding and crunch
    • 1 teaspoon salt
    • 1/2 teaspoon black pepper
    • 1 tablespoon olive oil for coating

    Equipment

    • Mixing bowls
    • Baking sheet
    • Parchment paper
    • Measuring cups and spoons
    • Spoon or small scoop

    Method
     

    1. Preheat your oven to 400°F (200°C). Line a baking sheet with parchment paper for easy cleanup.
    2. Place the fresh spinach in a large skillet over medium heat. Cook, stirring occasionally, until wilted and tender, about 3-4 minutes. Remove from heat and let it cool slightly.
    3. Squeeze out excess moisture from the cooled spinach using a clean kitchen towel or paper towels, pressing to remove as much water as possible. This helps keep the mixture from becoming too wet.
    4. Transfer the drained spinach to a mixing bowl. Add the shredded cheese, chopped herbs, cooked breadcrumbs, salt, and pepper. Mix everything together until well combined.
    5. Use a spoon or small cookie scoop to portion out the mixture and gently roll it between your hands into small, round balls. Place each ball onto the prepared baking sheet, spacing them evenly.
    6. Lightly brush each spinach cheese ball with olive oil. This will help them turn golden and crispy as they bake.
    7. Bake in the preheated oven for about 15 minutes, or until the balls are golden brown and crispy on the outside.
    8. Remove from the oven and let them cool for a few minutes. Serve warm or at room temperature for a tasty, crunchy snack or appetizer.

    Whatever you call them—spinach bites, snack balls, or midnight miracles—they’re pretty much always welcome here. Sometimes the simplest foods turn out to be the ones you end up craving the most. No fuss. Just a little bit of green and cheese, and I’m happy.

    Now I gotta think if I have enough spinach for a second batch. Or maybe just a few more for good measure. These little guys are proof that sometimes, the best ideas are the simplest ones.

  • The Surprise Twist You Didn’t Know Your Onion Dip Needed

    The Surprise Twist You Didn’t Know Your Onion Dip Needed

    I’ve always been obsessed with the smell of caramelizing onions. That deep, almost meaty aroma that sneaks out of the stovetop and lingers in the air for hours. It’s more than just a kitchen smell — it’s like a whisper from the past, reminders of Sundays at my grandma’s house, standing over bubbling pots.

    One day I realized that caramelized onions could do more than just sit on toast. They could transform a simple dip into something unexpected. No fancy tricks, just patience and sugar, which turns it sweet, sticky, and intensely savory. Right now, this feels perfect for those lazy weekend get-togethers—something cozy, yet surprisingly sophisticated.

    Why I Love This Recipe (And You Will Too)

    • It smells insanely good, like a slow-baked paradise, and isn’t that enough reason to make it?
    • It’s honestly just onions and a few pantry staples. No fuss, just flavors that chill out and develop depth.
    • Perfect for impromptu snack sessions or last-minute guests. No stress, just scoop and enjoy.
    • The richness of the caramelized onions paired with the creamy dip feels indulgent without overdoing it.
    • It’s made me rethink how simple ingredients can create something totally addictive. So yeah, I keep making it on repeat—probably you will too.

    Maybe I should’ve picked a different angle. But this? It’s honest, it’s real, and it kinds of blows my mind how something so simple can become a go-to.

    Caramelized Onion Dip

    This dip is made by slowly cooking sliced onions until they develop rich, golden-brown color and sweet, savory flavor. The caramelized onions are then mixed with creamy ingredients to create a smooth, thick dip with a deep, savory taste and a luscious, sticky texture. It is ideal for spreading or scooping at relaxed gatherings.
    Prep Time 10 minutes
    Cook Time 40 minutes
    Total Time 50 minutes
    Servings: 4
    Course: Main Course
    Cuisine: American
    Calories: 150

    Ingredients
      

    • 3 large yellow onions sliced thin
    • 2 tablespoons olive oil
    • 1 teaspoon granulated sugar
    • 0.5 cup mayonnaise or sour cream for tang
    • 0.5 cup cream cheese softened
    • to taste salt and black pepper

    Equipment

    • Large skillet
    • Spatula or wooden spoon

    Method
     

    1. Heat a large skillet over medium heat and add the olive oil, swirling to coat the pan. Once shimmering, add the thinly sliced onions and cook gently, stirring occasionally, until they soften and become translucent, about 10 minutes.
    2. Sprinkle the sugar over the onions and continue cooking, stirring regularly. Let the onions caramelize slowly, developing a deep golden color and sticky texture, which takes about 20-25 minutes. Keep the heat moderate to prevent burning.
    3. Remove the skillet from the heat and let the caramelized onions cool slightly, so they’re warm but not hot.
    4. In a mixing bowl, combine the mayonnaise, softened cream cheese, and a pinch of salt and pepper. Whisk until smooth and creamy, creating a soft base for the dip.
    5. Add the slightly cooled caramelized onions to the creamy mixture. Fold everything together until well incorporated, ensuring the onions are evenly distributed throughout the dip.
    6. Taste the dip and adjust the seasoning with more salt or pepper as needed for your preference.
    7. Transfer the dip to a serving bowl and serve immediately or refrigerate until ready to enjoy. The dip will have a thick, luscious consistency and a deep caramelized onion flavor.

    Honestly, I should stop talking now. Or maybe I’ll just keep snacking and forget about writing about it altogether.