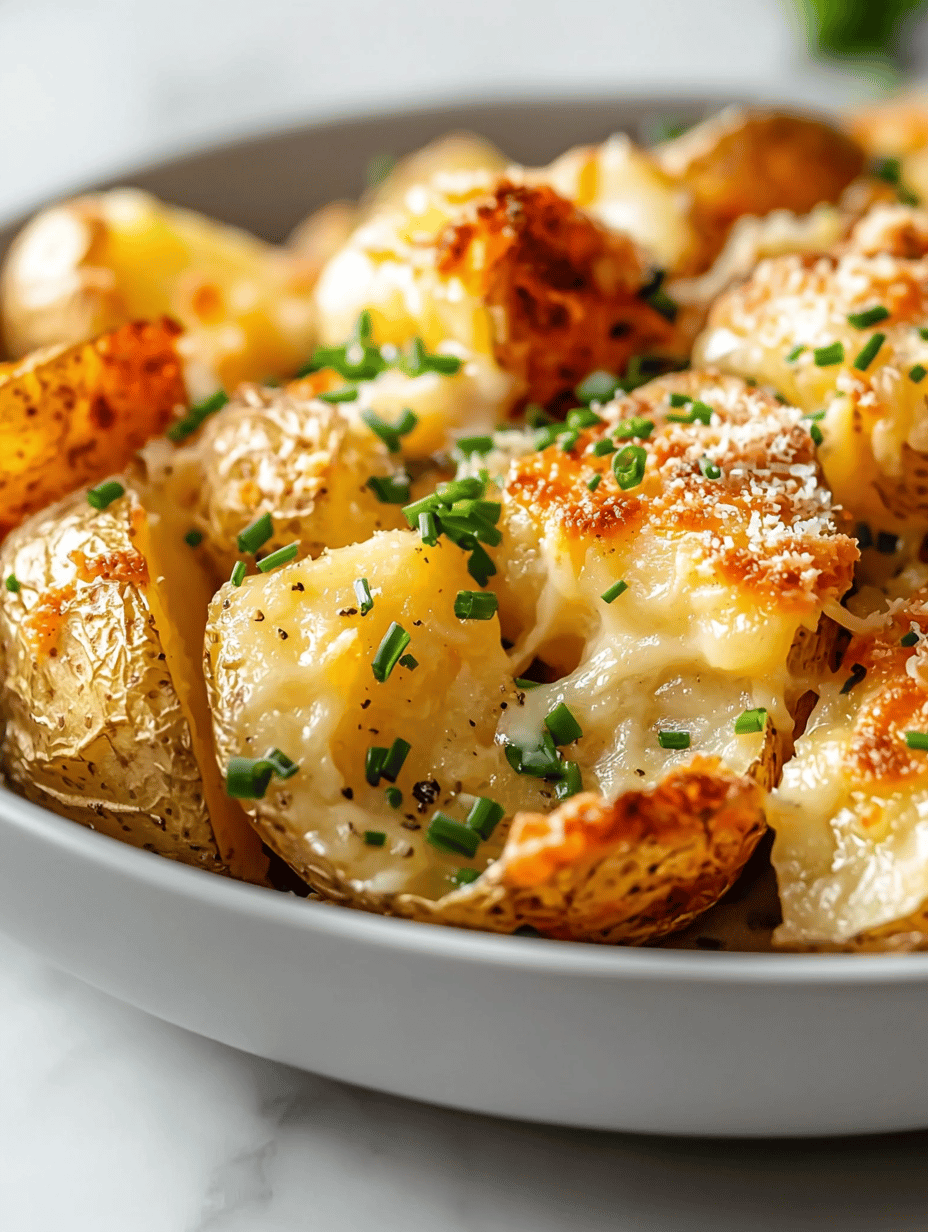
Category: Side Dishes

  • Copy Cat Outback Aussie Cheese Fries: A Surprising Flavored Nostalgia

    Copy Cat Outback Aussie Cheese Fries: A Surprising Flavored Nostalgia

    Ever think about how the smell of crispy fries mingling with melted cheese and dustings of savory spices can trigger a flood of memories? It’s not just junk food, it’s a tiny slice of a shared experience. When I saw this recipe pop up, I realized I’d been craving those weirdly addictive cheese fries more than I’d admit.

    I’ve always loved how the smell of warm, stretchy cheese pulls apart in that perfect cheesy stretch. But here’s the weird part — it’s not just the cheese. It’s the tang of that special seasoning dust, almost smoky, with a hint of garlic powder that sticks on your fingertips. This dish matters now because comfort food is having its moment again, and somehow, these greasy, cheesy bites hit the spot better than anything else right now.

    Why I Love This Recipe (And You Will Too)

    • It’s simple enough for any weeknight, but feels totally indulgent.
    • There’s a nostalgic rush every time you smell that cheesy garlic smell filling the kitchen.
    • You get that satisfying crunch from the fries paired with molten cheese — a combo that’s hard to beat.
    • It’s perfect for sharing or even just keeping all to yourself, no judgment.

    Honestly, this recipe makes me feel like I’m sneaking a cheeky cheat meal without the guilt. Sometimes it’s just little bites of comfort in the chaos.

    Cheese Fries with Savory Seasoning Dust

    This dish features crispy fries topped with melted cheese and a fragrant seasoning dust. The fries are baked until golden and crunchy, then generously coated with gooey cheese and a smoky garlic seasoning, resulting in a flavorful, crunchy, and cheesy final appearance.
    Prep Time 10 minutes
    Cook Time 20 minutes
    Total Time 30 minutes
    Servings: 4
    Course: Main Course
    Cuisine: American
    Calories: 580

    Ingredients
      

    • 4 large Russet potatoes for fries, cut into sticks
    • 2 cups shredded mozzarella cheese for melting over fries
    • 1 tablespoon olive oil to toss with fries
    • 1 teaspoon smoked paprika part of seasoning dust
    • 0.5 teaspoon garlic powder adds savory aroma
    • 0.25 teaspoon cayenne pepper optional for a slight kick
    • to taste salt
    • to taste black pepper

    Equipment

    • Baking sheet
    • Oven
    • Medium saucepan
    • Spatula

    Method
     

    1. Preheat your oven to 425°F (220°C). Line a baking sheet with parchment paper for easy cleanup.
    2. Peel the potatoes and cut them into evenly-sized fries, about 1/4 inch thick. Rinse the cut fries in cold water to remove excess starch, then dry thoroughly with a clean towel.
    3. In a large bowl, toss the fries with olive oil, salt, black pepper, smoked paprika, garlic powder, and cayenne pepper if using. Mix until the fries are evenly coated with the seasoning.
    4. Arrange the fries in a single layer on the prepared baking sheet, making sure they aren’t overlapping for maximum crispiness.
    5. Bake in the oven for about 15-20 minutes, flipping halfway through, until they turn golden brown and crispy around the edges.
    6. While the fries are baking, pour the shredded cheese into a medium saucepan and heat over low, stirring constantly until melted and smooth, about 3-4 minutes.
    7. Once the fries are done, remove them from the oven and transfer to a serving dish or keep on the baking sheet.
    8. Pour the melted cheese generously over the hot fries, ensuring all pieces are covered with ooey-gooey cheese.
    9. While the cheese is still warm and gooey, sprinkle the seasoning dust made from the smoked paprika, garlic powder, and cayenne over the top for an extra savory kick.
    10. Serve the cheese fries immediately while hot and enjoy their crispy texture combined with melted cheese and flavorful seasoning.

    And maybe I’ll keep tweaking this and see if I can make it even cheesier or spicier. Because really, that’s the fun part — turning a simple snack into something slightly more personal. Plus, the smell alone might make you forget about whatever crappy day you had.

  • The Secret Science of Crispy Baked Potato Chips

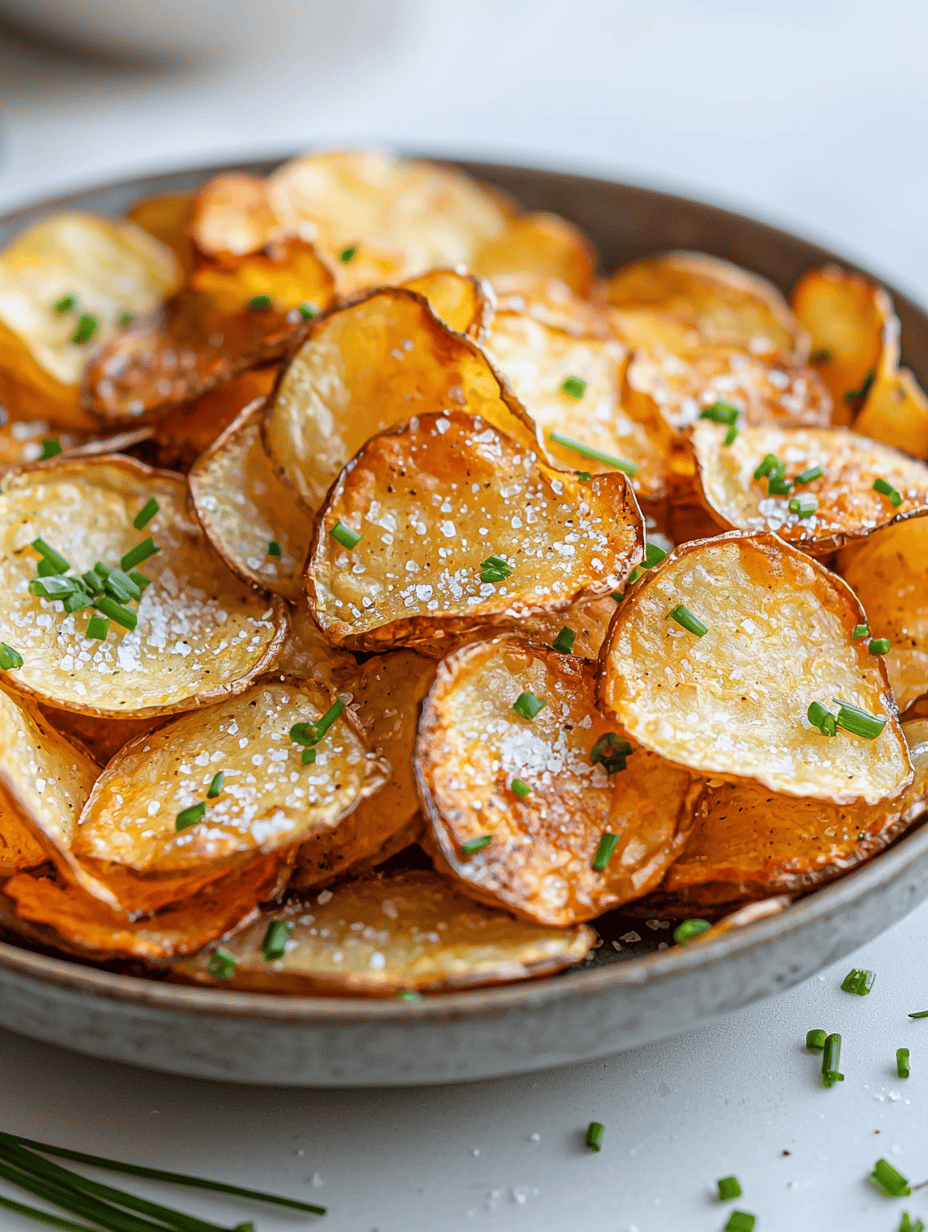
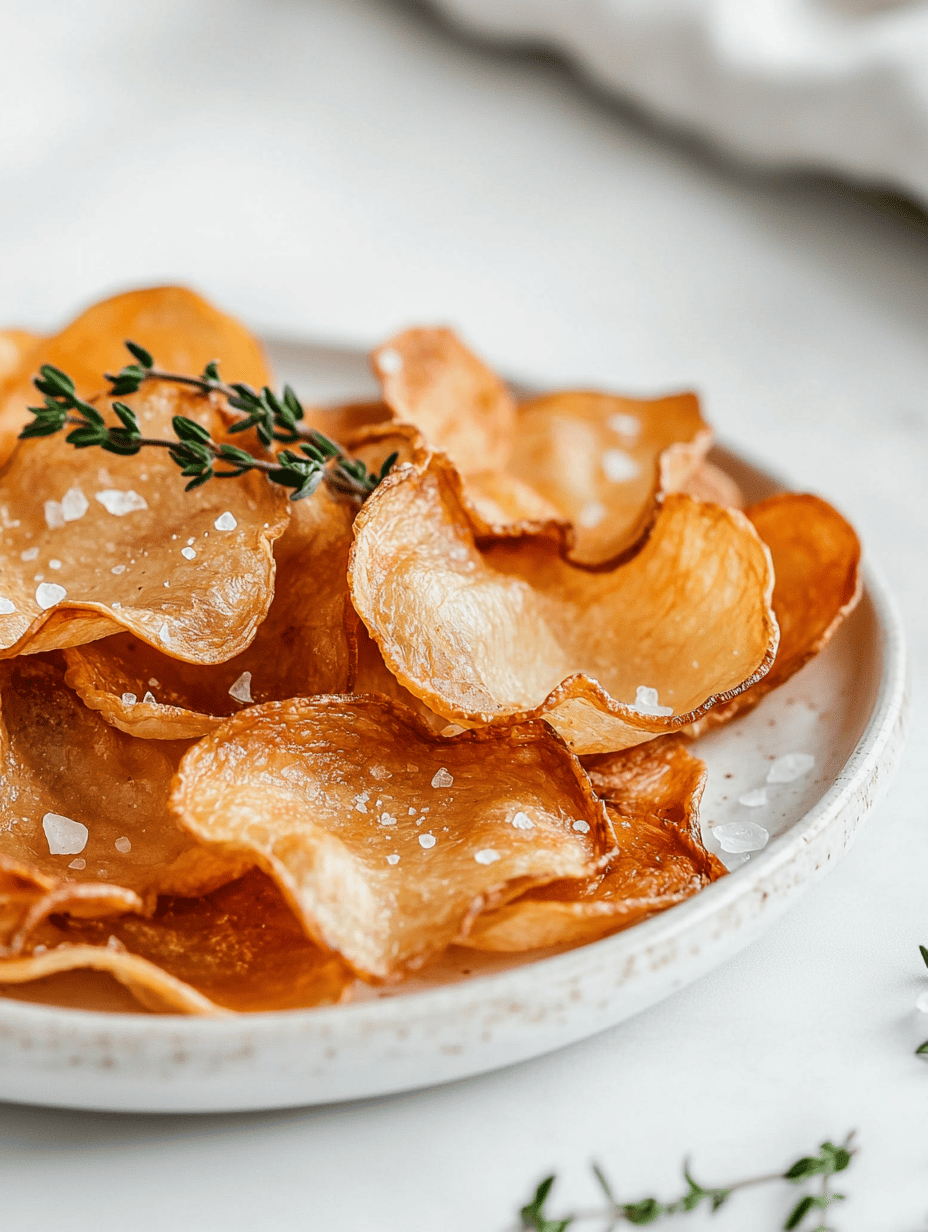
    The Secret Science of Crispy Baked Potato Chips

    Most of the time, we buy chips. Bag after bag, never thinking much about the process. But lately, I’ve been obsessed with understanding exactly what makes a chip crispy and not soggy. Turns out, it’s all in the way the starch gets a certain kind of careful dehydration, not just frying in oil.

    This recipe for baked potato chips isn’t just about skipping oil; it’s about the patience to thinly slice, pat dry, and bake just right. They smell like fresh potato with a hint of toasted earth. It’s weird how these tiny slices transform from raw to this fragile crunch in the oven. Right now, it feels like a tiny rebellion against the processed snack aisle.

    Why I Love This Recipe (And You Will Too)

    • It’s simple enough on weeknights but feels gourmet.
    • Seeing those extra-thin slices turn crispy is kind of a magic trick.
    • No junk ingredients, just potatoes and a little salt.
    • Once you get the technique down, it’s oddly satisfying to replace store-bought chips with these.
    • Plus, no guilt when you mindlessly munch. It’s a win every time.

    Anyway, I think I’ll just keep tweaking the seasonings. Maybe some smoked paprika next time. Or maybe I’ll just keep eating them plain and feeling like I cracked some snack code.

    Baked Potato Chips

    This recipe creates thinly sliced potatoes baked until crispy without added oil, resulting in light, crunchy chips with a delicate golden appearance. The process involves careful slicing, drying, and baking to achieve a chip with a brittle texture and slightly toasted flavor.
    Prep Time 15 minutes
    Cook Time 25 minutes
    Total Time 40 minutes
    Servings: 4
    Course: Main Course
    Cuisine: American
    Calories: 120

    Ingredients
      

    • 2 large potatoes preferably starchy like Russets
    • to taste pinch salt for seasoning

    Equipment

    • Mandoline or sharp knife
    • Baking sheet
    • Parchment paper
    • Chef’s towel or paper towels
    • Cooling rack

    Method
     

    1. Begin by rinsing and peeling the potatoes, then use a mandoline or sharp knife to slice them as thinly and uniformly as possible. Thin slices ensure maximum crispiness after baking.
    2. Place the sliced potatoes in a bowl of cold water and let them soak for 5 minutes. This helps remove excess starch, which aids in crisping.
    3. Drain the potato slices and spread them out on a clean kitchen towel or paper towels. Pat them completely dry to eliminate moisture, which is key to crispy chips.
    4. Preheat your oven to 375°F (190°C). Line a baking sheet with parchment paper to prevent sticking and ensure easy cleanup.
    5. Arrange the dried potato slices in a single layer on the prepared baking sheet, making sure they don’t overlap. This helps them bake evenly and become crispy all over.
    6. Bake the slices in the oven for about 20-25 minutes, flipping them over halfway through. Watch for them to turn golden and get crispy around the edges, and listen for a gentle sizzling or popping sound as they crisp up.
    7. Once baked, remove the chips from the oven and transfer them to a cooling rack. Sprinkle lightly with salt while still warm for the best flavor absorption.
    8. Allow the chips to cool completely for a few minutes until they become more brittle and crisp. This final cooling step ensures they reach that perfect crunch.
    9. Enjoy your homemade baked potato chips plain or with your favorite dip. Their delicate crunch and toasted potato flavor make them a satisfying snack.

    Notes

    For extra flavor, try sprinkling with smoked paprika or your preferred seasonings before baking.

    Cooking chips this way makes me think about the little victories. Sometimes the simplest things — just a potato, salt, and heat — surprise you the most. A snack that’s almost too easy to mess up, but rewarding when you get it right.

    Almost funny how these tiny slices become something I want to snack on with no shame. Maybe it’s just the act of making something that usually feels so processed, from scratch. Whatever it is, I’ll keep tweaking and nibbling.

  • Tennessee Onions: The Ones That Changed My Perspective on Simple Things

    Tennessee Onions: The Ones That Changed My Perspective on Simple Things

    Here’s something I’ve never fully appreciated until I actually made these onions myself. When I had them at a tiny roadside stop in rural Tennessee, I thought it was just fried onions, nothing special. But the smell of caramelized sugar and tangy vinegar mingling in the air stuck with me for days.

    Years later, I decided to try my hand at recreating them. Turns out, it’s about embracing those moments you overlook—simple ingredients and a little patience, turning ordinary into unforgettable. No fancy tricks, just a little heat, a splash of vinegar, and sugar making magic in the pan.

    Why I Love This Recipe (And You Will Too)

    • It’s raw and real—no fuss, just food that tastes like it’s been hanging around your favorite Southern kitchen for generations.
    • Perfect for when you want something crispy, a bit tangy, and honestly kind of addictive.
    • It sneaks into your day-to-day, whether as a side, a snack, or a way to dress up leftovers.
    • Feels surprising, maybe even a little rebellious—like a secret weapon you didn’t know you needed.
    • Turns a simple onion into something that makes you smile without trying too hard.

    Honestly, I think that’s why I keep coming back to them. It’s those small moments when you realize a handful of onions can be so much more than just a side. They become a story — and maybe, just maybe, a little reminder to enjoy the simple stuff.

    Caramelized Onion Rings in Vinegar and Sugar

    This dish features thinly sliced onions that are slowly caramelized in a sugar syrup until golden and sticky, then finished with a splash of vinegar for tang. The cooking process involves slow sautéing to develop sweetness and texture, resulting in crispy, tangy, and chewy onion rings that are rich in flavor and visually appealing with a glossy finish.
    Prep Time 10 minutes
    Cook Time 30 minutes
    Total Time 40 minutes
    Servings: 4
    Course: Main Course
    Cuisine: Southern
    Calories: 120

    Ingredients
      

    • 2 large onions thinly sliced
    • 1/4 cup sugar
    • 2 tablespoons vinegar apple cider or white vinegar

    Equipment

    • Skillet or frying pan
    • Spatula

    Method
     

    1. Start by peeling and thinly slicing the onions into rings or half-moons, aiming for uniform thickness for even cooking.
    2. Heat a skillet over medium-low heat, then add the sliced onions to the pan without oil to allow them to release moisture and start softening.
    3. Sprinkle the sugar evenly over the onions, then stir gently to coat the slices. You should hear a slight sizzle as the sugar begins to melt and coat the onions.
    4. Cook the onions slowly, stirring occasionally, as the sugar caramelizes and turns a deep amber, releasing a sweet, toasted aroma. Continue simmering for about 15–20 minutes until the onions are golden, sticky, and slightly crispy at the edges.
    5. Once the onions are deep golden and caramelized, pour in the vinegar and stir to combine. This will create a tangy, slightly acidic contrast to the sweetness, and bubbles will form as it cooks down.
    6. Allow the mixture to cook for another 2–3 minutes until the vinegar is absorbed and the onions look glossy and sticky.
    7. Remove the skillet from heat and let the onions cool slightly — they should be thick, sticky, and shiny, ready to serve as a savory topping or snack.
    8. Serve the caramelized onions warm, either as a side, topping for meats, or incorporated into other dishes for a burst of sweet and tangy flavor.

    Notes

    For best results, cook slowly over medium-low heat to develop the caramel flavor fully. Adjust the vinegar amount to taste for desired tanginess.

    And maybe that’s what makes them unforgettable. Not because they’re fancy or complicated, but because they ask you to slow down just a tiny bit. To really taste the caramel, the vinegar, the crispy bits. It’s like a little wake-up call for your dinner plate, a nudge to look closer at what’s right in front of you.

    Or maybe I just got distracted again… Either way, these onions will be around for a while. Maybe you’ll find your own weird little attachment to them someday. That’s the best part, really.

  • Unexpected Duo: Sautéed Mushrooms with Spinach That Actually Matters

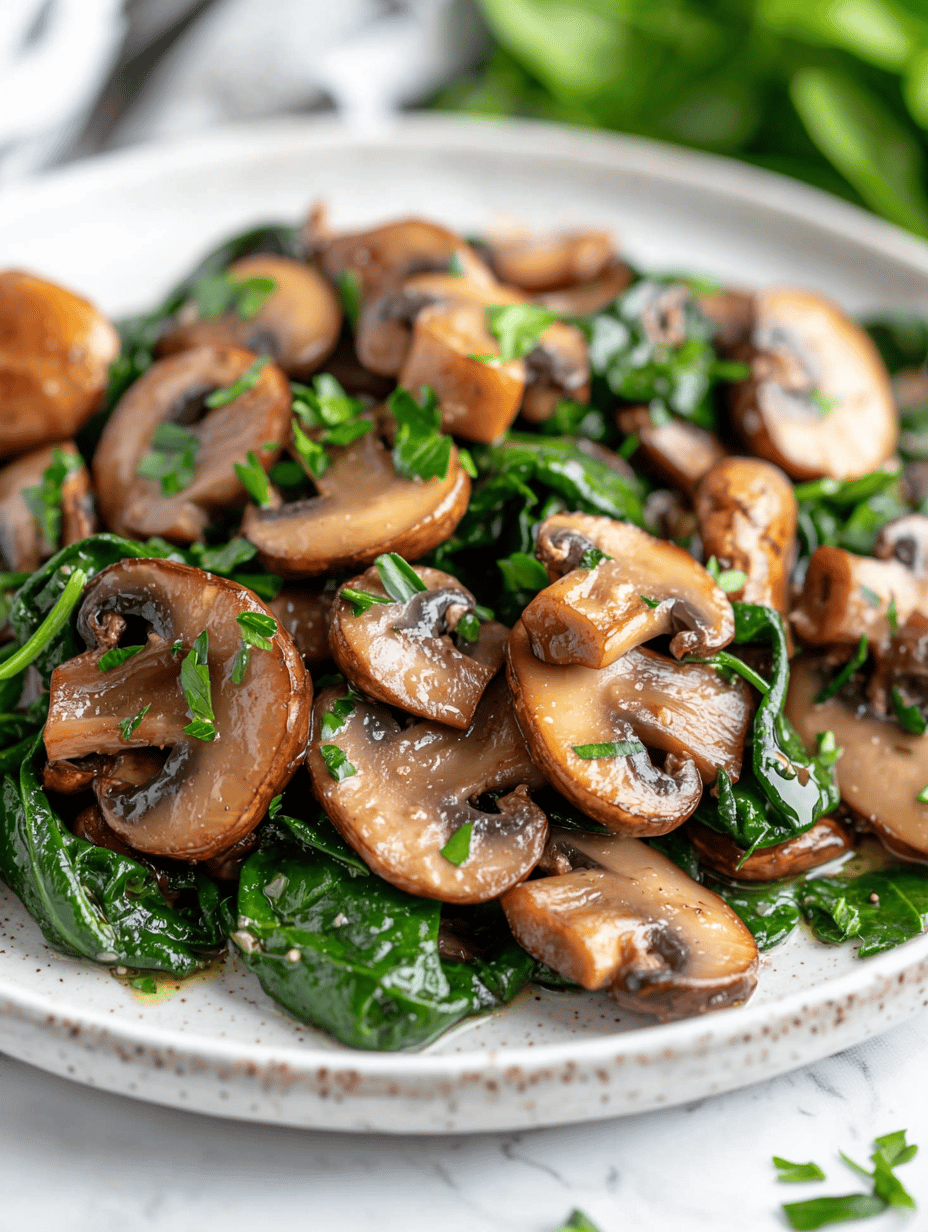
    Unexpected Duo: Sautéed Mushrooms with Spinach That Actually Matters

    Deep in the fridge, I found a bag of mushrooms that had seen better days, and a handful of spinach about to wilt. Instead of tossing both, I threw them in a pan together. The smell of the browning mushrooms mixing with the earthy spinach? It sneaks up, like a secret handshake between two unlikely friends.

    What makes this combo special right now is how perfect it is for weeknight dinner chaos. No fancy ingredients or long prep, just something that feels like a tiny victory in the middle of everything. Plus, the way the garlic releases that sweet, toasty aroma while frying? It’s pure sensory economy.

    Why I Love This Recipe (And You Will Too)

    • It’s a quick fix that doesn’t taste like a quick fix – actually satisfying.
    • Perfect for days when I want to get dinner on the table without thinking too hard.
    • The way the mushrooms caramelize and shrink down, leaving behind all that flavor — that’s my kind of magic.
    • It’s adaptable—throw in cheese, nuts, whatever’s lurking in the fridge.
    • Honestly, it feels a little rebellious to cook up something so simple and still end up with this much flavor.
    • Sometimes it’s the basic stuff that surprises you most. Anyway, I’ll probably make this several more times before I get bored.

      Sautéed Mushrooms and Spinach

      This dish combines sliced mushrooms and fresh spinach cooked together in a skillet, utilizing sautéing to develop rich, caramelized flavors and tender greens. The mushrooms shrink and brown, while the spinach wilts to a vibrant green, creating a savory, textured side or main component with a fragrant garlic aroma.
      Prep Time 5 minutes
      Cook Time 10 minutes
      Total Time 15 minutes
      Servings: 2
      Course: Main Course
      Cuisine: general
      Calories: 150

      Ingredients
        

      • 8 oz mushrooms sliced
      • 4 cups fresh spinach roughly chopped or whole
      • 3 cloves garlic minced
      • 2 tablespoons olive oil for sautéing
      • to taste salt and pepper

      Equipment

      • Skillet or frying pan
      • Spatula or wooden spoon

      Method
       

      1. Heat the olive oil in a skillet over medium heat until shimmering and the oil begins to ripple.
      2. Add the sliced mushrooms to the pan. Cook, stirring occasionally, until they release their moisture and turn golden brown, about 5-6 minutes. You should hear a gentle sizzle and see the mushrooms shrink slightly.
      3. Stir in the minced garlic and cook for about 30 seconds until fragrant and lightly toasted, filling the kitchen with a warm aroma.
      4. Add the fresh spinach to the skillet. Use a spatula to gently fold the greens into the mushrooms, allowing them to wilt and reduce in volume, about 2-3 minutes. You’ll notice the spinach turning a bright green and softening.
      5. Season with salt and pepper to taste, sprinkling evenly across the mixture, then toss to combine everything well.
      6. Cook for another minute to allow the flavors to meld and the ingredients to reach your preferred tenderness. The mushrooms should be caramelized, and the spinach fully wilted.
      7. Remove from heat and transfer to a serving dish. Serve immediately for the best flavor and texture.

      There’s a weird comfort in knowing you can turn plain mushrooms and spinach into something worth eating. No fuss, no fussing. Just a little chop, a quick sauté, and suddenly it’s dinner. Or breakfast, honestly.

      And if I think about it, maybe it’s not the ingredients that matter as much as that moment when everything comes together—smells good enough to make you forget about the day for a second.

  • Herb-Infused Mash Patties You Didn’t See Coming

    Herb-Infused Mash Patties You Didn’t See Coming

    Late night thoughts. I was knee-deep in growing my collection of vintage herb pots—tiny, mismatched, with the funny little saucers. It hit me how herbs don’t get enough spotlight in the spotlight of comfort food. These mashed potato patties aren’t just leftover mash turned up a notch—they’re basically a salute to those quiet moments of peeking into my windowsill garden.

    This recipe matters now because everyone’s craving something familiar but with an edge—something that makes the mundane magic again. The smell of garlic, chives, and thyme when they hit the hot pan? That’s invitation enough. Crispy edges, soft insides, herbs giving a subtle green-gift aroma—this isn’t fancy, but it feels like a secret handshake for anyone who’s ever loved a good, surprisingly imperfect snack.

    Why I Love This Recipe (And You Will Too)

    • It’s the kind of thing you toss together with whatever herbs are languishing in your fridge, no fancy shopping needed.
    • Perfect for a quick lunch or a drunken snack—because who doesn’t want crispy, herby bites after midnight?
    • Filling but not heavy, with that delightful contrast of crunchy outside and tender inside.
    • Impressively adaptable—think leftover roast veggies or a sprinkle of cheese for extra kick.
    • It catches you off guard how satisfying these little patties are, even if you weren’t planning to cook at all.

    They’re more of a whisper than a shout, really—just a little reminder that simple ingredients can surprise you when treated right. I didn’t start out wanting to perfect a herb mash—just fiddling in the kitchen one evening, and now I barely cook without a handful of parsley around.

    That’s the thing with these. They’re not flashy, but they stick with you. Maybe the reason they do? It’s the quiet moment of knowing you’ve taken crispy, humble mash and given it a little twist—no fuss needed.

    Herb Mashed Potato Patties

    This dish features small, crispy-on-the-outside, tender-on-the-inside patties made from leftover mashed potatoes infused with fresh herbs like chives, thyme, and garlic. The potatoes are shaped into patties and pan-fried until golden brown, creating a crispy exterior with a fragrant, herb-scented interior.
    Prep Time 10 minutes
    Cook Time 15 minutes
    Total Time 25 minutes
    Servings: 4
    Course: Main Course
    Cuisine: Comfort Food
    Calories: 250

    Ingredients
      

    • 2 cups mashed potatoes preferably cooled leftovers
    • 2 cloves garlic minced
    • 2 tablespoons chopped chives fresh
    • 1 teaspoon dried thyme
    • 1/2 teaspoon salt
    • 1/4 teaspoon black pepper
    • 1 egg egg beaten
    • 2 tablespoons all-purpose flour optional, helps bind the patties
    • 2 tablespoons vegetable oil for frying

    Equipment

    • Mixing bowl
    • Skillet or frying pan
    • Spatula
    • Plate

    Method
     

    1. Place the cooled mashed potatoes in a large mixing bowl. Add the minced garlic, chopped chives, dried thyme, salt, and pepper. Mix well until the herbs are evenly incorporated and the mixture feels cohesive.
    2. Pour in the beaten egg and sprinkle the flour over the mixture. Gently fold everything together until the ingredients are fully combined and the mixture holds together when shaped.
    3. Divide the mixture into four equal portions. Gently shape each portion into a patty about 1/2 inch thick, handling lightly so you don’t compress the potatoes too tightly.
    4. Heat the vegetable oil in a skillet over medium heat until shimmering and hot, ensuring enough oil to lightly coat the bottom of the pan.
    5. Gently place the patties into the hot skillet, allowing them to sizzle softly. Cook for about 3-4 minutes on one side, until golden brown and crispy, then flip carefully.
    6. Continue frying the patties for another 3-4 minutes on the second side until equally golden and crispy. Use a spatula to gently press down if needed for even browning.
    7. Remove the patties from the skillet and transfer them to a plate lined with paper towels to drain excess oil and stay crispy.
    8. Let the patties cool for a minute or two — they should be hot, crispy on the outside, and tender within, with faint herbal aroma wafting through the air.

    Notes

    Feel free to customize with additional herbs, cheese, or leftovers like roasted veggies for added flavor.

    Honestly, I keep thinking about how this little dish sneaks into your daily routine. Like, next thing you know you’re snacking on herb bites while waiting for your coffee to brew. That unexpected crunch and herby smell—that’s usually enough to make a boring evening feel just a little more interesting.

    Plus, they’re almost like the edible version of that favorite, weird vintage mug you bought on a whim—sounds odd, but it somehow fits perfectly into your day. Who knew mashed potatoes had such quiet surprises?

  • The Secret Spice That Turns Baked Potato Wedges Into a Game Day Must-Have

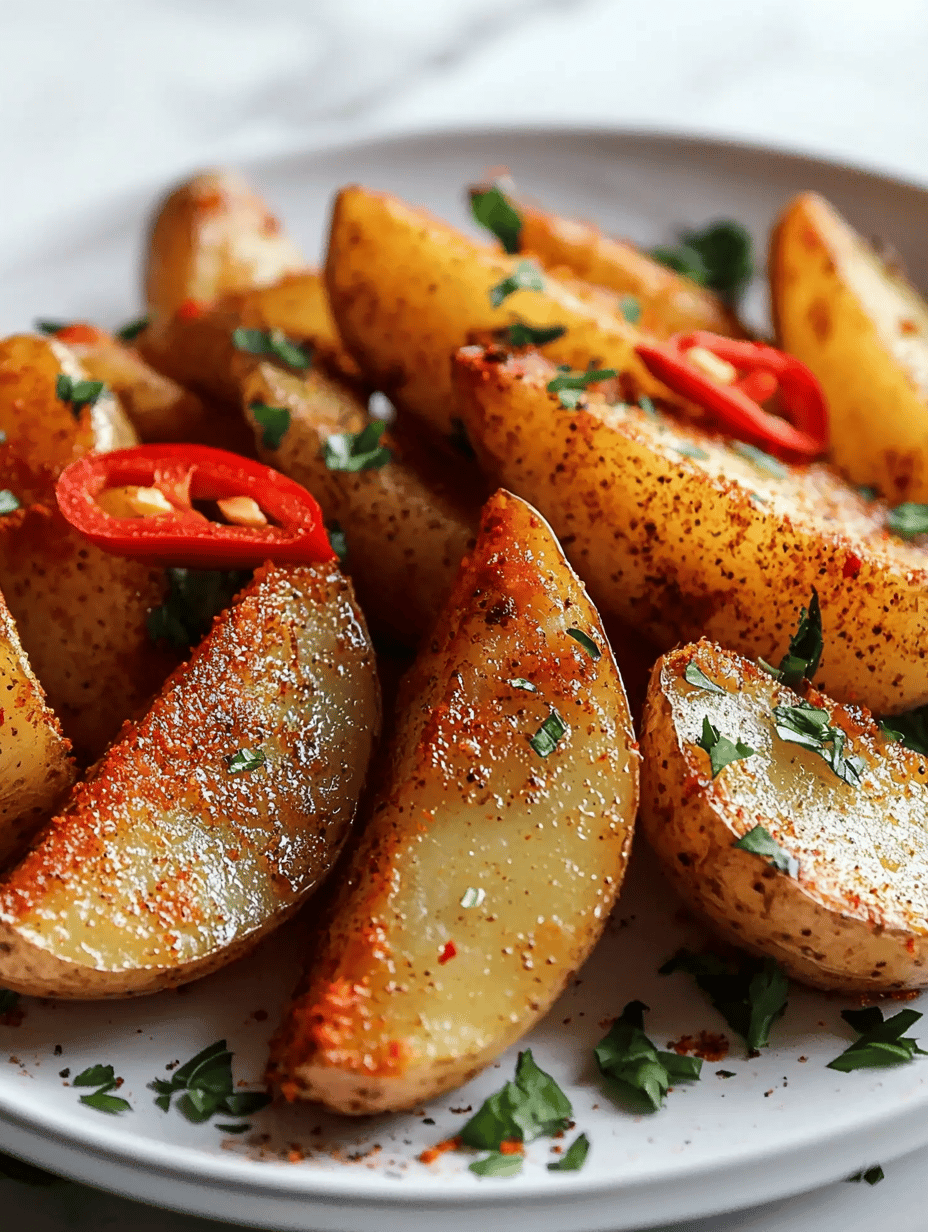
    The Secret Spice That Turns Baked Potato Wedges Into a Game Day Must-Have

    I woke up thinking about how we often overlook the simplest foods when it comes to making them special. Like your average baked potato wedges. But then I realized, it’s not just about tossing potatoes in oil and seasoning. It’s about the missing spice I keep in my pantry—smoked paprika—that transforms the entire flavor profile. That smoky aroma? It hits your nose first, then makes your taste buds sit up straight.

    Right now, these wedges feel perfect for a lazy weekend in, but also just the thing to serve at a last-minute gathering that somehow always sneaks up on you. The smell of roasting garlic, the crispy edges of the potatoes, and that kick of paprika—makes everything smell like comfort and mischief at once.

    Why I Love This Recipe (And You Will Too)

    • It’s so easy to throw together, yet feels fancy enough for guests.
    • That smoky flavor sneaks up on you—way more interesting than plain salt.
    • I always have all these spices on hand, so no special shopping trip needed.
    • Perfect for nights when I want snacky bites that don’t require a ton of effort or mess.
    • This recipe somehow turns even boring potatoes into something I actually look forward to eating.

    Honestly, sometimes I wonder if I’m just chasing that one surprise flavor I haven’t found yet. Turns out, it’s just paprika. Who knew?

    Smoked Paprika Roasted Potato Wedges

    This dish features potato wedges seasoned with smoked paprika and roasted until crispy. The ingredients are tossed together and baked in the oven, resulting in wedges with golden edges and a smoky, tender interior. The final appearance is crispy on the outside with a warm, flavorful aroma.
    Prep Time 10 minutes
    Cook Time 35 minutes
    Total Time 45 minutes
    Servings: 4
    Course: Main Course
    Cuisine: American
    Calories: 250

    Ingredients
      

    • 4 large potatoes Russet or Yukon Gold work well
    • 2 tbsp olive oil for tossing
    • 1 tsp smoked paprika adds smoky flavor
    • 0.5 tsp salt
    • 0.25 tsp black pepper
    • 2 cloves garlic minced

    Equipment

    • Baking sheet
    • Mixing bowl
    • Sharp Knife

    Method
     

    1. Preheat your oven to 425°F (220°C) and line a baking sheet with parchment paper for easy cleanup.
    2. Wash the potatoes thoroughly and cut each one into equally sized wedges, about 8 per potato, ensuring they are roughly the same thickness for even cooking.
    3. Place the potato wedges into a large mixing bowl and add the minced garlic, smoked paprika, salt, black pepper, and olive oil.
      4 large potatoes
    4. Toss everything together until the wedges are evenly coated with the oil and spices, making sure the spices stick well to the potato surfaces.
    5. Spread the seasoned wedges in a single layer on the prepared baking sheet, ensuring they aren’t crowded for maximum crispiness.
    6. Place the baking sheet into the oven and roast for about 30-35 minutes, flipping the wedges halfway through, until they are golden brown and crispy around the edges.
    7. Remove the wedges from the oven, and let them sit for a few minutes to crisp up slightly as they cool.
    8. Serve the smoky roasted potato wedges hot, perfect as a snack or side dish with your favorite dipping sauce or simply on their own.

    So yeah, maybe I’ll keep experimenting, but for now, these wedges are a keeper. Crispy, smoky, salt-sweet with a touch of garlic—they somehow remind me that simple is still good. Maybe even better. Sometimes, the most basic things give the biggest surprise after all.

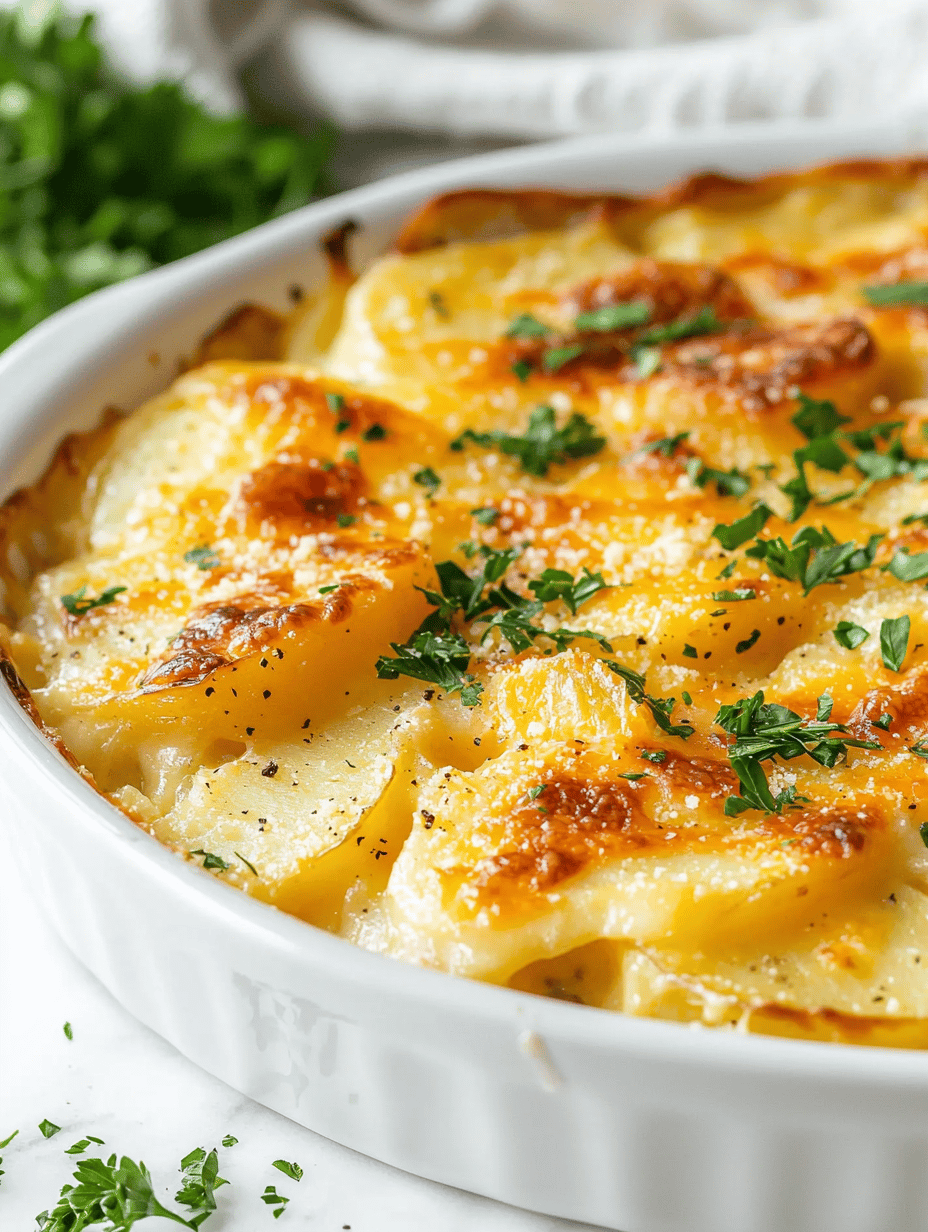
  • The Surprise Ingredient that Makes My Cheesy Scalloped Potatoes Unforgettable

    The Surprise Ingredient that Makes My Cheesy Scalloped Potatoes Unforgettable

    Honestly, I used to think scalloped potatoes were just a cream-and-cheese toss-up. Then I remembered the one thing I always forget—onions. Not just for flavor, but for that unexpected sweetness that sneaks out when you slow-cook them with the potatoes. Turns out, onion layers transform cheesy richness into something more complex, like a little secret hidden in each bite.

    Right now, this dish feels more relevant than ever. Comfort food is trending again, but I wanted to shake things up—bring a hint of caramelized depth that’s perfect for cozy dinners or weekend gatherings. The smell of melting cheese, simmered onions, and crispy edges is basically a guarantee you’ll want seconds. Honestly, it’s the kind of thing that’s better the next day—more flavor, less fuss.

    Why I Love This Recipe (And You Will Too)

    • It’s simple: just a handful of ingredients, but the flavor feels like it took ages to perfect.
    • The onion caramelizes slowly, making the whole casserole smell like a secret garden of sweetness and savoriness.
    • It pairs perfectly with almost anything—pork chops, roast chicken, or just a big green salad.
    • It’s that nostalgic kinda dish, but with a little twist that keeps it interesting.
    • It’s also a great way to use up those leftover potatoes you almost forgot you had in the back of the fridge.

    And honestly, I’m still surprised how little it takes to turn plain potatoes into something I crave. You’ll probably forget about monotony in the kitchen when you taste this one.

    Scalloped Potatoes with Caramelized Onions

    This dish combines thinly sliced potatoes layered with slowly caramelized onions and melted cheese, then baked until golden and bubbling. The slow-cooked onions add sweetness and depth, creating a creamy and crispy-textured casserole with a rich appearance.
    Prep Time 20 minutes
    Cook Time 1 hour
    Total Time 1 hour 20 minutes
    Servings: 6
    Course: Main Course
    Cuisine: Comfort Food
    Calories: 420

    Ingredients
      

    • 4 large potatoes thinly sliced
    • 2 large onions sliced into thin rings
    • 1 cup shredded cheese cheddar or Gruyère work well
    • 2 tablespoons butter for caramelizing onions
    • 1 cup heavy cream or whole milk for a lighter version
    • 1 teaspoon salt
    • 1/2 teaspoon black pepper

    Equipment

    • Sharp Knife
    • Mandoline or Vegetable Slicer
    • Large skillet or frying pan
    • Baking Dish
    • Oven

    Method
     

    1. Preheat your oven to 375°F (190°C). Thinly slice the potatoes using a mandoline or sharp knife, ensuring even thickness for even cooking.
    2. Heat a large skillet over medium heat and melt the butter. Once melted and bubbling, add the sliced onions and a pinch of salt. Cook slowly, stirring occasionally, until the onions are deeply caramelized and golden, about 20-25 minutes. They should smell sweet and have a rich color.
    3. In a mixing bowl, whisk together the heavy cream, salt, pepper, and half of the shredded cheese until well combined.
    4. Spread a thin layer of the creamy mixture at the bottom of a baking dish. Layer a handful of potato slices over the cream, slightly overlapping them. Repeat layering with the onions, remaining cheese, and the creamy mixture, finishing with a layer of potatoes on top.
    5. Pour the remaining creamy mixture evenly over the layered potatoes, ensuring all slices are coated. Cover the dish with foil.
    6. Bake in the preheated oven for 45-50 minutes, until bubbling around the edges and the potatoes are tender when pierced with a fork.
    7. Remove the foil and sprinkle the remaining shredded cheese over the top. Return to the oven and bake uncovered for an additional 10-15 minutes, or until the top is golden brown and crispy. Your kitchen should smell rich and cheesy.
    8. Let the scalloped potatoes rest for 5-10 minutes before serving. This helps the dish set and makes serving easier.
    9. Serve hot and enjoy the creamy, crispy layers of caramelized onions and melted cheese in every bite.

    Some days I wonder if I should just keep this recipe to myself. But then I remember how much I wish I’d known about onion magic sooner. Putting this together is almost meditative—chopping, layering, waiting. It’s funny how the simplest things sometimes make the biggest impact. Plus, I’ll admit, I sneak an extra spoonful of cheese just because I can.

    Anyway, if you’re feeling like blending comfort with a little surprise, this is your dish. Nothing fancy, just honest, cozy, cheesy potatoes with a secret ingredient that whispers, “Let’s do this again soon.”

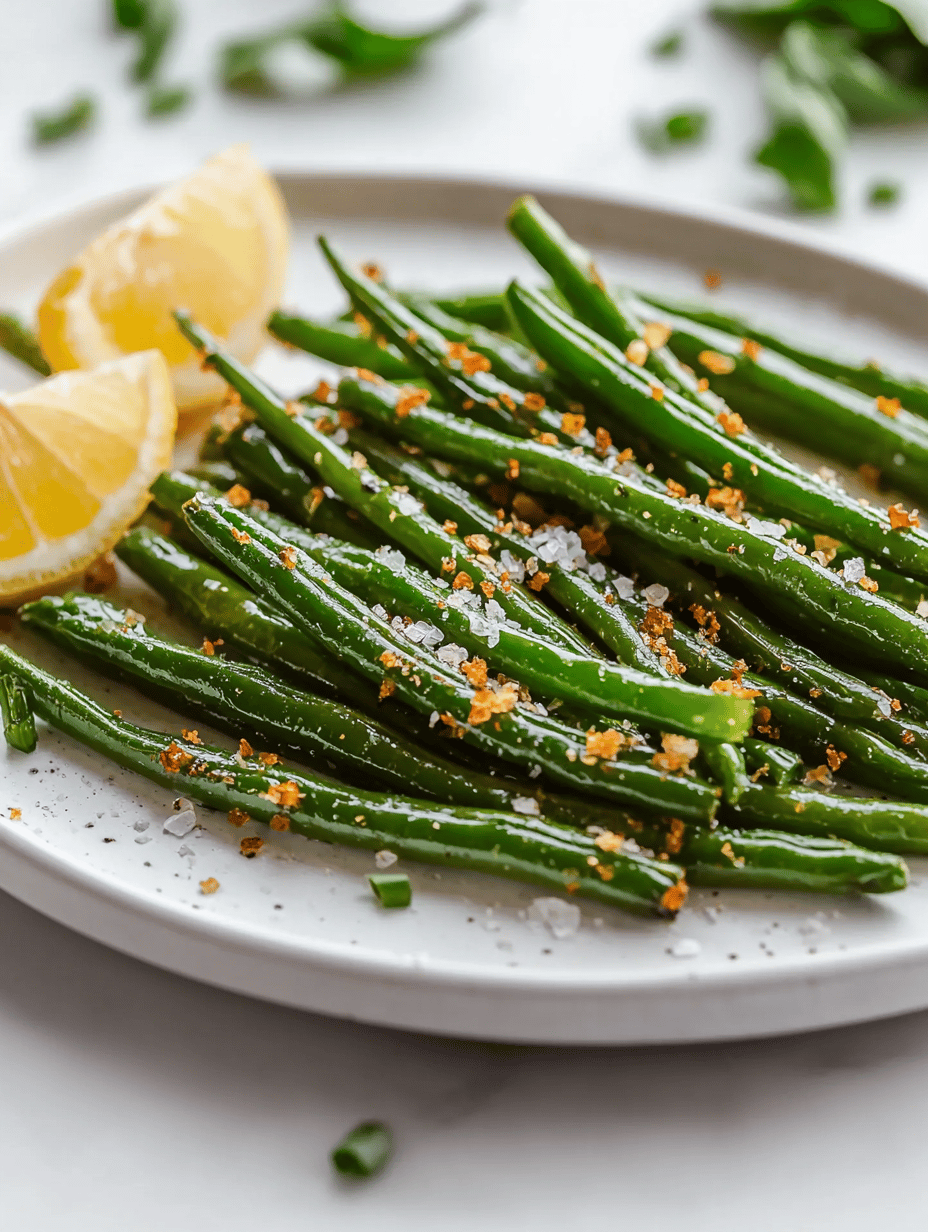
  • Craving Crunch? The Secret to Perfectly Crispy Air Fryer Green Beans

    Craving Crunch? The Secret to Perfectly Crispy Air Fryer Green Beans

    Ever think about how green beans can become unexpectedly addictive? I stumbled onto the trick by accident—trying to get rid of that limp, boiled flavor that used to haunt old holiday dinners. The smell of roasting green beans, with a slight char and a whisper of garlic, gets me every time. It’s almost like they transform into tiny, savory potato chips.

    What makes this special now? Well, green beans are everywhere—super cheap at the market, and in season, they look almost too perfect to pass up. But most recipes tire me out with soggy, bland results. This method? It’s like giving those beans a radical glow-up—crispy outside, tender inside, with a pop of flavor that hits differently.

    Why I Love This Recipe (And You Will Too):

    • It’s simple—minimal ingredients, quick cleanup, no fuss.
    • The aroma alone makes my kitchen feel cozier and more alive.
    • It’s a perfect snack or side, no matter how busy I am or how little I planned.
    • That first crunch always makes me think maybe I could do this with other veggies too.

    Sometimes it’s the small upgrades that stick around longer than the big ones. I guess I just like knowing I can turn what I have into something unexpectedly satisfying without much effort.

    Crispy Roasted Green Beans

    Green beans are tossed with oil and seasoned, then roasted at high heat until they develop a crispy, golden exterior with tender insides. The final dish resembles tiny, savory chips with a slight char and aromatic garlic flavor, offering a crunchy texture and vibrant appearance.
    Prep Time 10 minutes
    Cook Time 15 minutes
    Total Time 25 minutes
    Servings: 4
    Course: Main Course
    Cuisine: American
    Calories: 150

    Ingredients
      

    • 1 lb green beans trimmed and washed
    • 2 tablespoons olive oil for tossing and roasting
    • 1 clove garlic minced
    • to taste pinch salt
    • to taste pinch black pepper

    Equipment

    • Baking sheet
    • Mixing bowl

    Method
     

    1. Preheat your oven to 425°F (220°C). Arrange a baking sheet with parchment paper for easy cleanup.
    2. Place the green beans in a mixing bowl and drizzle with olive oil. Toss them well to ensure all beans are evenly coated, which helps achieve that crispy exterior during roasting.
    3. Add the minced garlic, salt, and black pepper to the bowl. Toss again to distribute the seasonings evenly across all the green beans.
    4. Spread the seasoned green beans in a single layer on the prepared baking sheet, making sure they are not overlapping for maximum crispiness.
    5. Roast the green beans in the oven for about 15 minutes, shaking the pan halfway through to promote even cooking. Look for a slight char and crispy edges once they’re done.
    6. Remove from the oven and let the green beans cool slightly; they will become crunchier as they rest. Serve immediately for the best texture and flavor.

    Isn’t it funny how something so humble can feel like a tiny victory? These green beans are now on my weekly rotation—proof that a little heat and a sprinkle of salt go a long way. Plus, anytime I throw things in the air fryer, I feel like I’ve unlocked a secret weapon for weeknight dinners. Honestly, kinda glad I forgot to buy chips this week.

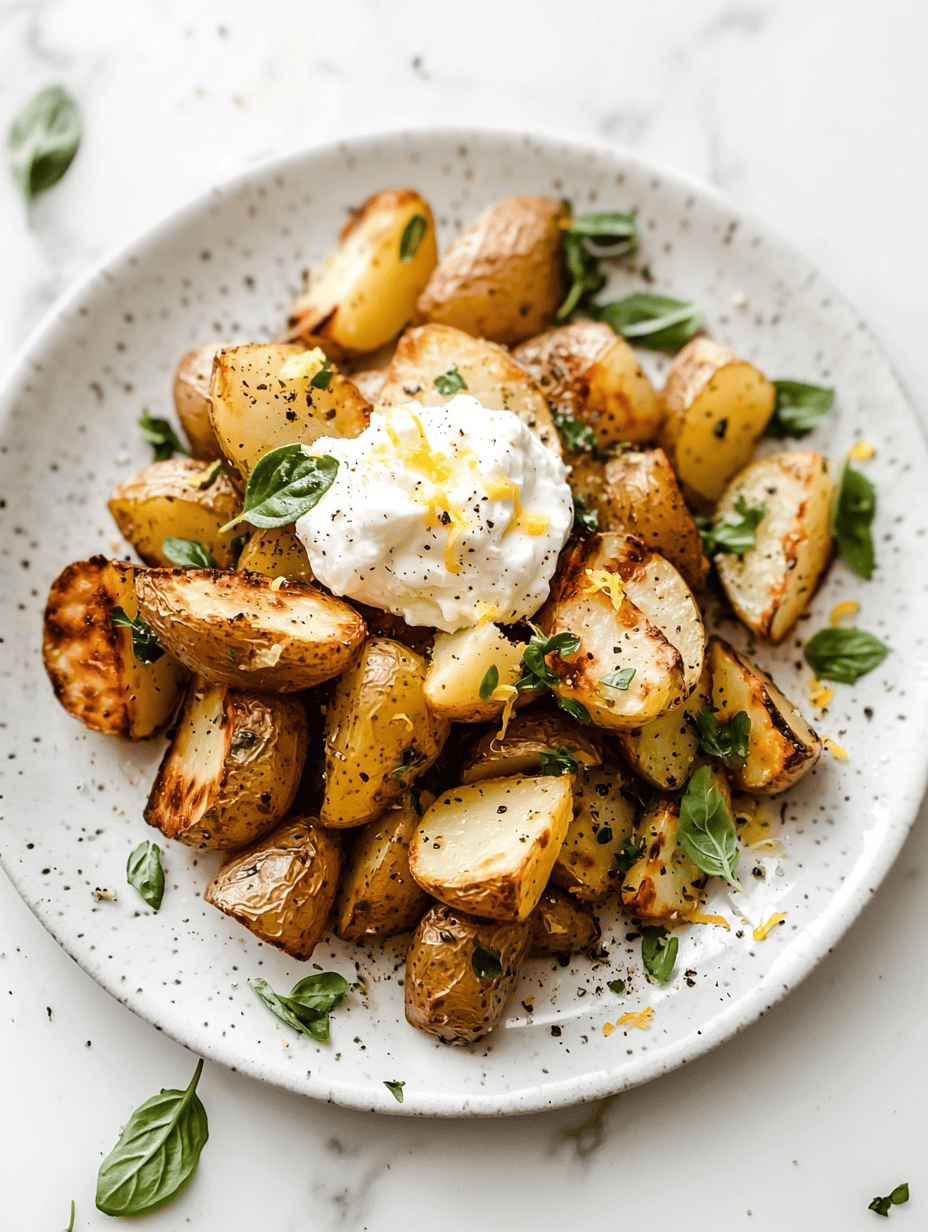
  • Greek Roasted Potatoes with Whipped Feta — A Snack You Didn’t Know You Needed

    Greek Roasted Potatoes with Whipped Feta — A Snack You Didn’t Know You Needed

    So, I’ve been experimenting with pantry staples, trying to turn simple ingredients into something that surprises me. This time, it was about roasted potatoes with a dollop of whipped feta. Nothing fancy, just the smell of rosemary baking into crispy edges and that faint tang of feta starting to melt. It’s weirdly satisfying, like a little secret that’s hiding in plain sight.

    What got me hooked was how the whipped feta transforms everything. It’s not just dipping sauce — it’s a creamy, slightly salty spread that sticks to each crispy cube. This dish feels like a real escape hatch from the usual, especially now when I crave familiar comfort but want a bit of *something different* for dinner or a snack. Maybe it’s the weekend thinking I need an unexpected treat, or just me craving something Greek to shake up the routine.

    Why I Love This Recipe (And You Will Too)

    • It’s a no-fuss way to make roasted potatoes feel fancy with minimal effort.
    • The whipped feta adds richness in a surprisingly light way, almost like a cheesy cloud.
    • Perfect for always having ingredients on hand, yet somehow feels special every time.
    • Feels indulgent but is totally simple — just crispy, creamy, salty, and a little herby.
    • Makes me think of those lazy, spontaneous dinners that turn into little moments of happiness.

    So yeah, that’s kind of where I am right now—thinking about how good food can be both simple and utterly unexpected. Or maybe I just need to keep experimenting before I get bored. Either way, this one’s staying in the rotation.

    Roasted Potatoes with Whipped Feta

    This dish features crispy roasted potatoes infused with rosemary, served with a dollop of whipped feta. The potatoes are baked until golden and crunchy, while the feta is whipped into a smooth, creamy spread that adds a tangy, salty contrast. The final presentation is a visually appealing combination of golden cubes topped with fluffy, rich feta.
    Prep Time 10 minutes
    Cook Time 40 minutes
    Total Time 50 minutes
    Servings: 4
    Course: Main Course
    Cuisine: Mediterranean
    Calories: 250

    Ingredients
      

    • 1.5 pounds potatoes Yukon Gold or Russet, cut into cubes
    • 2 tablespoons olive oil for roasting
    • 1 teaspoon rosemary fresh, chopped, or dried
    • 0.5 teaspoon salt or to taste
    • 0.25 teaspoon black pepper freshly ground
    • 4 ounces feta cheese preferably block, for whipping
    • 1 tablespoon milk or cream, optional for fluffiness

    Equipment

    • Baking sheet
    • Mixing bowl
    • Hand mixer or whisk
    • Knife
    • Cutting board

    Method
     

    1. Preheat your oven to 425°F (220°C). Line a baking sheet with parchment paper or lightly oil it. Toss the cubed potatoes with olive oil, chopped rosemary, salt, and pepper until evenly coated.
    2. Spread the potatoes out in a single layer on the prepared baking sheet, making sure they aren’t crowded. Roast in the oven for about 30-35 minutes, turning halfway through, until they’re golden brown and crispy around the edges.
    3. While the potatoes are baking, crumble the feta cheese into a mixing bowl. Use a hand mixer or whisk to whip the feta for about 2-3 minutes until it becomes light and fluffy. Add a splash of milk if needed to loosen the texture.
    4. Once the potatoes are done and crispy, remove them from the oven and let them cool slightly so they don’t burn your fingers. Transfer to a serving plate or bowl.
    5. Using a spoon or spatula, dollop generous amounts of the whipped feta over the roasted potatoes, spreading it lightly if desired, so each potato piece gets some creaminess.
    6. Optionally, sprinkle extra rosemary or cracked black pepper on top for added flavor. Serve immediately for the best contrast of crispy potatoes and creamy feta.

    Notes

    For an extra crunch, broil the potatoes for 2-3 minutes after roasting. You can also experiment with adding lemon zest or fresh herbs to the whipped feta for more flavor variation.

    Honestly, I was just hoping for something quick but ended up with a snack I keep sneaking bites of. Not mad about it. Sometimes, the best ideas are the ones you stumble on when you’re not really trying. Just real food. No fuss. Good flavors. That’s enough for today.

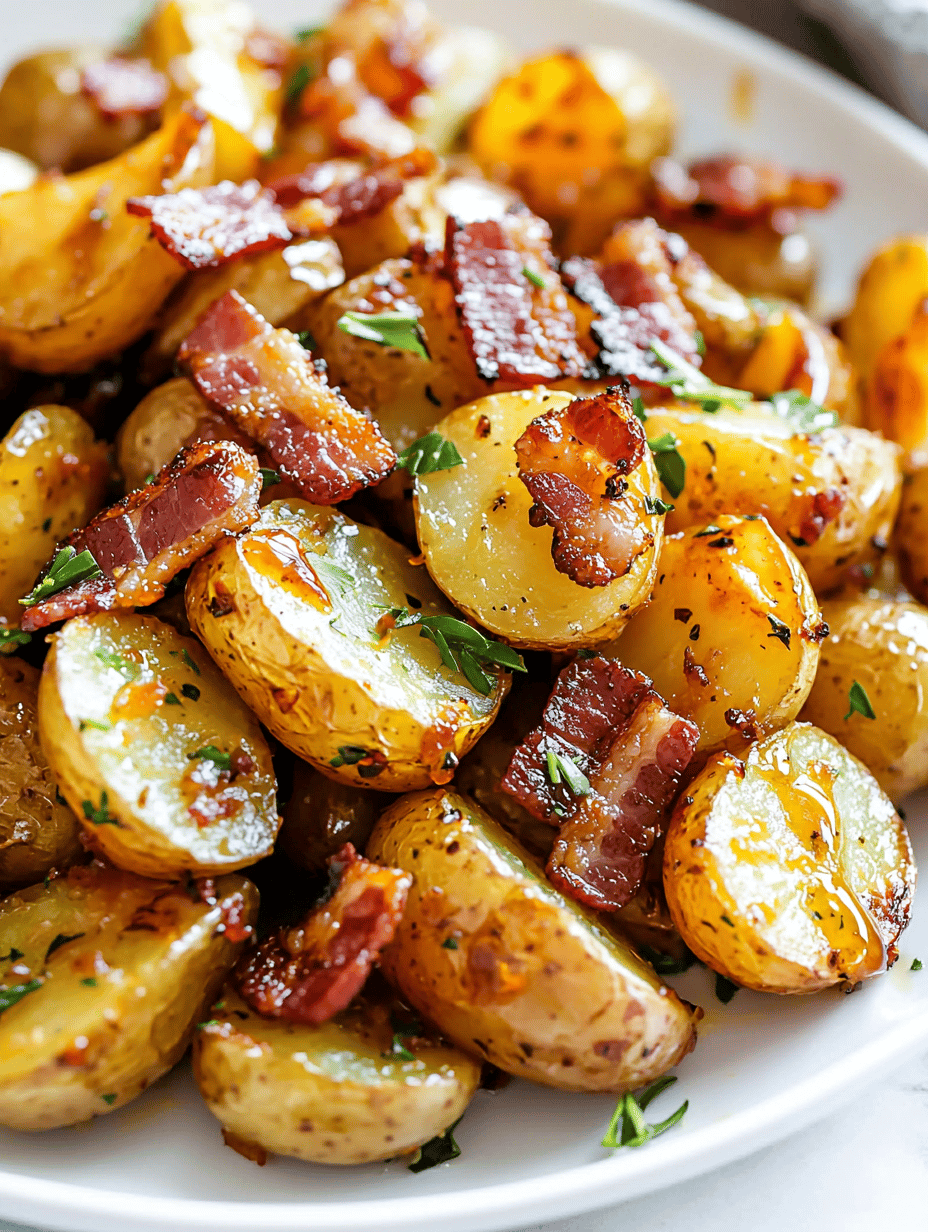
  • The Secret Life of Honey Bacon Roasted Potatoes

    The Secret Life of Honey Bacon Roasted Potatoes

    I started thinking about potatoes as more than just a side. Then I remembered that moment I accidentally drizzled honey on some bacon-studded fries last weekend. The way the sweet and smoky aroma mingled and made the whole kitchen smell like a cozy, chaotic bakery. It stuck with me.

    This isn’t your average roasted potato recipe. It’s about flipping the usual view — turning what’s simple into something that feels a little surprising. With honey caramelizing into a sticky gloss and bacon fat crisping up perfectly, this dish feels like a quiet rebellion in the middle of a busy week. Plus, it’s trending now—everyone’s pretending they don’t want bacon-wrapped everything. But really, it’s just a good excuse to double down on salty-sweet snacks.

    Why I love this recipe (and you will too):

    • It’s no-fuss but somehow feels fancy enough for guests.
    • The smell during roasting is so addictive, it’s almost a lie.
    • Perfect for those nights when you want real comfort but don’t want to cook for hours.
    • It reminds me that eating can be simple and messy and still totally satisfying.

    Honestly, I can’t tell if I crave this more for the flavor or the fact that it’s so easy to throw together when the fridge’s mysteries start to pile up.

    Honey Bacon Roasted Potatoes

    These roasted potatoes are cooked until tender with a golden, crispy exterior, flavored with bacon fat and topped with a glossy honey glaze. The dish involves roasting and caramelizing techniques, combining savory bacon with the sweetness of honey to create a flavorful, slightly sticky finish that enhances the potatoes’ natural texture.
    Prep Time 10 minutes
    Cook Time 40 minutes
    Total Time 50 minutes
    Servings: 4
    Course: Main Course
    Cuisine: American
    Calories: 320

    Ingredients
      

    • 1.5 pounds baby potatoes halved
    • 4 strips bacon cut into small pieces
    • 2 tablespoons honey for glazing
    • 1 tablespoon olive oil for coating
    • 1/2 teaspoon salt adjust to taste
    • 1/4 teaspoon black pepper freshly ground

    Equipment

    • Baking sheet
    • Mixing bowl

    Method
     

    1. Preheat your oven to 400°F (200°C). Line a baking sheet with parchment paper for easy cleanup.
    2. Wash and halve the baby potatoes, then toss them in a mixing bowl with olive oil, salt, and black pepper until evenly coated.
    3. Distribute the potatoes in a single layer on the prepared baking sheet, cut side down for maximum crispness.
    4. Sprinkle the small pieces of bacon over the potatoes, ensuring some bacon fat will render onto the potatoes as they roast.
    5. Place the baking sheet in the oven and roast for about 25-30 minutes, or until the potatoes are golden brown and crispy around the edges.
    6. Remove the baking sheet from the oven, then drizzle the honey evenly over the hot potatoes and bacon, allowing it to caramelize slightly from the residual heat.
    7. Use tongs or a spatula to gently toss everything together, ensuring the honey coats all pieces and the bacon crisps add texture and flavor.
    8. Return the baking sheet to the oven for an additional 5 minutes, letting the honey form a sticky glaze and the bacon crisp up further.
    9. Take the sheet out of the oven, let it cool for a few minutes, then transfer the roasted potatoes to a serving dish.
    10. Serve these honey-glazed bacon roasted potatoes warm, enjoying the crispy edges, the savory bacon, and the sweet, sticky glaze.

    Maybe I’ll just keep them around for when I need a quick win. Or maybe I’ll tuck this away for one of those weekends when you want to pretend you’re eating out but really just roasted these in pajamas. Either way, they’re enough to make me forget about the million other things I should be doing.