Category: Appetizers

  • Unexpected & Easy New Year’s Eve Appetizers That Will Have Guests Talking

    Unexpected & Easy New Year’s Eve Appetizers That Will Have Guests Talking

    The thing about making New Year’s bites right now

    I’m not talking about fancy hors d’oeuvres or stuff that takes hours. I mean, who’s got time for that on December 31st? I’ve been experimenting with the weirdest combos—like cracked black pepper and candied orange peel on salty cheese, just because I had them lying around. Turns out, that burst of heat and sweetness makes people stop and ask, “What’s that?”

    Honestly, these tiny surprises are what make the night memorable. It’s not about perfection. It’s about those little moments—smells of toasted nuts, the crunch of a thin cracker, the way a bite unravels layers of unexpected flavor. Those are the things I want this year. Because sometimes, magic is just a sprinkle of sea salt and a dash of curiosity.

    Spicy Candied Orange and Black Pepper Cheese Bites

    This recipe involves layering melted cheese with cracked black pepper and candied orange peel on thin crackers. The dish is assembled by toasting and combining these ingredients, resulting in crunchy bites with bursts of spicy and sweet flavors, finished with a golden appearance and slightly crisp texture.
    Prep Time 10 minutes
    Cook Time 10 minutes
    Total Time 20 minutes
    Servings: 8
    Course: Main Course
    Cuisine: fusion
    Calories: 120

    Ingredients
      

    • 1 cup shredded salty cheese (e.g., Gruyère or aged cheddar) preferably grated for easy melting
    • 1 tablespoon cracked black pepper coarsely cracked
    • 2 tablespoons candied orange peel finely chopped
    • 8 small crackers plain crackers

    Equipment

    • Baking sheet
    • Parchment paper
    • Saucepan
    • Spatula
    • Cheese grater
    • Knife

    Method
     

    1. Preheat the oven to 375°F (190°C). Line a baking sheet with parchment paper and arrange the crackers in a single layer.
    2. In a saucepan over low heat, melt the shredded cheese until smooth and gooey, about 3-4 minutes, stirring occasionally. The cheese should be glossy and fully melted.
      1 cup shredded salty cheese (e.g., Gruyère or aged cheddar)
    3. Sprinkle the cracked black pepper and chopped candied orange peel evenly over the melted cheese. Continue stirring until well combined, about 30 seconds.
      1 cup shredded salty cheese (e.g., Gruyère or aged cheddar)
    4. Spoon or pipe small dollops of the cheese mixture onto each cracker, covering the surface. Use a spatula to spread evenly if needed.
    5. Bake in the preheated oven for 7-10 minutes, or until the cheese is bubbly and golden around the edges. Watch closely to prevent over-browning.
    6. Remove from oven and let cool slightly until the cheese firms up and develops a crispy texture. Serve immediately as a crunchy, flavorful snack or appetizer.

    Notes

    For extra flavor, add a pinch of sea salt before baking. Adjust the amount of orange peel for sweetness to taste.

    No matter which weird combo you end up trying, the best part? Watching people’s faces when they realize you didn’t spend hours slaving away. Just good, simple, surprising bites. Sometimes that’s all you need to keep the night from feeling like another hurried dinner. Or maybe… just a way to keep the New Year weird and wonderful.

  • The Hidden Art of Snack Boards: Embracing Chaos & Charm for Independence Day

    The Hidden Art of Snack Boards: Embracing Chaos & Charm for Independence Day

    Bring the Mess, Forget the Rules

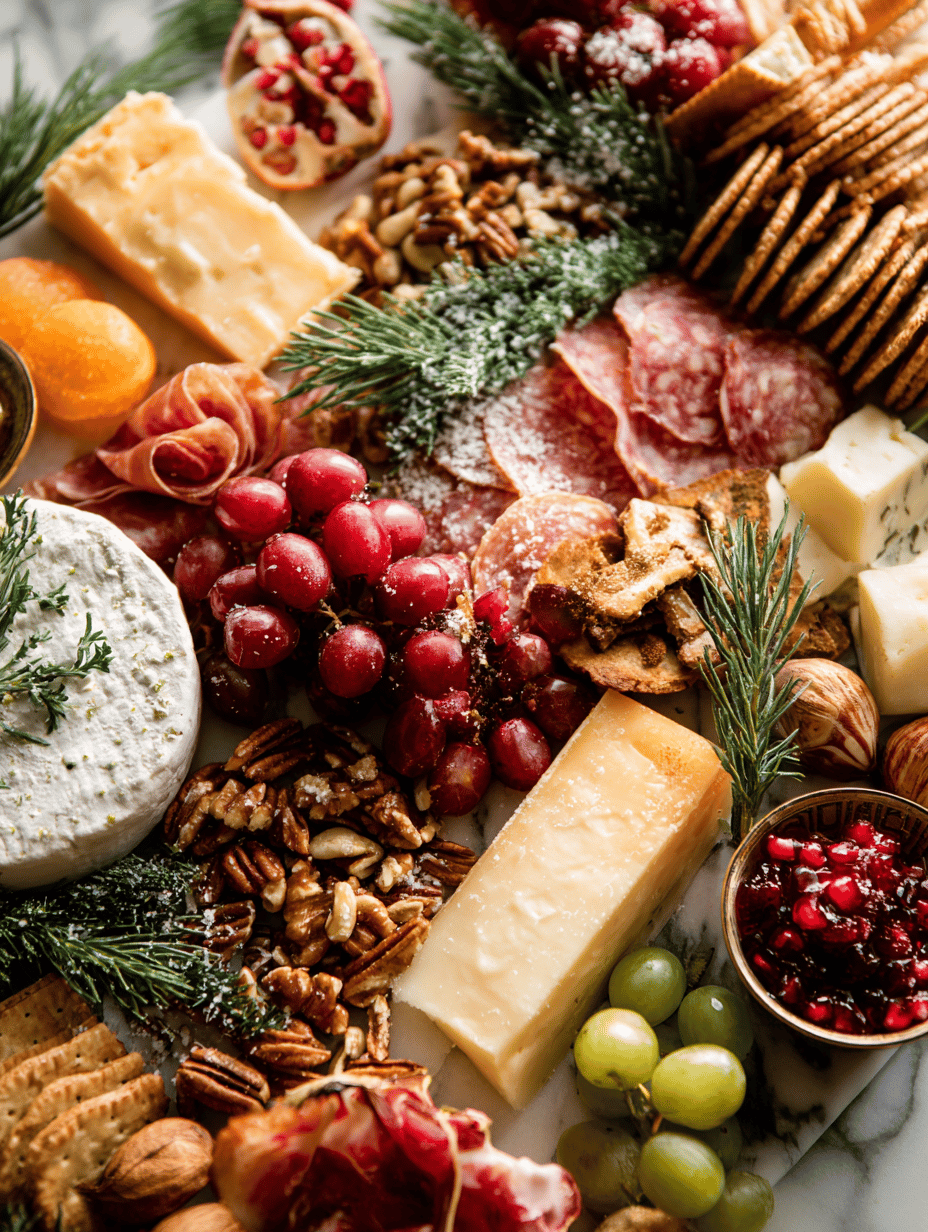
    This isn’t about perfect symmetry or Pinterest perfection. It’s about dumping all the stuff you love onto a board and realizing that rustic, haphazard arrangement isn’t a flaw—it’s the point. Before I ever measured out clever little piles, I just slapped down whatever was in the fridge. That scent of roasted cherry tomatoes mingling with salty crackers and sharp cheddar—that’s what makes this feel real. So much of what we prep for holidays is sterile, premeditated. But the best bites happen when you give into the chaos. July 4th is messy anyway—hot sun, spills, fireworks. The snack board should reflect that. No one expects a perfectly curated spread, just something you toss together that screams ‘I care enough, but I’m also drowning in watermelon slices.’

    Rustic Snack Board

    This dish consists of a spontaneous assembly of various snacks such as roasted cherry tomatoes, salty crackers, and sharp cheddar cheese, arranged on a large board. It emphasizes a relaxed, haphazard presentation, showcasing a mix of textures from juicy tomatoes to crunchy crackers and creamy cheese. The final appearance is colorful and inviting, with ingredients grouped loosely in an intentionally imperfect style.
    Prep Time 10 minutes
    Cook Time 20 minutes
    Total Time 30 minutes
    Servings: 4
    Course: Main Course
    Cuisine: American
    Calories: 350

    Ingredients
      

    • 2 cups cherry tomatoes preferably ripe and firm
    • 1 cup crackers salty variety
    • 8 oz sharp cheddar cheese cut into irregular chunks

    Equipment

    • Baking sheet
    • Chef’s knife

    Method
     

    1. Preheat the oven to 400°F (200°C). Spread the cherry tomatoes on a baking sheet, drizzle with olive oil, and sprinkle with salt. Roast for 15 minutes until the tomatoes are blistered and fragrant.
      2 cups cherry tomatoes
    2. While the tomatoes roast, cut the cheddar cheese into uneven, rustic chunks using a chef’s knife to enhance the haphazard aesthetic. Arrange the crackers and cheese on a large serving board, leaving space for the roasted tomatoes.
      1 cup crackers, 8 oz sharp cheddar cheese
    3. Once the cherry tomatoes are done, remove from the oven and let cool slightly. Then, scatter them loosely over the cheese and crackers on the board. Their juicy, blistered appearance adds color and texture variance.
      2 cups cherry tomatoes
    4. Garnish the board with additional casual touches if desired, such as slices of watermelon or a handful of nuts. Serve immediately to enjoy the mix of warm, roasted tomatoes with crunchy crackers and creamy cheese.

    And maybe that’s the secret. Let the board be ugly in the best way—imperfect, full of surprises, and totally unpretentious. Like your favorite uncle’s jokes, or a burnt hotdog. That’s the charm, right?

  • A Surprising Take on Chick Fil A Coleslaw That You’ll Love

    A Surprising Take on Chick Fil A Coleslaw That You’ll Love

    One thing I never expected? That cabbage could smell like a faint tang of vinegar mixed with crisp freshness, almost like biting into a fresh jar of sauerkraut but way milder. I’ve been obsessed with the weird little contrasts in coleslaw—how the crunch hits just right with that zing. It’s not just about the taste but the moment when you realize how simple vegetables can surprise you.

    Right now, I’m craving this because it’s hot and sticky outside. Everyone’s talking about quick sides, but what I love most is how this coleslaw stays cool and makes even the simplest meal feel special. Plus, it reminds me of summer picnics and sliding into a shady spot with something cold in hand. No fuss, just real ingredients playing nice together.

    Why I Love This Recipe (And You Will Too)

    • It’s the kind of thing I keep in the fridge for those lazy nights when I don’t want to cook but still want something fresh.
    • The smell of tangy vinegar and fresh cabbage is oddly addictive—like a secret handshake with summer.
    • This makes me feel like a backyard grill hero even when I’m just tossing it together before breakfast.
    • It’s weirdly satisfying to see how a few simple ingredients can brighten up a table full of pizza or fried chicken.

    So yeah, I keep thinking about the crunch and that subtle boost of acid. Some experiments turn into favorites, I guess.

    Creamy Coleslaw

    This coleslaw combines finely shredded cabbage with a tangy vinegar-based dressing, resulting in a crisp and refreshing salad. The mixture is tossed until evenly coated, creating a crunchy, slightly tangy dish with a bright appearance, perfect as a cool side.
    Prep Time 15 minutes
    Total Time 15 minutes
    Servings: 4
    Course: Main Course
    Cuisine: American
    Calories: 150

    Ingredients
      

    • 1 small head green cabbage small head, shredded finely
    • 1/2 cup apple cider vinegar for the tangy dressing
    • 2 tablespoons olive oil adds smoothness to the dressing
    • 1 tablespoon honey balances the acidity
    • 1 teaspoon mustard for extra flavor
    • 1/2 teaspoon salt to taste
    • 1/4 teaspoon black pepper freshly ground

    Equipment

    • Sharp Knife
    • Mixing bowl
    • Spoon or Tongs

    Method
     

    1. Start by shredding the green cabbage into thin, manageable pieces—you want that satisfying crunch with every bite. Place the shredded cabbage into a large mixing bowl.
    2. In a small bowl or jar, whisk together the apple cider vinegar, olive oil, honey, mustard, salt, and black pepper until the dressing is smooth and slightly frothy—this helps the ingredients meld together beautifully.
    3. Pour the tangy dressing over the shredded cabbage, then use a spoon or tongs to toss everything gently until the cabbage is evenly coated with the dressing. You should see the cabbage lose some of its rigidity as it softens slightly.
    4. Let the coleslaw sit for about 10 minutes at room temperature, giving the flavors time to meld and the cabbage to soften just a bit while maintaining its crunch.
    5. Give the coleslaw one last gentle toss to redistribute the dressing, then serve immediately or refrigerate until cold. The final dish should look vibrant, with crisp cabbage coated in a glossy, tangy dressing, ready to enjoy!

    Guess I’ll keep tweaking this one. Sometimes all it takes is a little more apple cider vinegar or less mayo. Anyway, food keeps surprising me—never thought cabbage could do this.

  • Recreating the McDonald’s Big Mac — From Backyard to Drive-Thru Feel

    Recreating the McDonald’s Big Mac — From Backyard to Drive-Thru Feel

    This didn’t start as a food experiment. One night, I found myself digging through my fridge, craving that distinct smell of grilled onions and that tangy sauce. It’s wild how a simple sandwich can pack so much nostalgia—like a quick visit to childhood, minus the chaos of a fast-food line.

    One thing I realized? Making this at home strips away the rush, lets you savor each bite and smell every layer—beef patty, pickle slices, that special sauce. This version isn’t just a copy; it’s a calming, no-pressure version you can tweak on a whim, perfect for the messy, unpredictable days. No drive-thru line necessary.

    Why I Love This Recipe (And You Will Too)

    • It’s a surprisingly straightforward way to reclaim that fast-food favorite without leaving your house.
    • The smell of toasted buns mixed with caramelized onions fills the kitchen—better than the drive-thru.
    • It’s perfect for last-minute dinners or surprise guests—simple, satisfying, and honestly kinda fun to build.
    • Feels like a small victory when you realize you just whipped up something on par with fast-food—but way fresher.
    • Plus, you get bragging rights when someone asks, “Did you really make that?”

    After all, some recipes are just about the little details and the memories they trigger—this one happens to be a surprisingly good excuse to get your hands dirty.

    There’s a certain joy in chasing that perfect sauce smear or finding the right texture—this version’s more about the process than perfection, honestly. Whatever, now I want a patty.

    Homemade Classic Cheeseburger

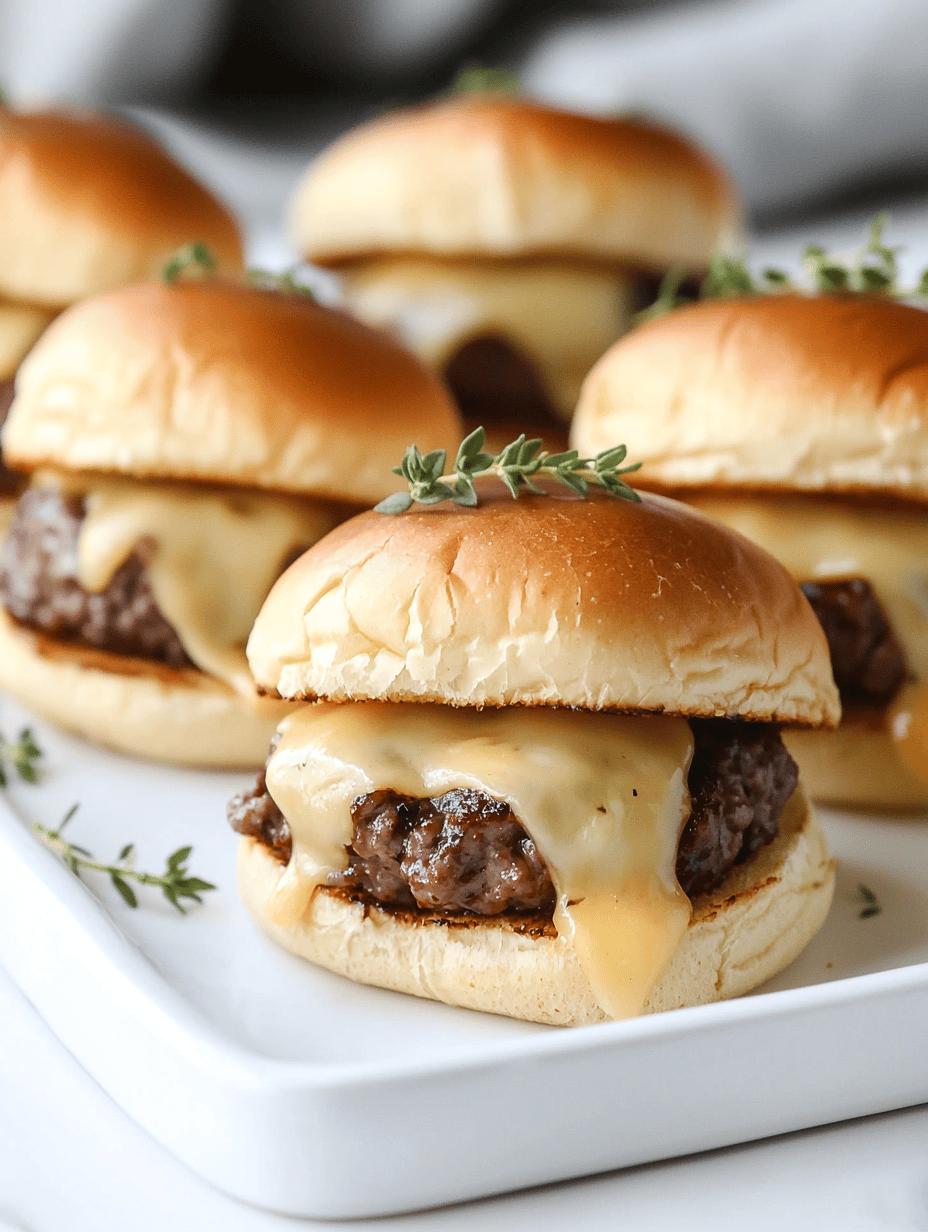
    This cheeseburger features a seasoned beef patty grilled to a juicy doneness, topped with melted cheese, crisp pickles, and a tangy sauce, all sandwiched between toasted buns. The final dish has a tender, flavorful patty with a slightly crispy exterior and a melty, cheesy interior, complemented by fresh toppings and a soft, golden bun.
    Prep Time 15 minutes
    Cook Time 15 minutes
    Total Time 30 minutes
    Servings: 4
    Course: Main Course
    Cuisine: American
    Calories: 650

    Ingredients
      

    • 1 lb ground beef (80% lean) divided into 4 portions
    • 4 slices cheddar cheese or your preferred cheese
    • 4 buns hamburger buns preferably toasted
    • 1 pickle slices for layering
    • 1/4 cup special sauce or ketchup/mustard blend
    • 1 small onion thinly sliced
    • to taste salt and pepper

    Equipment

    • Grill or stovetop skillet
    • Spatula
    • Baking sheet or plate
    • Knife
    • Cutting board

    Method
     

    1. Divide the ground beef into four equal portions and gently shape each into a patty about 3/4 inch thick, avoiding overworking the meat for tender burgers.
    2. Preheat your grill or skillet over medium-high heat until hot, and optionally toast the buns until golden on the cut sides.
    3. Season each beef patty generously with salt and pepper on both sides for flavor.
    4. Place the patties onto the hot grill or skillet, hearing a satisfying sizzle as they make contact, and cook for about 3-4 minutes per side until nicely browned and slightly crispy on the edges.
    5. Lay a slice of cheese on each patty during the last minute of cooking to allow it to melt beautifully.
    6. While the patties finish cooking, sauté the sliced onions in a little oil until they soften and develop a light caramel color, about 5 minutes.
    7. Assemble each burger by spreading the special sauce on the bottom bun, then layering with pickles, a beef patty with melted cheese, caramelized onions, and the top bun.
    8. Serve the cheeseburgers immediately, with extra toppings or side dishes as desired, enjoying the juicy, flavorful patty with the crispy edges and melty cheese.

    Maybe I’ll never truly replace fast-food nights, but this makes me rethink how simple it could be. Plus, no secret ingredients, no weird preservatives. Just a lot of mustard, ketchup, and a bit of patience. Kind of funny how a burger can remind you that comfort isn’t always complicated.

  • Buffalo Chicken Sliders: The Perfect Combo of Chaos and Comfort

    Buffalo Chicken Sliders: The Perfect Combo of Chaos and Comfort

    Why I Love This Recipe (And You Will Too)

    One day I was craving something loud — like, a mess on a bun that makes your hands sticky but in a good way. Something that’s not trying to be fancy, just honest heat and tang. The smell of hot sauce bubbling with butter makes the whole kitchen feel like a wild party you didn’t plan, but kind of want to keep going.

    These sliders matter right now because they’re not just for game day. They’re for those evenings when dinner feels like too much effort but you still want comfort with a kick. The bread soaks up that spicy, vinegary juice. It’s messy but satisfying—like life sometimes is.

    Why I Love This Recipe (And You Will Too)

    • They’re ridiculously quick to throw together when you’re too tired to cook.
    • Thetiny bites get you through Monday and make it feel less like… Monday.
    • They’re perfect for leftovers — if they last that long.
    • The sauce pools just enough inside the slider to make every bite a little chaos in your mouth.
    • Honestly, I keep making these just to see how much buffalo sauce I can pack into a bun without it falling apart.

    Anyway, that’s usually the point where I realize I should’ve doubled the recipe. Or not. Whatever.

    Buffalo Chicken Sliders

    Buffalo chicken sliders are small sandwiches filled with shredded cooked chicken coated in spicy buffalo sauce, served on soft buns. The dish involves simmering the chicken, mixing it with hot sauce and butter, and assembling the sliders with optional toppings for a messy, flavorful bite with juicy, tender chicken and tangy sauce. The final appearance is a saucy, gooey slider that’s perfect for casual, satisfying fare.
    Prep Time 10 minutes
    Cook Time 20 minutes
    Total Time 30 minutes
    Servings: 4
    Course: Main Course
    Cuisine: American
    Calories: 380

    Ingredients
      

    • 2 cups cooked chicken, shredded preferably rotisserie or boiled
    • 1/2 cup hot sauce such as Frank’s RedHot
    • 2 tbsp butter melted
    • 4 slider buns small sandwich buns soft, slider-sized
    • to taste blue cheese or ranch dressing optional topping
    • 2 celery stalks celery finely chopped, optional for crunch

    Equipment

    • Saucepan
    • Fork or tongs
    • Baking sheet

    Method
     

    1. Place the shredded chicken in a bowl and set aside.
    2. Combine hot sauce and melted butter in a small saucepan and warm over low heat, stirring until well blended and bubbling slightly.
    3. Poor the hot sauce mixture over the shredded chicken and toss gently with a fork or tongs to coat all pieces evenly. The chicken should turn a vibrant orange and smell spicy and buttery.
    4. While the chicken cools slightly, slice the slider buns in half horizontally, ensuring they stay intact for easy assembly.
    5. Spread a light layer of dressing on the bottom halves of the buns if desired, then spoon the buffalo chicken generously onto each bottom bun, creating a heaping, saucy layer.
    6. Top with chopped celery for crunch and extra freshness, then place the top bun over the assembly to complete each slider.
    7. Arrange the sliders on a baking sheet and optionally broil lightly for 1-2 minutes until the buns are toasted and the filling is heated through.
    8. Remove from the oven and serve immediately, allowing everyone to grab messy, flavorful bites of spicy chicken in a soft bun.

    Cooking these feels like a small rebellion. No fuss, no fluff, just spicy chicken nestled in a soft bun. And maybe, just maybe, a nap afterwards. Or more sliders. Who’s counting?

  • Turkey Bacon Cheddar Muffins That Make Zero Sense But Work Anyway

    Turkey Bacon Cheddar Muffins That Make Zero Sense But Work Anyway

    I never thought I’d crave the smell of melted cheddar and crispy turkey bacon mingling in a tiny muffin. It’s like an unexpected scent attack in the best way, sticky and cheesy with a hint of smoky bacon that somehow makes a morning feel a little less mundane. These muffins aren’t your average grab-and-go—they’re sneaky, filling, and weirdly addictive.

    What convinced me to try making them? Honestly, I had leftover turkey bacon and sighted a random bag of cheddar. One thing led to another, and suddenly I was whipping up batter while thinking about how perfect these are for mornings when coffee alone just isn’t enough. They’re a little rebellious—like, why not microwave a muffin and pretend it’s a breakfast snack? Yeah, I’m into it.

    Why I Love This Recipe (And You Will Too):

    • It’s a total lifesaver for busy mornings when you want a homemade touch but no time to fuss.
    • Cheddar and turkey bacon smell better than most candles I’ve bought.
    • They make good leftovers—warm or cold, no judgment.
    • Really, they’re kind of weird but also kind of perfect.

    Maybe I’ll stop thinking about them now, or maybe I’ll keep sneaking bites between writing. Who knows. Anyway, they’re just muffins, but somehow they matter more than I expected.

    Cheddar Turkey Bacon Muffins

    These muffins are savory, bite-sized baked treats made with shredded cheddar cheese and crispy turkey bacon mixed into a batter of eggs and flour. They develop a golden crust with a moist, cheesy interior, offering a satisfying combination of crunch and tender crumb. The baking method ensures an evenly cooked, portable breakfast or snack option.
    Prep Time 10 minutes
    Cook Time 20 minutes
    Total Time 30 minutes
    Servings: 6
    Course: Main Course
    Cuisine: American
    Calories: 220

    Ingredients
      

    • 4 large eggs beaten
    • 1 1/2 cups all-purpose flour
    • 1/2 cup milk
    • 1 cup shredded cheddar cheese
    • 4 slices turkey bacon cooked until crispy and crumbled
    • 1/4 cup butter melted
    • 1 teaspoon baking powder
    • 1/2 teaspoon salt

    Equipment

    • Mixing bowls
    • Muffin tin

    Method
     

    1. Preheat your oven to 375°F (190°C) and generously grease a muffin tin to prevent sticking.
    2. Cook the turkey bacon until crispy, then crumble it into small pieces, setting aside.
      4 large eggs
    3. In a large mixing bowl, whisk together the eggs and melted butter until well combined and slightly frothy.
      4 large eggs
    4. Add the milk to the egg mixture and stir gently to incorporate.
      4 large eggs
    5. In a separate bowl, whisk together flour, baking powder, and salt.
      4 large eggs
    6. Gradually fold the dry ingredients into the wet mixture, stirring until just combined—do not overmix to keep the muffins tender.
    7. Stir in the shredded cheddar cheese and crumbled turkey bacon, distributing evenly throughout the batter.
      4 large eggs
    8. Spoon the batter into the prepared muffin cups, filling each about three-quarters full for a domed top.
    9. Bake in the preheated oven for 18–22 minutes, until the muffins are golden brown on top and a toothpick inserted in the center comes out clean.
    10. Remove the muffins from the oven and let them cool in the tin for a few minutes; then transfer to a wire rack to cool slightly.
    11. Serve warm or at room temperature for a savory, cheesy bite with crispy bacon bits.

    Notes

    For extra flavor, add chopped green onions or a pinch of black pepper into the batter before baking.

    Sometimes, in the chaos of the week, I forget how satisfying simplicity can be. These muffins are proof that a few ingredients and some weird decisions can become a bright spot. Or at least a reason to smile while battling the pile of laundry behind me.

  • Copycat Chili’s Queso Dip That Will Make You Rethink Store-Bought

    Copycat Chili’s Queso Dip That Will Make You Rethink Store-Bought

    Sometimes the magic is just a pinch of cumin and a splash of milk away from your kitchen. I never realized how much I missed that slightly greasy, spicy smell wafting through my apartment until I tried to copy it myself. Turns out, it’s all about matching layers of melted cheese, smoky jalapeños, and a hint of tomato thread all together.

    What’s wild is how this little bowl turned into my “ultimate snack” unexpectedly. No hype—just a weird, guilty pleasure that feels kind of nostalgic now, especially with game nights or lazy weekends. It’s weird to say, but I crave that warm, thick pull when you scoop and bite, the kind that stretches just enough to make you grin.

    Why I Love This Recipe (And You Will Too)

    • It’s a shortcut to a restaurant experience—no lines, no wait.
    • Perfect for those times you want something cheesy but not too heavy.
    • Totally adjustable—add more spice or creaminess depending on your mood.
    • It’s surprisingly forgiving for a cheese dip—some extra cheese, a little kick, and you’re there.
    • And honestly, it’s just fun to say “copycat” and have that little victory in the kitchen.

    That’s pretty much it. No fancy techniques, just a little patience and a couple of pantry staples. Plus, it’s making me rethink my takeout habits — probably a good thing.

    Cheesy Jalapeño Dip

    This dish is a creamy, spicy cheese dip layered with melted cheese, smoky jalapeños, and a hint of tomato, cooked until bubbly and thick with a slightly greasy finish. It involves melting cheese on the stovetop or in the oven and integrating flavorful ingredients to create a pull-apart, gooey texture.
    Prep Time 10 minutes
    Cook Time 15 minutes
    Total Time 25 minutes
    Servings: 4
    Course: Main Course
    Cuisine: fusion
    Calories: 220

    Ingredients
      

    • 2 cups shredded melting cheese (such as Monterey Jack or cheddar) preferably fresh and grated
    • 2 jalapeños smoked or fresh jalapeños seeded and sliced
    • 1/2 cup diced tomatoes fresh or canned, drained
    • 1/4 cup milk to help loosen the cheese
    • 1 spoonful cumin ground
    • 1 tablespoon oil or butter for sautéing

    Equipment

    • Medium saucepan or oven-safe dish
    • Spatula or spoon

    Method
     

    1. Heat the oil or butter in a medium saucepan over medium heat until shimmering, and add the sliced jalapeños. Cook for 2-3 minutes until they start to soften and release aroma.
    2. Add the diced tomatoes and cumin to the jalapeños, stirring well. Cook for another 2 minutes, allowing the flavors to meld and the mixture to become more fragrant.
    3. Reduce the heat to low and pour in the shredded cheese, stirring constantly to melt uniformly and create a smooth, cheesy sauce.
    4. Gradually add the milk, stirring to loosen the cheese mixture to a dip-like consistency. Continue to stir until the mixture is thick but smooth and bubbling slightly around the edges.
    5. Once the dip is ready, remove from heat and give it a final stir to ensure all ingredients are well combined and heated through.
    6. Serve the cheesy jalapeño dip hot, scooped into a bowl or directly from the pan for dipping with chips, bread, or vegetables.

    Maybe next time I’ll toss in some chorizo or try making a batch with pepper Jack instead of plain cheddar. Or just stare at that melty, gooey bowl and wonder how something so simple can make the evening feel a little brighter, even if no one’s watching. Whatever happens, I can’t shake that feeling that this dip is just the beginning of good stuff to come.

  • Tiny Onions, Big Surprise: The Magic of Bite-Sized Blooming Onions

    Tiny Onions, Big Surprise: The Magic of Bite-Sized Blooming Onions

    I woke up thinking about how onion rings get all the attention. But what if tiny onions could steal the spotlight? I mean, the smell that hits your nose when you fry these—sweet caramelized onion with a whisper of garlic—makes your stomach rumble in an instant.

    This isn’t just about snacks. It’s about the art of transforming something simple into a crispy, tender burst of flavor. And right now, with everyone hunting for easy, crowd-pleasing bites, these little bloomers feel like a secret weapon. They’re perfect for an impromptu get-together or a snack that feels indulgent but tiny enough to eat a bunch of.

    Honestly, I love how these little onions make you pause. They’re a bit rebellious—tiny in size but big on character. I keep imagining their crispy edges spilling over with that garlicky, oniony goodness. Sometimes, it’s the small things that matter most in the chaos of everyday life.

    Why I Love This Recipe (And You Will Too)

    • It’s effortless but feels fancy—kind of magically transforms a humble onion.
    • Perfect for sharing, but not in a way that feels heavy or overwhelming.
    • Gets everyone reaching for more, even if they’re pretending to be on a diet.
    • That aroma—no one can resist it.
    • It’s my go-to for when I want to impress in the simplest way possible, no fuss.

    Sometimes, I just want some crispy fun without overthinking it. These little guys hit the spot every time.

    Mini Caramelized Onion Rings

    This dish features small onions that are sliced thinly and battered, then deep-fried until crispy and golden brown. The onions become tender and sweet with caramelized edges, complemented by a crispy coating that highlights their natural flavors and aroma.
    Prep Time 15 minutes
    Cook Time 10 minutes
    Total Time 25 minutes
    Servings: 4
    Course: Main Course
    Cuisine: general
    Calories: 180

    Ingredients
      

    • 4 small onions preferably sweet or yellow
    • 1 cup all-purpose flour
    • 1 cup cornstarch
    • 1 cup cold sparkling water or cold club soda
    • 1 tsp baking powder
    • 1 tsp garlic powder
    • to taste salt
    • to taste pepper
    • 2 cups vegetable oil for frying

    Equipment

    • Knife
    • Mixing bowls
    • Deep fryer or large pot
    • Slotted spoon
    • Cooling rack

    Method
     

    1. Peel the small onions and using a sharp knife, slice them very thinly into rings. Keep them ready in a bowl.
    2. In a mixing bowl, combine the all-purpose flour, cornstarch, baking powder, garlic powder, salt, and pepper. Whisk well to blend all the dry ingredients evenly.
    3. Gradually pour in the cold sparkling water while whisking gently, creating a smooth batter that’s slightly thick but still pourable. It should bubble slightly and have a light, airy texture.
    4. Heat the vegetable oil in a deep fryer or large heavy-bottomed pot over medium-high heat until it reaches about 350°F (175°C). You should see a steady simmer and faint ripples on the surface.
    5. Dip small handfuls of onion slices into the batter, ensuring they are coated evenly. Let excess batter drip back into the bowl.
    6. Carefully place the battered onions into the hot oil, one handful at a time, making sure not to overcrowd the pot. You should hear gentle bubbling as they fry.
    7. Fry the onions, stirring occasionally, until they turn golden brown and crispy around the edges, approximately 3-4 minutes. Use a slotted spoon to gently turn them for even color.
    8. Remove the crispy onion rings with a slotted spoon and transfer them to a cooling rack set over paper towels to drain excess oil.
    9. Repeat the battering and frying process with the remaining onion slices, maintaining the oil temperature.
    10. Once all the onion rings are cooked and drained, serve immediately while still crispy. Optionally, sprinkle with a pinch of salt or additional garlic powder for extra flavor.

    Notes

    For the best crispiness, serve immediately. Adjust seasoning as desired. You can also add a dash of hot sauce or serve with a dipping sauce for extra flavor.

    Because honestly, there’s something satisfying about watching tiny onions open up into these crispy, golden flowers. It’s messy and playful and feels almost wrong to eat, but you do it anyway. And then you sit there, stuffed with more than you planned, realizing that sometimes, the best things come in the tiniest packages.

    Just don’t be surprised if people keep asking for “more of those weird little onions”. They’re kind of addictive. And honestly, I’m already thinking about when to make them again. Maybe tonight. Maybe tomorrow.

  • Green Little Power Bites: Spinach Balls You’ll Actually Want to Eat

    Green Little Power Bites: Spinach Balls You’ll Actually Want to Eat

    I never thought about how much I missed hearing that squeak of frozen spinach from the bag until I cooked these. It’s like a tiny secret I catch mid-bite — the texture of those wilted leaves mixed with sharp bits of feta, all held together by a light egg crust. It’s funny how a simple ingredient can surprise you when you’re not looking.

    This recipe matters now because it feels like a small act of rebellion in a world of complicated dinners. It came together in a rush, just what I needed after a day that didn’t want to end, yet these little bites made me feel oddly grounded. They’re unpretentious, a little messy, but honest somehow.

    Why I Love This Recipe (And You Will Too)

    • They’re so fast, I almost feel guilty calling it a recipe.
    • Perfect for throwing together when you’re low on time but craving something fresh.
    • The smell of roasted garlic filling your kitchen? Pure chaos in the best way.
    • They actually stay together, unlike so many veggie snacks that crumble.
    • It’s nice to have a little something you can make without a shopping trip—frozen spinach, a handful of cheese, a few pantry staples.

    Maybe I’ll sneak a few more in the fridge before anyone notices how it’s basically a greens and cheese crash course in bite-sized form. Funny how the simplest things become your comfort food, huh?

    Frozen Spinach and Feta Bites

    These bites combine wilted frozen spinach with crumbled feta cheese, held together by a light egg crust. The mixture is shaped into small rounds and baked until golden, resulting in bite-sized snacks with a tender interior and slightly crisp edges.
    Prep Time 10 minutes
    Cook Time 15 minutes
    Total Time 25 minutes
    Servings: 4
    Course: Main Course
    Cuisine: Mediterranean
    Calories: 120

    Ingredients
      

    • 10 oz frozen spinach thawed and drained
    • 1 cup crumbled feta cheese
    • 2 large eggs
    • 2 cloves garlic minced or finely chopped
    • 1 tablespoon olive oil for roasting or sautéing garlic
    • 1/2 teaspoon salt
    • 1/4 teaspoon black pepper

    Equipment

    • Mixing bowl
    • Baking sheet
    • Parchment paper

    Method
     

    1. Preheat your oven to 375°F (190°C). Line a baking sheet with parchment paper to prevent sticking.
    2. Thaw the frozen spinach completely, then squeeze out excess moisture using a clean kitchen towel or paper towels. Set aside.
    3. In a small skillet, warm the olive oil over medium heat and sauté the minced garlic until fragrant and lightly golden, about 30 seconds.
    4. In a large mixing bowl, combine the drained spinach, sautéed garlic, crumbled feta, eggs, salt, and pepper. Mix everything together until well incorporated and the mixture is slightly sticky.
    5. Using your hands or a spoon, scoop out small portions of the mixture and shape them into compact rounds or patties, about 1.5 inches in diameter.
    6. Arrange the shaped bites on the prepared baking sheet, leaving space between each to allow for even baking.
    7. Bake in the preheated oven until the edges are golden brown and the bites are set, about 15 minutes.
    8. Remove from the oven and let them cool slightly for a few minutes; they will firm up as they rest.
    9. Serve warm or at room temperature, enjoying their tender, slightly crispy texture with a flavorful filling.

    Sometimes I think these little balls are just a reminder that you don’t need much to feel like you’ve got it together. Or at least, like you’re not messing up too badly. They’re not pretty, but they’re real. And sometimes that’s enough.

    Plus, they just might be the easiest way to get someone to eat their greens without a fight. I’ll keep a batch handy for those days when cooking feels too dramatic. Or when I forget to buy bread and need a snack stat.

  • The Octopus That Followed Me Home: A Cheeseburger Personal Twist

    The Octopus That Followed Me Home: A Cheeseburger Personal Twist

    Cooking octopus used to feel like wrestling a stubborn, slimy beast. Lately, I’ve started thinking about it like an old friend with stories to tell. This time I decided to skip the usual marinade and just cook it with a smear of garlic and lemon, but what really changed the game was grilling until it crackled with slight char. It caught me off guard how something so alien-looking can become such a familiar, almost nostalgic taste.

    The smell of the burnt garlic, the slightly briny aroma of fresh octopus, all mingling around the grill, I swear it’s like the ocean sneaking into your backyard. No marinades, no fancy tricks—just pure flavor and a bit of patience. Right now, I get the sense that quick fixes are everywhere, but sometimes the best thing is just letting ingredients do their thing and trusting the process.

    Why I Love This Recipe (And You Will Too)

    • It turned a weird, intimidating creature into something I crave regularly—seriously, I think about it all week.
    • It’s so easy to throw together after work, with minimal fuss, but it feels fancy enough to impress.
    • There’s satisfaction in the smoky crunch, the chewiness in perfect harmony, and the clean lemon finish.
    • It reminds me that good things come with patience—plus a little help from a hot grill.
    • Honestly, it’s the kind of thing I’ll keep coming back to when I want to test myself or just shake up dinner plans.

    Anyway, it’s not about perfection. It’s about giving a weird fantasy a shot and proving that sometimes the oddball stuff turns into your new favorite.

    Grilled Octopus with Garlic and Lemon

    This dish features octopus that is first cooked until tender, then grilled to develop a slightly charred exterior. The final dish has a smoky, chewy texture with a bright lemon flavor and hints of garlic, showcasing simple preparation that highlights the octopus’s natural brininess.
    Prep Time 20 minutes
    Cook Time 1 hour
    Total Time 1 hour 20 minutes
    Servings: 4
    Course: Main Course
    Cuisine: Mediterranean
    Calories: 250

    Ingredients
      

    • 2 lbs octopus fresh or previously frozen
    • 4 cloves garlic minced
    • 1 lemon lemon zested and juiced
    • 2 tablespoons olive oil for grilling
    • to taste salt
    • to taste black pepper

    Equipment

    • Large pot
    • Grill or grill pan
    • Tongs
    • Mixing bowl

    Method
     

    1. Bring a large pot of water to a boil, then carefully add the octopus. Simmer gently for about 45-60 minutes until it becomes tender and easily pierced with a knife.
    2. Once cooked, transfer the octopus to a plate and let it cool slightly, making handling easier.
    3. Pat the octopus dry with paper towels to remove excess moisture, which helps achieve a good char on the grill.
    4. Use a sharp knife to cut the octopus into manageable pieces, typically separating the head and tentacles if desired.
    5. In a mixing bowl, combine the minced garlic, lemon zest, lemon juice, olive oil, salt, and pepper. Mix well to create a simple marinade or brush.
    6. Brush the octopus pieces generously with the garlic-lemon mixture, ensuring all sides are coated.
    7. Preheat the grill to medium-high heat and oil the grill grates to prevent sticking.
    8. Place the octopus on the grill and cook for about 3-4 minutes per side, or until lightly charred and crispy on the edges.
    9. Use tongs to turn the octopus, listening for a gentle sizzling sound and watching for a golden-brown crust to form.
    10. Once grilled, remove the octopus from the heat and serve immediately, garnished with extra lemon wedges if desired.

    Notes

    Rest the octopus for a few minutes after grilling to allow juices to redistribute. Serve with additional lemon and grilled vegetables for a complete meal.

    Sometimes I wonder if I’m just chasing that first bite, that perfect moment when everything comes together—the smoky char, the tender bite, the burst of lemon. It’s messy. It’s imperfect. It’s real. But maybe that’s the reason I keep coming back to it. Anyway, who knew octopus could be so forgiving?