Making a cheese ball might seem like a simple affair, but there’s a real art to balancing flavors and textures. I love how it combines that nostalgic creaminess with a bit of crunch and freshness, making it perfect for any gathering. It’s a dish that invites both comfort and a little bit of playful elegance on the table.
What keeps me coming back to this recipe is how versatile it is—easy enough for a quick snack but impressive enough to serve at a party. I’ve tweaked it over the years, adding small touches like herbs or a spicy kick, but at its core, it’s about that perfect combination of tangy cheese and crunchy bits. It’s honest, no-fuss, and always a hit.
There’s something satisfying about shaping and rolling the cheese mixture, seeing it come together into a neat, inviting ball. It reminds me of childhood parties and lazy weekend afternoons with friends. When I make this, I know I’ve got a crowd-pleaser that’s both nostalgic and fresh, a little messy and totally worth it.
Focusing on crafting a cheese ball that balances nostalgic comfort with modern flavor twists, emphasizing the importance of texture and presentation for a standout appetizer.
A nostalgic twist on a classic
- This cheese ball reminds me of family gatherings, where the smell of toasted nuts and sharp cheese filled the room, making everything feel cozy and familiar.
- I love how a simple combination of cream cheese and herbs can turn into something so addictive, especially when paired with crispy crackers or fresh veggies.
- There’s a chaos in shaping these balls—sometimes they crack, but that’s part of the charm, giving it a rustic, homemade vibe I cherish.
- Nothing beats the pride I feel when I see guests crowding around, eager to dip into my cheesy little masterpiece.
- Every time I make this, I’m transported back to my grandma’s kitchen, where comfort food was all about honest, straightforward flavors.
The story behind this recipe
- This cheese ball started as a way to use up odds and ends in my fridge. I’d always have cream cheese, some sharp cheddar, and whatever nuts or herbs I had on hand. Over the years, I realized that the fun isn’t just in the taste, but in shaping it and seeing everyone’s faces light up when they see that perfect round. It’s messy, imperfect, but always a hit.
- I remember one particular holiday gathering—everyone was rushing around, chaos swirling, but that cheese ball sat in the center, quiet and inviting. When I finally got around to passing it, the smiles and nostalgic stories started flowing. It’s become a tradition now, a little messy centerpiece that sparks joy and conversation.
- heading: ‘The story behind this recipe’
Cheese ball trivia and history
- The cheese ball gained popularity in mid-20th-century America as a festive, communal appetizer, often served at potlucks and parties.
- Originally, cheese balls were made with simple ingredients like cream cheese and nuts, symbolizing resourcefulness during wartime rationing.
- Some of the earliest recipes included ingredients like dried fruit, bacon bits, or even anchovies, reflecting regional tastes and available ingredients.
- The classic cheese ball’s shape is believed to mimic the traditional cheese wheel, turning a humble snack into a decorative centerpiece.
- In certain regions, cheese balls are infused with local flavors—like Cajun spices or herbs—showcasing regional culinary identities.
Ingredient breakdown
- Cream cheese: It’s the backbone—creamy, tangy, and just soft enough to blend smoothly. If you want a lighter version, try mascarpone for a milder, silkier texture.
- Cheddar cheese: Sharp and crumbly when grated, it gives that punchy flavor. For a milder, creamier taste, swap in Monterey Jack or gouda, especially if you prefer less bite.
- Nuts (walnuts or pecans): I love their crunch and toasty aroma. Toasted nuts add a smoky depth; skip them if allergies are a concern, but add a pinch of smoked paprika for smoky flavor.
- Herbs (chives or parsley): Fresh herbs brighten the richness. If you’re out, dried herbs work, but use half the amount—they’re more concentrated and can overpower.
- Spices (paprika or cayenne): Just a dash adds warmth and color. For a more subtle kick, reduce cayenne or skip it altogether—your call, depending on how much heat you want.
- Seasoning (salt and pepper): Basic but crucial. Taste the mixture before shaping; it often needs a pinch more salt or a grind of fresh pepper to really pop.
- Optional add-ins (bacon bits or sun-dried tomatoes): They add umami and a burst of flavor. Use crispy bacon for crunch, or finely chopped sun-dried tomatoes for a tangy twist—don’t overload, keep balance.
Spotlight on key ingredients
Cream cheese:
- It’s the soft, tangy core—melts easily, creating that smooth, luscious texture. If you want lighter, try mascarpone, but it’s less tangy.
- Cheddar cheese: Sharp, crumbly when grated, it provides that savory punch. For a milder profile, swap in Monterey Jack or gouda for creaminess without the bite.
Nuts:
- Nuts (walnuts or pecans): Toasted nuts add a smoky aroma and crunch that contrasts beautifully with the creamy cheese. Skip them if allergies are an issue, but consider a sprinkle of smoked paprika for a similar smoky effect.
- ingredient
Notes for ingredient swaps
- Dairy-Free: Swap cream cheese for dairy-free cream cheese or mashed avocado—less tang, more buttery feel.
- Cheddar: Use Monterey Jack or gouda for a milder, creamier flavor—less sharp but still cheesy.
- Nuts: Almonds or cashews toasted for a different crunch and aroma—less smoky, more neutral flavor.
- Herbs: Dried chives or parsley—less vibrant but still add freshness, use half as much.
- Spices: Paprika or cayenne—smoked paprika adds depth, cayenne for heat; adjust to taste, less heat if needed.
- Seasoning: Salt and pepper—consider adding a splash of hot sauce or mustard for extra zing.
- Add-ins: Bacon bits or sun-dried tomatoes—bacon for smoky crunch, sun-dried for tangy burst—use sparingly.
Equipment & Tools
- Mixing bowl: To combine and soften the ingredients.
- Spatula: To mix ingredients thoroughly.
- Baking sheet: To hold the cheese ball while chilling.
- Plate: For serving the finished cheese ball.
Step-by-step guide to cheese ball
- Gather your equipment: a mixing bowl, a spatula, a small baking sheet, and a plate for serving.
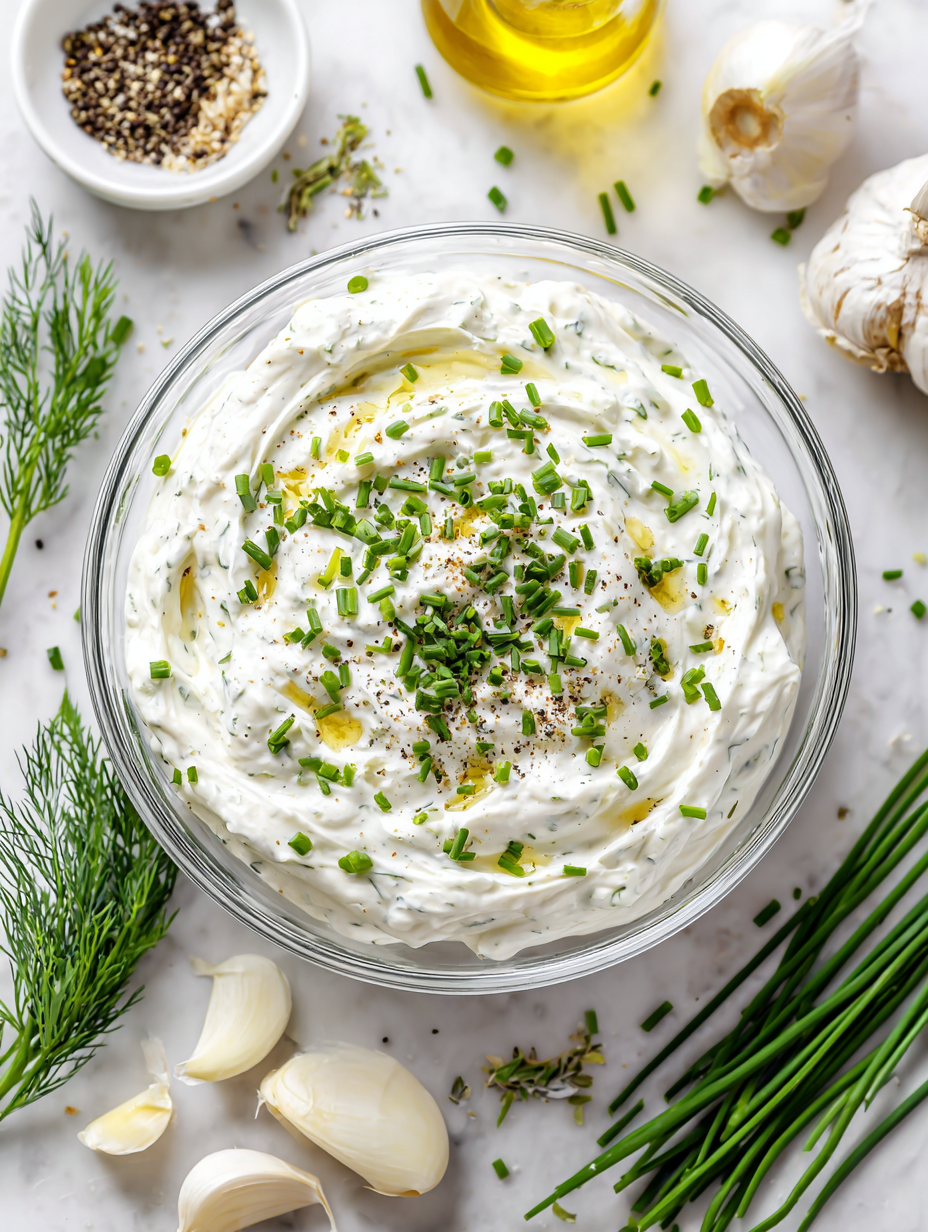
- In the mixing bowl, soften 8 oz cream cheese in the microwave for about 20 seconds until just soft, not runny.
- Add 1 cup grated sharp cheddar, 2 tbsp finely chopped chives, 1/2 tsp smoked paprika, and a pinch of salt and pepper.
- Mix everything thoroughly until the mixture is uniform and slightly sticky, about 2-3 minutes.
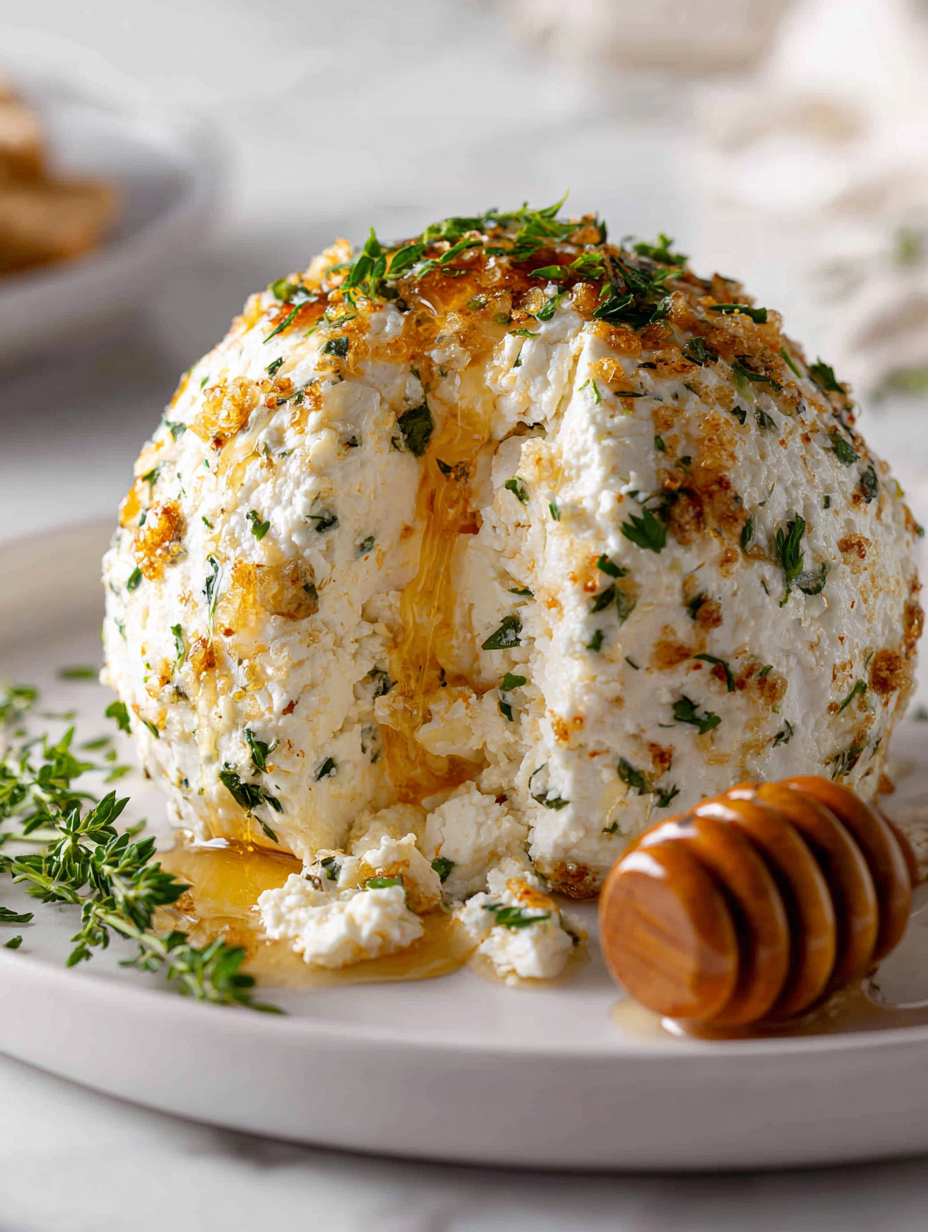
- Using your hands or a spoon, shape the mixture into a tight ball, about 3 inches in diameter. Don’t worry if it cracks—patch with a bit more cheese mixture if needed.
- Roll the cheese ball in 1/2 cup toasted chopped nuts—walnuts or pecans work well—pressing gently to adhere.
- Place the cheese ball on the baking sheet and refrigerate for at least 1 hour, uncovered, to firm up and allow flavors to meld.
- Remove from the fridge. If desired, roll again in nuts for extra crunch and presentation.
- Serve with crackers, sliced baguette, or fresh veggie sticks. Bring to room temperature for about 15 minutes before serving for maximum flavor and softness.
Refrigerate the cheese ball uncovered for at least 1 hour. Before serving, roll in nuts again if desired, then slice or present whole with accompaniments. Let it sit at room temperature for 15 minutes to soften slightly, enhancing flavor and texture.
How to Know It’s Done
- Cheese mixture should be smooth and cohesive, not crumbly.
- The cheese ball should hold shape without cracking excessively.
- Nuts should adhere firmly and be toasted to bring out aroma and crunch.
Classic Cheese Ball
Ingredients
Equipment
Method
- Place the softened cream cheese in a mixing bowl and use a spatula to blend until smooth and creamy, about 2 minutes. You should see a uniform, slightly fluffy texture.
- Add the grated sharp cheddar, chopped chives, smoked paprika, and a pinch of salt and pepper to the bowl. Stir everything together thoroughly until well combined, ensuring the mixture is cohesive and slightly sticky.
- Use your hands or a spatula to shape the cheese mixture into a tight, smooth ball about 3 inches in diameter. If the mixture cracks, gently press it back together.
- Pour the toasted chopped nuts onto a plate. Roll the cheese ball in the nuts, pressing gently to help the nuts adhere evenly all over the surface, creating a crunchy exterior.
- Place the coated cheese ball on a baking sheet and refrigerate uncovered for at least 1 hour. This helps it firm up and allows the flavors to meld beautifully.
- Once chilled, remove the cheese ball from the fridge. If desired, re-roll it in the nuts for added crunch and presentation. Serve on a plate with crackers or veggies, and enjoy at room temperature for the best flavor.
Notes
Pro tips for perfect cheese balls
- Bolded tip: Use room temperature cream cheese for easier mixing and a smoother texture.
- Bolded tip: Toast nuts until fragrant and golden—this enhances their flavor and crunch significantly.
- Bolded tip: Chill the assembled cheese ball for at least an hour—firmness makes rolling and presentation easier.
- Bolded tip: When rolling in nuts, press gently but firmly to ensure they stick and don’t fall off.
- Bolded tip: If the mixture feels too soft, refrigerate for 15–20 minutes before shaping to prevent cracking.
- Bolded tip: For a more vibrant appearance, sprinkle extra herbs or paprika on the surface just before serving.
- Bolded tip: Use a spatula or wet hands to shape the cheese ball smoothly—this prevents sticking and gives a cleaner look.
Common mistakes and how to fix them
- FORGOT to chill the cheese ball properly → Chill at least 1 hour for firm texture.
- DUMPED nuts before toasting → Toast nuts until golden for enhanced flavor and crunch.
- OVER-TORCHED the nuts → Toast nuts gently to avoid bitterness and burnt flavor.
- FAILED to adjust seasoning after mixing → Taste and add more salt or herbs for balance.
Quick fixes and pantry swaps
- When mixture is too soft, chill it for 10 minutes to firm up and prevent sticking.
- Splash a little lemon juice into the cheese mixture to brighten flavors if it tastes flat.
- Patch cracks by gently pressing extra cheese mixture into gaps before rolling.
- Shield the cheese ball with plastic wrap if it starts to dry out or crack before serving.
- When nuts are stale, swap with toasted sunflower seeds for a crunchy, budget-friendly alternative.
Prep, store, and reheat tips
- Preparing the cheese mixture a day in advance allows flavors to meld and makes assembly quicker. Keep it covered in the fridge, sensory note: it will be soft and slightly tangy.
- Shape the cheese ball and roll it in nuts up to 24 hours ahead. Wrap tightly in plastic wrap and refrigerate; the nuts may absorb some moisture but will stay crunchy if kept airtight.
- Store the assembled cheese ball in the fridge for up to 3 days. The texture will firm up, but bring it to room temperature for 15 minutes before serving to restore creaminess and aroma.
- Reheating isn’t necessary—serve straight from the fridge. If it’s too firm, let it sit at room temperature briefly until it softens and the flavors loosen up.
Top questions about cheese balls
1. How do I soften the cream cheese?
Use softened cream cheese for easy mixing and a smooth texture. It should be soft but not runny.
2. How should I prepare the nuts?
Toast the nuts until golden and fragrant—about 5 minutes in a dry skillet over medium heat—to bring out their flavor.
3. How long should I chill the cheese ball?
Chill the assembled cheese ball for at least an hour to firm up before rolling in nuts and serving.
4. Can I make the cheese ball ahead?
Yes, you can prepare the mixture the day before. Keep it covered in the fridge and shape it before rolling in nuts.
5. How do I shape the cheese ball without cracking it?
Use a spatula or wet hands to shape the mixture smoothly. If it cracks, refrigerate briefly to firm up.
6. How do I ensure the flavor is balanced?
Adjust seasoning by tasting the mixture before shaping. Add more salt, herbs, or spices as needed for flavor balance.
7. When should I serve the cheese ball?
Serve at room temperature for about 15 minutes to soften and enhance flavor and aroma before slicing or presenting.
8. What if the mixture is too soft to shape?
If the mixture is too soft, refrigerate it for 15–20 minutes, which helps it firm up for easier shaping.
9. How long can I store leftover cheese ball?
Refrigerate leftovers in an airtight container for up to 3 days. Re-roll in nuts if needed before serving.
10. Can I substitute the nuts?
Yes, you can swap the nuts for sunflower seeds or almonds if you have allergies or want a different crunch.
This cheese ball echoes those old family gatherings, with the warm aroma of toasted nuts and the sharp tang of aged cheese. It’s imperfect, a little rustic, but always makes the table feel inviting and lively. That balance of creamy, crunchy, and savory just keeps pulling me back.
In the end, it’s not just about the recipe, but the moments around it—the laughter, the messy hands, the shared bites. It’s simple comfort with a touch of personality, perfect for spontaneous snacking or a casual party. And honestly, that’s what makes it worth the effort every time.

Hi, I’m Theo Granger, the voice and recipe creator behind Boldly Overseasoning.
If you believe salt is not the enemy, spices should be generous, and flavor should never whisper when it can sing, then you are absolutely in the right place. Boldly Overseasoning is my unapologetic celebration of big flavor, confident cooking, and trusting your instincts in the kitchen. I created this space for people who are done with bland food and ready to cook with courage.


Leave a Reply