Category: Side Dishes

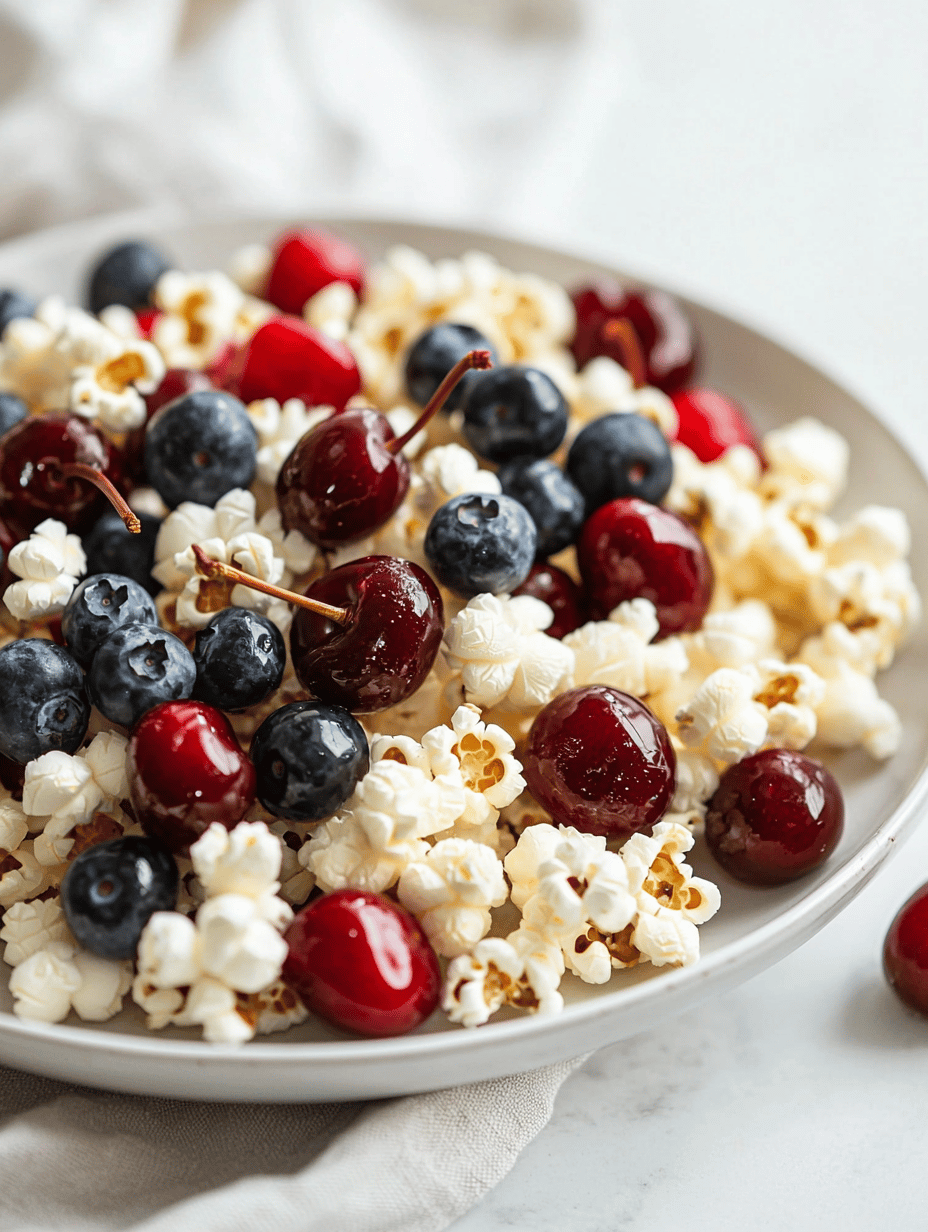
  • Patriotic Popcorn Mix: A Snack that Tells a Story

    Patriotic Popcorn Mix: A Snack that Tells a Story

    I didn’t plan on making anything fancy today—just looking for a quick snack. But then I smelled the sharp tang of cherry candies mixing with the salty popcorn, and it hit me. This isn’t just a treat; it’s a tiny reminder of summer days at the fair, the kind of childhood memory that sneaks up when you least expect it. I love how the red and blue M&Ms, the sweet and salty clash, all wrapped up in a handful. It’s weird how a simple combination can spark a wave of nostalgia—like finding an old, faded photo in a book. We need these little moments right now. Something about the holiday coming up makes me crave that burst of red, white, and blue—all in one bite. It’s stupidly satisfying, and honestly, it might become my go-to snack for random afternoons.

    Cherry and Blueberry Popcorn Mix

    This dish combines air-popped popcorn with melted white chocolate, mixed with vibrant red and blue M&Ms and dried cherry candies. The final result is a colorful, crunchy snack with a sweet and salty flavor profile and a glossy, crispy appearance.
    Prep Time 10 minutes
    Cook Time 10 minutes
    Total Time 20 minutes
    Servings: 4
    Course: Main Course
    Cuisine: American
    Calories: 250

    Ingredients
      

    • 8 cups air-popped popcorn plain or lightly salted
    • 1 cup white chocolate chips for melting
    • 0.5 cup red M&Ms cherry flavor preferred
    • 0.5 cup blue M&Ms
    • 0.5 cup dried cherry candies chopped into small pieces

    Equipment

    • Large mixing bowl
    • Microwave-safe bowl
    • Silicone spatula
    • Parchment paper or baking sheet
    • Cooking spray or non-stick spray

    Method
     

    1. Measure and set aside all ingredients, ensuring popcorn is evenly spread on a large plate.
    2. Place white chocolate chips in a microwave-safe bowl and heat in 30-second intervals, stirring after each, until smooth and fully melted. The chocolate should be glossy and pourable.
      8 cups air-popped popcorn
    3. Pour the melted white chocolate over the popcorn in the large mixing bowl, gently tossing with a silicone spatula until the popcorn is evenly coated with a shiny layer of chocolate.
      8 cups air-popped popcorn
    4. Spread the coated popcorn onto a parchment-lined baking sheet, spreading out evenly to prevent clumping. Allow to set for about 10 minutes at room temperature or place in the refrigerator for quicker setting.
      8 cups air-popped popcorn
    5. Once the chocolate has cooled and set, gently break the popcorn into clusters if desired. Mix in the red and blue M&Ms along with chopped dried cherries, distributing evenly throughout the snack.
      8 cups air-popped popcorn
    6. Serve immediately or store in an airtight container for up to 3 days for a crunchy, colorful snack.

    No fancy ingredients, no fuss—you just toss a handful of popcorn with some candies, and suddenly it feels like a tiny celebration. Like a small rebellion against the usual. Sometimes what makes a snack special isn’t the recipe, but the story it’s telling. And maybe that’s enough to keep making it, even when no one’s looking.

  • 4th of July Popcorn that Tells a Story

    4th of July Popcorn that Tells a Story

    Forget the red, white, and blue—think about the smell

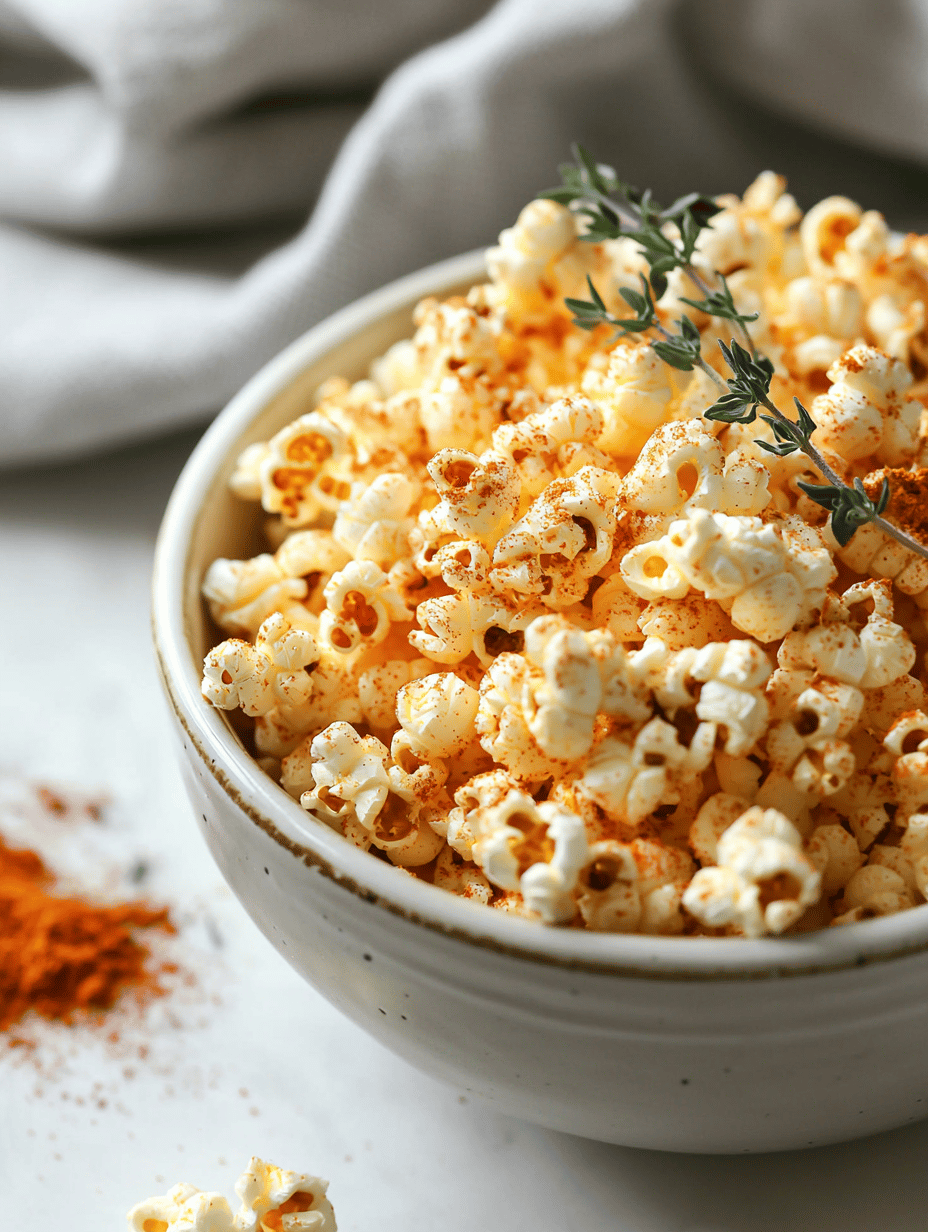
    That buttery popcorn smell mixed with a hit of sharp cheddar and a tiny flicker of smoked paprika. It’s like your childhood movie nights but layered with now. No fancy ingredients, just popcorn, spice, and a moment you didn’t know you needed. I didn’t plan on making anything for the Fourth except maybe a quick snack, but then I sniffed the bag and thought—this is what summer’s supposed to taste like. You know that feeling when your fingers are sticky with melted cheese and you don’t even care? That’s what this does.

    Why now?

    Because fireworks are loud, sure, but for me, the real boom is in that first crunch, that explosion of flavor. Plus, the chaos of the holiday, the crowd, the heat, it all makes a simple snack feel like a small act of rebellion. Or just a reason to sit for a second. I guess I just want popcorn that’s a little more secret-weapon than side piece.

    Cheddar-Smoked Paprika Popcorn

    This popcorn recipe combines fluffy, air-popped kernels with melted cheddar cheese and a sprinkle of smoked paprika, creating a savory, crunchy snack with a rich aroma. The dish involves popping the corn, melting cheese, and mixing in spices to coat the popcorn evenly, resulting in a visually appealing, flavor-packed final product with a crispy texture.
    Prep Time 10 minutes
    Cook Time 10 minutes
    Total Time 20 minutes
    Servings: 4
    Course: Main Course
    Cuisine: American
    Calories: 250

    Ingredients
      

    • ½ cup popcorn kernels preferably plain and unsalted
    • 2 cups shredded cheddar cheese freshly grated
    • 1 teaspoon smoked paprika adjust to taste
    • 2 tablespoons unsalted butter
    • 2 tablespoons milk optional, for smoother cheese melting
    • ½ teaspoon salt

    Equipment

    • Large pot or popcorn popper
    • Microwave-safe bowl or double boiler
    • Spatula or large spoon
    • Baking sheet
    • Parchment paper

    Method
     

    1. Set up a large pot or popcorn popper on medium heat. Add a few kernels and cover; once they pop, add the rest of the popcorn kernels. Shake the pot gently while popping to prevent burning. Continue until popping slows to a stop, then remove from heat and transfer the popped popcorn to a large bowl.
    2. Melt the unsalted butter in a microwave-safe bowl or double boiler, stirring until smooth. Once melted, stir in the milk (if using) and half of the shredded cheddar cheese, mixing until the cheese begins to melt and the mixture is creamy. Add the smoked paprika and salt, then stir to combine evenly.
      ½ cup popcorn kernels
    3. Slowly pour the cheese mixture over the warm popcorn, using a spatula or large spoon to toss and coat the kernels evenly. Continue until most of the popcorn is covered with the cheesy mixture and the cheese has melted further, creating a glossy, fragrant coating.
      ½ cup popcorn kernels
    4. Sprinkle the remaining shredded cheddar cheese and extra smoked paprika over the coated popcorn, tossing gently to distribute evenly. Look for a vibrant, cheesy appearance with visible specks of paprika clinging to the popcorn.
      ½ cup popcorn kernels
    5. Spread the popcorn onto a baking sheet lined with parchment paper. Bake in a preheated oven at 350°F (175°C) for 5-7 minutes, just until the cheese is bubbling and slightly golden around the edges. Remove and let cool for a few minutes before serving.
    6. Serve the popcorn in a large bowl, showcasing its crispy, cheesy appearance with flecks of paprika and a rich, savory aroma. Enjoy immediately for the best crunch and flavor.

    Maybe I’m overthinking it. Or maybe I just want one more handful before it’s all gone, counting the kernels like a mad person. Whatever. That’s the kind of stuff that makes a holiday feel real. Snacks should surprise you, even if it’s just in the middle of summer.

  • Why I Break My Own Rules for McDonald’s Fries

    Why I Break My Own Rules for McDonald’s Fries

    So here’s the weird truth. I bake my own fries at home all the time. Sweet potatoes, backyard Yukon golds, you name it. But I still find myself craving McDonald’s fries at 2 a.m. when I’ve had a rough day. What is that, really? I finally realized it isn’t just the salt or the crunch. It’s the smell—frying in that specific blend of canola oil, salt, and some secret flavor. It’s the way they hit your nose the moment you open the bag. That metallic sparkle of the thin, perfectly cooked skin—crisp but not overly greasy. It’s a feeling you get from eating them. No other fry has that specific oily, salty bite that makes you forget you’re eating fast food. Maybe I’ll keep trying to make my own, but those fries aren’t replaceable. And honestly? I kind of like it that way.

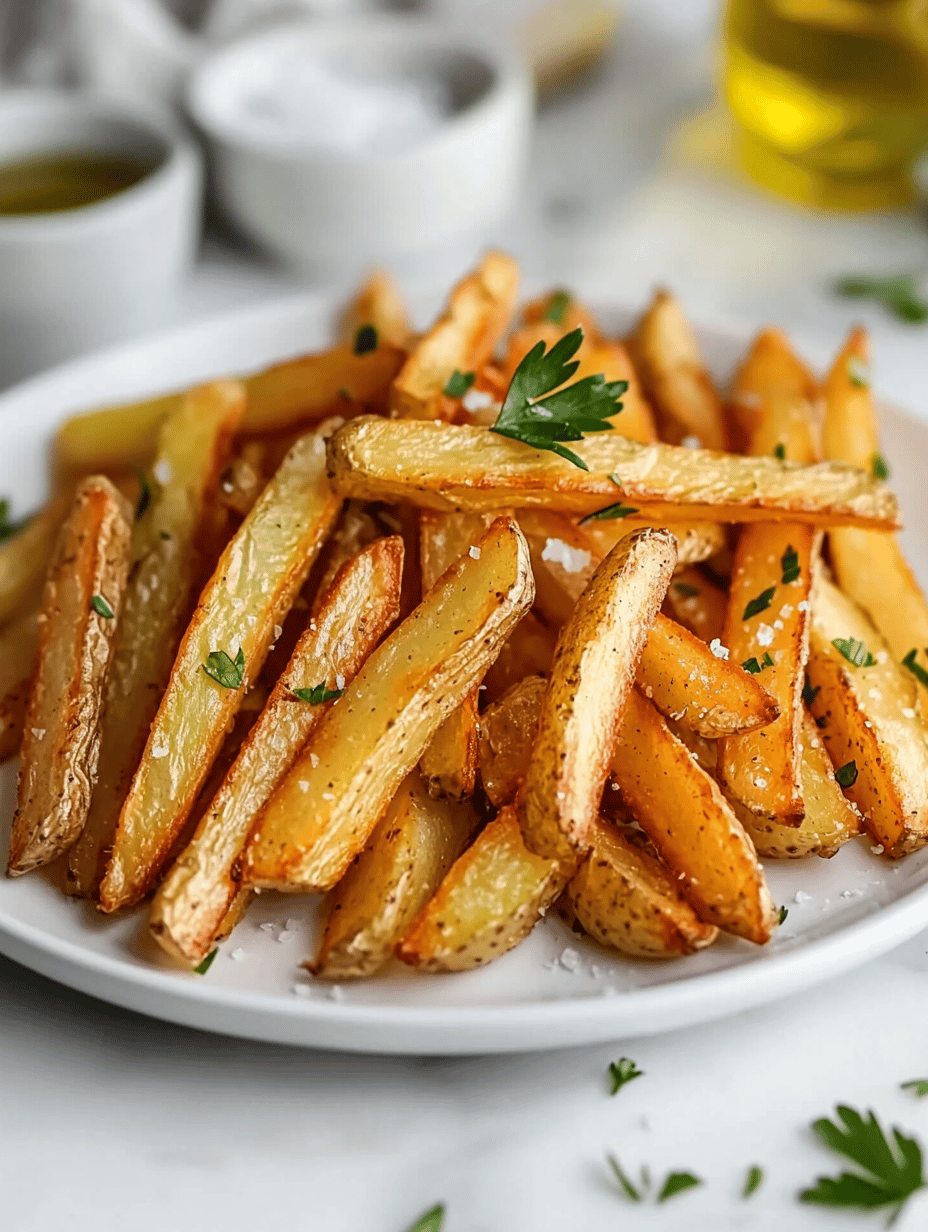
    Classic French Fries

    This dish involves cutting potatoes into thin sticks, soaking them to remove excess starch, and then deep-frying in hot oil until crisp. The final result is golden-brown fries with a crispy exterior and tender interior, exhibiting a matte sheen with a hint of salt and a savory aroma.
    Prep Time 15 minutes
    Cook Time 10 minutes
    Total Time 25 minutes
    Servings: 4
    Course: Main Course
    Cuisine: French
    Calories: 312

    Ingredients
      

    • 4 large russet potatoes peeled and cut into strips
    • 4 cups cold water for soaking
    • 1 tsp salt for soaking water
    • 4 cups vegetable oil for frying
    • to taste salt for seasoning after frying

    Equipment

    • Chef’s knife
    • Large Bowl
    • Peeler
    • Dutch oven or deep-fryer
    • Slotted spoon
    • Paper towels

    Method
     

    1. Use a chef’s knife to peel the potatoes, then cut each into uniform thin sticks about 1/4 inch thick. Place cut potatoes in a large bowl of cold water with 1 teaspoon of salt and soak for at least 30 minutes to remove excess starch.
      4 large russet potatoes, 4 cups cold water, 1 tsp salt
    2. Drain the soaked potatoes and pat them completely dry with paper towels to ensure minimal oil splatter during frying. Preheat a Dutch oven or deep-fryer to 300°F (150°C).
      4 large russet potatoes
    3. Carefully add the prepared potato sticks into the hot oil, working in batches if necessary. Fry for about 4-5 minutes until they are soft but not browned, then remove and drain on paper towels. This first fry helps cook the interior.
    4. Increase the oil temperature to 375°F (190°C). Return the fries to the hot oil and fry for an additional 2-3 minutes until they turn golden brown and crispy, with a puffed appearance and a crunching sound when tested. Remove with a slotted spoon and drain on fresh paper towels.
    5. Transfer the fries to a bowl, season immediately with salt to taste, and gently toss to coat. Serve hot with your preferred dipping sauces.
      to taste salt

    Some recipes you chase forever. Others you accept for what they are. And McDonald’s fries? They’re stubborn little reminders that sometimes, the perfect snack doesn’t need reinventing. Just a bag and a secret sauce of memory.

  • Patriotic Popcorn Balls: A Homemade Time Capsule for the Fourth

    Patriotic Popcorn Balls: A Homemade Time Capsule for the Fourth

    I never expected childhood nostalgia would hit me so hard making these popcorn balls. It’s not just the sticky sweetness, but that unmistakable hint of melted marshmallow and the way the popcorn crackles against your teeth. The smell of butter and sugar mixes in the air, suddenly making me seven years old, staring at a sparking firework night, craving these simple, messy bites.

    But more than that, making these now feels like a tiny act of rebellion. In a world obsessed with perfect Instagram treats, this is raw, imperfect, nostalgic chaos. There’s something grounding about forming these ragged, colorful balls with your hands—an easy way to remember what matters. They remind me of summer nights, of childhood, of making do with what’s around. Right now, with all the noise, these popcorn balls wake up that sort of quiet joy we sometimes forget to hold onto.

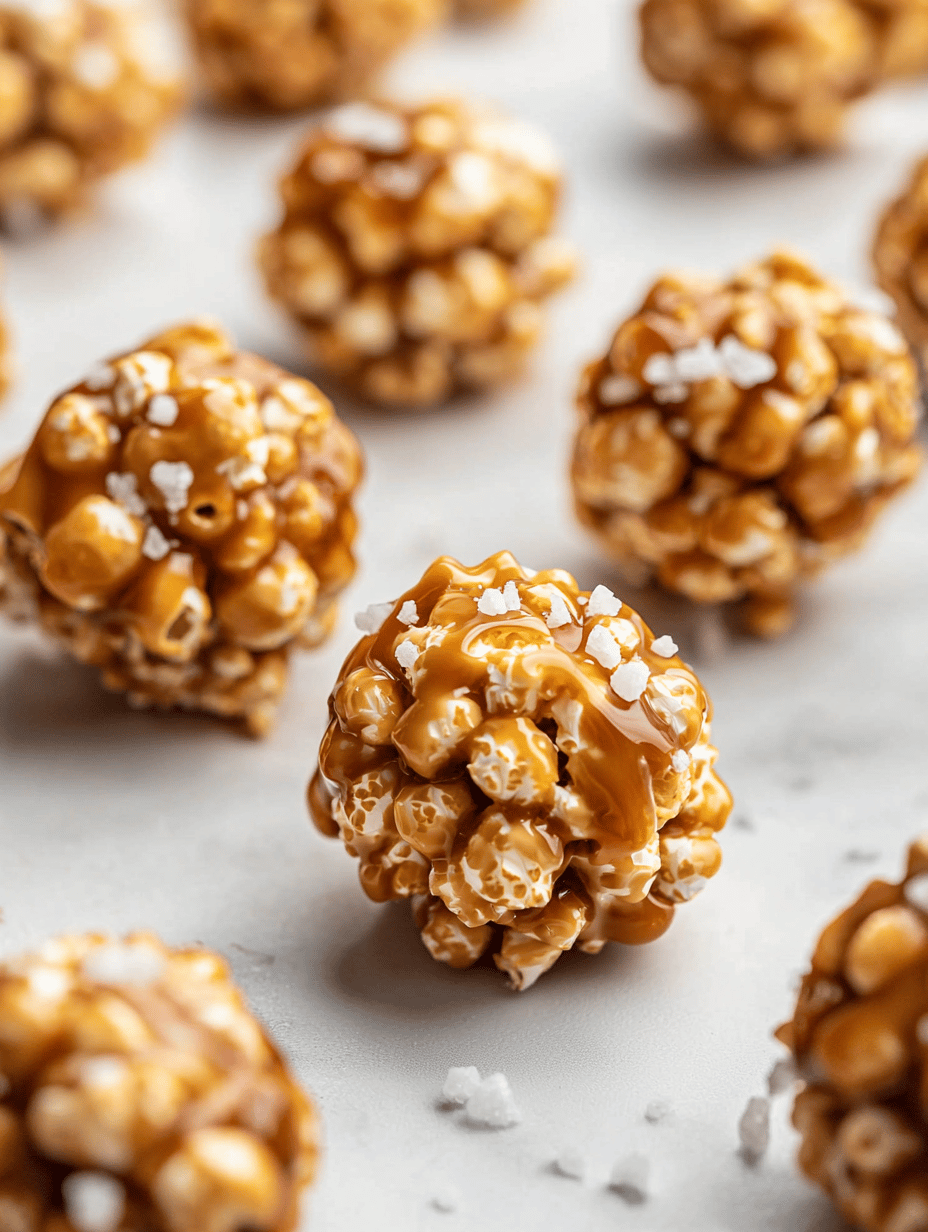
    Homemade Popcorn Balls

    A sweet treat made by combining toasted popcorn with melted marshmallows and butter, then shaping the mixture into balls. The final result is a sticky, chewy snack with crispy popcorn clusters and a colorful, imperfect appearance. The texture balances gooeyness atop crunchy popcorn, creating a nostalgic comfort food.
    Prep Time 10 minutes
    Cook Time 10 minutes
    Total Time 20 minutes
    Servings: 8
    Course: Main Course
    Cuisine: American
    Calories: 250

    Ingredients
      

    • 10 cups popped popcorn preferably plain and lightly salted
    • 1 cup marshmallows mini or regular size, chopped if large
    • 4 tablespoons unsalted butter
    • 1/2 cup granulated sugar
    • 1 teaspoon vanilla extract

    Equipment

    • Large saucepan
    • Wooden spoon or heat-resistant spatula
    • Mixing bowl
    • Measuring cups and spoons
    • Baking sheet or parchment-lined surface

    Method
     

    1. Measure out 10 cups of popcorn and set aside in a large mixing bowl.
    2. In a large saucepan, melt the butter over medium heat, watching for a gentle bubbling and a fragrant aroma.
    3. Add the marshmallows and granulated sugar to the melted butter. Stir continuously with a wooden spoon until the marshmallows are completely melted and the mixture becomes smooth and glossy, about 3-5 minutes.
    4. Remove the saucepan from heat and stir in vanilla extract. Pour the hot marshmallow mixture over the popcorn in the mixing bowl.
    5. Gently fold the mixture with a spatula until the popcorn is evenly coated and sticky.
    6. While still warm, shape the mixture into 8 to 10 balls using your hands, pressing firmly to compact pastes. Place the balls onto a parchment-lined sheet to cool and set.

    Notes

    For easier shaping, slightly dampen hands or oil them lightly before forming the balls. Store leftovers in an airtight container at room temperature.

    Maybe the best part is how you can customize them—red and blue sprinkles, a drizzle of melted chocolate, whatever chaos your kitchen can handle. Just don’t be surprised if you find yourself sneaking bites after everyone leaves the table.

  • Quick Fix Potato Salad — No Boil, No Fuss, Just Real Flavor

    Quick Fix Potato Salad — No Boil, No Fuss, Just Real Flavor

    Why I Can’t Get Enough of This Instant Pot Potato Salad

    There’s something weirdly satisfying about how the potatoes steam so quietly inside the Instant Pot. No boiling water splashing all over, no poking with a fork every few minutes. Just pop in the potatoes, close the lid, and forget about it. I made this last-minute for a picnic, but I swear, the way the garlic, dill, and creamy mayo mingle in a fraction of the usual time—that’s what I keep coming back to. It’s not just quick; it’s stupid simple, and it actually tastes like I fussed for hours. The potatoes come out perfectly tender without that weird mealy texture. Plus, you get this faint smell of warm, roasted garlic that sneaks out before you even taste it. Right now, in this weird weather, I’m all about dishes that come together without making my tiny kitchen even messier than it already is.

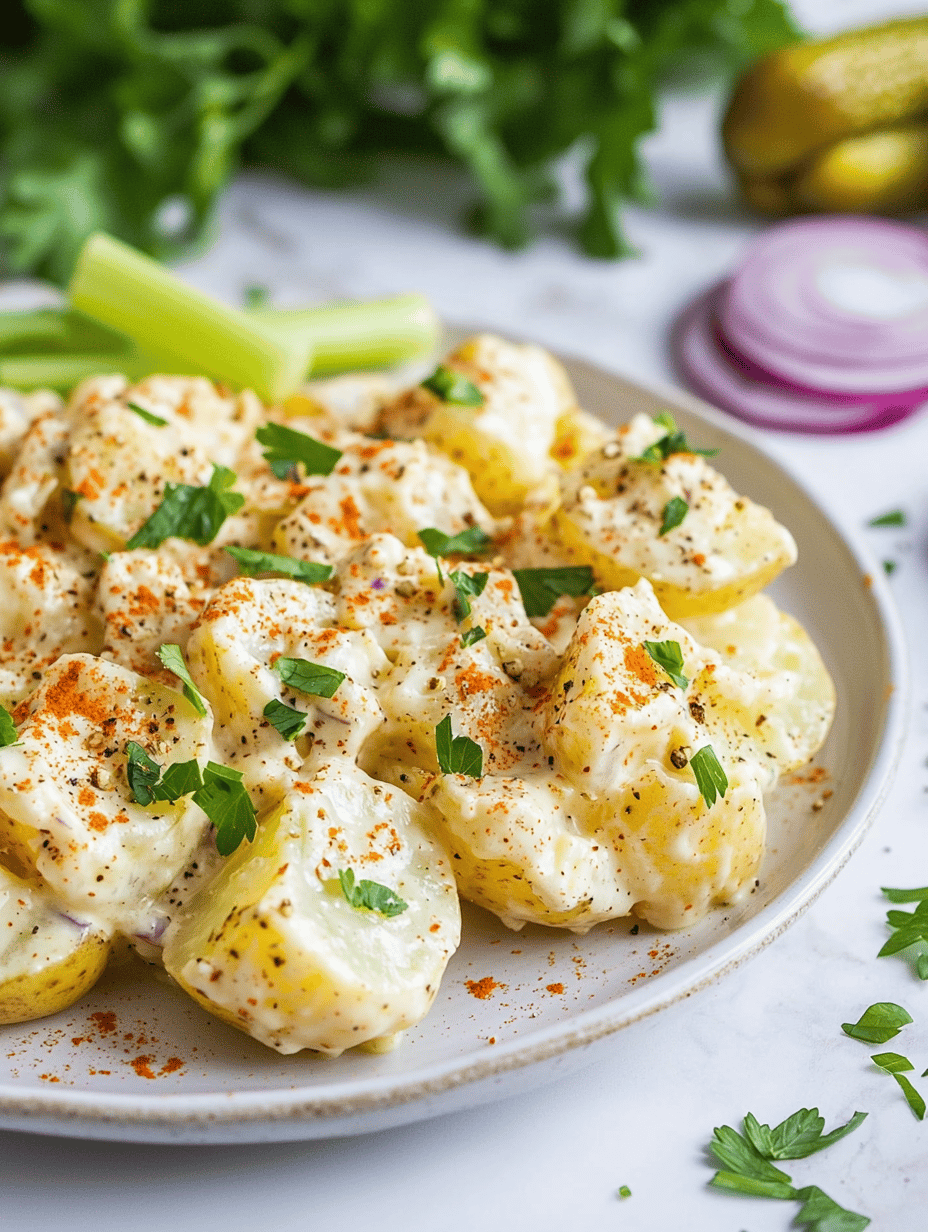
    Instant Pot Potato Salad

    This potato salad is prepared by steaming diced potatoes directly in an Instant Pot until tender, then mixing them with garlic, fresh dill, and mayonnaise to create a creamy, flavorful dish. The final result features uniformly cooked potatoes with a smooth texture, combined with herbs and a creamy dressing for a visually appealing, salad-like appearance.
    Prep Time 10 minutes
    Cook Time 10 minutes
    Total Time 20 minutes
    Servings: 4
    Course: Main Course
    Cuisine: American
    Calories: 250

    Ingredients
      

    • 2 pounds Yukon Gold potatoes peeled and diced into 1-inch pieces
    • 3 cloves garlic minced
    • 2 tablespoons mayonnaise preferably full-fat
    • 2 tablespoons fresh dill chopped
    • to taste salt and pepper for seasoning

    Equipment

    • Instant Pot or electric pressure cooker
    • Cutting board
    • Chef’s knife
    • Mixing bowl
    • Spatula or spoon

    Method
     

    1. Begin by peeling and dicing the Yukon Gold potatoes into approximately 1-inch cubes. Place the diced potatoes in a mixing bowl, then add the minced garlic, a pinch of salt, and a teaspoon of oil if desired. Toss to combine and set aside.
      2 pounds Yukon Gold potatoes, 3 cloves garlic
    2. Pour 1 cup of water into the Instant Pot insert. Place the steamed basket or trivet inside, then evenly spread the seasoned potatoes on top. Secure the lid and set the valve to sealing. Cook on high pressure for 5 minutes, then perform a quick release once the cooking time ends.
      2 pounds Yukon Gold potatoes, 3 cloves garlic
    3. Open the lid carefully, revealing tender, steam-hot potatoes. Use a slotted spoon or tongs to transfer the cooked potatoes into a large mixing bowl, leaving behind any excess liquid. Let the potatoes cool slightly for 2-3 minutes.
      2 pounds Yukon Gold potatoes
    4. Add the mayonnaise, chopped fresh dill, and additional salt and pepper to the warm potatoes. Gently fold and mash the potatoes with a spatula until well combined but still slightly chunky, ensuring the dressing coats all pieces evenly. Observe the creamy mixture coming together with flecks of green from the dill.
      2 tablespoons mayonnaise, 2 tablespoons fresh dill, to taste salt and pepper
    5. Taste and adjust seasoning if necessary. Transfer the potato salad to a serving dish, garnish with extra dill or paprika if desired, and serve immediately or refrigerate for later.

    Honestly, sometimes I wonder if this should be illegal—how easy it is yet so good. Makes me think I could get away with making it weekly and no one would be the wiser. Anyway, if you’re tired of the usual potato salad routine, this might just make you look like a genius in about 20 minutes.

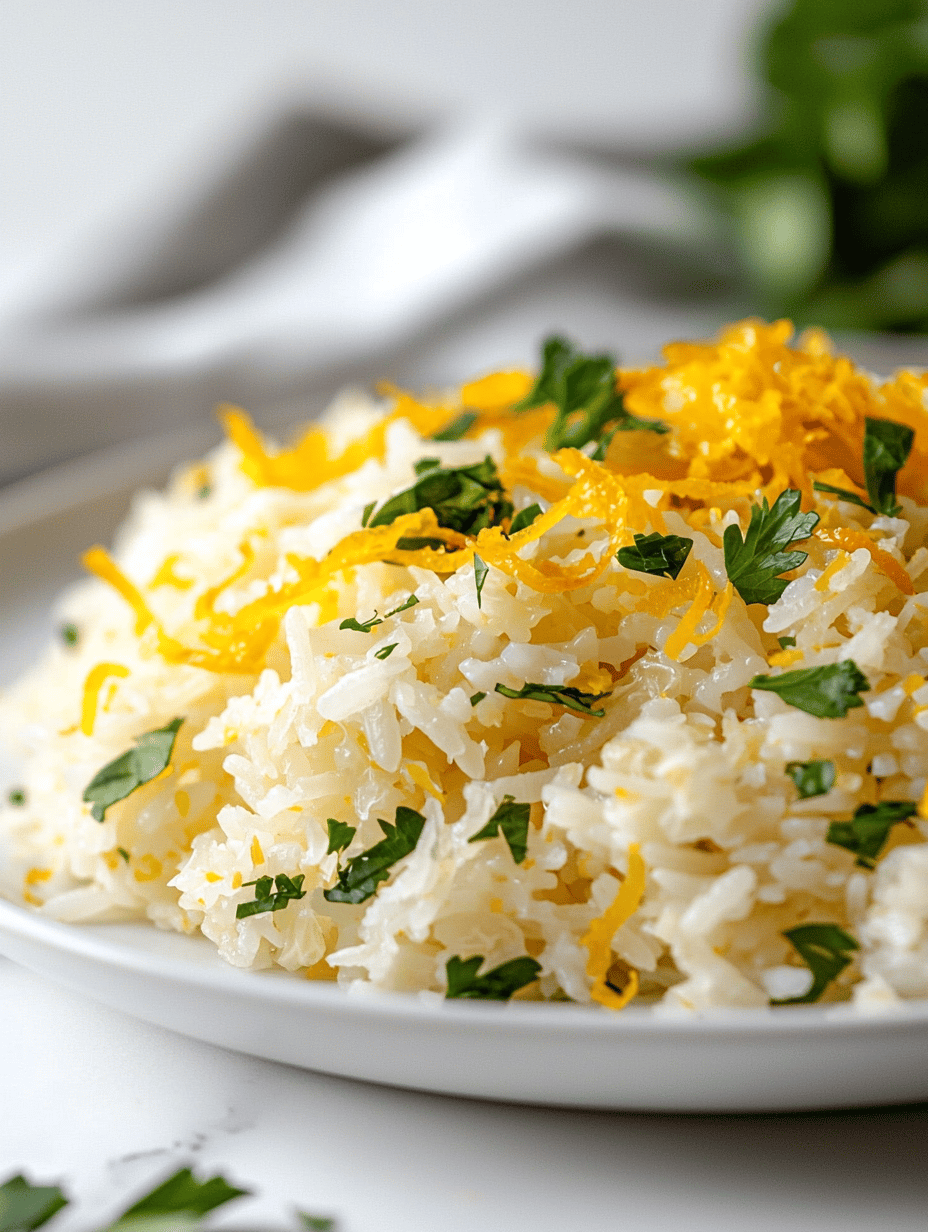
  • Mediterranean Lemon Rice & Cabbage — But Not How You Expect

    Mediterranean Lemon Rice & Cabbage — But Not How You Expect

    One night, I stabbed a lemon into my rice—and it just sat there, firm and sharp, releasing this bright, citrusy jolt that made me wonder why I don’t do that more often. The cabbage wasn’t squeaky or limp, but really crisp, almost like it’s holding on to its own little secret. This dish isn’t about fancy ingredients, it’s about small surprises—like how a squeeze of lemon can wake up rice that’s been sitting around all afternoon. It’s trending because everyone’s tired of overly complicated, fancy ingredients. Sometimes it’s about simple stuff—something you throw together, but then it refuses to be boring. It feels like a dish you make when you want your fridge to surprise you, when the season asks for something fresh but grounded. Honestly, I think I was just craving a little citrus kick and didn’t even realize it.

    Citrus-Infused Rice with Crisp Cabbage

    This dish combines fluffy rice infused with bright lemon notes and a crisp, fresh cabbage component. The rice is cooked with lemon for a citrusy boost, while the cabbage remains crunchy and raw, creating a textural contrast. The final presentation highlights the vibrant colors and contrasting textures of the ingredients.
    Prep Time 10 minutes
    Cook Time 20 minutes
    Total Time 30 minutes
    Servings: 4
    Course: Main Course
    Cuisine: fusion
    Calories: 250

    Ingredients
      

    • 1 cup white rice preferably jasmine or basmati
    • 1.5 cups water
    • 1 each lemon for zest and juice
    • 1/4 teaspoon salt for cooking rice
    • 2 cups cabbage preferably green or Napa, shredded
    • 1 tablespoon olive oil optional, for dressing
    • to taste salt and pepper

    Equipment

    • Medium saucepan
    • Chopping board
    • Chef’s knife
    • Large Bowl
    • Lemon Zester or Microplane
    • Measuring cups and spoons

    Method
     

    1. Bring the water, salt, and lemon zest to a boil in the medium saucepan over high heat. Meanwhile, rinse the rice under cold water until the water runs clear and drain well.
    2. Add the rinsed rice to the boiling water, reduce heat to low, cover with a lid, and simmer for 15 minutes or until the rice is tender and the liquid is absorbed. Remove from heat and let it sit, covered, for 5 minutes.
    3. While the rice cooks, peel and juice the lemon directly into a large bowl. Zest some additional lemon peel if desired. Toss the shredded cabbage with a teaspoon of lemon juice and a pinch of salt to keep it crisp.
      1 cup white rice
    4. Once the rice is done, fluff it with a fork and transfer it to the bowl with lemon juice. Mix gently to evenly distribute the citrus flavor.
      1 cup white rice
    5. Arrange the shredded cabbage on a serving plate or bowl. Drizzle with olive oil and season with salt and pepper. Serve the citrus-infused rice alongside, creating a contrast between the warm, fragrant rice and the crispy, fresh cabbage.
      1 cup white rice
    6. Optionally, garnish with additional lemon zest or herbs for extra brightness before serving.

    Notes

    Ensure the cabbage remains crisp by adding lemon and salt just before serving. Adjust seasoning according to taste.

    Maybe next time I’ll toss in some sunflower seeds or a handful of mint—see if I can mess with this a little more. I probably will. Nothing’s perfect, but sometimes a dish just clicks without trying too hard. Oh, and don’t be surprised if you find yourself squeezing that lemon a second time—because it’s exactly that kind of simple, unexpected brightness that makes all the difference.

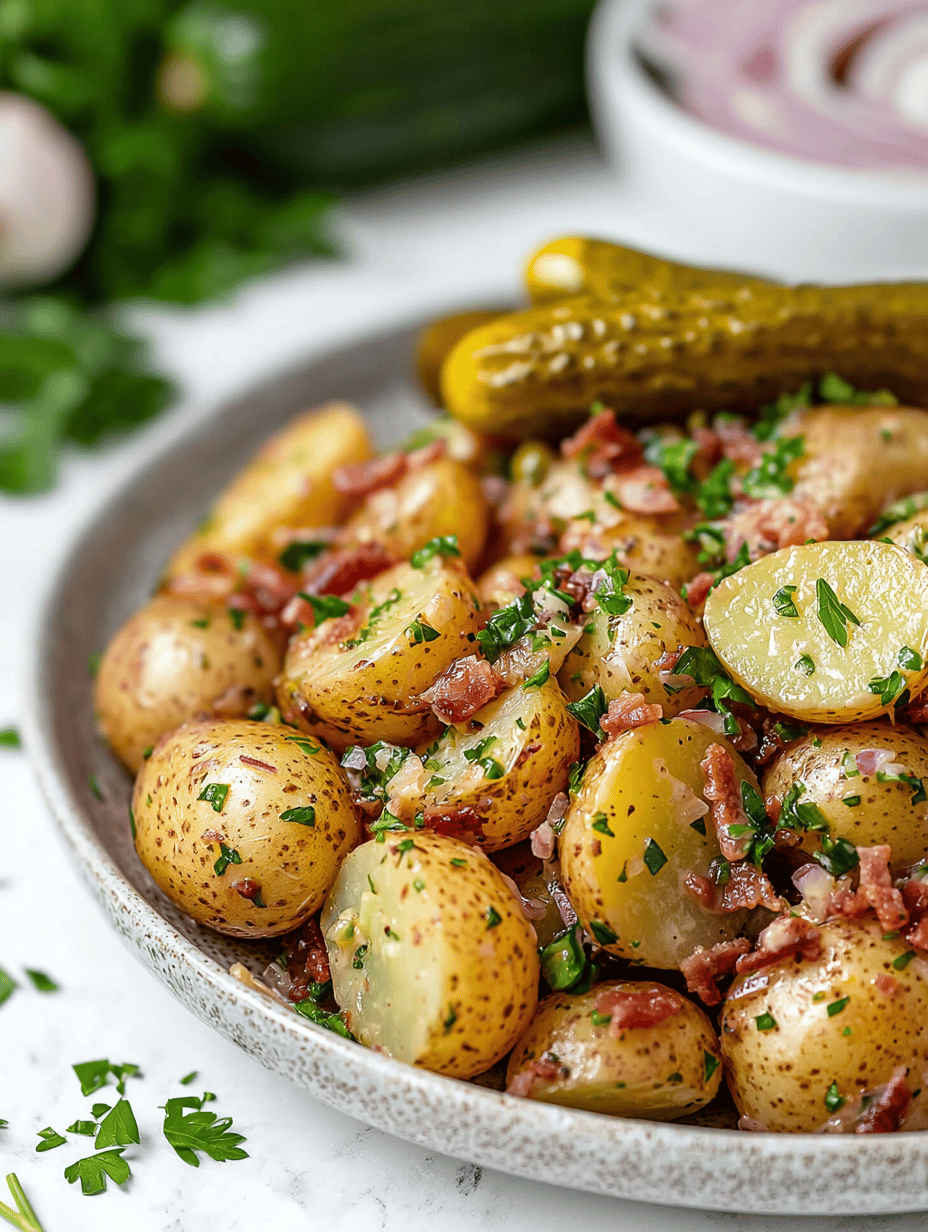
  • German Potato Salad: The One That Secretly Uses Pickle Juice

    German Potato Salad: The One That Secretly Uses Pickle Juice

    Made this last weekend on a whim, mostly ’cause I had some leftover new potatoes and a jar of pickles in the fridge. Turns out, the tangy brine is the secret weapon in this salad—not vinegar, not mustard, but that salty, sour punch that wakes up every bite. No one talks about that side of German potato salad, but it’s the kind of flavor that sneaks up on you, especially when the potatoes are still warm and soaking up every drop. It’s also kind of perfect right now, seasonally—summer’s heat meets that sharp bite of pickle. It’s weird how a handful of ingredients, tossed together quick, can feel like a small rebellion against the usual. I keep thinking about how this should totally be a thing at picnics or even just a quick lunch when you need to change up the usual potato salad routine—think I might just eat the whole bowl by myself.

    German Potato Salad with Pickle Brine

    This potato salad combines cooked new potatoes with a tangy dressing made from pickle brine, resulting in a dish with a glossy, slightly saucy appearance. The potatoes are quartered and warmed to absorb the salty, sour flavor, yielding a tender yet intact texture with a vibrant, pickled flavor profile.
    Prep Time 10 minutes
    Cook Time 15 minutes
    Total Time 25 minutes
    Servings: 4
    Course: Main Course
    Cuisine: German
    Calories: 180

    Ingredients
      

    • 1 pound new potatoes preferably small and uniform in size
    • 1/2 cup pickles yellow or dill pickles, chopped
    • 2 tablespoons pickle brine from the jar of pickles
    • 1 tablespoon olive oil
    • 1 teaspoon Dijon mustard
    • to taste salt & pepper

    Equipment

    • Medium pot
    • Colander
    • Mixing bowl
    • Stirring spoon
    • Serving bowl

    Method
     

    1. Place the new potatoes in a medium pot and cover with cold water. Bring to a boil over high heat and cook until the potatoes are tender when pierced with a fork, about 10-12 minutes. Drain the potatoes in a colander and set aside to cool slightly.
    2. While the potatoes are still warm, quarter them into halves or halves plus eighths depending on size, and transfer to a mixing bowl.
    3. In a small bowl, whisk together the pickle brine, olive oil, and Dijon mustard until well combined. Taste and season with salt and pepper as needed.
      1 pound new potatoes
    4. Pour the dressing mixture over the warm potatoes and gently toss with a spoon to coat evenly. Add chopped pickles and fold into the salad.
      1 pound new potatoes
    5. Serve the potato salad warm or at room temperature, with additional seasoning if desired. The potatoes will have absorbed the tangy brine, giving the dish a glossy appearance with a slightly saucy texture.

    The kind of dish you don’t see coming. And honestly, I don’t think it gets enough credit. Something about it feels like discovering an old family secret in the fridge—simple, unexpected, a little rebellious.

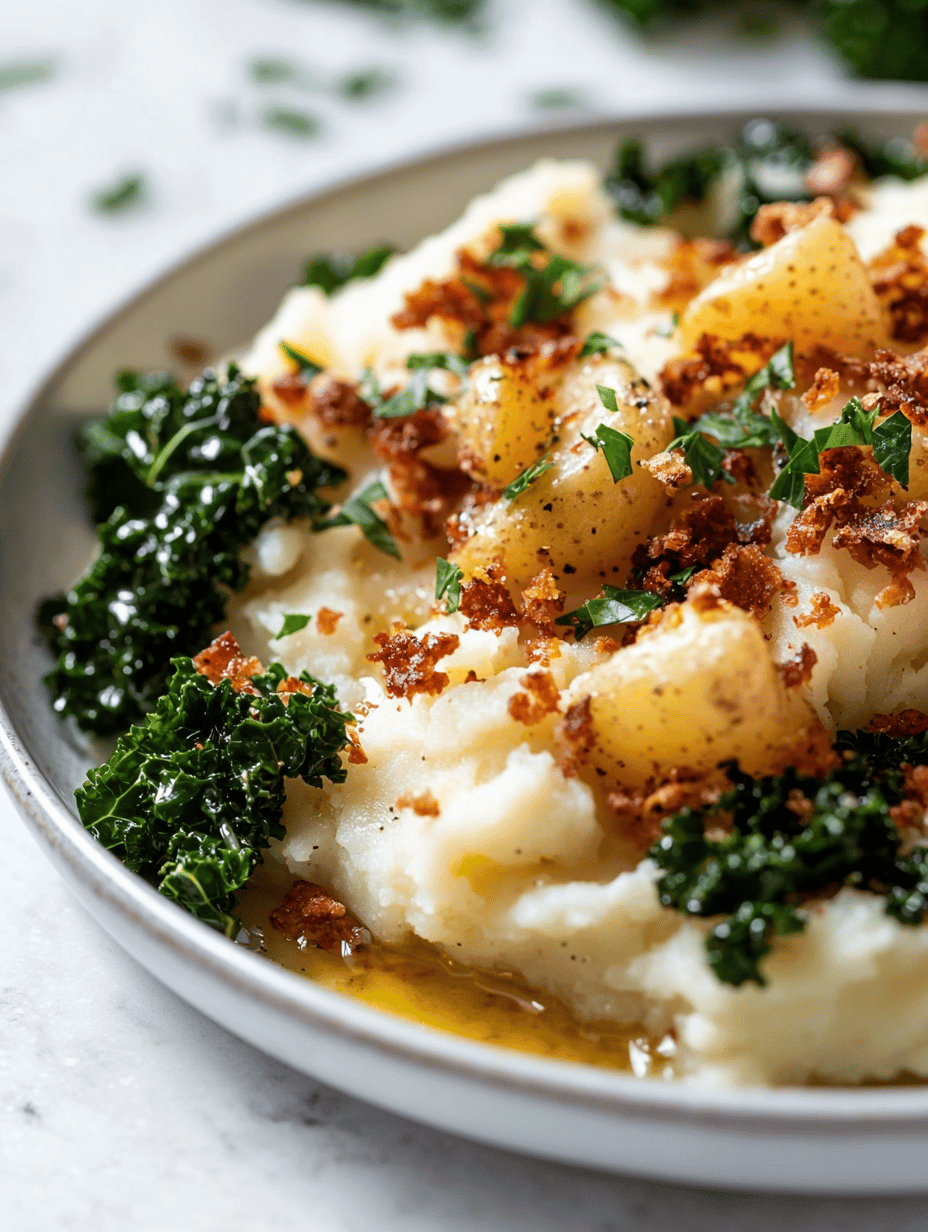
  • Colcannon: The Unexpected Star of My Midnight Snack Lineup

    Colcannon: The Unexpected Star of My Midnight Snack Lineup

    It’s odd how some of my best ideas happen after midnight, when the house is quiet and I’m just wandering between the fridge and the sink. Last night, I stumbled on a leftover pile of mashed potatoes, kale, a bit of scallion, and I thought—this doesn’t need to be just a side. It’s like these ingredients sing together when no one’s paying attention. The smell was sharp and earthy—kale’s bitterness mellowed out by the butter and the slight tang of the scallion—it’s the kind of comfort that sneaks up on you. No fancy ingredients, just stuff you probably have. That’s what makes it feel honest. Not trying to be chic, not trying to impress. Just real food, made with a little patience, turning into something I keep wanting to revisit. Honestly, I think I might be onto something.

    Mashed Potato and Kale Hash

    This dish combines reheated mashed potatoes with sautéed kale and scallions, cooked together until edges are crispy and flavors meld. The mixture is pan-fried to develop a golden crust, resulting in a hearty and slightly chewy texture with vibrant greens and tender potatoes.
    Prep Time 10 minutes
    Cook Time 15 minutes
    Total Time 25 minutes
    Servings: 2
    Course: Main Course
    Cuisine: American
    Calories: 250

    Ingredients
      

    • 2 cups leftover mashed potatoes preferably chilled
    • 1 cup kale stems removed, chopped
    • 2 scallions scallions sliced thinly
    • 2 tablespoons butter for sautéing
    • 1 tablespoon olive oil
    • to taste salt and pepper for seasoning

    Equipment

    • Skillet or cast-iron pan
    • Spatula
    • Knife
    • Cutting board
    • Stirring spoon

    Method
     

    1. Chop the kale into bite-sized pieces on a cutting board using a sharp knife. Slice the scallions thinly for garnish and flavor.
      2 cups leftover mashed potatoes
    2. Heat the skillet over medium heat and add the butter and olive oil. Once melted and shimmering, add the chopped kale. Sauté for 3-4 minutes until the kale darkens in color and reduces slightly in volume.
      2 cups leftover mashed potatoes
    3. Add the leftover mashed potatoes to the skillet with the sautéed kale. Press down gently with a spatula to spread evenly. Cook for about 5 minutes without stirring, allowing the bottom to brown and form a crispy crust.
      2 cups leftover mashed potatoes
    4. Carefully flip the mixture using a spatula or divide it into smaller sections and flip each piece to brown the other side. Cook for an additional 4-5 minutes until the second side is golden brown and crispy edges form.
    5. Sprinkle sliced scallions over the top, season with salt and pepper to taste, and cook for another minute just to meld flavors. Serve hot, with crispy edges and tender insides.
      2 cups leftover mashed potatoes

    Notes

    For extra flavor, add a dash of hot sauce or a sprinkle of cheese while cooking.

    It’s funny—how some of the simplest flavors stay with me. Maybe because they’re honest, no pretenses. This isn’t some trendy mash—just good, straightforward food that feels… right, right now. Sometimes, that’s all I need to feel a little more grounded after a long day. Or awake at midnight, poking around the kitchen again, finding comfort in the familiar.

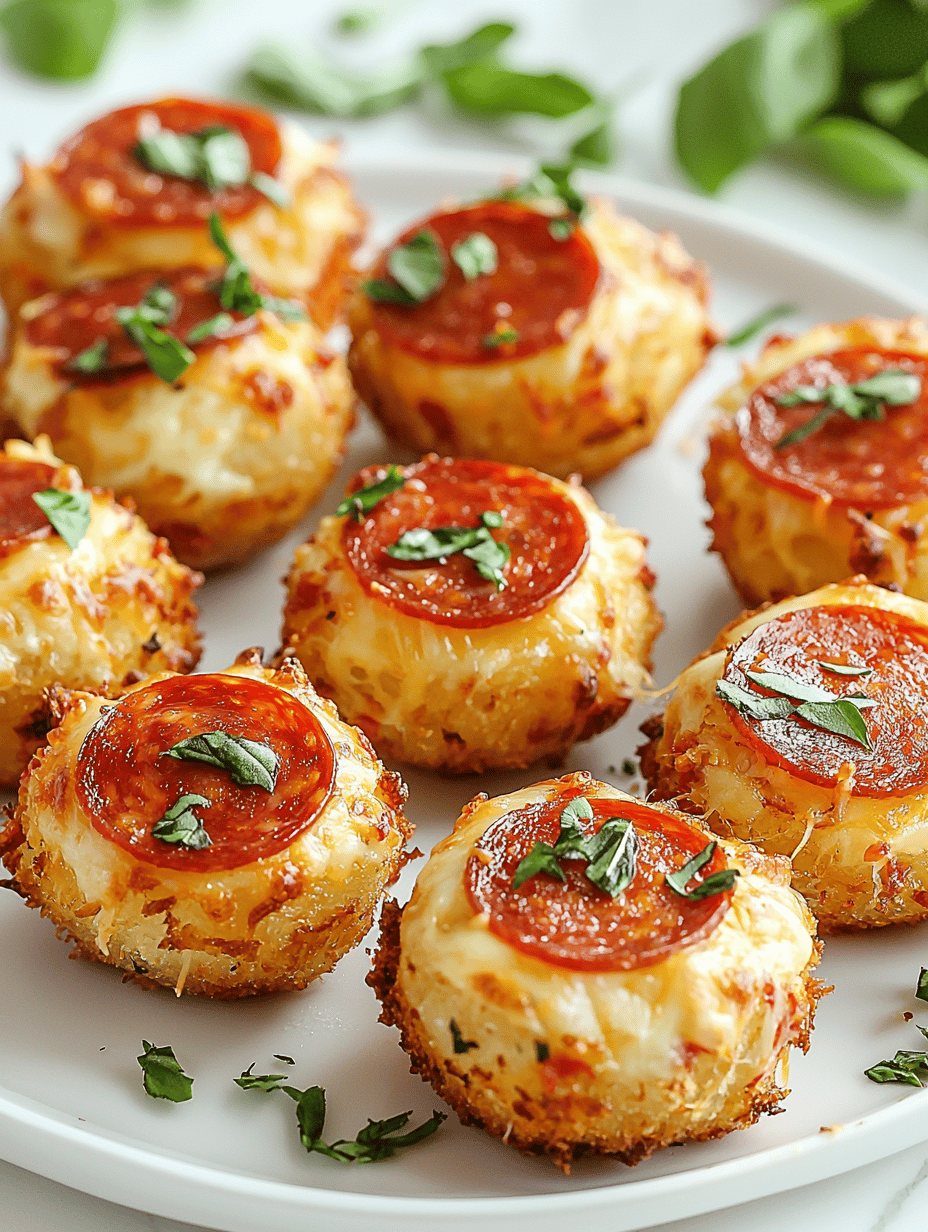
  • Cheesy Pepperoni Pizza Bombs: The Snack That Stretches the Limits of Comfort Food

    Cheesy Pepperoni Pizza Bombs: The Snack That Stretches the Limits of Comfort Food

    Ever think about the moment your whole house smells like a pizza parlor? It’s that sweet, slightly tangy aroma of melted cheese and sizzling pepperoni that instantly makes you forget about the world outside. But these pizza bombs? They’re not just the smell, they’re the texture—crispy outside, gooey inside, with bursts of tomato and spice in every bite.

    What made me crack and give these a shot was realizing how much I could stuff into a tiny, handheld package. Perfect for mess-free lunches or midnight snack attacks when only cheese and carbs will do. Right now, when everyone’s craving comfort but still wants something fun, these fit right in.

    Why I Love This Recipe (And You Will Too)

    • It’s almost foolproof — worth trying even if you’re nervous about making dough from scratch.
    • They’re totally customizable — add more pepperoni or swap cheese for something zesty.
    • Great for quick weeknight dinners or lazy binge nights — no complicated steps.
    • The oozing cheese is a small miracle every single time.
    • They remind me of childhood afternoons, when snacks mattered most and time moved slow.

    Honestly, I keep thinking about the next batch already. Could be dangerous how easily they disappear.

    Pizza Bombs

    Pizza bombs are small, handheld snacks made by wrapping pizza ingredients such as cheese, pepperoni, and tomato sauce inside a dough pocket. They are baked until the outside is crispy and golden, while the interior remains gooey with melted cheese and flavorful fillings. The final appearance is round, golden, and inviting, with visible cheese and toppings peeking through the dough.
    Prep Time 20 minutes
    Cook Time 15 minutes
    Total Time 35 minutes
    Servings: 8
    Course: Main Course
    Cuisine: American
    Calories: 250

    Ingredients
      

    • 2 cups all-purpose flour for dough
    • 1 packet active dry yeast about 2 ¼ tsp
    • ¾ cup warm water about 110°F/45°C
    • 1 tbsp sugar to activate yeast
    • 1 tsp salt
    • 2 cups shredded mozzarella cheese for filling
    • ¼ cup pizza sauce for filling
    • ½ cup sliced pepperoni optional, for filling
    • 1 egg beaten for egg wash

    Equipment

    • Mixing bowls
    • Baking sheet
    • Cooking parchment paper
    • Rolling pin
    • Knife
    • Measuring cups and spoons

    Method
     

    1. Activate the yeast by mixing it with warm water and sugar in a small bowl. Let it sit for about 5 minutes until it becomes frothy and bubbly, indicating it’s ready.
    2. In a large mixing bowl, combine the flour and salt. Pour in the activated yeast mixture and stir until a sticky dough begins to form.
    3. Knead the dough on a floured surface for about 5 minutes until smooth and elastic. Cover with a damp towel and let it rest for 10 minutes to relax the gluten.
    4. Preheat your oven to 400°F (200°C) and line a baking sheet with parchment paper.
    5. Divide the rested dough into 8 equal pieces. Roll each piece into a flat circle about 4 inches in diameter.
    6. Place a spoonful of pizza sauce, some shredded cheese, and a slice of pepperoni (if using) in the center of each dough circle.
    7. Fold the dough over to enclose the fillings and pinch the edges together to seal completely, forming a tight pocket.
    8. Brush the top of each sealed dough ball with the beaten egg for a golden finish.
    9. Arrange the filled dough balls on the prepared baking sheet, leaving space around each for expansion.
    10. Bake in the preheated oven for 15 minutes or until the outside is golden brown and crispy.
    11. Remove from the oven, let cool slightly, and serve warm to enjoy the melty cheese and flavorful fillings inside the crispy crust.

    Sometimes I wonder if I should just mill around the kitchen making these forever. Or maybe just leave them as a secret weapon for when you need a warm, cheesy miracle in a bite.

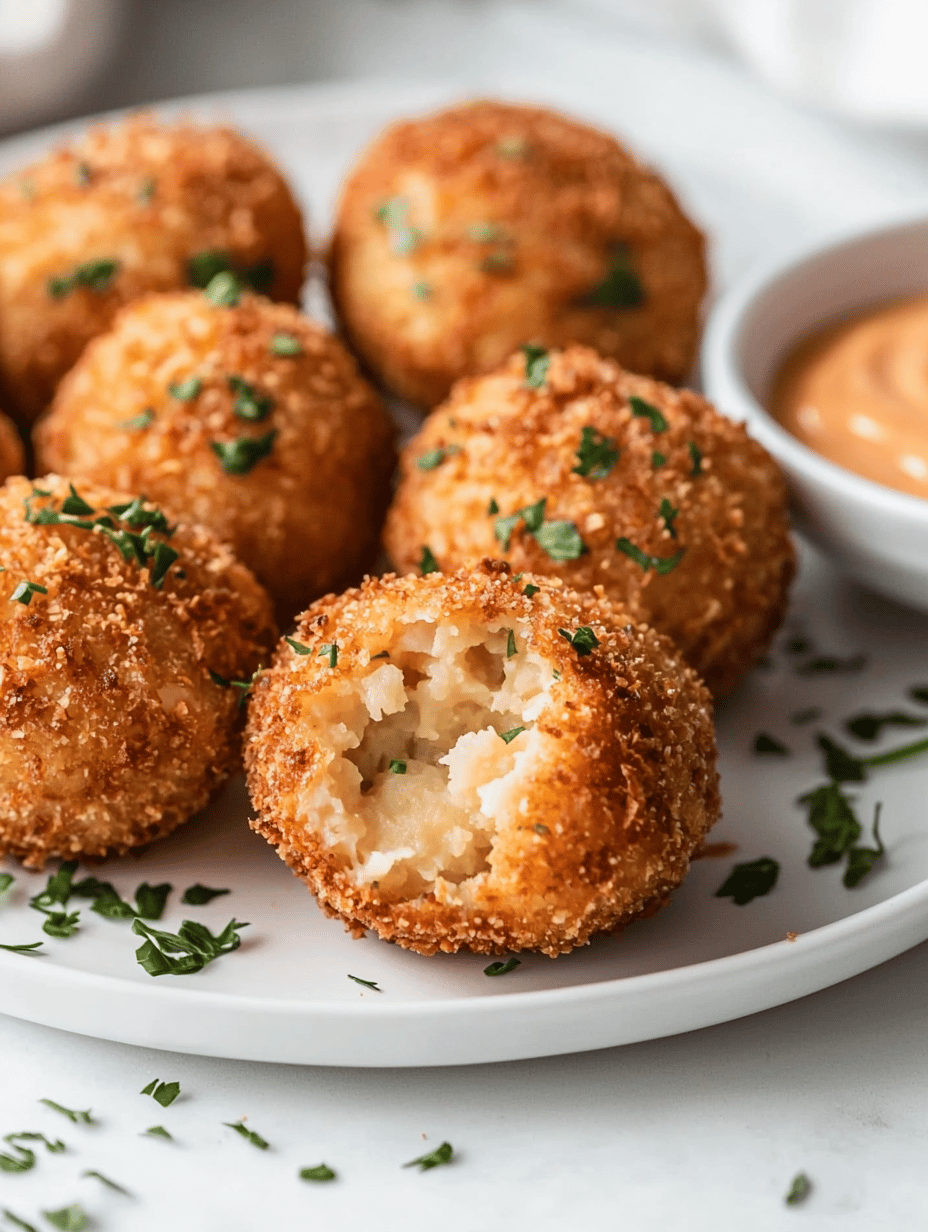
  • Potato Bunny Croquettes: A Cozy Twist for Busy Nights

    Potato Bunny Croquettes: A Cozy Twist for Busy Nights

    Ever think about the quiet magic of potato starch turning into something fluffy and crispy all at once? It’s like capturing a moment of pure chaos—mashing, shaping, frying—done in the flurry of a weekday dinner. I started making these last winter when I needed something straightforward but a little unexpected, something that felt almost childish but tasted like a victory.

    There’s no fancy ingredient list here, just potatoes, a sprinkle of salt, and a secret crunch inside that makes every bite feel like a tiny celebration. The bunny shape wasn’t planned—it just kind of happened as I rolled and pinched. Now, it feels oddly comforting to have a little edible critter on my plate, especially when life’s feeling a bit too grown-up.

    Why I Love This Recipe (And You Will Too)

    • They’re perfect for when you want something crispy outside but totally tender inside— no fuss, just good texture.
    • Making bunny shapes turns dinner into a mini craft project—great for kids or just to entertain yourself after a long day.
    • The smell of frying potatoes with a hint of nutmeg or garlic? That’s pure nostalgia, in the best way.
    • It’s fast enough for a weeknight, but fancy enough to feel like a little treat—and maybe a dessert if you’re feeling wild.
    • Honestly, having a handful of these ready-to-go feels like having a secret weapon for when guests drop by unexpectedly.

    The best part—the way these tiny guys make me smile, even when everything’s a mess outside. Guess sometimes, it’s the small, weird comforts we didn’t know we needed.

    Potato Bunny Crisps

    This dish features mashed potatoes shaped into bunny forms and fried until crispy on the outside and tender inside. The process involves mashing, shaping, and frying the potato portions to achieve a light, crunchy texture with a playful appearance. The final result is a charming, snack-like treat with a golden exterior and soft interior.
    Prep Time 15 minutes
    Cook Time 10 minutes
    Total Time 25 minutes
    Servings: 4
    Course: Main Course
    Cuisine: Comfort Food
    Calories: 150

    Ingredients
      

    • 4 medium potatoes Russet or Yukon Gold preferred, peeled and chopped
    • 1/2 teaspoon salt for seasoning
    • 1 cup potato starch or corn starch if unavailable
    • 2 tablespoons vegetable oil for frying plus extra for coating

    Equipment

    • Potato masher or fork
    • Small sharp knife
    • Frying pan or deep fryer
    • Slotted Spoon or Tongs
    • Plate lined with paper towels

    Method
     

    1. Boil the peeled and chopped potatoes in salted water until they are fork-tender, about 15 minutes. Drain well and return to the hot pot for a minute to evaporate excess moisture.
    2. Mash the potatoes thoroughly until smooth and let them cool slightly so they’re easier to handle.
    3. Mix in the potato starch and a pinch of salt into the mashed potatoes until well combined and the mixture holds together when pressed.
    4. Take a small portion of the potato mixture and roll it into a ball, about the size of a walnut. Flatten it slightly to form a small disc.
    5. Use the tip of a small knife to gently pinch the top of the disc into two small upward points, creating bunny ears, forming a bunny shape.
    6. Repeat with the remaining potato mixture, shaping all into bunny forms and setting them aside on a tray.
    7. Heat vegetable oil in a frying pan or deep fryer over medium heat until shimmering and hot enough for frying, about 350°F (175°C).
    8. Carefully place the bunny shapes into the hot oil, working in batches if necessary, and fry until they are golden brown and crispy, about 3-4 minutes per batch.
    9. Use a slotted spoon or tongs to remove the crispy bunnies from the oil and drain on a plate lined with paper towels.
    10. Serve the potato bunnies warm, allowing the crispy exterior and tender interior to be fully enjoyed.

    Notes

    For extra flavor, sprinkle with a pinch of garlic powder or nutmeg before frying. These are best enjoyed fresh but can be kept warm in a low oven for a short time.

    Honestly, I should probably keep these bunny croquettes to myself but whatever. They’re oddly satisfying in the chaos of dinner prep. Sometimes, a little kid’s whimsy is exactly the kind of break I need from adulting.