Category: Main Course

  • Maple Pecan Granola: A Breakfast You Can’t Milkshake Away

    Maple Pecan Granola: A Breakfast You Can’t Milkshake Away

    This granola isn’t just about crunchy clusters or that sticky, toasty smell when you open the jar. It’s about the weird thrill of hearing the pecans crackle, that little burst of caramelized maple syrup on your tongue, and realizing you’ve been eating it straight out of the mixing bowl in your pajamas for the third morning in a row.

    I started making this after I realized granola is a blank canvas. No rules. Just sweet enough to crave but not enough to scare away the health-conscious. And honestly? It fits into this weird, messy moment where everything feels slightly out of control but still somehow grounded by those familiar, comforting bites.

    Plus, it smells like fall but works for any season, which might be the most rebellious thing about it—like turning on your oven when you know it’s supposed to be spring and just saying screw it.

    Homemade Maple Pecan Granola

    This granola is made by tossing oats, pecans, and sweetened with maple syrup, then baking until golden brown and crunchy. The final product has clusters with a caramelized aroma and a slightly chewy, nutty texture, perfect for snacking or topping yogurt.
    Prep Time 10 minutes
    Cook Time 25 minutes
    Total Time 35 minutes
    Servings: 8
    Course: Main Course
    Calories: 200

    Ingredients
      

    • 3 cups rolled oats gluten-free if needed
    • 1 cup pecan halves roughly chopped
    • 0.5 cup maple syrup pure maple syrup preferred
    • 2 tablespoons vegetable oil
    • 0.5 teaspoon salt

    Equipment

    • Large mixing bowl
    • Baking sheet
    • Parchment paper
    • Spatula
    • Oven

    Method
     

    1. Pour the rolled oats into a large mixing bowl. Add the chopped pecans, salt, maple syrup, and vegetable oil.
      3 cups rolled oats, 1 cup pecan halves, 0.5 cup maple syrup, 2 tablespoons vegetable oil, 0.5 teaspoon salt
    2. Stir the mixture thoroughly with a spatula until all ingredients are evenly coated and clump together slightly, forming a sticky, caramel-like consistency.
      3 cups rolled oats, 1 cup pecan halves, 0.5 cup maple syrup, 2 tablespoons vegetable oil, 0.5 teaspoon salt
    3. Spread the mixture evenly onto a parchment-lined baking sheet, pressing down lightly to create an even layer.
      3 cups rolled oats, 1 cup pecan halves, 0.5 cup maple syrup, 2 tablespoons vegetable oil, 0.5 teaspoon salt
    4. Bake in a preheated 350°F (175°C) oven for 20-25 minutes, stirring once at the halfway point, until the granola is golden brown and fragrant.
    5. Remove from oven and let cool completely on the pan; the granola will firm up and form clusters as it cools.
    6. Break into clusters and transfer to an airtight container for storage. Serve as a breakfast cereal or snack.

    Bag it up, share it, eat it straight from the jar. Or don’t. Granola shouldn’t be complicated. It just is—but only when you add enough butter and maple syrup to make a tiny sticky kingdom you’ll want to live inside for a while.

  • Egg Casserole That Cooks Itself Overnight — No Frills, Just Flavor

    Egg Casserole That Cooks Itself Overnight — No Frills, Just Flavor

    Late Night Drunken Brainstorm

    I was up past midnight, staring at the fridge, thinking about breakfast. Not because I was hungry, but because I couldn’t sleep. Then I saw the eggs, a stray cheese slice, and some wilted spinach. Normally, bullshit recipes flood my brain, but this time, I just needed something that didn’t mess around.

    I don’t want fancy. I want simple, reliable. Something that says, hey, I got your back tomorrow morning, no matter how wrecked you feel now. I love how, late at night, the kitchen smells like warm eggs and sharp cheese—kinda comforting, kinda rebellious. All you need is a little patience, a few odds and ends, and a dish that practically makes itself. No fuss, no fuss, just nourishment that actually tastes like real food—not some painstaking masterpiece.

    Late Night Drunken Brainstorm

    This dish consists of a quick scramble of eggs with melted cheese and wilted spinach, cooked in a skillet until just set. The final dish has a soft, slightly creamy texture with pockets of melted cheese and wilted greens, served hot straight from the pan.
    Prep Time 5 minutes
    Cook Time 5 minutes
    Total Time 10 minutes
    Servings: 1
    Course: Main Course
    Cuisine: American
    Calories: 250

    Ingredients
      

    • 2 large eggs beaten
    • 1 slice cheese stray cheese slice, shredded or torn
    • 1/2 cup wilting spinach roughly chopped
    • 1 tablespoon butter for cooking
    • to taste salt
    • to taste pepper

    Equipment

    • Frying pan or skillet
    • Spatula
    • Cutting board
    • Knife

    Method
     

    1. Use a knife and cutting board to roughly chop the spinach into small pieces. Set aside.
      1/2 cup wilting spinach
    2. Crack two large eggs into a bowl and beat with a fork or whisk until fully combined and slightly frothy.
      2 large eggs
    3. Heat the frying pan over medium-low heat and add the butter, allowing it to melt and foam slightly, coating the pan evenly.
      1 tablespoon butter
    4. Pour the beaten eggs into the pan, gently swirling to distribute evenly. Cook without stirring until the edges begin to set and you see a slight puff in the center, about 1-2 minutes.
    5. Add the wilted spinach and shredded cheese evenly across the eggs. Continue cooking until the eggs are mostly set but still slightly runny on top, approximately 1-2 minutes. Season with salt and pepper as desired.
      1/2 cup wilting spinach, 1 slice cheese, to taste salt, to taste pepper
    6. Gently fold the mixture or slide it onto a plate to finish cooking and serve immediately while still moist and warm.

    It’s funny how a casserole can be so straightforward but still feel like some secret weapon. Maybe I’m just craving something honest, no pretenses. Anyway, this one’s staying on my roster. Because sometimes, you don’t want perfect, you want easy and satisfying. And maybe, just maybe, you’ll know exactly what I mean.

  • The Surprising Science Behind Perfect Air Fryer Chicken Tenders

    The Surprising Science Behind Perfect Air Fryer Chicken Tenders

    Why This Matters Right Now

    I kept thinking about how I used to pan-fry tenders, the smell of hot oil filling the kitchen, all that splatter and mess. Then I remembered how I tried the air fryer recently. Not just less mess — but somehow, the tenders crackled with this almost toothsome crust, like the fryer was doing a strange little dance underneath. It’s weird how an appliance I mostly used for frozen fries suddenly became my go-to for crispy, juicy bites—something about not having to stand over a pan, turning tenders one by one, makes it feel a bit rebellious. Plus, with summer coming, who wants to mess with hot oil? It’s random — a tiny kitchen hack that surprises me every time I make it. There’s an odd satisfaction in hearing that almost-static crackle of the coating, knowing I’m skipping the grease but still getting that crunch.

    Air Fryer Crispy Chicken Tenders

    Boneless chicken tenders are coated in seasoned breadcrumbs and cooked in the air fryer until golden brown. The result is a crispy, juicy exterior with tender meat inside, achieved through a baking and air frying process that mimics deep frying texture without the excess oil.
    Prep Time 15 minutes
    Cook Time 15 minutes
    Total Time 30 minutes
    Servings: 4
    Course: Main Course
    Cuisine: American
    Calories: 320

    Ingredients
      

    • 1 lb boneless chicken tenders cut into strips if large
    • 1 cup all-purpose flour for dredging
    • 2 large eggs beaten
    • 1.5 cups breadcrumbs panko preferred for crunch
    • 1 teaspoon paprika for flavor and color
    • 1/2 teaspoon garlic powder
    • to taste salt and pepper
    • cooking spray olive oil or cooking spray for greasing the basket if needed

    Equipment

    • Air fryer
    • Mixing bowls
    • Baking sheet or plate
    • Tongs
    • Cooking brush

    Method
     

    1. Preheat the air fryer to 400°F (200°C). Prepare three shallow dishes: one with flour, one with beaten eggs, and one with seasoned breadcrumbs mixed with paprika, garlic powder, salt, and pepper.
    2. Dredge each chicken tender first in flour, shaking off excess, then dip into egg wash, ensuring an even coat, and finally press into seasoned breadcrumbs, coating thoroughly. Place the coated tenders on a plate.
    3. Spray the air fryer basket lightly with cooking spray or brush with oil to prevent sticking. Arrange the coated tenders in a single layer in the air fryer basket, leaving space between each piece.
    4. Cook the tenders in the preheated air fryer for 12-15 minutes, flipping or turning them halfway through, until the exterior is golden brown and crispy, and the internal temperature reaches 165°F (74°C). Listen for a crispy crackle and smell for a toasted aroma.
    5. Remove tenders carefully from the air fryer using tongs, serve immediately with your favorite dipping sauce, and observe the crunchy texture and appealing appearance.

    Notes

    For extra crunch, spray the coated tenders lightly with cooking spray before air frying. Adjust cooking time based on tender size and desired crispiness.

    Sometimes, I think I get too caught up chasing complicated recipes. These tenders? Just a couple of ingredients, a quick spray, and a few minutes. Still craving that perfect bite, like a little reminder that good food doesn’t need to be fancy. Just crispy enough, juicy inside, and enough of a surprise to make me smile. Guess I’ll keep experimenting with this thing. It’s kind of fun when the kitchen turns into a science lab for a minute.

  • Turkey Meatballs That Taste Like My Chicken Noodle Soup Used to When I Was Sick

    Turkey Meatballs That Taste Like My Chicken Noodle Soup Used to When I Was Sick

    Why I Made These

    No, I didn’t want to impress anyone with fancy ingredients or some exotic spice blend. I just needed something that reminded me of home. When I was a kid, my mom would make chicken noodle soup for every runny nose or bad day. That smell—poultry, garlic, a splash of thyme—stuck in my memory. I realized turkey could do this. It’s lean enough, but still carries that comforting savory scent. Now, I cook these turkey meatballs late at night when I’m worn down — the kind of tired that lingers. They smell like a warm memory, but with a little more grown-up flavor.

    Why It Matters Now

    Feels like we all need a reminder of simple comfort right now. Not fancy. Just good, honest food that grounds you. Meatballs that smell like you’re being cared for—like someone’s waiting at the table with a spoon and a warm smile.

    Turkey Meatballs

    Turkey meatballs are formed from ground turkey mixed with seasonings and breadcrumbs, then shaped into small rounds. They are pan-fried or baked until browned and cooked through, resulting in tender, evenly textured meatballs with a slightly crispy exterior. The dish showcases a savory, comforting flavor profile with a moist interior.
    Prep Time 15 minutes
    Cook Time 20 minutes
    Total Time 35 minutes
    Servings: 4
    Course: Main Course
    Cuisine: American
    Calories: 180

    Ingredients
      

    • 1 pound ground turkey preferably lean
    • 1/2 cup breadcrumb crumbs plain or seasoned
    • 1 clove garlic minced
    • 1 teaspoon dried thyme or fresh thyme, chopped
    • 1 large egg beaten
    • to taste salt and pepper
    • 1-2 tablespoons olive oil for frying or brushing

    Equipment

    • Mixing bowl
    • Baking sheet or skillet
    • Measuring cups and spoons
    • Cooking thermometer
    • Cooking Tongs or Spatula

    Method
     

    1. Combine ground turkey, breadcrumb crumbs, minced garlic, thyme, beaten egg, salt, and pepper in a mixing bowl. Mix thoroughly until all ingredients are evenly incorporated and the mixture becomes cohesive.
    2. Using your hands, form the mixture into evenly sized meatballs, about 1 to 1.5 inches in diameter. Place them on a tray lined with parchment paper for easy handling.
    3. Heat a tablespoon of olive oil in a large skillet over medium heat until shimmering and starting to smoke lightly. Add the meatballs to the pan, ensuring they are spaced apart and not overcrowded.
    4. Cook the meatballs, turning occasionally with tongs or a spatula, until they are browned all over and reach an internal temperature of 165°F (74°C). This typically takes about 8-10 minutes. You may also transfer the meatballs to a baking sheet and bake at 375°F (190°C) for about 15 minutes as an alternative method.
    5. Remove the cooked meatballs from heat, and let them rest for a few minutes. Serve warm, with optional fresh herbs or sauce.

    Sometimes I think about how food is just scent memories in disguise. These turkey meatballs? Just a way to bring back that feeling, even if I’m the only one who notices it anymore. Guess that’s enough sometimes.

  • Frozen Pizza Burgers: The Unlikely Combo That Feels Like Cheating

    Frozen Pizza Burgers: The Unlikely Combo That Feels Like Cheating

    Why I Tried This

    Random thought, really. I was staring at my freezer and saw a frozen pepperoni pizza and a stack of burger buns. Usually, that’s just snack and dinner clutter, right? But suddenly, it felt kinda genius. The smell of melted cheese blending with sizzling beef, crispy crust soaking up juices—nothing about that mix makes sense until it does. These burgers are about to turn your snack routine upside down. No fancy ingredients needed—just those two things that everyone hides in the back of the freezer. It’s not about looking fancy; it’s about the thrill of messing around, breaking the rules, and realizing that sometimes the best ideas are the easiest. No plan. Just a gut feeling I couldn’t ignore.

    Frozen Pepperoni Pizza Burger Buns

    This dish combines sliced burger buns with chunks of frozen pepperoni pizza, then grills them to create a crispy, cheesy snack or meal. The process involves reheating and melding the ingredients to achieve a crispy exterior with melted cheese and flavorful toppings inside.
    Prep Time 5 minutes
    Cook Time 10 minutes
    Total Time 15 minutes
    Servings: 2
    Course: Main Course
    Cuisine: fusion
    Calories: 600

    Ingredients
      

    • 2 pieces burger buns frozen or thawed slightly for easier handling
    • 1 cup frozen pepperoni pizza slices thawed slightly for easier chopping if desired
    • to taste cheese slices or shredded cheese optional, for extra melty topping

    Equipment

    • Skillet or frying pan
    • Spatula
    • Knife
    • Plate

    Method
     

    1. Slice the frozen pepperoni pizza into bite-sized chunks using a sharp knife on a cutting board.
    2. Preheat a skillet over medium heat until hot and lightly greased with a small amount of oil or cooking spray.
    3. Place the burger buns cut-side down in the skillet and toast for about 2 minutes until golden brown and crispy, then flip and toast the other side similarly.
    4. Remove the buns from the skillet and set aside. In the same skillet, add the pizza chunks and spread them out evenly. Cook for 3-4 minutes until the cheese starts to melt and the pizza pieces are heated through, stirring occasionally to prevent sticking.
    5. Optional: Place cheese slices or shredded cheese on top of the pizza mixture and cover the skillet for 1 minute until the cheese melts and becomes gooey.
      2 pieces burger buns
    6. Assemble the dish by spooning the cheesy pizza mixture onto the toasted buns. Top with the remaining bun halves, then serve immediately, showcasing the crispy buns with melted cheese and flavorful pizza chunks inside.

    Like I said, probably not how you’d plan a dinner but somehow feels just right. Sometimes, the weirdest ideas are exactly what we need. No regrets, just a greasy, cheesy mess worth the mess.

  • The Pancakes That Always Wake Up My Brain

    The Pancakes That Always Wake Up My Brain

    Unexpected Fluffiness

    So, I’ve been convinced for years that pancake texture boils down to eggs and buttermilk. Turns out, it’s actually the way you fold the batter—gently, like whispering secrets to a friend. I found myself sitting at the counter, smelling the last bits of vanilla and butter melting. I wasn’t even hungry, just craving that quiet moment when the skillet sizzles and the batter bubbles softly. Nothing fancy, just simple ingredients, but when you get the technique right, they’re light as clouds and just barely sticky—you know, the kind that makes you wonder why all the fluffy pancakes aren’t this effortless. For some reason, making pancakes that resemble clouds feels like a small rebellion against all the overly complicated recipes I’ve seen lately—probably because sometimes, the best tricks are the simplest ones you forget to try.

    Fluffy Pancakes

    This pancake recipe relies on gentle folding of a whipped egg and buttermilk batter to achieve a light, airy texture. The key cooking methods involve careful mixing, folding, and griddling at medium heat to create fluffy, golden-brown pancakes with a soft interior.
    Prep Time 10 minutes
    Cook Time 15 minutes
    Total Time 25 minutes
    Servings: 4
    Course: Main Course
    Cuisine: American
    Calories: 250

    Ingredients
      

    • 2 cups all-purpose flour sifted
    • 2 tablespoons granulated sugar
    • 2 teaspoons baking powder
    • 0.5 teaspoons salt
    • 1.75 cups buttermilk
    • 2 large eggs separated into yolks and whites
    • 4 tablespoons unsalted butter melted
    • 1 teaspoon vanilla extract

    Equipment

    • Mixing bowls
    • Whisk or electric mixer
    • Spatula
    • Griddle or non-stick skillet
    • Measuring cups and spoons

    Method
     

    1. Measure and sift the dry ingredients — flour, sugar, baking powder, salt — into a large mixing bowl to ensure even distribution.
    2. In a separate medium bowl, whisk together the buttermilk, egg yolks, melted butter, and vanilla extract until well combined.
    3. Using an electric mixer or whisk, beat the egg whites until soft peaks form, indicating a fluffy, airy consistency, then gently fold the whites into the wet mixture.
    4. Carefully fold the dry sifted mixture into the wet and whipped egg whites, using a spatula to turn the batter gently until just combined. The batter should be slightly lumpy but homogeneous.
    5. Preheat a griddle or non-stick skillet over medium heat until hot but not smoking. Lightly grease with butter or oil. Pour 1/4 cup portions of batter onto the skillet.
    6. Cook the pancakes until bubbles form on the surface and the edges look set, about 2-3 minutes. Flip them and cook for another 2 minutes until golden brown and cooked through. Serve immediately.

    Notes

    For extra fluffy pancakes, do not overmix the batter. Adjust heat as needed to prevent burning. Serve with toppings of choice.

    Like, I almost forgot how much I used to love the smell of pancakes in the morning. Maybe that’s all I needed to remember. Or maybe I just need a second pancake.

  • Why KFC Cole Slaw Might Save Your Summer BBQ (In a Surprising Way)

    Why KFC Cole Slaw Might Save Your Summer BBQ (In a Surprising Way)

    I never thought about cole slaw beyond its crunchy crunch and tangy bits until I realized I was craving it in a way that wasn’t about the salad itself but the way it feels in your mouth. That almost waxy, slick texture paired with the sharp bite of vinegar and the sweetness of the cabbage—makes your teeth slide. It’s like an unexpected companion amid all the crispy fried chicken and smoky grills. Right now, with BBQs creeping into every weekend plan, this stuff isn’t just a side. It’s that weird, comforting anchor when everything feels a little chaotic, like the one thing you can count on not to fall apart. I think about how food sometimes is less about the flavors and more about the memory of biting into something that just feels right. This cole slaw? It’s kind of like that—simple but quietly dependable.

    Cabbage Slaw with Vinegar Dressing

    This coleslaw features finely shredded green cabbage combined with a tangy vinegar-based dressing, resulting in a crisp and slick-textured salad. The ingredients are mixed and marinated to develop a slightly wilted appearance with a shiny, wet surface, emphasizing the contrasting textures of crunch and smoothness.
    Prep Time 15 minutes
    Total Time 15 minutes
    Servings: 4
    Course: Main Course
    Cuisine: American
    Calories: 120

    Ingredients
      

    • 4 cups green cabbage, finely shredded use a sharp knife or mandoline for uniform strips
    • 0.25 cup apple cider vinegar for tangy flavor
    • 2 Tbsp sugar to balance acidity
    • 1 tsp salt
    • 0.5 tsp black pepper freshly ground if possible
    • 2 Tbsp vegetable oil for moisture and coating

    Equipment

    • Large mixing bowl
    • Chef’s knife
    • Grater or Mandoline
    • Measuring spoons
    • Spatula

    Method
     

    1. Use a sharp chef’s knife or mandoline to finely shred the green cabbage until uniform in size. Place the shredded cabbage into a large mixing bowl.
      4 cups green cabbage, finely shredded
    2. In a small bowl, whisk together apple cider vinegar, sugar, salt, and black pepper until the sugar and salt dissolve completely, creating a tangy and slightly syrupy dressing.
      4 cups green cabbage, finely shredded
    3. Pour the vinegar mixture over the shredded cabbage and add vegetable oil. Toss the mixture thoroughly with a spatula until all the cabbage is evenly coated and begins to wilt slightly, absorbing the dressing and developing a glossy, slick surface.
      4 cups green cabbage, finely shredded
    4. Allow the mixture to sit at room temperature for about 10 minutes, during which the cabbage softens slightly and the flavors meld. You’ll see the cabbage’s color deepen slightly and the texture become more tender yet still crunchy.
      4 cups green cabbage, finely shredded
    5. Give the slaw a final toss to redistribute the dressing, then serve immediately or refrigerate for up to an hour for additional flavor development. The finished dish will have a shiny, slick appearance with crisp shredded cabbage coated in vinegary glaze.
      4 cups green cabbage, finely shredded

    No fancy tricks, just crunch, tang, and a little sweetness. Sometimes that’s enough to anchor a moment, or make a dull afternoon somehow better. Giving it a shot might make you realize why we keep going back to those familiar sides. Or maybe it’ll just remind you how good the simple stuff can be—no fuss, no fussiness, just vegetables and vinegar doing their thing.

  • Reimagining the Filet-O-Fish: An Unexpected Take

    Reimagining the Filet-O-Fish: An Unexpected Take

    Forget what you know

    Today, I’m not just making another Fish Sandwich. I’m trying to capture that strange moment when fried fish meets lemony tartar, but with a twist of my own. No factory breading here. Instead, I’m roasting a fillet in a pan, letting the edges crisp up just right, almost caramelized. It smells like early spring – that mix of fresh dill, lemon zest, and the faint, savory warmth of cooked fish. This isn’t about fast food nostalgia; it’s about reclaiming something familiar and making it real again. Right now, I’m obsessed with swapping out the bun for something a little different—maybe crispy, buttered toast or a soft lettuce leaf, I haven’t totally decided. It’s strange how _simple_ things get complicated when I think about building the perfect bite.

    Roasted Fish Sandwich with Lemon Dill Tartar

    This dish features a pan-roasted fish fillet with a crispy, caramelized exterior and tender inside, served with a tangy lemon dill tartar sauce. The dish is assembled on crispy toast or lettuce leaves, offering contrasting textures of crispy, flaky fish and fresh, crunchy accompaniments.
    Prep Time 15 minutes
    Cook Time 15 minutes
    Total Time 30 minutes
    Servings: 2
    Course: Main Course
    Cuisine: Modern
    Calories: 450

    Ingredients
      

    • 2 fillets fish fillets (e.g., cod or haddock) skinless, boneless
    • 1 cup panko bread crumbs for coating
    • 1 tsp lemon zest for tartar sauce
    • 2 tbsp dill, chopped fresh
    • 1 cup mayonnaise
    • 1 tbsp capers, chopped
    • 2 tsp lemon juice
    • 4 slices bread or lettuce leaves for serving
    • 2 tbsp butter for toasting
    • to taste salt and pepper

    Equipment

    • Pan
    • Spatula
    • Mixing bowl
    • Measuring spoons
    • Knife
    • Cutting board

    Method
     

    1. Pat the fish fillets dry with paper towels. Use a sharp knife to remove any remaining bones and gently season both sides with salt and pepper. Place the panko bread crumbs in a shallow dish and lightly zest the lemon directly into the crumbs for added flavor.
      2 fillets fish fillets (e.g., cod or haddock), 1 cup panko bread crumbs, 1 tsp lemon zest
    2. Heat a pan over medium heat and add the butter until melted and bubbling, about 1-2 minutes. Carefully place the seasoned fish fillets into the pan, skin side down if applicable. Cook undisturbed for 4-5 minutes until edges are golden brown and the fish is opaque halfway up the sides.
      4 slices bread or lettuce leaves
    3. Flip the fillets gently using a spatula and cook for another 3-4 minutes until fully cooked and crispy on the outside. The fish should be golden brown and easily flake with a fork. Remove from pan and set aside.
      2 fillets fish fillets (e.g., cod or haddock)
    4. While the fish cooks, prepare the tartar sauce by combining mayonnaise, chopped dill, capers, lemon juice, and lemon zest in a mixing bowl. Mix thoroughly until well combined and refrigerate until serving.
      2 tbsp dill, chopped, 1 cup mayonnaise, 1 tbsp capers, chopped, 2 tsp lemon juice
    5. Toast the bread slices or prepare lettuce leaves by rinsing and patting dry. In a separate pan, melt the remaining butter over medium heat and toast the bread slices until golden and crispy, about 2-3 minutes per side.
      2 tbsp butter
    6. Assemble the dish by placing a fish fillet on each toasted bread or leaf-lined plate. Top with a generous spoonful of tartar sauce. Garnish as desired and serve immediately, with the crispy elements contrasting the tender fish.
      2 fillets fish fillets (e.g., cod or haddock), 1 cup mayonnaise, 4 slices bread or lettuce leaves

    No giant story, no grand finale. Just a fish sandwich. But maybe that’s where the magic is. When it’s right, it hits a little different—like a tiny, quiet rebellion against the usual. And honestly, I don’t mind that at all.

  • The Quiet Charm of California Roll Sushi Bowls No One Talks About

    The Quiet Charm of California Roll Sushi Bowls No One Talks About

    Forget Sushi Rolls for a Day

    This isn’t about the usual seaweed wrapped thing. It’s about thinking of sushi as something you just scoop up, not roll up tight. I was craving that bright tang of rice vinegar and salty nori but didn’t want the fuss of rolling. So I threw everything in a bowl. It’s like a deconstructed california roll, only crammed full of crunchy cucumber, ripe avocado, and those tiny pops of sesame seeds. What hits me is how sitting there, spoon in hand, I realize this meal is grounded in chaos—all layers tossed together, yet somehow perfect. It’s shipping season, and I’m tired. Sometimes, a dish like this is just enough to keep everything simple and still cozy. No fuss, no perfection, just flavor in every bite, honestly.

    Deconstructed Sushi Bowl

    This dish involves tossing cooked sushi rice with rice vinegar, sesame seeds, and seasonings, then topping it with fresh, crunchy cucumber and ripe avocado slices. The final presentation features a layered yet naturally mixed bowl with a combination of soft rice and crisp vegetables, offering a vibrant and textured meal.
    Prep Time 15 minutes
    Cook Time 10 minutes
    Total Time 25 minutes
    Servings: 2
    Course: Main Course
    Cuisine: Japanese-Inspired
    Calories: 350

    Ingredients
      

    • 1 cup sushi rice rinsed until water runs clear
    • 1 1/4 cups water
    • 2 tablespoons rice vinegar preferably seasoned
    • 1 teaspoon sugar
    • 1/2 teaspoon salt
    • 1 seeded cucumber cucumber cut into thin half-moons
    • 1 ripe avocado peeled and sliced
    • 1 tablespoon toasted sesame seeds

    Equipment

    • Saucepan
    • Mixing bowl
    • Knife
    • Cutting board
    • Wooden spoon

    Method
     

    1. Combine rinsed sushi rice and water in a saucepan. Bring to a boil over medium-high heat, then reduce heat to low, cover, and simmer for 10 minutes until the water is absorbed and rice is tender. Remove from heat and let it steam for 10 more minutes.
    2. In a small bowl, stir together rice vinegar, sugar, and salt until the sugar and salt are dissolved. Pour this mixture over the cooked rice in the mixing bowl, gently folding to evenly coat the grains. Allow the rice to cool slightly while you prepare other ingredients.
    3. Arrange the sliced cucumber and avocado on the serving bowls. Slice the avocado into thin, even pieces and place over the rice or around the bowl for visual appeal.
    4. Scoop the cooled rice into bowls, creating a base layer. Top with the sliced cucumber and avocado, then sprinkle evenly with toasted sesame seeds for crunch and flavor.
    5. Serve immediately with additional seasonings or soy sauce if desired. The dish should have a firm, slightly sticky rice base with crisp vegetables and a nutty sesame topping.

    And honestly, maybe what makes this interesting is how it feels like a quiet rebellion against overthought sushi. No rolling mats. No perfect slices. Just a bowl full of everything good. Maybe that’s what I’ll keep making instead of obsessing over the shape. Sometimes, the best ideas are the simplest ones, right?

  • Lemon Chicken That Gets Better the Day After

    Lemon Chicken That Gets Better the Day After

    Why I Keep Making Lemon Chicken

    It’s not just about lemon—though that tart brightness is irresistibly fresh and wakes up my senses. It’s about the way the marinade sinks in, making the chicken almost tangy with that little zing. I realized I love it more the next day, cold, sliced thin, with a smear of hummus and some pita. It’s my go-to for a lunch that doesn’t feel like a compromise. No fancy ingredients, no fuss—just a weekday that suddenly feels a bit brighter. The smell of lemon zest bubbling during the cooking? That sharp, citrusy pop sneaking through the kitchen. And the way the meat soaks up the lemon juice overnight, it’s like it’s been marinating forever, even if I just threw it together this morning. That’s what makes this recipe real for me—not just dinner, but the promise of better leftovers.

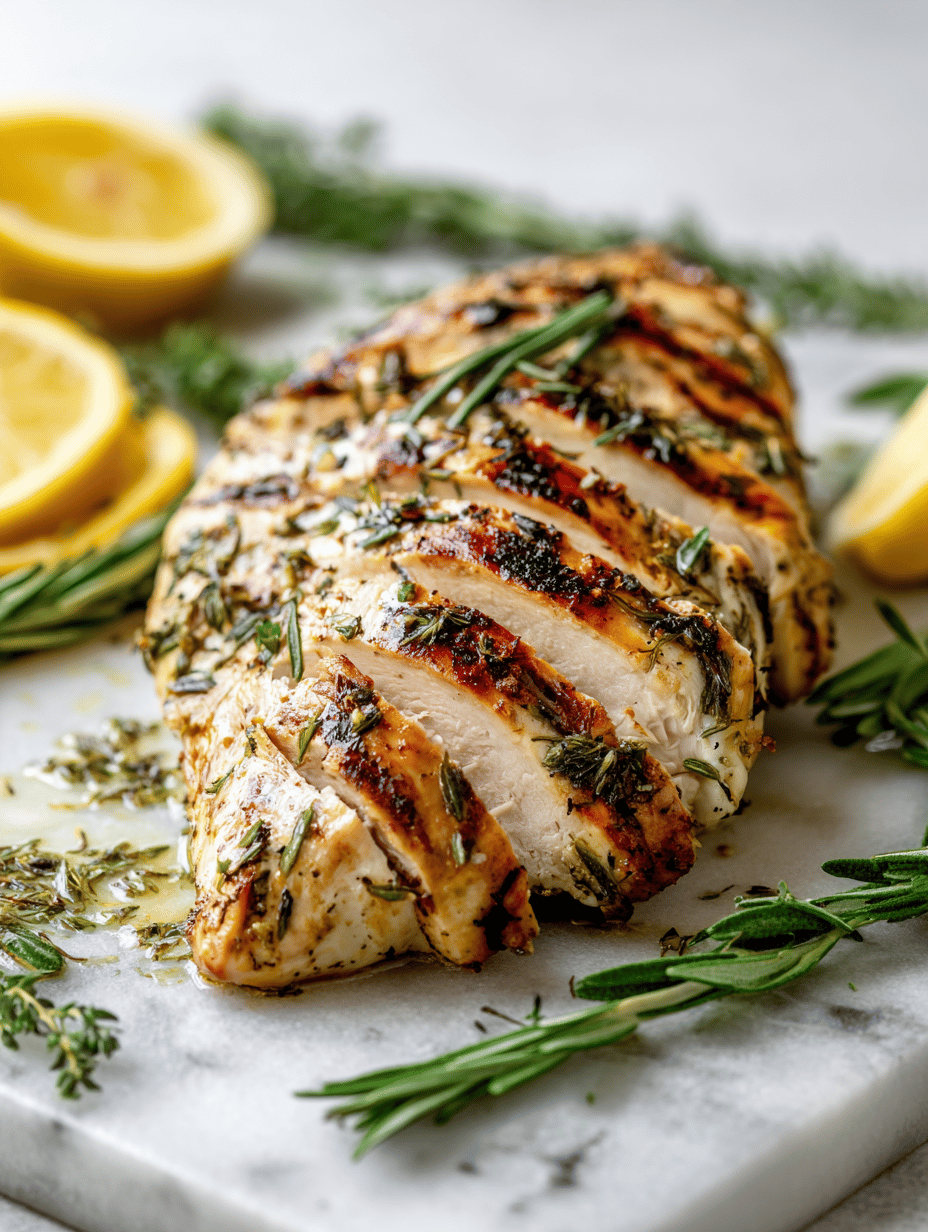
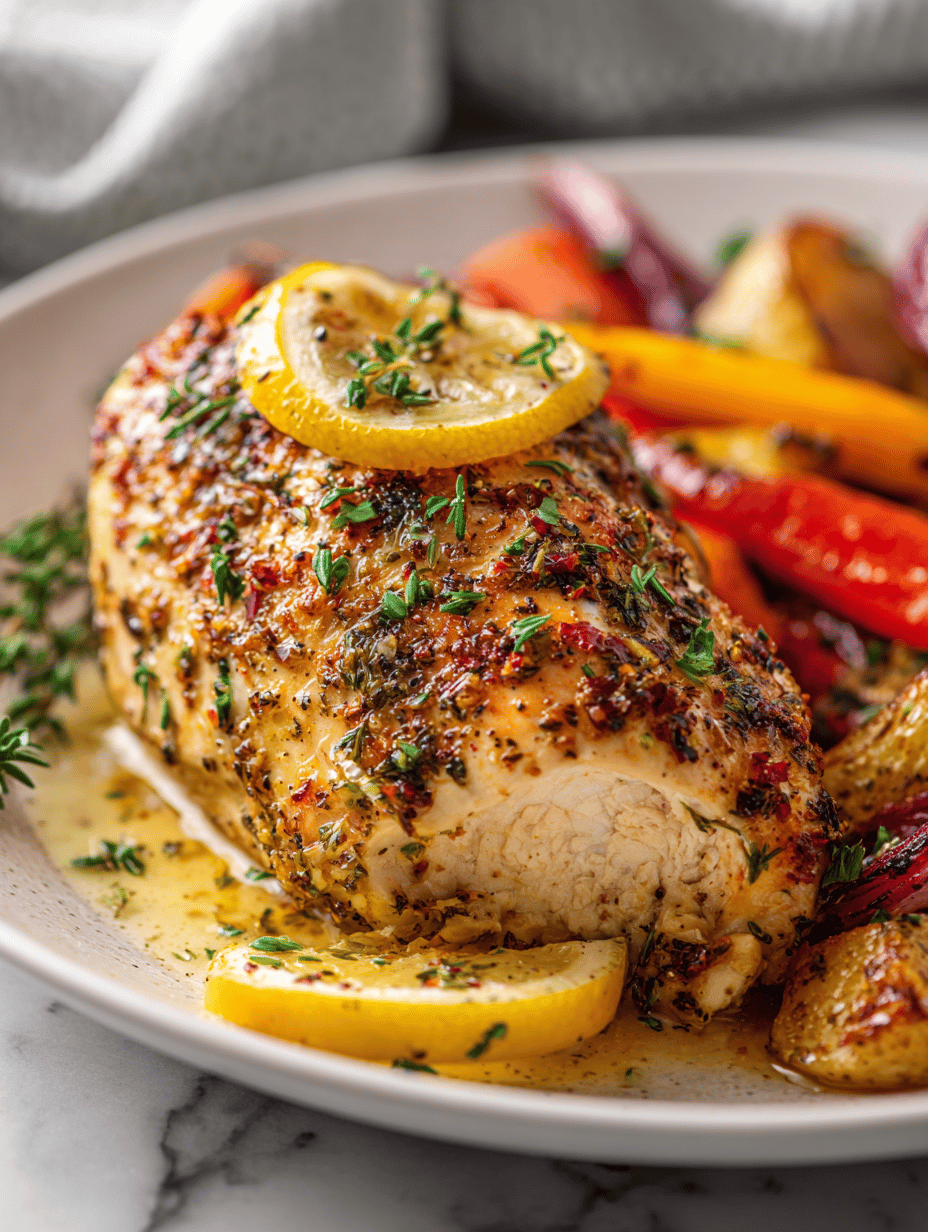
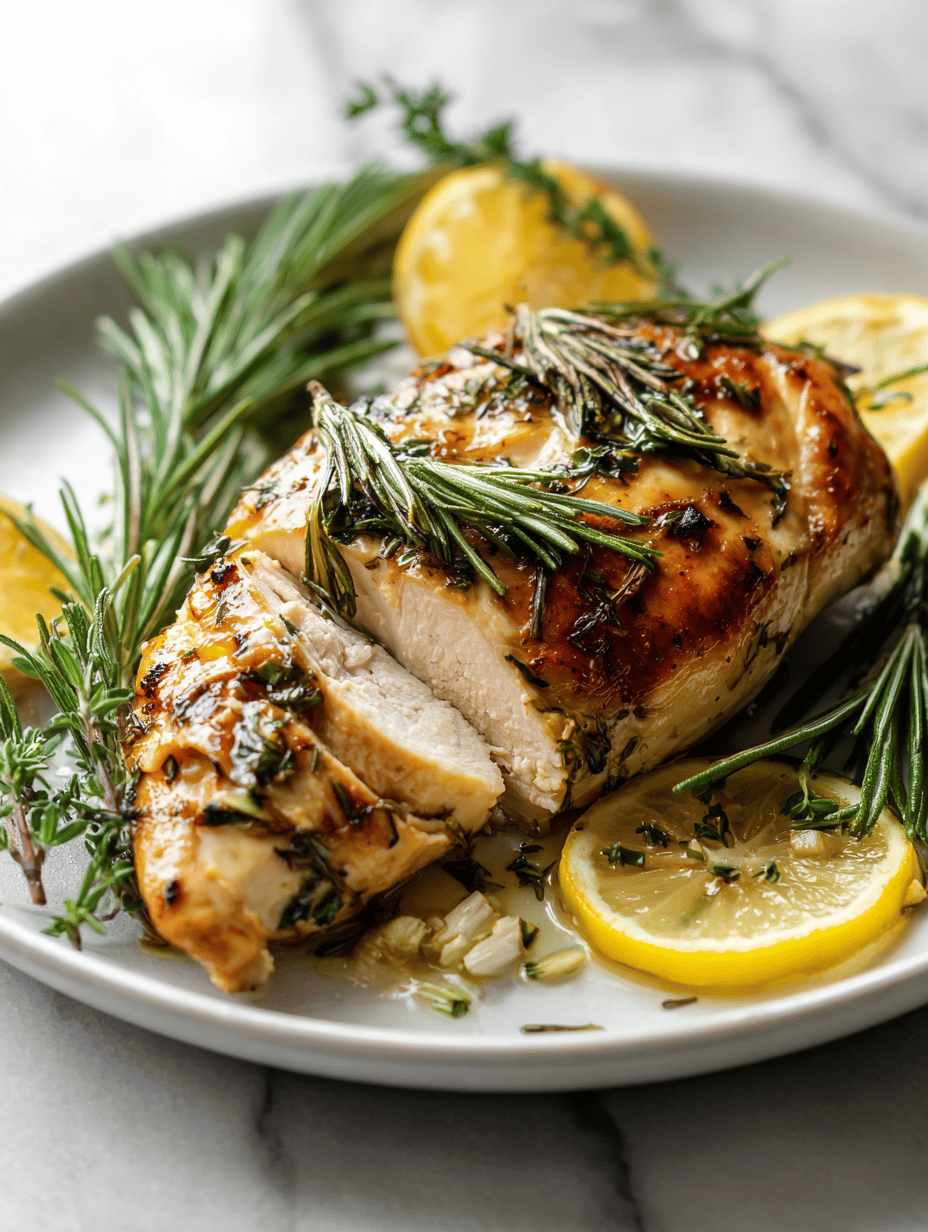
    Lemon Chicken

    Lemon Chicken involves marinating chicken breasts in a mixture of lemon juice, zest, and seasonings, then pan-searing until golden and cooked through. The dish features a tender interior with a slightly crisp exterior, coated in a bright, citrusy sauce that coats the chicken evenly.
    Prep Time 10 minutes
    Cook Time 15 minutes
    Total Time 25 minutes
    Servings: 4
    Course: Main Course
    Cuisine: International
    Calories: 250

    Ingredients
      

    • 4 pieces chicken breasts boneless, skinless
    • 1/4 cup fresh lemon juice
    • 1 tbsp lemon zest from about 1 lemon
    • 2 cloves garlic minced
    • 2 tbsp olive oil
    • 1 tsp salt
    • 1/2 tsp black pepper

    Equipment

    • Mixing bowl
    • Skillet or frying pan
    • Measuring utensils
    • Zester or grater
    • Tongs or spatula

    Method
     

    1. Place the chicken breasts in a mixing bowl and pour over the lemon juice. Add the lemon zest, minced garlic, salt, and pepper.
      4 pieces chicken breasts, 1/4 cup fresh lemon juice, 1 tbsp lemon zest, 2 cloves garlic, 1 tsp salt, 1/2 tsp black pepper
    2. Cover the bowl with plastic wrap and refrigerate for at least 30 minutes to allow the chicken to marinate and absorb the flavors.
    3. Heat a skillet over medium-high heat and add the olive oil. Once hot, remove the chicken from the marinade (letting excess drip off) and place it in the pan.
      4 pieces chicken breasts, 2 tbsp olive oil
    4. Cook the chicken for about 5-6 minutes per side, until golden brown and cooked through with an internal temperature of 165°F (75°C). Flip once and see a well-browned crust forming.
    5. Once cooked, remove the chicken from the pan and let it rest for a few minutes. In the same pan, add a splash of water or chicken broth if needed, and cook until the sauce thickens slightly and becomes glossy. Scrape up any browned bits for flavor.
    6. Slice the rested chicken, arrange on plates, and spoon the citrus sauce over the top. Serve immediately.

    The best part? You won’t feel guilty about pulling out cold leftovers. Just a little squeeze of lemon before eating, and it’s like rediscovering it all over again. Sometimes I forget how simple dishes like this turn into my favorites—nothing fancy, just enough to remind me why I started cooking in the first place.