Category: Desserts

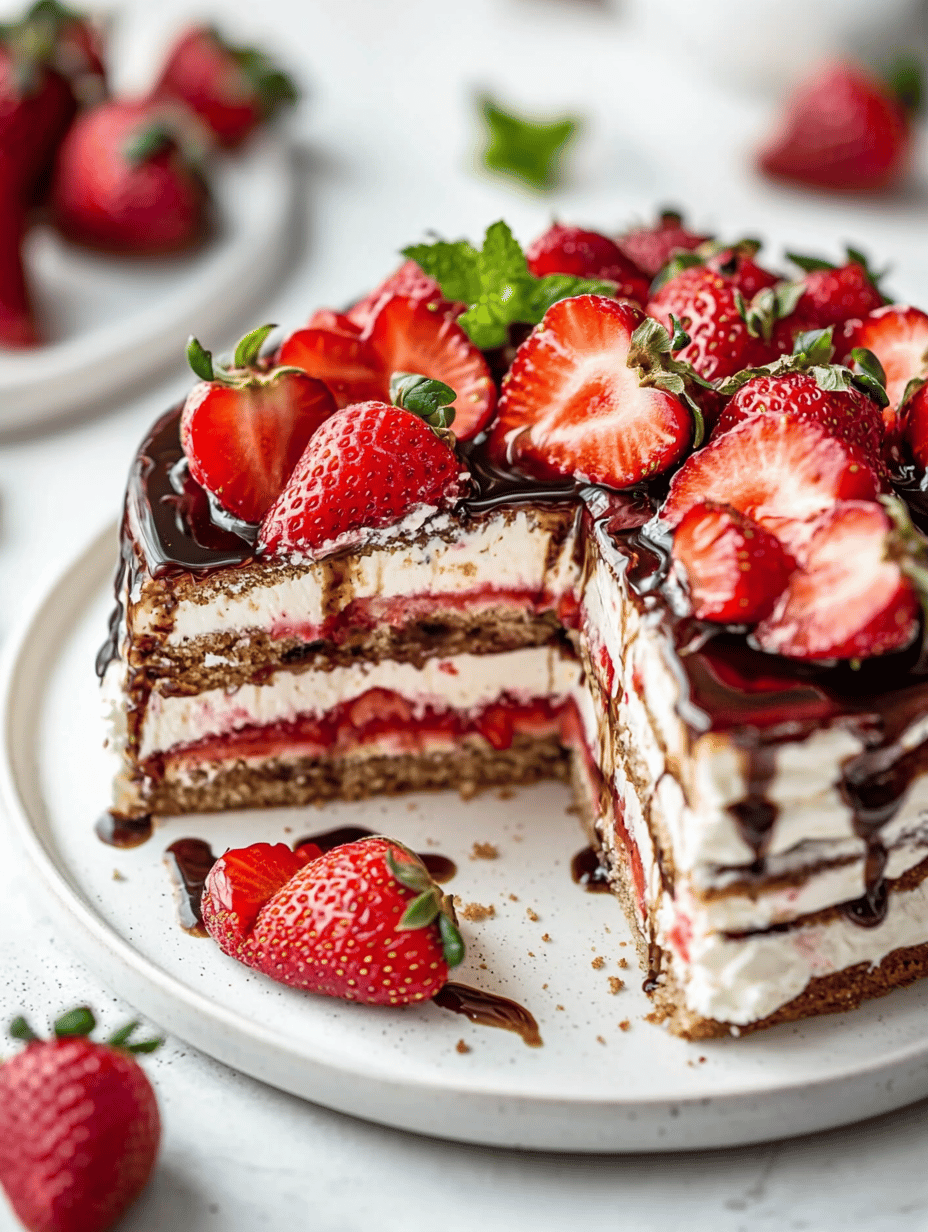
  • Strawberry Mascarpone Cake: A Secret Family Concoction No One Talks About

    Strawberry Mascarpone Cake: A Secret Family Concoction No One Talks About

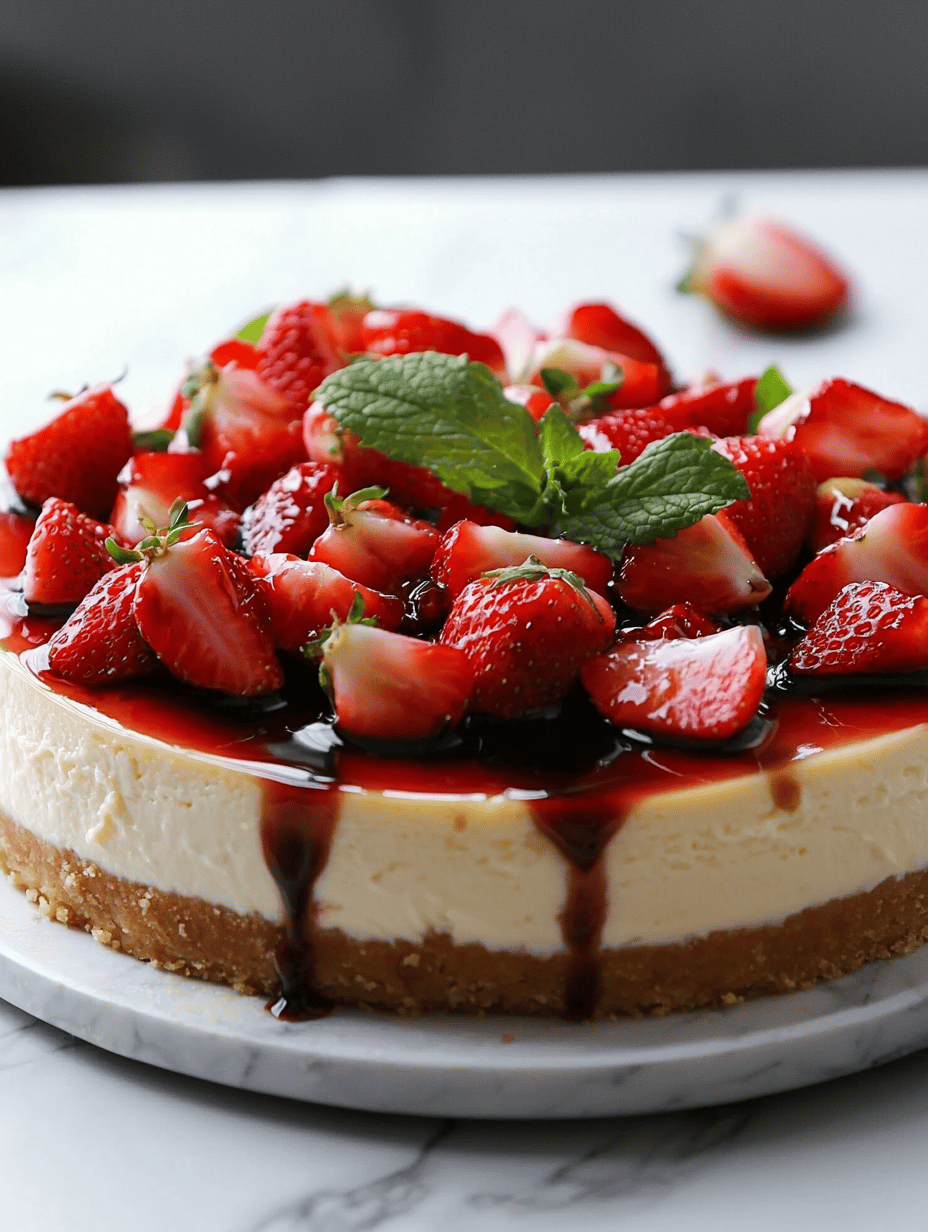
    Honestly, I don’t think anyone’s ever made a cake quite like this intentionally. I stumbled onto the combo after rummaging through my grandmother’s old recipe box—her notes were so scribbled I couldn’t read half of it. Turns out, she accidentally combined leftover mascarpone with smashed strawberries, and the result was a sort of creamy, tangy layer cake that tasted like a summer memory.

    The first bite hits you with the strawberry’s bright juice—almost like biting into a perfectly ripe wild berry—and then the richness of mascarpone that smooths it all out without being too heavy. It’s not overly sweet, just balanced enough to feel special but still totally casual for a sleepover or lazy weekend.

    This cake feels especially important right now, with strawberry season peaking. It’s straightforward enough to throw together but feels extravagant enough for a little celebration, even if that’s just surviving the week. The kind of thing you make when you want to surprise yourself, really.

    Why I Love This Recipe (And You Will Too)

    • It’s quick to assemble but makes you feel like a pastry chef.
    • I’ve used it during hectic mornings; no-fuss, just fresh flavor.
    • The mascarpone keeps it surprisingly light, even with all that fruit.
    • Perfect for a small gathering or a quiet night when you want a little something sweet.
    • Basically, it’s my new *back pocket* dessert—simple but’ll wow anyone.

    Strawberry Mascarpone Layer Cake

    This dessert features a creamy mascarpone filling layered with fresh, juicy strawberries. The cake has a smooth, velvety texture with vibrant fruit bursts, assembled through simple mixing and layering methods, resulting in a lightly sweet, visually appealing treat.
    Prep Time 15 minutes
    Total Time 15 minutes
    Servings: 4
    Course: Main Course
    Cuisine: fusion
    Calories: 250

    Ingredients
      

    • 8 ounces mascarpone cheese softened
    • 1/2 cup fresh strawberries hulled and sliced
    • 2 tablespoons granulated sugar
    • 1 teaspoon vanilla extract
    • 4 slices white bread or sponge cake slices for layering
    • additional extra strawberries for garnish

    Equipment

    • Mixing bowls
    • Whisk
    • Spatula
    • Serving plate

    Method
     

    1. Start by mixing softened mascarpone with granulated sugar and vanilla extract in a bowl, whisking until smooth and creamy.
    2. Add sliced strawberries into the mascarpone mixture and gently fold them in, allowing the fruit to release some juice for extra flavor.
    3. Lay a slice of bread or sponge cake on a serving plate as the base layer.
    4. Spread a generous layer of the mascarpone and strawberry mixture over the cake, smoothing it into an even layer.
    5. Add another layer of bread or sponge cake on top of the first, pressing gently to adhere.
    6. Spread the remaining mascarpone mixture over the second layer, spreading it smoothly and evenly.
    7. Decorate the top with extra sliced strawberries or whole berries for an inviting presentation.
    8. Refrigerate the cake for at least 15 minutes to let the flavors meld and the mascarpone set slightly.
    9. Slice and serve the cake chilled, enjoying the creamy texture with fresh, juicy strawberries.

    Plus, I find myself craving that first bite more than I’d admit. It’s not just a cake; it’s a reminder that with a few good ingredients, you can turn something ordinary into a little celebration. Or at least, a reason to pause for a second and enjoy the mess.

    Good luck trying to keep it from disappearing too fast. Honestly, I probably should’ve made two.

  • Caramel Apple Empanadas — The Surprise Snack You Didn’t Know You Needed

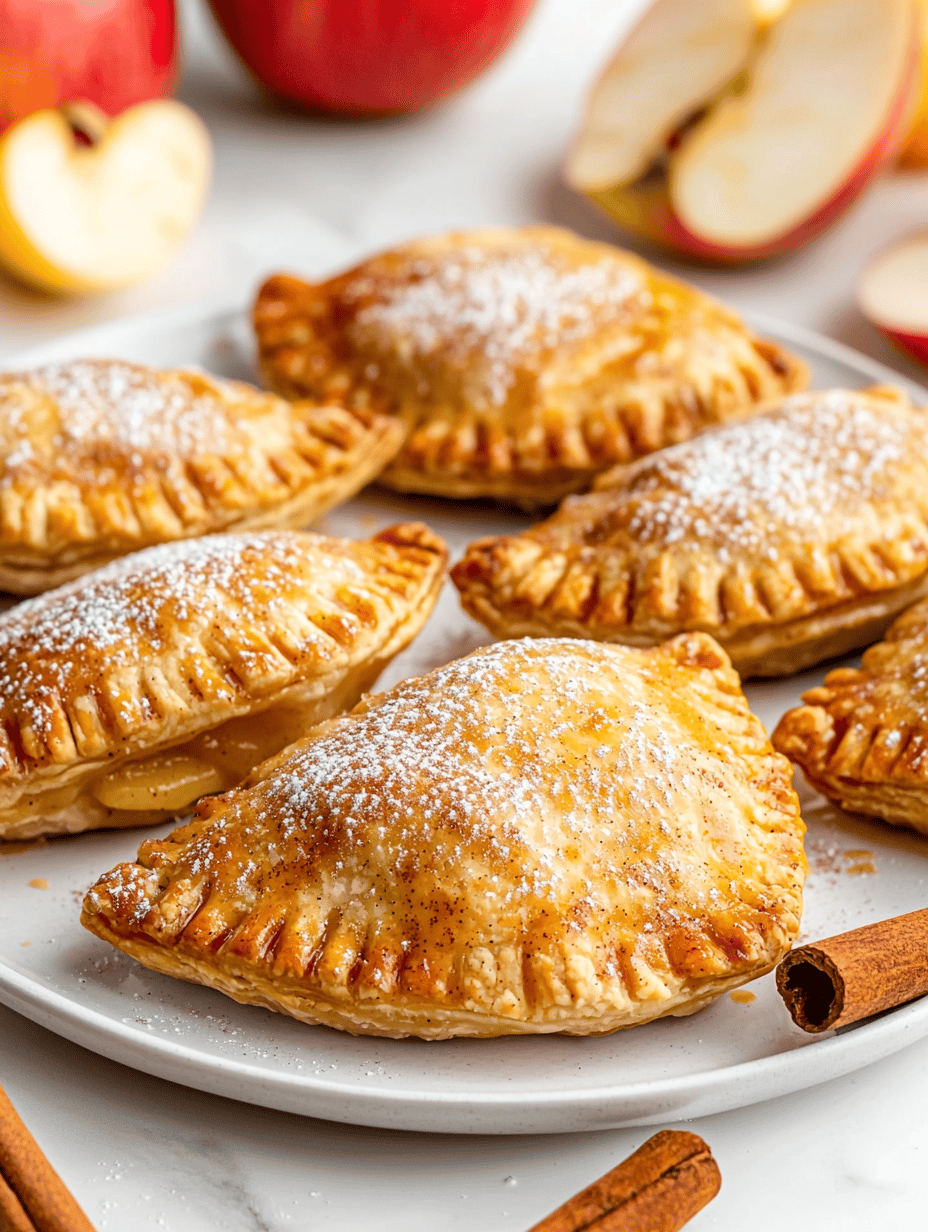
    Caramel Apple Empanadas — The Surprise Snack You Didn’t Know You Needed

    I stumbled on this idea while cleaning out my granny’s old recipe box. Somewhere buried between faded pages was a battered handwritten note for an apple empanada. Only, I added a twist: a gooey caramel drizzle. Turns out, the caramel makes the crispy crust crackle in that satisfying way, the apple filling bites soft and tart, and the whole thing smells like a caramel orchard.

    It’s not just a fall treat. These empanadas are perfect for sharing on a lazy Sunday or packing in a lunchbox that feels a little special. The best part? They’re surprisingly quick to pull together, especially if you keep some caramel sauce handy. I made a batch on a whim, and somehow, they disappeared before I even fussed about taking pictures.

    Why I Love This Recipe (And You Will Too)

    • They bring back childhood flavors but with a grown-up caramel twist.
    • Perfect for when you want something homemade but don’t want to spend hours in the kitchen.
    • The crispy edges and gooey interior are worth the mess I make trying to roll out dough.
    • They look fancy enough for guests but are honestly just a project you can do in pajamas.

    Honestly, I keep thinking if I make these often enough, I might not need any other dessert around. Maybe that’s just wishful thinking, but it’s a good one.

    Apple Empanadas with Caramel Drizzle

    This dessert features flaky, golden-brown pastry pockets filled with tart apple slices. The empanadas are baked until crispy and golden, then topped with a gooey caramel drizzle that adds sweetness and a touch of chewiness to contrast with the crisp crust.
    Prep Time 30 minutes
    Cook Time 20 minutes
    Total Time 50 minutes
    Servings: 8
    Course: Main Course
    Cuisine: Custom
    Calories: 250

    Ingredients
      

    • 2 cups all-purpose flour for the pastry dough
    • 1/2 cup unsalted butter cold and cubed
    • 1/4 cup ice water to bring the dough together
    • 2 large apples peeled, cored, and thinly sliced
    • 1 tbsp lemon juice to prevent apple browning
    • 1/4 cup granulated sugar for the apple filling
    • 1/2 tsp ground cinnamon adds warmth to the filling
    • 1/4 cup caramel sauce for drizzling

    Equipment

    • Mixing bowls
    • Rolling pin
    • Baking sheet
    • Pastry brush
    • Cooling rack

    Method
     

    1. Combine flour and salt in a mixing bowl. Add cold, cubed butter and use a pastry cutter or fingertips to work it into the flour until the mixture resembles coarse crumbs.
    2. Gradually pour in ice water, a tablespoon at a time, mixing gently until the dough begins to come together. Avoid overworking the dough to keep it flaky.
    3. Gather the dough into a ball, flatten into a disk, wrap in plastic wrap, and refrigerate for at least 20 minutes to relax the gluten.
    4. While the dough chills, toss sliced apples with lemon juice, sugar, and cinnamon in a bowl until evenly coated.
    5. Preheat your oven to 375°F (190°C) and line a baking sheet with parchment paper.
    6. Remove the dough from the refrigerator, roll it out on a lightly floured surface to about 1/8 inch thickness. Cut into 4-5 inch circles using a cookie cutter or cup.
    7. Spoon a small amount of apple filling onto the center of each dough circle, then fold over to form a half-moon shape. Press the edges together to seal, then crimp if desired.
    8. Place the filled empanadas onto the prepared baking sheet, leaving space between each. Optional: brush the tops with a little beaten egg for shine.
    9. Bake for 20 minutes, or until the empanadas are golden brown and crispy around the edges. Let cool slightly once out of the oven.
    10. Drizzle the warm caramel sauce generously over the empanadas. The caramel will soften the crust slightly and add a sweet, gooey topping.
    11. Serve the apple empanadas slightly warm or at room temperature, enjoying the crisp pastry contrasting with the tender filling and sweet caramel topping.

    Sometimes, dessert should just surprise you — in the best way. These caramel apple empanadas might be simple, but they’re a little rebellious too. Who knew caramel and apple could be packed into such a flaky pocket? Maybe I’ll just bake another batch, see if I can get the caramel to drip just right this time. Because some recipes are worth fighting for, especially ones that turn out this good in about half an hour.

  • Cookies & Cream Cheesecake: The Unexpected Comfort of Crunchy Bits in Every Bite

    Cookies & Cream Cheesecake: The Unexpected Comfort of Crunchy Bits in Every Bite

    I never thought I’d be obsessing over the sound of a spoon cracking through a creamy layer. But this cheesecake is different. The crackle of crushed cookies blending into the smooth cream—there’s something oddly satisfying about that contrast. It’s like a tiny, crunchy rebellion in every forkful.

    Right now, it’s the kind of treat that feels practically essential. When everyone’s stuck inside, craving nostalgia and a little chaos in their kitchen, this dessert sneaks in all those chocolatey, cookie-dusted memories. It’s loud in flavor but easy enough to pull together without a fuss.

    Making this feels like holding a secret… and then sharing it turns into a kind of victory. What matters most right now is that this cheesecake isn’t just a dessert. It’s proof that small surprises—like extra crunch—can make the ordinary feel special.

    Why I Love This Recipe (And You Will Too)

    • It’s a guaranteed crowd-pleaser, even with the chaos of my kitchen.
    • Enjoying the crunchy cookie bits mid-bite is pure accidental joy.
    • It’s comforting but doesn’t make me feel like I’ve overindulged.
    • Perfect for when I want a little nostalgia but also something totally new.

    Crunchy Cookie Crumble Cheesecake

    This cheesecake features a smooth, creamy filling combined with crushed cookie layers that add a satisfying crunch. The crust is made from crushed cookies mixed with butter, and the filling is a velvety cream cheese mixture that is poured over the crust and topped with cookie crumbs. The final dessert has a firm yet silky texture, with a visually appealing contrast between the creamy filling and crunchy topping.
    Prep Time 30 minutes
    Cook Time 15 minutes
    Total Time 45 minutes
    Servings: 8
    Course: Main Course
    Cuisine: Western
    Calories: 450

    Ingredients
      

    • 200 g digestive biscuits or graham crackers for crust
    • 100 g unsalted butter melted
    • 600 g cream cheese room temperature
    • 150 g granulated sugar
    • 2 large eggs at room temperature
    • 1 tsp vanilla extract
    • 100 g cookie crumbs from crushed cookies for topping

    Equipment

    • 9-inch Springform Pan
    • Mixing bowls
    • Electric mixer or whisk
    • Measuring cups and spoons
    • Food Processor or Plastic Bag and Rolling Pin
    • Spatula

    Method
     

    1. Crush the cookies or biscuits into fine crumbs using a food processor or by sealing them in a plastic bag and rolling over with a rolling pin.
    2. Mix the crushed cookies with melted butter until evenly coated and slightly clumpy, then press this mixture firmly into the base of a 9-inch springform pan to form an even crust.
    3. Whisk the cream cheese in a large bowl until smooth and creamy, scraping down the sides as needed.
    4. Add the sugar to the cream cheese and beat until combined and fluffy.
    5. Beat in the eggs one at a time, mixing well after each addition, then stir in the vanilla extract until the mixture is smooth and creamy.
    6. Pour the cream cheese filling over the prepared crust, smoothing the top with a spatula.
    7. Sprinkle the cookie crumbs evenly over the surface of the filling for a crunchy topping.
    8. Bake in a preheated oven at 160°C (320°F) for about 15 minutes, or until just set but still slightly wobbly in the center. Turn off the oven and let the cheesecake cool inside for 30 minutes to prevent cracking.
    9. Remove the cheesecake from the oven and cool completely at room temperature, then refrigerate for at least 4 hours or overnight to set firmly.
    10. Gently slide a knife around the edge of the springform pan before removing the sides to serve the cheesecake. Slice and enjoy the contrasting creamy and crunchy textures.

    Notes

    For best texture, ensure ingredients are at room temperature and chill thoroughly before serving.

    It’s honestly the kind of dessert I forget about, then remember and get excited to make again. Because somehow, just cookies and cream can hold this much unexpected magic. And right now? I think that’s exactly what I need.

  • Angel Food Cake: An Unexpected Symphony of Air and Memory

    Angel Food Cake: An Unexpected Symphony of Air and Memory

    Ever notice how angel food cake smells like fresh pillow fluff meets the faintest hint of toasted marshmallow? It’s not just about the texture, but that delicate whiff of sugar and vanilla that floats up your nose as you bake it. It’s weird because this cake feels more like a secret kept in the pantry than a dessert.

    I started making it on a whim, during that slow stretch between seasons, when you crave something light but also somehow nostalgic. It’s a cake with no fat—just egg whites, sugar, and a pinch of cream of tartar. But don’t let that fool you. It’s fragile, yes, but sturdy enough to remind you that simplicity can be wild.

    This one’s for when you’re tired of heavy stuff and want a clean, airy lift—something to serve with berries or just by itself on a hurried weeknight. It’s not fancy for fancy’s sake. It’s just right when you’re craving that little moment of sweet quiet before the chaos of the day comes back.

    Why I Love This Recipe (And You Will Too)

    • I’ve sneaked it into weekend brunches, and it always feels special but easy to pull off.
    • Something about whisking egg whites makes me feel like I’m crafting a tiny miracle.
    • It’s the only cake I make where I can’t resist snapping a photo before it’s even cool.
    • Having a slice makes me think of childhood summers. Big bowls of fruit, late nights, no worries.
    • And let’s be honest, when was the last time dessert was this light and still totally satisfying?

    Sometimes, I catch myself just cracking the leftover eggs in the morning and thinking maybe I should keep the tradition going more often.

    Angel Food Cake

    Angel food cake is an airy, cloud-like dessert made primarily from beaten egg whites, sugar, and a touch of vanilla or almond extract. It has a delicate, sponge-like texture with a light golden crust and a soft, tender crumb that is almost melt-in-your-mouth. The baking process involves whipping egg whites to stiff peaks and gently folding in the dry ingredients before baking in a tube pan to achieve height and lightness.
    Prep Time 15 minutes
    Cook Time 35 minutes
    Total Time 50 minutes
    Servings: 8
    Course: Main Course
    Cuisine: American
    Calories: 170

    Ingredients
      

    • 1 cup granulated sugar divided
    • 1 1/2 cups egg whites from about 10 large eggs
    • 1/2 teaspoon cream of tartar
    • 1 teaspoon vanilla extract

    Equipment

    • Tube pan or angel food cake pan
    • Mixing bowls
    • Electric mixer or whisk
    • Sifter

    Method
     

    1. Sift together half of the sugar with the flour or cornstarch (if using), and set aside.
    2. In a clean, dry mixing bowl, whip the egg whites using an electric mixer on medium speed until foamy.
    3. Add the cream of tartar and continue whisking until soft peaks form, which means the whites hold a slight bend when you lift the beaters.
    4. Gradually add the remaining sugar, a few tablespoons at a time, while whisking at high speed. Continue until stiff, glossy peaks form that stand up straight when you lift the beaters.
    5. Gently fold in the vanilla extract using a spatula.
    6. Carefully sift in the dry mixture over the whipped egg whites, a little at a time, folding gently after each addition. Be careful not to deflate the fluffy mixture.
    7. Pour the batter into an ungreased tube pan. Smooth the top gently with a spatula or the back of a spoon.
    8. Bake in a preheated oven at 350°F (175°C) for about 35 minutes, or until the cake is golden brown and a toothpick inserted into the center comes out clean.
    9. Remove the cake from the oven and immediately invert the pan onto a bottle or cooling rack to cool completely upside down, which helps keep it airy and prevents collapsing.
    10. Once cooled completely, run a thin knife around the edges of the pan to loosen the cake, then carefully lift it out.
    11. Slice gently with a serrated knife and serve alone or with fresh berries. The cake should be light, fluffy, and tender with a slightly crisp crust.

    Making angel food cake feels like a tiny rebellion against heaviness. A reminder that sometimes the simplest ingredients make the most unexpected happiness. I guess it’s the quiet kind of magic—no fuss, just air and sweetness.

    Plus, it’s funny how a cake with no butter or oil can be so… generous. That’s probably what sticks with me the most. Anyway, if you’re into fluffy, fragile, totally unpretentious desserts, this is probably your new go-to.

  • Baklava That Unlocks Hidden Memories in Every Bite

    Baklava That Unlocks Hidden Memories in Every Bite

    Making baklava always feels like digging into a secret drawer of my grandma’s kitchen, a handful of almonds mixed with whispers of cardamom and honey, sticky and fragrant as a summer breeze. But lately, I’ve been thinking: it’s more than just a layered pastry. It’s a tiny, edible time capsule, somehow revive a moment I didn’t even realize I missed.

    I’m not even a pastry person—more of a thrown-together snack kind of cook. But baklava? It’s like a tiny act of rebellion. Crumbling phyllo, chopping nuts, brushing on floral syrup—it’s chaos I look forward to. It’s about creating something sweet that’s worth all the patience. Because sometimes a sticky, nut-studded piece of the past is what you actually need, right now.

    Why I Love This Recipe (And You Will Too)

    • It’s unexpectedly simple—just takes a little patience and a lot of butter.
    • Hearing that crackling sound when you bake it? Like a secret handshake from the oven.
    • The scent of warm honey and roasted nuts fills the house, feels like you’re whispering to yourself.
    • It’s a little messy, a little chaotic, but totally worth the effort.
    • Perfect for when you want something familiar but with a tiny twist of adventure.

    Maybe I’ll mess it up next time, but right now, staging a comeback of my childhood flashbacks with some crispy, syrupy goodness sounds like a plan.

    Baklava

    Baklava is a layered pastry made with thin phyllo dough, chopped nuts, and a sweet honey syrup. It has a flaky, crisp texture with a sticky, fragrant exterior from the syrup, and a rich, nutty interior. The dish involves layering, baking, and pouring syrup to create a balanced blend of crunch and sweetness.
    Prep Time 30 minutes
    Cook Time 40 minutes
    Total Time 1 minute
    Servings: 12
    Course: Main Course
    Cuisine: Middle Eastern
    Calories: 250

    Ingredients
      

    • 1 pound phyllo dough thawed
    • 2 cups mixed nuts preferably walnuts, almonds, or pistachios, chopped
    • 1 teaspoon ground cardamom optional
    • 1 cup unsalted butter melted
    • 1 cup honey for the syrup
    • 0.5 cup water for syrup
    • 0.5 cup granulated sugar for syrup

    Equipment

    • 7×11 inch baking dish
    • Pastry brush
    • Sharp Knife
    • Saucepan
    • Mixing bowl

    Method
     

    1. Preheat your oven to 350°F (175°C). Place your baking dish nearby and set out all ingredients. Start by chopping the nuts finely and mixing them with ground cardamom in a bowl to evenly distribute the spice.
    2. Melt the unsalted butter gently in a saucepan until it’s clear and fragrant, then set aside to cool slightly. Brush a thin layer of melted butter over the bottom of the baking dish to prevent sticking and add flavor.
    3. Lay the first sheet of phyllo dough in the dish, gently pressing it into the corners. Brush this layer lightly with more melted butter using your pastry brush. Repeat this process, layering and buttering each sheet, until you’ve stacked about 8 sheets which will form the base.
    4. Sprinkle a handful of the chopped nut mixture evenly over the layered dough, creating a generous filling layer that spreads easily and looks textured.
    5. Continue layering more sheets of phyllo, brushing each with butter, and adding nuts periodically. Repeat until all ingredients are used, finishing with a top layer of about 8 sheets. Be sure to brush the top layer thoroughly with butter for a crisp, golden crust.
    6. Using a sharp knife, carefully cut the assembled baklava into diamonds or rectangles. This helps it bake evenly and makes serving easier later.
    7. Bake in the preheated oven for about 40 minutes, or until the top is deeply golden and crisp, and the kitchen smells sweet and nutty.
    8. While it bakes, prepare the syrup by combining honey, water, and sugar in a saucepan. Bring to a gentle boil, stirring until the sugar dissolves completely. Let it simmer for 5 minutes until slightly thickened, then remove from heat.
    9. Once the baklava is out of the oven, pour the warm honey syrup evenly over the hot pastry, ensuring all pieces are coated. The syrup will seep into the layers, making the baklava sticky and luscious.
    10. Allow the baklava to cool completely at room temperature—this helps the syrup set and the layers to firm up, resulting in a crisp, glossy finish.
    11. Serve the baklava at room temperature, ideally with a cup of tea or coffee, and enjoy the layered crunch and rich, fragrant sweetness.

    Notes

    Store leftovers in an airtight container at room temperature for up to a week. For a softer texture, reheat slightly before serving.

    So yeah, baklava. Not just a treat but a sticky, nutty reminder that sometimes, the best moments are those unplanned bites. The ones that make you pause and wonder what’s hidden in the layers beneath. That’s what keeps me coming back—finding new details in something I thought I already knew.

    Plus, it’s good to remember that even a little chaos in the kitchen can turn into something unexpectedly meaningful. Or at least, delicious. And that’s pretty much always enough for me.

  • The Mug Cookie That Feels Like a Secret Held in Your Hand

    The Mug Cookie That Feels Like a Secret Held in Your Hand

    Sometimes I think about how a tiny slice of forbidden warmth can quiet all the noise. This mug cookie isn’t about fancy ingredients or perfect shapes. It’s about the slow, almost rebellious act of microwaving chocolate chips and butter into a gooey cloud, right in your hand.

    I stumbled on this idea late one night when I desperately needed a fix that wouldn’t make me commit to a full batch. The smell of melting chocolate and toasted marshmallow sweetness that floods your nose—the way it somehow amplifies the cozy chaos of a late-night craving—feels like a small, quiet victory. It’s oddly satisfying to make something this indulgent with so little fuss.

    Right now, in the middle of a whirlwind of deadlines and cold nights, this feels like a tiny secret. A little moment of joy that’s just for me. I keep thinking about how this might hack into the chaos—brightening the smallest part of a long day.

    Why I Love This Recipe (And You Will Too)

    • It’s perfect for days when I just want a sweet fix without baking a full batch.
    • The smell—that rich, melty chocolate with a hint of vanilla—follows you around the house.
    • I love how quick it is. 5 minutes max, and suddenly my craving is satisfied.
    • There’s something oddly satisfying about shaping it in a mug and watching it transform.
    • It’s all about that imperfect, cozy indulgence that feels a little rebellious but totally comforting.

    It’s funny how something so simple can feel like a secret treasure—like a tiny, decadent rebellion in a mug. Maybe tonight I’ll do it again, just because.

    Microwave Mug Cookie

    This mug cookie is a single-serving treat made by melting chocolate chips and butter together in the microwave, resulting in a gooey, soft cookie-like texture. The ingredients are combined directly in a mug and heated briefly, creating a warm, indulgent dessert with a rich, melty center. It’s a quick and cozy way to satisfy a sweet craving without baking a batch.
    Prep Time 2 minutes
    Cook Time 3 minutes
    Total Time 5 minutes
    Servings: 1
    Course: Main Course
    Cuisine: Comfort Food
    Calories: 250

    Ingredients
      

    • 2 tablespoons butter roughly chopped
    • 3 tablespoons chocolate chips semi-sweet or milk chocolate
    • 1 tablespoon granulated sugar
    • 1/4 teaspoon vanilla extract optional
    • 1 pinch salt
    • 1 tablespoon all-purpose flour optional for slightly firmer texture

    Equipment

    • Microwave
    • Mug

    Method
     

    1. Place the butter in a microwave-safe mug and microwave for about 20-30 seconds until melted and bubbling.
    2. Add the chocolate chips to the melted butter and microwave for an additional 15-20 seconds, then stir until smooth and glossy.
    3. Stir in the sugar, vanilla extract, and salt until well combined, creating a shiny, thick mixture.
    4. If using flour, fold it into the mixture until just incorporated for a slightly denser cookie.
    5. Microwave the mug on high for 1.5 to 2 minutes, watching for the cookie to become soft and slightly risen, with bubbling edges.
    6. Carefully remove the mug from the microwave and let it sit for about 1 minute to thicken slightly and cool just enough to enjoy.
    7. Insert a spoon and scoop out a warm, gooey, chocolatey mug cookie, watching the rich center ooze out.

    Notes

    You can add a scoop of ice cream or a drizzle of caramel for extra indulgence. Adjust microwave time for softer or firmer cookies based on preference.

    Plus, who needs a plate when you have a mug? Really. It’s almost like stealing a treat from the kitchen shelf, but you know, without the guilt. I might keep this one just for me—nobody needs to know how often I indulge in these tiny, sweet escapes.

  • The Unexpected Power of Fudge: Why a Dense Chocolate Cake Changes Everything

    The Unexpected Power of Fudge: Why a Dense Chocolate Cake Changes Everything

    One thing I didn’t see coming—this cake is practically a secret weapon for when life feels off-kilter. It’s not just about the chocolate, but the texture. Dense, almost fudge-like, with tiny pockets of melted chocolate that surprise you in every bite. I found myself craving it at odd hours, especially when the house felt too quiet or too noisy.

    This isn’t a fluff pieces kind of dessert. It’s about leaning into the indulgence, especially now. No fancy techniques required—just raw ingredients and a little patience. Sometimes, the best recipes are the ones that make you pause, then surrender. That’s what this cake does. It’s honest, straightforward, and strangely restorative.

    Why I Love This Recipe (And You Will Too)

    • It’s a total cheat code for quick comfort—rich, satisfying, and done in less than an hour.
    • The smell alone—baking chocolate and butter—smells like a secret kept between you and the oven.
    • Perfect for tossing together last minute when you need to surprise someone or yourself.
    • It fits perfectly into the chaos of everyday life—no fluff, just good, honest chocolate.
    • Honestly, I like that it’s not perfect. A little crack on top? Adds character.

    Sometimes I think the best desserts are the ones that feel a little rebellious—like breaking the rules, but on your own terms. That’s what this fudge cake does for me. I’ll probably eat a second slice while writing this. Or maybe just stare at it a little while longer.

    Chocolate Fudge Cake

    This dense chocolate fudge cake is prepared by melting butter and dark chocolate to create a smooth batter, then baking until it develops a fudgy, almost gooey texture with a cracked top. The final cake is rich, moist, and compact with tiny pockets of melted chocolate throughout, offering a decadent appearance and texture.
    Prep Time 15 minutes
    Cook Time 25 minutes
    Total Time 40 minutes
    Servings: 8
    Course: Main Course
    Cuisine: Dessert
    Calories: 380

    Ingredients
      

    • 200 g dark chocolate chopped into small pieces
    • 115 g unsalted butter cut into chunks
    • 1 cup granulated sugar
    • 3 large eggs lightly beaten
    • 1 tsp vanilla extract
    • 0.5 cup all-purpose flour
    • 0.25 tsp salt

    Equipment

    • Mixing bowl
    • Whisk
    • Rubber spatula
    • 8-inch baking pan
    • Cooling rack

    Method
     

    1. Preheat your oven to 180°C (350°F) and grease your baking pan to prevent sticking.
    2. Combine the chopped dark chocolate and butter in a heatproof bowl, then melt them together over a double boiler or in short bursts in the microwave, stirring until smooth and glossy. Let it cool slightly.
    3. Pour the melted chocolate mixture into a large mixing bowl, then add the sugar and whisk until well combined and shiny.
    4. Add the eggs one at a time, whisking vigorously after each addition until the batter is glossy and slightly thickened.
    5. Stir in the vanilla extract, ensuring the mixture is smooth and uniform.
    6. Sift in the flour and salt, then gently fold them into the batter using a spatula, taking care not to overmix. The batter should be thick and fudgy.
    7. Pour the batter into the prepared baking pan, smoothing the top with a spatula. It will look dense and shiny.
    8. Bake in the preheated oven for about 25 minutes, or until the top is cracked and the center is just set but still fudgy when tested with a toothpick.
    9. Remove from the oven and allow the cake to cool in the pan for 10 minutes, then transfer to a wire rack and cool completely before slicing.
    10. Slice the cake with a sharp knife, revealing the dense, moist crumb with tiny melted pockets of chocolate inside.
    11. Serve the cake as is or with a dusting of powdered sugar for a simple, indulgent dessert.

    Maybe that’s the whole point—hope you don’t mind the mess. Or the fact that this cake is a little more bumbling than polished. But if you’re craving the kind of chocolate that really sticks to your ribs, this one’s worth making. Sometimes, simple is better. Sometimes, it’s exactly what you need.

  • Turtle Chocolate Chip Cookies: Nostalgia in Every Bite

    Turtle Chocolate Chip Cookies: Nostalgia in Every Bite

    Ever thought about starting a cookie recipe with a surprising ingredient? I grabbed a handful of pecans and caramel candies and kind of winged it. Turns out, they turn into little pockets of salty-sweet creaminess, almost like a tiny guilty secret in each chew.

    The smell of toasted pecans melting into buttery dough, mixed with the faint scent of caramel that gets a tiny char on the edges—pure chaos of scents I didn’t plan but now can’t live without. It’s not just a cookie, it’s a messy remembrance of summer fairs and old candy jars. Right now, I need something that feels indulgent but doesn’t require fancy ingredients or complicated steps.

    This one’s pure comfort, no fluff. Like, baking in your pajamas while the rain drums on the window kind of comfort. Honestly, I probably shouldn’t have discovered this, but hey, some recipes are better understated. Maybe I’ll call it my guilty pleasure for when life feels a little too normal, or I just need a break.

    Why I Love This Recipe (And You Will Too)

    • It’s ridiculously easy—seriously, no fancy techniques, just throwing stuff together.
    • That caramel-peanut combo? It sneaks up on you but totally wins you over.
    • Perfect for lazy afternoons when you crave something rich but need to keep it simple.
    • It’s become my unexpected favorite, makes over the usual chocolate chip cookies.
    • Most importantly, it’s a little bit of chaos in your kitchen that ends with something truly special.

    Some recipes you stumble into, and they just stay—like a weird little treasure you didn’t know you needed.

    Caramel Pecan Cookies

    These cookies feature a soft, chewy texture with pockets of creamy caramel and crunchy toasted pecans woven throughout. The dough is made by combining butter, sugar, and vanilla, then folded with caramel candies and chopped pecans before baking until golden brown. The resulting cookies are rich, slightly gooey on the inside, and have a satisfying crunch from the pecans.
    Prep Time 15 minutes
    Cook Time 12 minutes
    Total Time 27 minutes
    Servings: 12
    Course: Main Course
    Cuisine: American
    Calories: 250

    Ingredients
      

    • 1 cup unsalted butter softened to room temperature
    • 1 cup granulated sugar
    • 1 large egg
    • 2 teaspoons vanilla extract
    • 2 ½ cups all-purpose flour
    • ½ teaspoon baking soda
    • ½ teaspoon salt
    • 8 oz caramel candies cut into small pieces
    • 1 cup chopped pecans toasted lightly for extra flavor

    Equipment

    • Mixing bowl
    • Baking sheet
    • Parchment paper
    • Slotted spoon
    • Cooling rack

    Method
     

    1. Preheat your oven to 350°F (175°C) and line a baking sheet with parchment paper.
    2. In a large mixing bowl, cream together the softened butter and granulated sugar until smooth and fluffy, about 2-3 minutes. You should see a pale, creamy mixture and hear a gentle beating sound.
    3. Beat in the egg and vanilla extract, mixing just until combined. The mixture may look a little grainy but should be well incorporated.
    4. In a separate bowl, whisk together the flour, baking soda, and salt. Gradually add the dry ingredients into the wet mixture, folding gently until just combined. The dough will start to come together and feel soft but manageable.
    5. Stir in the chopped caramel candies and toasted pecans, folding until evenly distributed. Expect the candies to slightly melt into the dough, creating sweet pockets, with pecans adding crunch.
    6. Use a tablespoon or cookie scoop to drop dollops of dough onto the prepared baking sheet, spacing them about 2 inches apart to allow for spreading.
    7. Bake in the preheated oven for 10-12 minutes, or until the edges turn golden brown and the centers look set but still slightly soft. You will smell a buttery, caramel aroma as they bake.
    8. Remove the baking sheet from the oven and let the cookies cool on the sheet for about 5 minutes, allowing them to firm up a bit while still warm.
    9. Transfer the cookies to a wire rack to cool completely. The cookies will be chewy and slightly gooey inside with a crisp exterior, showcasing the caramel pockets and nut crunch.
    10. Enjoy your caramel pecan cookies as a sweet treat — perfect with a glass of milk or coffee.

    Notes

    For extra flavor, toast the pecans lightly before mixing. Store the cookies in an airtight container for up to a week for maximum freshness.

    And honestly, I’m already thinking about what to throw into the next batch. Maybe a dash of sea salt or a handful of pretzels. It’s the kind of mess that makes you happy, or at least forget you’re baking.

    Maybe I should stop here before I start adding marshmallows or bacon. But that’s the fun of it, right? Creating chaos, tasting the unexpected, and realizing the best things usually come from a little reckless improvisation.

  • Cappuccino Fudge Cheesecake: An Unexpected Coffee Diary in Dessert Form

    Cappuccino Fudge Cheesecake: An Unexpected Coffee Diary in Dessert Form

    I didn’t plan for this to happen. I was just trying to use up that lonely can of sweetened condensed milk, and somehow I ended up making a cheesecake that smells like a morning espresso shot combined with warm chocolate fudge. It’s like you’re baking at dawn and the smell sneaks into your dreams.

    This isn’t for the faint of heart or those who prefer their desserts predictable. The coffee notes are intense—coffee grounds ground fresh, not instant—and the fudge swirl gets chewy and glossy. It’s a reminder that desserts can be wildly personal, layered with nostalgia and a little chaos. Right now, I’m craving comfort that hits all the senses, and this fits the bill.

    Sometimes, I think baked goods don’t get enough credit for their storytelling. A little bitter, a little sweet, and with a hint of bitterness that makes the sugar sparkle. Plus, it’s one of those recipes you can make in advance and watch your friends get genuinely excited about cake again. No grand gestures needed—just a honest spoonful of what I needed this week.

    Why I Love This Recipe (And You Will Too)

    • It’s a quiet way to start the day—coffee in dessert form. Who wouldn’t want that?
    • The fudge swirl is so rich you forget about regular cheesecake toppings.
    • It feels fancy but is way easier than you think.
    • Perfect for when life gets busy but you still need a little ritual.
    • It’s a little indulgent, a little punchy—kind of like a good conversation you didn’t see coming.

    All I know is, I’ll probably be chasing that first sip of coffee with another forkful of this.

    Espresso Chocolate Fudge Cheesecake

    This cheesecake combines a creamy, smooth texture with bold coffee and rich fudge swirls. It is baked until set and features a graham cracker crust, with the fudge adding a glossy, chewy contrast to the dense, velvety interior. The final appearance is a decadent, marbled dessert with a glossy top and a thick, inviting cut.
    Prep Time 30 minutes
    Cook Time 1 hour
    Total Time 1 hour 30 minutes
    Servings: 8
    Course: Main Course
    Cuisine: fusion
    Calories: 650

    Ingredients
      

    • 1 1/2 cups graham cracker crumbs for crust
    • 1/4 cup granulated sugar for crust
    • 1/2 cup unsalted butter melted, for crust
    • 16 oz cream cheese softened
    • 1 cup sweetened condensed milk
    • 3 shots strong brewed espresso cooled
    • 3 tbsp all-purpose flour
    • 1/2 cup dark chocolate chopped, for fudge
    • 2 tbsp unsalted butter for fudge
    • 2 tbsp coffee grounds freshly ground

    Equipment

    • Springform pan
    • Mixing bowls
    • Electric mixer
    • Rubber spatula
    • Saucepan
    • Measuring cups and spoons
    • Baking sheet

    Method
     

    1. Preheat your oven to 325°F (160°C). Combine graham cracker crumbs and sugar in a bowl, then mix in melted butter until the mixture resembles wet sand. Press this mixture firmly into the bottom of a springform pan to form the crust, then bake for 10 minutes to set it. Remove and let cool slightly.
    2. In a large mixing bowl, beat the softened cream cheese with an electric mixer until smooth and fluffy, about 2-3 minutes. Add the sweetened condensed milk gradually, mixing on low speed, until combined and creamy.
    3. Pour in the cooled espresso and continue mixing until fully incorporated. Sprinkle the flour over the mixture and mix just until blended, which helps stabilize the cheesecake filling.
    4. Transfer the batter onto the prepared crust and smooth the top with a spatula. Place the cheesecake in the oven and bake for about 50-60 minutes, or until the edges are set but the center still slightly jiggles.
    5. While the cheesecake bakes, prepare the fudge swirl. In a small saucepan, melt the dark chocolate and butter over low heat, stirring until smooth and glossy. Remove from heat and stir in the freshly ground coffee for an intensified flavor.
    6. Once the cheesecake is baked, remove it from the oven and let it cool for about 30 minutes. Then, gently dollop spoonfuls of the fudge mixture over the surface and use a skewer or toothpick to swirl it into the cheesecake, creating a beautiful marbled effect.
    7. Refrigerate the cheesecake for at least 4 hours or preferably overnight to allow it to set completely and the flavors to meld beautifully.
    8. Before serving, run a thin knife along the edges to loosen the cheesecake from the pan. Carefully remove the sides of the springform pan. Slice with a sharp knife and enjoy the rich, layered flavors with a glossy fudge swirl on top.

    Notes

    For an extra coffee kick, dust with cocoa powder or garnish with whipped cream before serving.

    Some days, I think the best recipes are the ones that catch you off guard. This one definitely did that for me. It’s messy to describe, maybe too much for some, but it feels real. Like, I could obsess over the perfect swirl or just call it good, and both would be right.

    Maybe I’ll make it just for me tomorrow. Or maybe I’ll try to make it with decaf, like a rebel who still wants the smell. Either way, it’s good to know that sometimes, all a dessert needs is a little caffeine and a lot of fudge.

  • Oreo Poke Cake: The Chocolatey Horror Turned Sweet Surprise

    Oreo Poke Cake: The Chocolatey Horror Turned Sweet Surprise

    Sometimes, I think about how food can feel like an accidental science experiment. Like tossing crushed Oreos into cake batter and discovering that the gooey, creamy bits melt into pockets of chocolate nightmares. It sounds gross now that I say it out loud, but honestly, that’s what makes it fun. I made this during a frantic, sleep-deprived night, just to see what would happen.

    This cake isn’t about perfect layers or Insta-worthy slices. It’s about that moment when you poke and prod, and the cake just soaks up the sweet milk and Oreo chunks, turning into something almost rebellious. It’s trending because it’s absurdly indulgent, oddly satisfying, and perfect for when you don’t want your dessert to be pretty—just memorable.

    Why I Love This Recipe (And You Will Too)

    • It’s a cheat that feels like a victory. No fancy technique, just Oreo chaos.
    • It’s the kind of dessert you can throw together at 2 pm and still have something show up to impress.
    • Every bite has this intriguing crunch plus that gooey, milk-soaked vibe.
    • Perfect for those moments when sugar is the only solution.

    Honestly, I keep thinking about how this sweet mess is basically a shortcut to happy chaos. Maybe it’s not elegant, but sometimes that’s exactly what you need.

    Oreo Infused Cake

    This cake is created by folding crushed Oreos into cake batter, resulting in a moist, gooey dessert filled with chocolate chunks and milk-soaked softness. The final texture is rich and chewy with pockets of melt-in-your-mouth Oreo bits, giving it an indulgent, rebellious appearance.
    Prep Time 15 minutes
    Cook Time 35 minutes
    Total Time 50 minutes
    Servings: 8
    Course: Main Course
    Cuisine: Dessert
    Calories: 420

    Ingredients
      

    • 2 cups all-purpose flour
    • 1 cup granulated sugar
    • 1/2 cup unsweetened cocoa powder
    • 1 teaspoon baking powder
    • 1/2 teaspoon salt
    • 1 cup vegetable oil
    • 3 large eggs
    • 1 cup buttermilk
    • 1 tablespoon vanilla extract
    • 20 OREO cookies Oreos, crushed about 2 cups worth, crushed into chunks

    Equipment

    • Mixing bowls
    • Stand mixer or hand whisk

    Method
     

    1. Preheat your oven to 350°F (175°C). Grease a 9-inch round cake pan and set aside.
    2. In a large mixing bowl, sift together the flour, cocoa powder, baking powder, salt, and sugar to ensure everything is evenly combined.
    3. Add the vegetable oil, eggs, buttermilk, and vanilla extract to the dry ingredients. Mix with a stand mixer or whisk until the batter is smooth and slightly thickened, about 2-3 minutes. The batter should be homogeneous with no lumps.
    4. Gently fold in the crushed Oreos, ensuring they are evenly distributed throughout the batter. The mixture should be chunky with bits of Oreo visible.
    5. Pour the batter into the prepared cake pan, spreading it out evenly with a spatula. The batter will be thick and textured due to the Oreos.
    6. Bake in the preheated oven for 35-40 minutes, or until a toothpick inserted into the center comes out with moist crumbs. The top should be slightly cracked and aromatic.
    7. Remove the cake from the oven and let it cool in the pan for 10 minutes. Then, transfer it to a wire rack to cool completely. The cake should feel dense but moist to the touch.
    8. Once cooled, cut into slices to reveal the rich, chocolatey interior with Oreo chunks peeking through. Serve as is or with a drizzle of chocolate sauce for extra indulgence.

    Notes

    For a more chocolatey flavor, add a handful of chocolate chips to the batter before baking.

    And maybe next time I’ll add peanut butter or double the Oreos. Who knows. It’s weird how the simplest things turn into the best stories on a plate. Or at least that’s what I tell myself before I finish the last crumb.