Category: Desserts

  • Love Letter Butter Cookies: A Secret Handwritten in Dough

    Love Letter Butter Cookies: A Secret Handwritten in Dough

    Ever think about how certain recipes sneak into your day without fanfare? These Love Letter Cookies are that quiet note passing through the cracks of a busy life. The smell of melted butter, a whisper of almond extract, and those tiny indents filled with jam—like tiny secrets sealed with love. I’ve been making them since I was a kid, writing letters to myself, to family, maybe even to future me. Right now, they aren’t just cookies—they’re a gentle reminder that sometimes the most meaningful things are the smallest, simplest notes you leave behind. No fancy ingredients, no complicated steps. Just a moment frozen in flour and butter. It’s funny how something so petite can carry such a rush of nostalgia. Guess I just needed a sweet way to hold onto that…

    Love Letter Cookies

    Love Letter Cookies are delicate, buttery cookies with a thin, crisp texture. They are traditionally shaped into rectangular forms with small indentations filled with jam, creating a visually appealing and crisp treat that melts in the mouth. The recipe involves rolling out dough, shaping, and filling the indentations before baking until golden.
    Prep Time 15 minutes
    Cook Time 10 minutes
    Total Time 25 minutes
    Servings: 24
    Course: Main Course
    Cuisine: French
    Calories: 150

    Ingredients
      

    • 1 cup unsalted butter softened
    • 1 cup granulated sugar
    • 1 large egg
    • 1 teaspoon almond extract
    • 2 ½ cups all-purpose flour
    • ½ teaspoon salt
    • ½ cup jam preferably fruit-flavored

    Equipment

    • Rolling pin
    • Baking sheet

    Method
     

    1. Cream the softened butter and granulated sugar in a mixing bowl using a hand or stand mixer until the mixture is light and fluffy, about 2-3 minutes, and visibly increased in volume.
    2. Add the egg and almond extract to the creamed mixture, and beat until fully combined, about 1 minute. The mixture should be smooth with a glossy appearance.
    3. Gradually add the flour and salt to the wet ingredients, mixing on low speed until the dough begins to come together. Then, knead briefly by hand if needed until a cohesive dough forms.
    4. Divide the dough into two equal portions, wrap each in plastic wrap, and chill in the refrigerator for at least 1 hour to firm up.
    5. Preheat the oven to 350°F (175°C). Remove one dough portion from the refrigerator and roll it out on a lightly floured surface to about 1/8-inch thickness. Cut into rectangular shapes or use a cookie cutter as desired.
    6. Use a small tool or the back of a piping tip to make tiny indentations in the center of each cookie rectangle. Fill these indentations with a small amount of jam, about ½ teaspoon each, creating a filled appearance.
    7. Arrange the filled cookies on a parchment-lined baking sheet. Bake in the preheated oven for 8-10 minutes, or until the edges are lightly golden and crisp.
    8. Remove the cookies from the oven and allow them to cool on the baking sheet for 5 minutes before transferring to a wire rack to cool completely. The cookies should be crisp, thin, and slightly delicate.

    When I start eating these, I realize it’s not the cookie I crave. It’s the act of writing that makes them special. Like a little love letter you get to taste. Sometimes, just crumb-sized reminders of what matters. That’s all these are really.

  • How Coffee Saved These Chocolate Cookie Bars from Being Too Sweet

    How Coffee Saved These Chocolate Cookie Bars from Being Too Sweet

    Behind the scenes: the unexpected sleepy magic

    So I was craving something rich and chocolatey, but honestly, I was running on fumes, about to spiral into that guilty snack zone none of us talk about. I grabbed a mug of cold brew—no fancy brew, just black and bitter—because sometimes you need a little jolt, not just caffeine, but a reminder that sweetness isn’t the only thing that makes dessert pop. Turns out, the coffee’s dark roasted aroma slipped right into these cookie bars, deepening the chocolate flavor in a way that’s almost sneaky. And the best part? It’s not overt. Just a whisper of roasted beans amid gooey chocolate chips and buttery crust. Right now, space for something familiar and a little unexpected feels right. No bells, no whistles—just a quiet rescue from too much sugar.

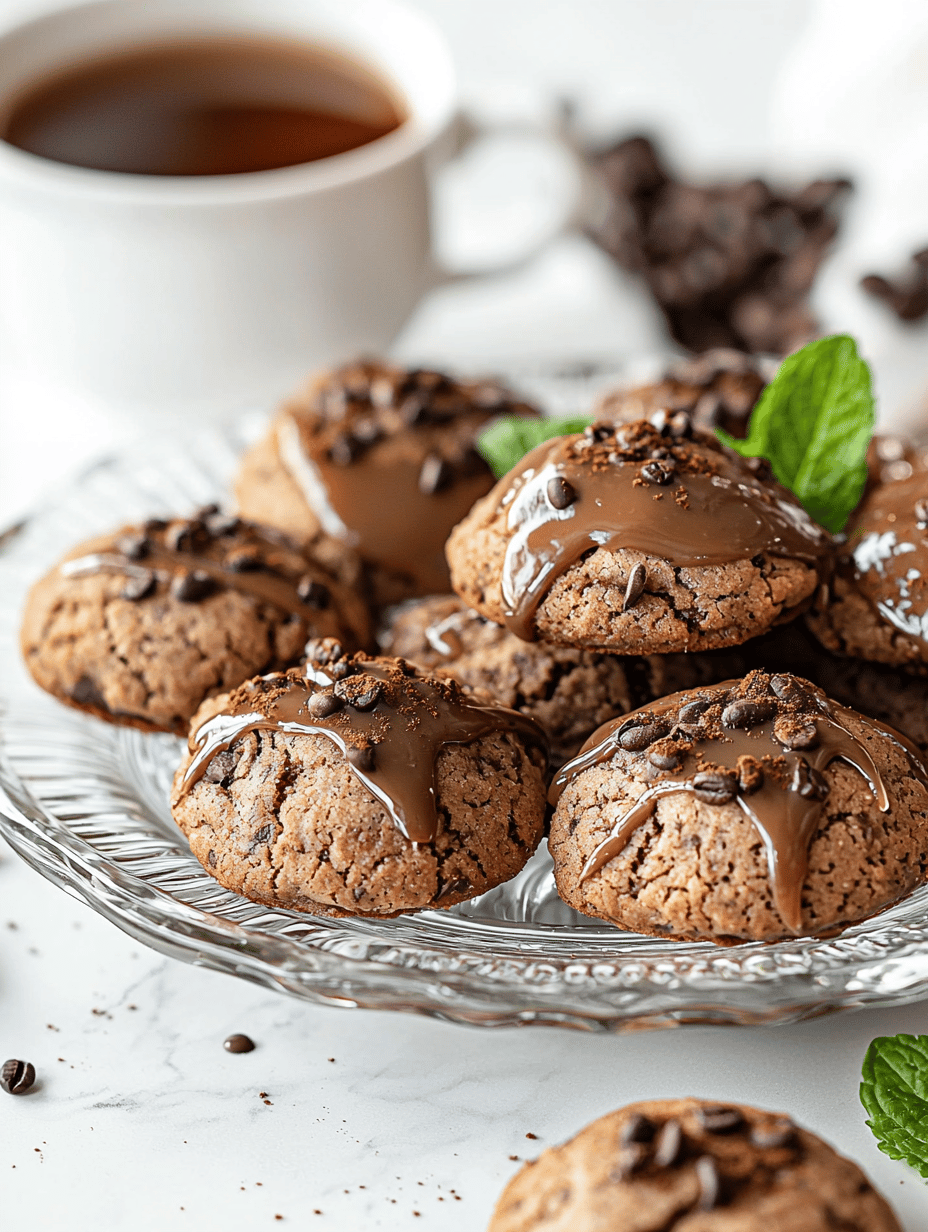
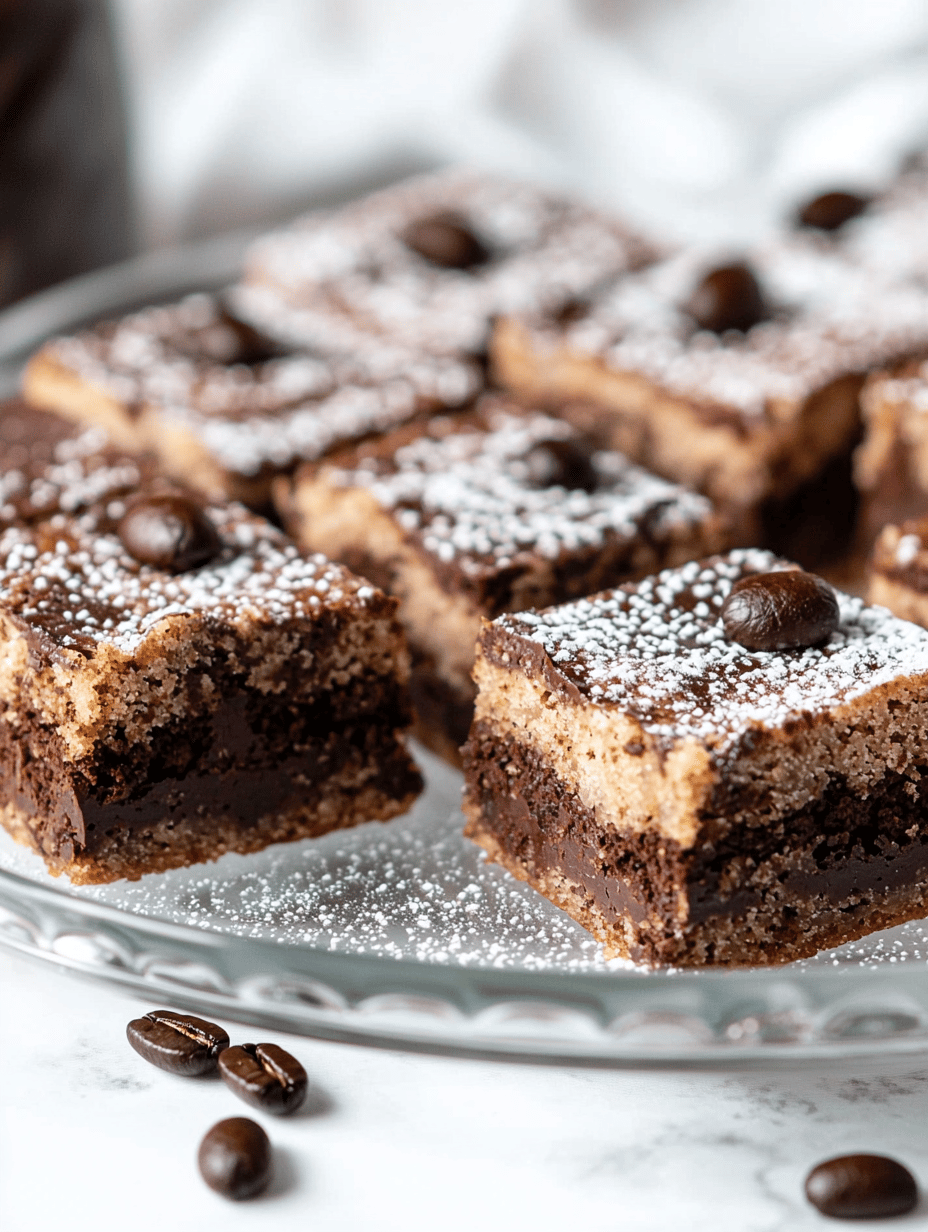
    Chocolate Coffee Cookie Bars

    This recipe creates chewy cookie bars infused with a subtle roasted coffee flavor, combined with gooey chocolate chips. The dough is mixed, pressed into a pan, and baked until lightly golden, resulting in a dense, fudgy texture with ripples of coffee aroma throughout.
    Prep Time 15 minutes
    Cook Time 25 minutes
    Total Time 40 minutes
    Servings: 12
    Course: Main Course
    Cuisine: American
    Calories: 180

    Ingredients
      

    • 1 cup all-purpose flour sifted
    • 1/2 cup granulated sugar
    • 1/2 cup unsalted butter melted
    • 2 tablespoons cold brew coffee strongly brewed
    • 1 teaspoon vanilla extract
    • 1/4 teaspoon salt
    • 1/2 cup chocolate chips

    Equipment

    • Mixing bowls
    • 9×9 inch baking pan
    • Spatula
    • Oven
    • Measuring cups and spoons
    • Chocolate chips

    Method
     

    1. Preheat the oven to 350°F (175°C). Line the baking pan with parchment paper or spray with non-stick spray.
    2. In a large mixing bowl, combine the sifted flour, sugar, and salt. Stir until evenly mixed.
    3. Add the melted butter, cold brew coffee, and vanilla extract to the dry ingredients. Mix with a spatula until the dough becomes cohesive and slightly sticky.
    4. Fold in the chocolate chips until evenly dispersed throughout the dough.
    5. Transfer the dough to the prepared baking pan. Use a spatula or your hands to press and spread the dough evenly across the pan’s surface.
    6. Bake in the preheated oven for 20-25 minutes, or until the edges are golden brown and a toothpick inserted in the center comes out with moist crumbs. Remove from oven and cool slightly before cutting into bars.

    Anyway, that’s how coffee turned these sticky, fudgy cookie bars into a little more than just dessert. Sometimes a little odd ingredient sneaks in and reminds you that baking is about experimenting—messing around, adding what you have, and seeing what sticks. Or melts. Or makes the house smell just a little darker and cozier.

  • Cranberry Pistachio Shortbread Cookies: A Unexpected Holiday Flip

    Cranberry Pistachio Shortbread Cookies: A Unexpected Holiday Flip

    Why I Started Making These Cookies

    Honestly, I didn’t set out to bake a cookie. I grabbed a bag of dried cranberries to toss into oatmeal. But then I remembered that weird box of pistachios shoved in the back of the cupboard. Nothing about this plan sounds like a traditional holiday cookie, which is exactly why I wanted to try it.

    Crushing the pistachios and scattering the tart cranberries into the buttery dough felt kind of rebellious. It’s not the usual peppermint or ginger, but somehow it screams winter. The smell alone — roasted nuts merging with tart, ruby cranberries — made me pause. That moment of sniffing the raw dough, knowing it’ll turn into something unexpectedly good. That’s what I love about baking right now. No fancy ingredients, no fuss. Just a little surprise, a pinch of unpredictability.

    Cranberry Pistachio Cookies

    These cookies are baked treats that combine chopped pistachios and dried cranberries into a buttery dough. The dough is shaped and baked until golden, resulting in cookies with a tender yet slightly chewy texture, studded with colorful fruit and nut pieces.
    Prep Time 15 minutes
    Cook Time 12 minutes
    Total Time 27 minutes
    Servings: 12
    Course: Main Course
    Cuisine: baking
    Calories: 150

    Ingredients
      

    • 1 cup unsalted butter softened
    • 1 cup granulated sugar
    • 1 large egg
    • 1 teaspoon vanilla extract
    • 2 1/2 cups all-purpose flour
    • 1/2 teaspoon baking soda
    • 1/2 teaspoon salt
    • 1 cup dried cranberries
    • 3/4 cup pistachios roughly chopped

    Equipment

    • Mixing bowls
    • Baking sheet
    • Parchment paper
    • Measuring cups and spoons
    • Knife
    • Food processor or chopping board

    Method
     

    1. Preheat the oven to 350°F (175°C). Line a baking sheet with parchment paper. Measure out the softened butter and granulated sugar into a mixing bowl and cream together with a hand or stand mixer until the mixture is light and fluffy, about 2-3 minutes. Observe the pale color and airy texture as an indicator of proper creaming.
      1 cup unsalted butter, 1 cup granulated sugar
    2. Add the egg and vanilla extract to the creamed mixture. Beat until fully incorporated, about 1 minute. The mixture should become slightly glossy and smooth.
      1 large egg, 1 teaspoon vanilla extract
    3. In a separate bowl, whisk together the flour, baking soda, and salt. Gradually add the dry ingredients to the wet mixture, mixing on low speed until just combined. The dough will start to come together and look crumbly but should hold when pressed.
      2 1/2 cups all-purpose flour, 1/2 teaspoon baking soda, 1/2 teaspoon salt
    4. Fold in the dried cranberries and chopped pistachios using a spatula or spoon until evenly distributed throughout the dough. The dough should be thick, with visible bits of fruit and nuts.
      1 cup dried cranberries, 3/4 cup pistachios
    5. Using a cookie scoop or tablespoons, portion the dough onto the prepared baking sheet, spacing them about 2 inches apart. Slightly flatten each mound with your fingers or the back of a fork for even baking.
    6. Bake in the preheated oven for 10-12 minutes, or until the edges are golden brown and the centers look set but slightly soft. You should hear a gentle sizzle and see the cookies turn a warm golden tone. Remove from oven and let cool on the sheet for 5 minutes before transferring to a wire rack to cool completely.

    Sometimes I think I forget that cookies don’t have to be perfect or pretty. They can be a little messy, a little weird, and still turn into something kind of special. Honestly, I don’t want these cookies to be for everyone. I want them to be the kind of thing you bake in a flurry of last-minute holiday chaos, then sneak a few before anyone can find them.

  • Lemon Muffins That Actually smell like a Lemon Tree in bloom

    Lemon Muffins That Actually smell like a Lemon Tree in bloom

    I’ve been thinking about how we chase after complicated recipes, fancy ingredients, top-shelf everything. But what if the secret isn’t complexity? Today, I made a batch of lemon muffins just to see if I could make something that smells like a real lemon grove—bright, bitter, the way lemon zest hits your nose the second you open the fridge. Not sweetened to kingdom come. Just pure, honest lemon, paired with a crumb that’s almost too tender to believe. I like that these muffins aren’t trying to be anything fancy. No glaze, no icing. Just lemon, butter, and a little flour. It’s the kind of thing that makes me want to sit outside with a cup of black coffee and watch the afternoon shadows stretch out. Sometimes simplicity isn’t boring—sometimes it’s just enough to make you forget about everything else for a little while.

    Lemon Muffins

    This recipe yields bright, fragrant lemon muffins with a tender crumb and a golden-brown crust. The muffins are made by mixing fresh lemon zest and juice into a simple batter, then baking until light and airy, showcasing a moist interior and a slightly crisp top.
    Prep Time 15 minutes
    Cook Time 20 minutes
    Total Time 35 minutes
    Servings: 12
    Course: Main Course
    Cuisine: Western
    Calories: 180

    Ingredients
      

    • 1 cup all-purpose flour sifted
    • 0.75 cup granulated sugar
    • 1 tablespoon baking powder
    • 0.5 teaspoon salt
    • 0.5 cup unsalted butter melted and slightly cooled
    • 2 large eggs
    • 0.3 cup fresh lemon juice
    • 1 tablespoon lemon zest from about 1 lemon

    Equipment

    • Mixing bowls
    • Measuring cups and spoons
    • Whisk
    • Muffin tin
    • Paper liners or butter for greasing

    Method
     

    1. Preheat the oven to 375°F (190°C). Line a muffin tin with paper liners or lightly grease with butter.
    2. In a large mixing bowl, combine the sifted flour, sugar, baking powder, and salt. Whisk together until evenly mixed.
      1 cup all-purpose flour, 0.75 cup granulated sugar, 1 tablespoon baking powder, 0.5 teaspoon salt
    3. In a separate bowl, whisk together the melted butter and eggs until well combined. Add the lemon juice and lemon zest, mixing again until smooth.
      0.5 cup unsalted butter, 2 large eggs, 0.3 cup fresh lemon juice, 1 tablespoon lemon zest
    4. Pour the wet mixture into the dry ingredients. Gently fold together with a spatula until just combined; the batter should be slightly lumpy but free of dry flour.
      0.5 cup unsalted butter, 2 large eggs, 0.3 cup fresh lemon juice, 1 tablespoon lemon zest
    5. Spoon the batter evenly into the prepared muffin cups, filling each about two-thirds full. Place the tray in the oven.
    6. Bake for 20 minutes, or until the muffins are golden brown on top and a toothpick inserted into the center comes out clean. The edges should be slightly crisp, and the muffins will have risen nicely.

    Anyway, if you’re into that kind of thing—simple, real, and with a punch of lemon—you might want to give these a shot. Or just smell the batter next time. It’s a little glimpse of something pure and simple. No fuss, no extras. Sometimes that’s all we really need to remind us how good a good lemon muffin can be.

  • No Bake Pumpkin Cheesecake: A Surprise in Every Spoonful

    No Bake Pumpkin Cheesecake: A Surprise in Every Spoonful

    What’s really going on in this dessert?

    This isn’t just pumpkin pie in disguise. I’ve been secretly experimenting with textures lately, craving that satisfying crunch of a graham cracker crust but without turning on the oven. So I pressed the crumb base into the freezer, kind of like giving it a little chill pill. When I tasted the first slice, I was struck by how the creaminess catches your tongue—like pumpkin-flavored clouds—soft but with a subtle tang from cream cheese that hits your palate just right.

    It’s the kind of dessert that screams fall but doesn’t demand baking. Perfect for busy days — you get a sweet hit, a good dose of cozy spices, and the smoothest texture you didn’t even ask for. Honestly, I think this might be the only pumpkin treat I’ll want for the next few weeks. It just feels right—like I’m cheating, but I’m not. Just assembling a little magic in my fridge.

    No-Bake Pumpkin Cheesecake

    This dessert features a graham cracker crust pressed into a pan, topped with a creamy filling made from pumpkin, cream cheese, and whipped cream. The mixture is chilled to set, resulting in a smooth, firm texture with a soft, velvety appearance and a subtle pumpkin flavor infused with warm spices.
    Prep Time 20 minutes
    Total Time 20 minutes
    Servings: 8
    Course: Main Course
    Cuisine: American
    Calories: 350

    Ingredients
      

    • 1 1/2 cups graham cracker crumbs about 10 full crackers crushed finely
    • 1/4 cup granulated sugar
    • 6 tablespoons unsalted butter melted
    • 16 oz cream cheese softened
    • 1 cup canned pumpkin preferably pure pumpkin puree
    • 1/2 cup powdered sugar
    • 1 cup heavy whipping cream cold
    • 1 1/2 teaspoons ground cinnamon
    • 1/4 teaspoon ground nutmeg
    • 1/4 teaspoon ground ginger
    • 1/4 teaspoon salt

    Equipment

    • Mixing bowls
    • 9-inch Springform Pan
    • Measuring cups and spoons
    • Spatula
    • Food processor or breadcrumb crush tool
    • Refrigerator

    Method
     

    1. Combine graham cracker crumbs, granulated sugar, and melted butter in a mixing bowl. Mix until the crumbs are evenly coated and the mixture resembles wet sand. Press this mixture firmly into the bottom of the springform pan to create an even crust layer. Chill in the freezer for 10-15 minutes to set.
      1 1/2 cups graham cracker crumbs, 1/4 cup granulated sugar, 6 tablespoons unsalted butter
    2. In a separate large bowl, beat the softened cream cheese with a hand or stand mixer until smooth and fluffy. Add the canned pumpkin, powdered sugar, cinnamon, nutmeg, ginger, and salt, mixing thoroughly to incorporate all ingredients and achieve a uniform filling.
      16 oz cream cheese, 1 cup canned pumpkin, 1/2 cup powdered sugar, 1 1/2 teaspoons ground cinnamon, 1/4 teaspoon ground nutmeg, 1/4 teaspoon ground ginger, 1/4 teaspoon salt
    3. In a chilled mixing bowl, whip the heavy cream until stiff peaks form, indicating it’s prepared for folding. Gently fold the whipped cream into the pumpkin mixture in batches, maintaining the airy texture and avoiding deflation.
      1 cup heavy whipping cream
    4. Scoop the pumpkin filling onto the prepared crust in the springform pan. Use a spatula to evenly spread the filling over the crust, smoothing the top for a clean appearance. Refrigerate the cheesecake for at least 4 hours or until fully set and firm.
      16 oz cream cheese, 1 cup canned pumpkin, 1/2 cup powdered sugar, 1 cup heavy whipping cream
    5. Remove the cheesecake from the refrigerator once set. Carefully run a knife around the edge of the springform pan before releasing the sides to prevent cracking. Slice cold to serve, revealing a smooth, creamy texture with a subtle orange hue and a spiced aroma.

    No fuss, no oven, just a little bit of chill and a whole lot of flavor. Sometimes the best ideas come from skipping the expected. And I might just keep this recipe in rotation—because it’s simple, satisfying, and kind of sneaky good for a last-minute craving.

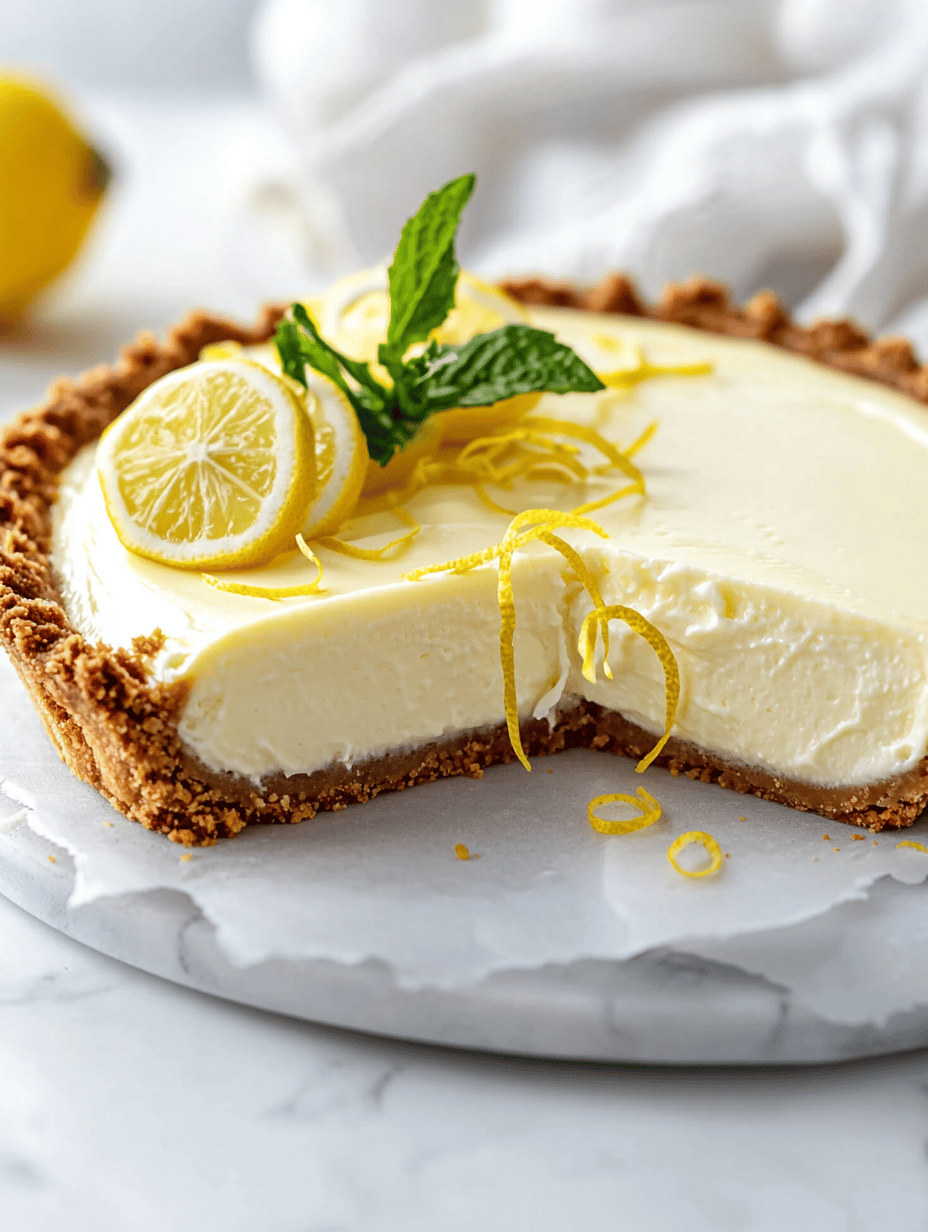
  • Lemon Mug Cake: When Citrus Meets Cozy in Your Microwave

    Lemon Mug Cake: When Citrus Meets Cozy in Your Microwave

    Ever thought about a dessert that smells like a lemon orchard picked at dawn, but in less time than it takes to check your phone? That’s what this mug cake is. It’s not just the sweet tartness of lemon—it’s the bright oil scent escaping as you mix, the slight crackle as it bakes. I made this one night after realizing all my favorite desserts need an entire oven. Who needs that waiting game? This tiny, warm hit of citrus hits your nose first, then melts into a spongy center, not too dense, not too airy. It’s like a little rebellion—fast, fresh, surprisingly elegant. What I love about it now? It’s perfect for the weird in-between moments, when you want something sweet but don’t want to turn on technology or wait for a delivery. Sometimes, the simplest things are the most surprising.

    Lemon Mug Cake

    This lemon mug cake is a single-serving microwave-baked dessert combining flour, eggs, and fresh lemon for a bright, citrus-flavored sponge. The final texture is tender and spongy, with a slightly crackled top and moist interior that resembles a miniature lemon sponge cake.
    Prep Time 5 minutes
    Cook Time 2 minutes
    Total Time 7 minutes
    Servings: 1
    Course: Main Course
    Cuisine: Global
    Calories: 210

    Ingredients
      

    • 4 tablespoons all-purpose flour sifted
    • 2 tablespoons granulated sugar
    • 1/4 teaspoon baking powder
    • 1 large egg beaten
    • 2 tablespoons milk
    • 1 tablespoon olive oil
    • 1 teaspoon lemon zest freshly grated
    • 1 tablespoon lemon juice preferably fresh

    Equipment

    • Microwave-safe mug
    • Mixing spoon or whisk
    • Measuring spoons
    • Lemon zester or fine grater
    • Fork

    Method
     

    1. Add dry ingredients: In a microwave-safe mug, combine sifted flour, sugar, and baking powder. Stir with a fork until evenly mixed, ensuring no lumps remain.
      4 tablespoons all-purpose flour, 2 tablespoons granulated sugar, 1/4 teaspoon baking powder
    2. Mix wet ingredients: In a small bowl or directly in the mug, whisk together the beaten egg, milk, olive oil, lemon zest, and lemon juice until well combined and slightly frothy.
      1 large egg, 2 tablespoons milk, 1 tablespoon olive oil, 1 teaspoon lemon zest, 1 tablespoon lemon juice
    3. Combine the mixtures: Pour the wet mixture into the dry ingredients in the mug. Stir gently with a spoon or fork, folding until the batter is smooth and uniform, with no streaks of flour visible.
      4 tablespoons all-purpose flour, 2 tablespoons granulated sugar, 1/4 teaspoon baking powder, 1 large egg, 2 tablespoons milk, 1 tablespoon olive oil, 1 teaspoon lemon zest, 1 tablespoon lemon juice
    4. Microwave the batter: Place the mug in the microwave and cook on high power for about 1 minute and 30 seconds to 2 minutes. The top should look puffed and slightly cracked, and a toothpick inserted into the center should come out with moist crumbs but not wet batter.
    5. Check for doneness: Carefully remove the mug from the microwave (it will be hot and steamy). Let it cool for a minute, then observe the spongy, light texture with a slightly crackled surface and moist interior. Optionally, garnish with extra lemon zest or a dusting of powdered sugar.

    Notes

    Best enjoyed warm immediately after baking. Adjust cooking time for microwave wattage as needed.

    So that’s the deal with lemon mug cake. It’s the kind of thing you make on a whim, then wonder why you don’t do it more often. A little zest, a dash of sugar, and a microwave—doesn’t get simpler than this. Or honestly, better.

  • Ginger Cookies That Actually Know What They’re Doing

    Ginger Cookies That Actually Know What They’re Doing

    Most ginger cookies taste like a faint whisper of spice—if you even notice it. Not these. The smell hits you first, sharp and bright, like peeling ginger and clove together, almost aggressive. And the texture? Not crumbly or airy, but chewy and thick with a little bite, like someone hand-pressed each one. It’s funny — I often wonder if the magic is in the ginger itself or just how much of it I toss in. Makes me think about all the times I’ve overlooked simple things that really matter, like an extra pinch of spice at exactly the right moment.

    Right now, everyone’s fiddling with seasonal baking, but I keep reaching for these when the weather flips. They don’t just taste like Christmas; they remind me of cold mornings when I’d crack ginger candies in my grandma’s house, spilling bits of sugar and spice everywhere. Weird how a cookie can suddenly carry a whole chapter of your childhood, isn’t it?

    Spicy Chewy Ginger Cookies

    These ginger cookies are characterized by their bold aroma of fresh ginger and clove, with a thick, chewy texture that provides a satisfying bite. The recipe involves mixing, chilling, and baking until golden around the edges, resulting in cookies that are moist inside with a slight chewiness and visible cracks on the surface.
    Prep Time 15 minutes
    Cook Time 12 minutes
    Total Time 27 minutes
    Servings: 24
    Course: Main Course
    Cuisine: American
    Calories: 130

    Ingredients
      

    • 1 1/2 cups all-purpose flour
    • 1/2 cup granulated sugar
    • 1/2 cup brown sugar packed
    • 1/4 cup unsalted butter softened
    • 1 large egg
    • 2 tablespoons fresh ginger root finely grated
    • 1 1/2 teaspoons ground cinnamon
    • 1/2 teaspoon ground cloves
    • 1/4 teaspoon salt

    Equipment

    • Mixing bowls
    • Stand mixer or hand whisk
    • Baking sheet
    • Parchment paper
    • Cooling rack
    • Measuring cups and spoons

    Method
     

    1. In a large mixing bowl, combine the softened butter, granulated sugar, and brown sugar. Using a stand mixer or whisk, beat until the mixture is light and fluffy, about 2-3 minutes. The mixture should look pale and creamy, with no visible sugar granules.
      2 tablespoons fresh ginger root, 1 large egg
    2. Add the egg and grated fresh ginger to the creamed mixture. Continue beating until fully incorporated, about 30 seconds. Smell should be fragrant with ginger and spices as you mix.
      1 large egg, 2 tablespoons fresh ginger root
    3. In a separate bowl, whisk together the flour, cinnamon, cloves, and salt. Gradually add the dry ingredients to the wet mixture in three additions, mixing on low speed until just combined. The dough will become thick and slightly sticky.
      1 1/2 cups all-purpose flour, 1 1/2 teaspoons ground cinnamon, 1/2 teaspoon ground cloves, 1/4 teaspoon salt
    4. Cover the bowl with plastic wrap and chill the dough in the refrigerator for at least 1 hour. The dough will firm up and be easier to shape once chilled.
    5. Preheat the oven to 350°F (175°C). Line a baking sheet with parchment paper. Scoop tablespoon-sized portions of dough and roll them into balls. Place them on the prepared baking sheet, spacing them about 2 inches apart. Gently flatten each ball slightly with the palm of your hand.
    6. Bake in the preheated oven for 10-12 minutes, or until the edges are golden brown and cookies have cracked slightly on the surface. The centers should still look a bit soft when removed from the oven.
    7. Allow the cookies to cool on the baking sheet for 5 minutes, then transfer them to a cooling rack. The cookies will firm up and develop a chewy exterior with a slightly moist interior.

    These cookies are not delicate or overly fancy — they’re straightforward. Honest. Sometimes that’s exactly what I want. Nothing to analyze, no getting fancy. Just a little jar of spicy, chewy bits that somehow feel more real than a lot of what’s out there right now.

  • Unexpectedly Perfect for Post-Holiday Cravings: Cranberry Pecan Mini Goat Cheese Balls

    Unexpectedly Perfect for Post-Holiday Cravings: Cranberry Pecan Mini Goat Cheese Balls

    Why I Started Making These

    I rediscovered something odd in my fridge last week — a handful of dried cranberries I forgot about. No big deal, right? But then I grabbed a block of creamy goat cheese just because. I dipped my finger in, tasted them side by side, and bam: a flavor combo I didn’t see coming.

    It’s this little surprise flavor explosion. The tart cranberry hits first, then the nuttiness of good pecans, and that milky goat cheese hanging around in the background. Turns out, mashing those together into tiny balls feels like a rebellious act against all the usual holiday cookies.

    Right now? It’s like they’re calling out to be made when everyone’s looking for something both fancy and weirdly comforting. Not sure why, but these tiny bites seem to catch that vibe.

    Cranberry Goat Cheese Bites

    These are small, no-bake cheese balls made from creamy goat cheese mixed with dried cranberries and chopped pecans. They are shaped into bite-sized balls, resulting in a creamy, chewy, and crunchy texture with vibrant color contrasts. The dish involves mixing, shaping, and garnishing, serving as an appetizer or party snack.
    Prep Time 15 minutes
    Total Time 15 minutes
    Servings: 12
    Course: Main Course
    Cuisine: American
    Calories: 95

    Ingredients
      

    • 8 ounces goat cheese block softened to room temperature
    • 1/4 cup dried cranberries chopped
    • 1/2 cup pecans chopped
    • Optional fresh herbs or honey for garnish

    Equipment

    • Mixing bowl
    • Measuring cups and spoons
    • Small scoop or spoon
    • Serving platter

    Method
     

    1. Place dried cranberries and chopped pecans in separate small bowls for easy access during shaping.
      1/4 cup dried cranberries, 1/2 cup pecans
    2. Using a fork or rubber spatula, mix the softened goat cheese in a large mixing bowl until smooth and creamy, approximately 1-2 minutes.
      8 ounces goat cheese block
    3. Fold in the chopped dried cranberries and pecans into the goat cheese until evenly incorporated, creating a chunky mixture.
      1/4 cup dried cranberries, 1/2 cup pecans
    4. Using a small scoop or spoon, portion out approximately one tablespoon of the mixture and roll it gently between your palms to form a smooth ball.
    5. Roll each ball in chopped pecans to coat the exterior evenly, pressing gently to adhere. Place the coated balls on a serving platter.
      1/2 cup pecans
    6. Optional: Garnish with sprigs of fresh herbs or drizzle with honey for presentation. Serve immediately or chill for 30 minutes for firmer texture.
      Optional fresh herbs or honey

    Notes

    For a firmer consistency, chill the assembled bites before serving. Experiment with different nuts or add a touch of honey to the mixture for extra sweetness.

    This isn’t about impressing with complexity. It’s about catching all those unexpected bites, the ones that make you go, ‘Yeah, that’s different.’ Kind of like childhood snacks but with a little twist of grown-up weirdness. Whatever you call it, I’m pretty sure they’re here for the long haul.

  • The Surprising Comfort of Baked Lemon Pudding During Pancake Season

    The Surprising Comfort of Baked Lemon Pudding During Pancake Season

    Why This Matters Right Now

    I made this last Sunday afternoon because I was craving something that’s not quite a dessert, not quite breakfast—something in between. It hit me that most pudding recipes are heavy on cream or sugar, but here’s a secret: it’s the tang of fresh lemon that keeps it light yet somehow makes it feel indulgent. Especially when the house smells like a citrus orchard in February—bright, sharp, waking up a tired kitchen.

    This dish isn’t fancy, nor does it pretend to be. It’s odd in the best way. The way the eggs go soft in the oven, trapping that lemon aroma like a secret. It’s comfort food that makes you think, hmm, maybe I don’t need a complicated weeknight dinner. Just a few eggs, some lemon, a pan, and a little patience.

    Why I’m Hanging Onto It

    Because sometimes, dissolving a weighty craving into something unexpectedly simple is exactly what you didn’t realize you needed.

    Lemon Baked Eggs

    Lemon Baked Eggs are a simple dish where eggs are gently baked until the whites set and the yolks remain runny, infused with bright lemon flavor. The eggs are combined with lemon juice, zest, and seasonings before baking in a ramekin or small ovenproof dish, resulting in a tender texture with a citrus aroma.
    Prep Time 10 minutes
    Cook Time 15 minutes
    Total Time 25 minutes
    Servings: 2
    Course: Main Course
    Cuisine: Occasional
    Calories: 150

    Ingredients
      

    • 4 large eggs preferably fresh
    • 2 tablespoons fresh lemon juice about 1 lemon
    • 1 teaspoon lemon zest from about 1 lemon
    • 1/4 teaspoon salt or to taste
    • pinch black pepper optional, for seasoning
    • 1 teaspoon olive oil or butter for greasing

    Equipment

    • Ramekins or small ovenproof dishes
    • Mixing bowl
    • Whisk
    • Lemon zester
    • Measuring spoons
    • Oven
    • Baking sheet

    Method
     

    1. Preheat the oven to 375°F (190°C). Lightly grease two ramekins or small ovenproof dishes with olive oil or butter. Place them on a baking sheet to catch any spills.
    2. In a mixing bowl, crack the eggs and gently whisk them together until the yolks and whites are combined but not overly frothy. Measure out lemon juice and zest.
      4 large eggs
    3. Add lemon juice, zest, salt, and black pepper to the eggs. Whisk until well incorporated. The mixture should be slightly frothy and fragrant with citrus.
      4 large eggs
    4. Divide the mixture evenly between the greased ramekins. Place the ramekins on the baking sheet in the oven-safe tray.
      4 large eggs
    5. Bake in the preheated oven for about 12-15 minutes, or until the whites are set but the yolks remain slightly runny. You should see gentle bubbling around the edges and a slight puffing of the whites.
    6. Remove from the oven and let stand for 1 minute. Carefully run a spatula or knife around the edges to loosen, then serve immediately with a garnish of lemon zest if desired.

    Notes

    Serve promptly to enjoy the lightly runny yolks and bright lemon flavor. These baked eggs can be customized with herbs or a sprinkle of cheese for variation.

    This pudding is the kind of thing that sneaks up on you. No bells, no whistles—just honest, fresh flavor. I salted my last bite and wondered if I’d forgotten something. Then I remembered: the best comfort foods are always the ones that catch you off guard.

  • Oreo Poke Cake: The Lazy Person’s Fix for Instant Happiness

    Oreo Poke Cake: The Lazy Person’s Fix for Instant Happiness

    This isn’t about fancy toppings or complicated layers. It’s about the sweet, vanilla-scented chaos of poking holes into cake and watching Oreo crumbs spill out like tiny treasures. I accidentally discovered this after a long day, craving something sweet that wouldn’t demand a full hour of decoration or precision.

    What makes this special right now is how it’s perfect for the chaos of life — no frosting pots or piping bags, just a single box of cake mix, some Oreos, and a little patience. It feels nostalgic, but also kind of rebellious. Like, who says you need 20 steps to get a dessert that tastes like victory?

    Something about the soft cake soaked in sweet milk, crunchy bits of Oreos peeking through — that’s pure comfort. And honestly, the messier the better. I’m pretty sure this recipe sneaked its way into my weekly rotation because it’s wildly forgiving, and anyway, I need a reason to keep Oreos around.

    Why I Love This Recipe (And You Will Too)

    • It’s effortless but feels indulgent—perfect for last-minute cravings.
    • Appeals to that childhood joy of Oreos mixed into anything sweet.
    • Brings together ingredients I usually stock—no special trips required.
    • It gets better overnight, so I can just forget about it and come back to a ready dessert.
    • It’s surprisingly satisfying, even if you’re not a baker.

    Sometimes, I think the best recipes are the ones that find you when you’re not really looking, and this one? It definitely did.

    Oreo-Stuffed Vanilla Cake Poke

    This no-frosting cake involves baking a vanilla-flavored cake mix and then creating holes in the soft, baked cake to fill with crushed Oreo cookies. The final dish features a moist, tender crumb with crunchy Oreo bits peeking through, giving it a playful, mess-friendly appeal.
    Prep Time 10 minutes
    Cook Time 30 minutes
    Total Time 40 minutes
    Servings: 8
    Course: Main Course
    Cuisine: American
    Calories: 320

    Ingredients
      

    • 1 box vanilla cake mix plus ingredients specified on the box
    • 1 package Oreos about 15, crushed
    • syrup or milk sweetened milk for soaking the cake

    Equipment

    • 9-inch cake pan
    • Mixing bowls
    • Whisk or handheld mixer
    • Straw or skewer for poking holes
    • Spatula

    Method
     

    1. Preheat your oven to the temperature specified on your cake mix box and grease your cake pan to prevent sticking.
    2. Mix the vanilla cake batter according to the package instructions using your whisk or mixer until smooth and slightly bubbly—this helps the batter relax and bake evenly.
    3. Pour the batter into your prepared cake pan and smooth the top with a spatula for an even surface.
    4. Bake the cake until the edges are golden and a toothpick inserted in the center comes out clean—usually about 25-30 minutes. Let it cool in the pan for 10 minutes, then transfer to a wire rack to cool completely.
    5. Once cooled, use a straw or skewer to poke holes all over the surface of the cake, spacing them evenly. This creates channels for the milk to soak in.
    6. Crush the Oreos into small, crumbly pieces—this can be done by placing them in a plastic bag and gently smashing with a rolling pin or using a food processor.
    7. Sprinkle the crushed Oreos generously over the surface and into the holes of the cake, pressing gently to embed them into the batter.
    8. Pour sweetened milk over the cake, making sure it soaks into the holes and helps the cake become moist and flavorful.
    9. Let the cake sit for at least 2 hours or overnight in the refrigerator—this allows all the flavors to meld and the cake to become cuddly and rich.
    10. Serve slices with extra Oreo crumbs if desired—this dish is all about a messy, indulgent experience.

    Honestly, I keep wondering if next time I should skip the frosting altogether and just sprinkle more Oreos on top. Or maybe I need to try adding a handful of mini chocolate chips. Whatever happens, I know this is going to be the go-to for those evenings when I want something sweet but don’t want to clean up the whole kitchen. Or think too much. That’s the real magic — low effort, big reward.