Author: Theo Granger

  • Blueberry Coffee Cake: A Morning Ritual Reclaimed

    Blueberry Coffee Cake: A Morning Ritual Reclaimed

    Why a coffee cake? Not just for mornings anymore.

    Turns out, blueberry coffee cake isn’t about breakfast alone. I’ve been thinking about all the mornings I rush through, not really tasting the toast, barely noticing the smell of coffee filling the house. This cake, it’s different. It’s the kind of thing that makes you slow down, even if just for a few minutes. The scent of warm butter, the tangy burst of blueberries, the crackle of sugar on top. I’ve been making it each Sunday, realizing what I’ve been missing is that imperfect quiet in the mornings. It’s not trendy or fancy; it’s familiar. Sometimes, the best recipes are the ones you come back to when life feels like it’s spinning faster than you want it to. Picking blueberries fresh from the market this week—takes me right back to the summer days I want to hold onto.

    Blueberry Coffee Cake

    This blueberry coffee cake is a moist, tender crumb with a swirl of fresh blueberries throughout and a crispy sugar topping. It is baked until golden brown with a slightly crackled top, showcasing a vibrant interior filled with juicy blueberries. The cake features a buttery texture and a sweet-tart flavor profile, ideal for breakfast or snacks.
    Prep Time 15 minutes
    Cook Time 35 minutes
    Total Time 50 minutes
    Servings: 8
    Course: Main Course
    Cuisine: American
    Calories: 320

    Ingredients
      

    • 1 cup all-purpose flour
    • 1/2 cup granulated sugar
    • 1/2 cup unsalted butter cold, cut into small cubes
    • 1 teaspoon baking powder
    • 1/2 teaspoon salt
    • 2 large eggs
    • 1 cup buttermilk
    • 1 teaspoon vanilla extract
    • 1 1/2 cups fresh blueberries
    • 1/2 cup coarse sugar for topping
    • 2 tablespoons all-purpose flour for topping

    Equipment

    • Mixing bowls
    • Whisk
    • Measuring cups and spoons
    • 9-inch square or round baking pan
    • Parchment paper
    • Rubber spatula
    • Cooling rack

    Method
     

    1. Preheat the oven to 350°F (175°C). Line the baking pan with parchment paper for easy removal. In a large mixing bowl, whisk together the flour, sugar, baking powder, and salt.
    2. Add the cold, cubed butter to the dry ingredients. Using a pastry cutter or fingertips, cut the butter into the mixture until it resembles coarse crumbs with small pea-sized pieces. This builds a flaky texture in the cake topping.
    3. In a separate bowl, whisk together eggs, buttermilk, and vanilla extract until well combined. Pour the wet ingredients into the dry mixture and gently fold with a spatula until just combined. Do not overmix to keep the cake tender.
    4. Gently fold the blueberries into the batter, ensuring even distribution without crushing the fruit. Transfer the batter to the prepared baking pan, spreading it evenly with a spatula.
    5. Prepare the crumble topping by combining 2 tablespoons of flour and the coarse sugar. Sprinkle this evenly over the batter in the pan to create a crunchy, sweet topping.
    6. Bake in the preheated oven for 35-40 minutes, or until the top is golden brown and a toothpick inserted into the center comes out clean. The edges may lift slightly, and the top will develop a crackled appearance.

    Sometimes, I wonder if these simple recipes are more about holding onto the slow moments, not just about what’s on the plate. Baking this cake feels like a little rebellion—against busy, against rushed mornings. It’s a reminder that the small joys are worth making space for, and that a slice of blueberry coffee cake can do more than fill you up. It can make you pause, breathe, and maybe even smile in the middle of the chaos.

  • The Unexpected Joy of a Strawberry Sheet Cake You Can’t Stop Eating

    The Unexpected Joy of a Strawberry Sheet Cake You Can’t Stop Eating

    Why Now?

    Nothing says summer like the smell of ripe strawberries. But sometimes, I wonder if we’re missing out on how they can surprise us outside of cereal bowls or shortcakes. A late-night craving led me to throw a handful of strawberries into a simple sheet cake, not for any reason other than I needed the house to smell like fresh strawberries, warm sugar, and a little bit of vanilla. Turns out, that mix is addictive. No fancy technique, just a humble cake that feels nostalgic but also fresh in a way I hadn’t expected. It’s perfect for lazy weekends or those mornings when you just want to wake up to something bright. And honestly, it’s a reminder that simple ingredients, when treated right, can somehow make all our small worries disappear for a bit.

    What’s Special?

    The touch of real strawberries baked right into the batter, bursting with juice in every bite, makes it feel like summer in cake form. The texture is unexpectedly tender but sturdy enough to hold up whatever whipped topping or extra strawberries you toss on top. It smells like a fresh market stall, but with a buttery richness that keeps it from feeling too frilly or delicate. I’ve made many cakes, but this one somehow feels more like a quiet rebellion—a way to celebrate something sweet without overthinking it.

    Strawberry Sheet Cake

    This sheet cake incorporates fresh strawberries into the batter, resulting in a tender and moist crumb with bursts of juiciness in every bite. The cake’s appearance is light and golden, often topped with whipped cream or additional strawberries, offering a simple yet vibrant treat that highlights the flavor of ripe berries.
    Prep Time 15 minutes
    Cook Time 35 minutes
    Total Time 50 minutes
    Servings: 8
    Course: Main Course
    Cuisine: American
    Calories: 320

    Ingredients
      

    • 1 cup fresh strawberries hulled and chopped
    • 2 cups all-purpose flour
    • 1.5 cups granulated sugar
    • 1/2 cup unsalted butter melted
    • 3 large eggs
    • 1 teaspoon vanilla extract
    • 1/2 cup milk
    • 1 teaspoon baking powder
    • 1/4 teaspoon salt

    Equipment

    • Mixing bowls
    • Whisk or electric mixer
    • 9×13 inch baking pan
    • Parchment paper
    • Cooling rack
    • Spatula

    Method
     

    1. Preheat the oven to 350°F (175°C). Line the 9×13 inch baking pan with parchment paper for easy removal.
    2. In a medium bowl, whisk together the flour, baking powder, and salt. Set aside.
    3. In a large bowl, combine the melted butter and sugar, whisking until smooth and slightly thickened. Add the eggs one at a time, mixing thoroughly after each addition, until the mixture becomes pale and slightly fluffy.
    4. Stir in the vanilla extract and milk until evenly combined. Gradually add the dry ingredients to the wet mixture, folding gently with a spatula until just incorporated. Do not overmix.
    5. Gently fold in the chopped strawberries, distributing evenly throughout the batter. The batter should be thick but scoopable.
    6. Pour the batter into the prepared baking pan, spreading it evenly with a spatula. Bake in the preheated oven for 35 minutes, or until the top is golden brown and a toothpick inserted into the center comes out clean.
    7. Remove the cake from the oven and let it cool in the pan for 10 minutes. Transfer to a wire rack and cool completely before slicing and serving, optionally topped with whipped cream or extra strawberries.

    If you’re tired of the same old, this one might sneak in without much fuss. Sometimes I think the best recipes are the ones you forget you needed until you’re eating them. Maybe it’s just bread and sugar with a pop of pink, but that’s enough. Honestly, I think I’ll be making it again tomorrow. Or maybe the next day. Can’t decide yet.

  • Why KFC Cole Slaw Might Save Your Summer BBQ (In a Surprising Way)

    Why KFC Cole Slaw Might Save Your Summer BBQ (In a Surprising Way)

    I never thought about cole slaw beyond its crunchy crunch and tangy bits until I realized I was craving it in a way that wasn’t about the salad itself but the way it feels in your mouth. That almost waxy, slick texture paired with the sharp bite of vinegar and the sweetness of the cabbage—makes your teeth slide. It’s like an unexpected companion amid all the crispy fried chicken and smoky grills. Right now, with BBQs creeping into every weekend plan, this stuff isn’t just a side. It’s that weird, comforting anchor when everything feels a little chaotic, like the one thing you can count on not to fall apart. I think about how food sometimes is less about the flavors and more about the memory of biting into something that just feels right. This cole slaw? It’s kind of like that—simple but quietly dependable.

    Cabbage Slaw with Vinegar Dressing

    This coleslaw features finely shredded green cabbage combined with a tangy vinegar-based dressing, resulting in a crisp and slick-textured salad. The ingredients are mixed and marinated to develop a slightly wilted appearance with a shiny, wet surface, emphasizing the contrasting textures of crunch and smoothness.
    Prep Time 15 minutes
    Total Time 15 minutes
    Servings: 4
    Course: Main Course
    Cuisine: American
    Calories: 120

    Ingredients
      

    • 4 cups green cabbage, finely shredded use a sharp knife or mandoline for uniform strips
    • 0.25 cup apple cider vinegar for tangy flavor
    • 2 Tbsp sugar to balance acidity
    • 1 tsp salt
    • 0.5 tsp black pepper freshly ground if possible
    • 2 Tbsp vegetable oil for moisture and coating

    Equipment

    • Large mixing bowl
    • Chef’s knife
    • Grater or Mandoline
    • Measuring spoons
    • Spatula

    Method
     

    1. Use a sharp chef’s knife or mandoline to finely shred the green cabbage until uniform in size. Place the shredded cabbage into a large mixing bowl.
      4 cups green cabbage, finely shredded
    2. In a small bowl, whisk together apple cider vinegar, sugar, salt, and black pepper until the sugar and salt dissolve completely, creating a tangy and slightly syrupy dressing.
      4 cups green cabbage, finely shredded
    3. Pour the vinegar mixture over the shredded cabbage and add vegetable oil. Toss the mixture thoroughly with a spatula until all the cabbage is evenly coated and begins to wilt slightly, absorbing the dressing and developing a glossy, slick surface.
      4 cups green cabbage, finely shredded
    4. Allow the mixture to sit at room temperature for about 10 minutes, during which the cabbage softens slightly and the flavors meld. You’ll see the cabbage’s color deepen slightly and the texture become more tender yet still crunchy.
      4 cups green cabbage, finely shredded
    5. Give the slaw a final toss to redistribute the dressing, then serve immediately or refrigerate for up to an hour for additional flavor development. The finished dish will have a shiny, slick appearance with crisp shredded cabbage coated in vinegary glaze.
      4 cups green cabbage, finely shredded

    No fancy tricks, just crunch, tang, and a little sweetness. Sometimes that’s enough to anchor a moment, or make a dull afternoon somehow better. Giving it a shot might make you realize why we keep going back to those familiar sides. Or maybe it’ll just remind you how good the simple stuff can be—no fuss, no fussiness, just vegetables and vinegar doing their thing.

  • Patriotic Ice Cream: A Kid’s Perspective on Freedom and Flavor

    Patriotic Ice Cream: A Kid’s Perspective on Freedom and Flavor

    Why I Make This Each Year

    My little cousin’s eyes light up when he sees those red, white, and blue swirls. Doesn’t matter that he’s only five — he recognizes red, white, and blue as something bigger. Like the country he’s just starting to understand. This ice cream isn’t just dessert. It smells like summer, like backyard barbecues and long holiday weekends. The vanilla base is smooth, almost like a blank canvas. The strawberries and blueberries sprinkle in bursts of tartness that jump mid-bite. It’s messy — melting quicker than I want, spilling over the sides. I think about how sometimes food is better when it’s imperfect. No perfect scoop, just a shared laugh watching it drip down your hand. Some years I think I might skip it. But then I realize, it’s never really about the ice cream. It’s about those fleeting, loud, clumsy moments that make the 4th of July feel like home.

    Red, White, and Blue Swirl Ice Cream

    This ice cream features a vanilla custard base mixed with fresh strawberries and blueberries, creating vibrant swirls of red, white, and blue. The mixture is churned until smooth and creamy, with a soft-textured final appearance that melts quickly in the mouth. The colorful presentation and layered flavors evoke summer festivities and patriotic celebrations.
    Prep Time 20 minutes
    Cook Time 15 minutes
    Total Time 35 minutes
    Servings: 8
    Course: Main Course
    Cuisine: American
    Calories: 250

    Ingredients
      

    • 2 cups heavy cream chilled
    • 1 cup whole milk
    • 3/4 cup granulated sugar
    • 1 tablespoon vanilla extract
    • 3 cups fresh strawberries hulled and chopped
    • 1 cup fresh blueberries rinsed

    Equipment

    • Medium saucepan
    • Mixing bowls
    • Whisk
    • Fine mesh sieve
    • Ice cream maker
    • Rubber spatula
    • Cutting board
    • Knife

    Method
     

    1. Combine the heavy cream, milk, sugar, and vanilla extract in a medium saucepan. Place over medium heat and whisk until the sugar dissolves completely and the mixture is hot but not boiling. Heat for about 5 minutes, then remove from heat and set aside.
      2 cups heavy cream, 1 cup whole milk, 3/4 cup granulated sugar, 1 tablespoon vanilla extract
    2. Meanwhile, puree the strawberries in a blender until smooth. Transfer to a fine mesh sieve placed over a bowl and press through with a spatula to remove seeds, creating a smooth strawberry puree.
      3 cups fresh strawberries
    3. Once the cream mixture has cooled slightly, pour it into a mixing bowl. Stir in the strawberry puree until fully combined. Chill the mixture in the refrigerator for at least 2 hours or until thoroughly cold.
      2 cups heavy cream, 3 cups fresh strawberries
    4. Pour the chilled mixture into an ice cream machine and churn according to the manufacturer’s instructions, typically about 20-25 minutes, until it reaches a soft-serve consistency.
    5. During the last 5 minutes of churning, gradually add the blueberries, allowing them to disperse evenly throughout the ice cream. Once the churning is complete, transfer the ice cream to a freezer-safe container.
      1 cup fresh blueberries
    6. Swirl in additional strawberry and blueberry preserves or whole berries if desired, then freeze the ice cream for at least 4 hours or until firm. Serve scoops with visible swirls of red, white, and blue for a colorful presentation.

    Notes

    For Best Results: Use ripe, fresh berries. Adjust sweetness by adding more or less sugar. To make a layered swirl effect, layer flavors in the freezer before the final freeze.

    Maybe next year I’ll add a splash of lemonade. Or skip the sprinkles altogether. But with this, I remember: some traditions are just about the simple stuff. The messy, sweet, loud stuff. And that’s enough.

  • Patriotic Popcorn Balls: A Homemade Time Capsule for the Fourth

    Patriotic Popcorn Balls: A Homemade Time Capsule for the Fourth

    I never expected childhood nostalgia would hit me so hard making these popcorn balls. It’s not just the sticky sweetness, but that unmistakable hint of melted marshmallow and the way the popcorn crackles against your teeth. The smell of butter and sugar mixes in the air, suddenly making me seven years old, staring at a sparking firework night, craving these simple, messy bites.

    But more than that, making these now feels like a tiny act of rebellion. In a world obsessed with perfect Instagram treats, this is raw, imperfect, nostalgic chaos. There’s something grounding about forming these ragged, colorful balls with your hands—an easy way to remember what matters. They remind me of summer nights, of childhood, of making do with what’s around. Right now, with all the noise, these popcorn balls wake up that sort of quiet joy we sometimes forget to hold onto.

    Homemade Popcorn Balls

    A sweet treat made by combining toasted popcorn with melted marshmallows and butter, then shaping the mixture into balls. The final result is a sticky, chewy snack with crispy popcorn clusters and a colorful, imperfect appearance. The texture balances gooeyness atop crunchy popcorn, creating a nostalgic comfort food.
    Prep Time 10 minutes
    Cook Time 10 minutes
    Total Time 20 minutes
    Servings: 8
    Course: Main Course
    Cuisine: American
    Calories: 250

    Ingredients
      

    • 10 cups popped popcorn preferably plain and lightly salted
    • 1 cup marshmallows mini or regular size, chopped if large
    • 4 tablespoons unsalted butter
    • 1/2 cup granulated sugar
    • 1 teaspoon vanilla extract

    Equipment

    • Large saucepan
    • Wooden spoon or heat-resistant spatula
    • Mixing bowl
    • Measuring cups and spoons
    • Baking sheet or parchment-lined surface

    Method
     

    1. Measure out 10 cups of popcorn and set aside in a large mixing bowl.
    2. In a large saucepan, melt the butter over medium heat, watching for a gentle bubbling and a fragrant aroma.
    3. Add the marshmallows and granulated sugar to the melted butter. Stir continuously with a wooden spoon until the marshmallows are completely melted and the mixture becomes smooth and glossy, about 3-5 minutes.
    4. Remove the saucepan from heat and stir in vanilla extract. Pour the hot marshmallow mixture over the popcorn in the mixing bowl.
    5. Gently fold the mixture with a spatula until the popcorn is evenly coated and sticky.
    6. While still warm, shape the mixture into 8 to 10 balls using your hands, pressing firmly to compact pastes. Place the balls onto a parchment-lined sheet to cool and set.

    Notes

    For easier shaping, slightly dampen hands or oil them lightly before forming the balls. Store leftovers in an airtight container at room temperature.

    Maybe the best part is how you can customize them—red and blue sprinkles, a drizzle of melted chocolate, whatever chaos your kitchen can handle. Just don’t be surprised if you find yourself sneaking bites after everyone leaves the table.

  • Reimagining the Filet-O-Fish: An Unexpected Take

    Reimagining the Filet-O-Fish: An Unexpected Take

    Forget what you know

    Today, I’m not just making another Fish Sandwich. I’m trying to capture that strange moment when fried fish meets lemony tartar, but with a twist of my own. No factory breading here. Instead, I’m roasting a fillet in a pan, letting the edges crisp up just right, almost caramelized. It smells like early spring – that mix of fresh dill, lemon zest, and the faint, savory warmth of cooked fish. This isn’t about fast food nostalgia; it’s about reclaiming something familiar and making it real again. Right now, I’m obsessed with swapping out the bun for something a little different—maybe crispy, buttered toast or a soft lettuce leaf, I haven’t totally decided. It’s strange how _simple_ things get complicated when I think about building the perfect bite.

    Roasted Fish Sandwich with Lemon Dill Tartar

    This dish features a pan-roasted fish fillet with a crispy, caramelized exterior and tender inside, served with a tangy lemon dill tartar sauce. The dish is assembled on crispy toast or lettuce leaves, offering contrasting textures of crispy, flaky fish and fresh, crunchy accompaniments.
    Prep Time 15 minutes
    Cook Time 15 minutes
    Total Time 30 minutes
    Servings: 2
    Course: Main Course
    Cuisine: Modern
    Calories: 450

    Ingredients
      

    • 2 fillets fish fillets (e.g., cod or haddock) skinless, boneless
    • 1 cup panko bread crumbs for coating
    • 1 tsp lemon zest for tartar sauce
    • 2 tbsp dill, chopped fresh
    • 1 cup mayonnaise
    • 1 tbsp capers, chopped
    • 2 tsp lemon juice
    • 4 slices bread or lettuce leaves for serving
    • 2 tbsp butter for toasting
    • to taste salt and pepper

    Equipment

    • Pan
    • Spatula
    • Mixing bowl
    • Measuring spoons
    • Knife
    • Cutting board

    Method
     

    1. Pat the fish fillets dry with paper towels. Use a sharp knife to remove any remaining bones and gently season both sides with salt and pepper. Place the panko bread crumbs in a shallow dish and lightly zest the lemon directly into the crumbs for added flavor.
      2 fillets fish fillets (e.g., cod or haddock), 1 cup panko bread crumbs, 1 tsp lemon zest
    2. Heat a pan over medium heat and add the butter until melted and bubbling, about 1-2 minutes. Carefully place the seasoned fish fillets into the pan, skin side down if applicable. Cook undisturbed for 4-5 minutes until edges are golden brown and the fish is opaque halfway up the sides.
      4 slices bread or lettuce leaves
    3. Flip the fillets gently using a spatula and cook for another 3-4 minutes until fully cooked and crispy on the outside. The fish should be golden brown and easily flake with a fork. Remove from pan and set aside.
      2 fillets fish fillets (e.g., cod or haddock)
    4. While the fish cooks, prepare the tartar sauce by combining mayonnaise, chopped dill, capers, lemon juice, and lemon zest in a mixing bowl. Mix thoroughly until well combined and refrigerate until serving.
      2 tbsp dill, chopped, 1 cup mayonnaise, 1 tbsp capers, chopped, 2 tsp lemon juice
    5. Toast the bread slices or prepare lettuce leaves by rinsing and patting dry. In a separate pan, melt the remaining butter over medium heat and toast the bread slices until golden and crispy, about 2-3 minutes per side.
      2 tbsp butter
    6. Assemble the dish by placing a fish fillet on each toasted bread or leaf-lined plate. Top with a generous spoonful of tartar sauce. Garnish as desired and serve immediately, with the crispy elements contrasting the tender fish.
      2 fillets fish fillets (e.g., cod or haddock), 1 cup mayonnaise, 4 slices bread or lettuce leaves

    No giant story, no grand finale. Just a fish sandwich. But maybe that’s where the magic is. When it’s right, it hits a little different—like a tiny, quiet rebellion against the usual. And honestly, I don’t mind that at all.

  • The Quiet Charm of California Roll Sushi Bowls No One Talks About

    The Quiet Charm of California Roll Sushi Bowls No One Talks About

    Forget Sushi Rolls for a Day

    This isn’t about the usual seaweed wrapped thing. It’s about thinking of sushi as something you just scoop up, not roll up tight. I was craving that bright tang of rice vinegar and salty nori but didn’t want the fuss of rolling. So I threw everything in a bowl. It’s like a deconstructed california roll, only crammed full of crunchy cucumber, ripe avocado, and those tiny pops of sesame seeds. What hits me is how sitting there, spoon in hand, I realize this meal is grounded in chaos—all layers tossed together, yet somehow perfect. It’s shipping season, and I’m tired. Sometimes, a dish like this is just enough to keep everything simple and still cozy. No fuss, no perfection, just flavor in every bite, honestly.

    Deconstructed Sushi Bowl

    This dish involves tossing cooked sushi rice with rice vinegar, sesame seeds, and seasonings, then topping it with fresh, crunchy cucumber and ripe avocado slices. The final presentation features a layered yet naturally mixed bowl with a combination of soft rice and crisp vegetables, offering a vibrant and textured meal.
    Prep Time 15 minutes
    Cook Time 10 minutes
    Total Time 25 minutes
    Servings: 2
    Course: Main Course
    Cuisine: Japanese-Inspired
    Calories: 350

    Ingredients
      

    • 1 cup sushi rice rinsed until water runs clear
    • 1 1/4 cups water
    • 2 tablespoons rice vinegar preferably seasoned
    • 1 teaspoon sugar
    • 1/2 teaspoon salt
    • 1 seeded cucumber cucumber cut into thin half-moons
    • 1 ripe avocado peeled and sliced
    • 1 tablespoon toasted sesame seeds

    Equipment

    • Saucepan
    • Mixing bowl
    • Knife
    • Cutting board
    • Wooden spoon

    Method
     

    1. Combine rinsed sushi rice and water in a saucepan. Bring to a boil over medium-high heat, then reduce heat to low, cover, and simmer for 10 minutes until the water is absorbed and rice is tender. Remove from heat and let it steam for 10 more minutes.
    2. In a small bowl, stir together rice vinegar, sugar, and salt until the sugar and salt are dissolved. Pour this mixture over the cooked rice in the mixing bowl, gently folding to evenly coat the grains. Allow the rice to cool slightly while you prepare other ingredients.
    3. Arrange the sliced cucumber and avocado on the serving bowls. Slice the avocado into thin, even pieces and place over the rice or around the bowl for visual appeal.
    4. Scoop the cooled rice into bowls, creating a base layer. Top with the sliced cucumber and avocado, then sprinkle evenly with toasted sesame seeds for crunch and flavor.
    5. Serve immediately with additional seasonings or soy sauce if desired. The dish should have a firm, slightly sticky rice base with crisp vegetables and a nutty sesame topping.

    And honestly, maybe what makes this interesting is how it feels like a quiet rebellion against overthought sushi. No rolling mats. No perfect slices. Just a bowl full of everything good. Maybe that’s what I’ll keep making instead of obsessing over the shape. Sometimes, the best ideas are the simplest ones, right?

  • Shepherd’s Pie for the Curious Eaters: A Hidden Twist on a Classic

    Shepherd’s Pie for the Curious Eaters: A Hidden Twist on a Classic

    Ever wonder how the smell of roasted carrots melts into beefy gravy as it mingles with earthy thyme? It’s not just comfort; it’s a reminder that some recipes hold memories in their aroma. This isn’t your grandma’s Shepherd’s Pie, though. I swapped out the usual mashed potatoes for sweet potato and let the meat stew simmer with a splash of soy sauce. Yeah, that salty umami sneaks in.

    Right now, in the middle of winter, when all I want is something honest and filling but not overly fancy, this dish hits differently. You get that crispy crust on top, a little charred around the edges, and underneath, a messy mash of meat and vegetables. It’s like a warm secret buried under golden clouds. Would I call it elegant? Nope. But I’ll tell you, it’s just what some nights ask for.

    Sweet Potato Shepherd’s Pie with Soy-Infused Beef

    This dish features a savory ground beef filling combined with roasted carrots and earthy thyme, topped with a layer of mashed sweet potatoes. The casserole is baked until the top is golden and slightly crispy, showcasing a hearty texture with tender vegetables and flavorful meat beneath a smooth, orange crust.
    Prep Time 20 minutes
    Cook Time 40 minutes
    Total Time 1 hour
    Servings: 4
    Course: Main Course
    Cuisine: Comfort Food
    Calories: 480

    Ingredients
      

    • 2 large carrots roasted and sliced
    • 1 lb ground beef preferably lean
    • 2 cloves garlic minced
    • 1 tablespoon soy sauce for umami flavor
    • 1 teaspoon thyme dried or fresh
    • 2 sweet potatoes sweet potatoes peeled and chopped
    • 2 tablespoons butter for mashing
    • 1/4 cup milk to loosen mash
    • salt to taste
    • pepper to taste

    Equipment

    • Chef’s knife
    • Cutting board
    • Skillet or frying pan
    • Medium pot
    • Mixing bowl
    • Whisk
    • Baking Dish

    Method
     

    1. Preheat the oven to 400°F (200°C). Place whole carrots on a baking sheet, toss with a little oil, and roast for about 20-25 minutes until tender and caramelized. Remove from oven, let cool slightly, then slice into rounds.
      1 lb ground beef
    2. Meanwhile, peel and chop sweet potatoes into even chunks. Place in a medium pot, cover with water, and bring to a boil over high heat. Cook for 15-20 minutes until very tender. Drain and transfer to a mixing bowl.
      1 lb ground beef
    3. Heat a skillet over medium-high heat. Add ground beef and cook until browned, about 8-10 minutes. Break apart the meat with a spoon as it cooks. Add minced garlic, thyme, soy sauce, salt, and pepper, and cook for another 2-3 minutes until fragrant. Remove from heat.
      1 lb ground beef
    4. Drain the cooked sweet potatoes and mash with butter and milk until smooth and creamy. Season with salt and pepper to taste. Set aside.
      1 lb ground beef
    5. Spread the beef mixture evenly in a baking dish, then layer the roasted carrots over the meat. Spoon the sweet potato mash on top, spreading it into an even layer with a spatula. Smooth the surface for an even crust.
      1 lb ground beef
    6. Bake in the preheated oven for 20-25 minutes, until the top is golden brown and slightly crispy around the edges. Let rest for 5 minutes before serving.

    Notes

    For added flavor, add a pinch of smoked paprika or chopped fresh herbs on top before baking.

    Sometimes you just need food that doesn’t pretend to be anything but honest. No fuss, no frills—just a plate that tastes like I meant it to. Shepherd’s Pie, but with a little more swagger.

  • Lemon Chicken That Gets Better the Day After

    Lemon Chicken That Gets Better the Day After

    Why I Keep Making Lemon Chicken

    It’s not just about lemon—though that tart brightness is irresistibly fresh and wakes up my senses. It’s about the way the marinade sinks in, making the chicken almost tangy with that little zing. I realized I love it more the next day, cold, sliced thin, with a smear of hummus and some pita. It’s my go-to for a lunch that doesn’t feel like a compromise. No fancy ingredients, no fuss—just a weekday that suddenly feels a bit brighter. The smell of lemon zest bubbling during the cooking? That sharp, citrusy pop sneaking through the kitchen. And the way the meat soaks up the lemon juice overnight, it’s like it’s been marinating forever, even if I just threw it together this morning. That’s what makes this recipe real for me—not just dinner, but the promise of better leftovers.

    Lemon Chicken

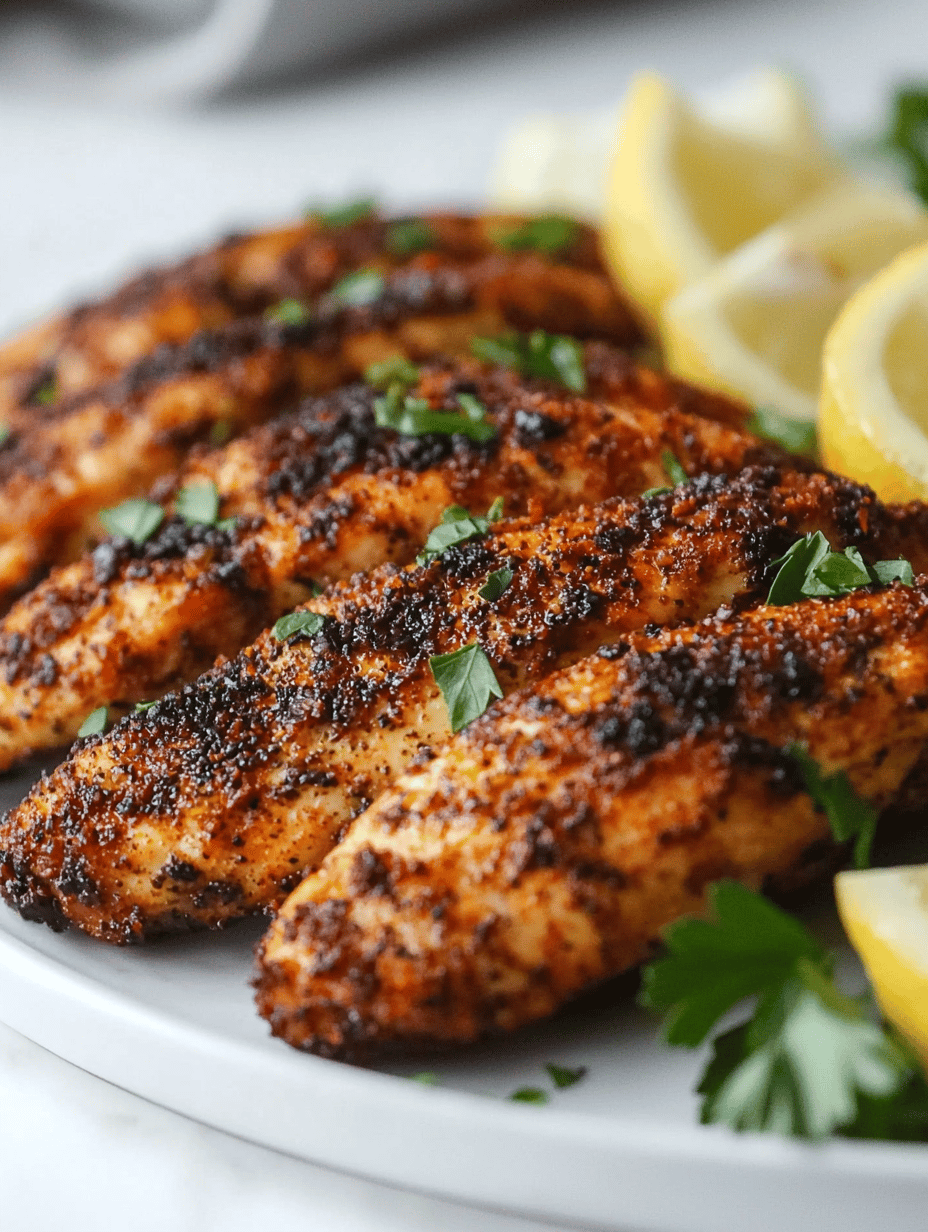
    Lemon Chicken involves marinating chicken breasts in a mixture of lemon juice, zest, and seasonings, then pan-searing until golden and cooked through. The dish features a tender interior with a slightly crisp exterior, coated in a bright, citrusy sauce that coats the chicken evenly.
    Prep Time 10 minutes
    Cook Time 15 minutes
    Total Time 25 minutes
    Servings: 4
    Course: Main Course
    Cuisine: International
    Calories: 250

    Ingredients
      

    • 4 pieces chicken breasts boneless, skinless
    • 1/4 cup fresh lemon juice
    • 1 tbsp lemon zest from about 1 lemon
    • 2 cloves garlic minced
    • 2 tbsp olive oil
    • 1 tsp salt
    • 1/2 tsp black pepper

    Equipment

    • Mixing bowl
    • Skillet or frying pan
    • Measuring utensils
    • Zester or grater
    • Tongs or spatula

    Method
     

    1. Place the chicken breasts in a mixing bowl and pour over the lemon juice. Add the lemon zest, minced garlic, salt, and pepper.
      4 pieces chicken breasts, 1/4 cup fresh lemon juice, 1 tbsp lemon zest, 2 cloves garlic, 1 tsp salt, 1/2 tsp black pepper
    2. Cover the bowl with plastic wrap and refrigerate for at least 30 minutes to allow the chicken to marinate and absorb the flavors.
    3. Heat a skillet over medium-high heat and add the olive oil. Once hot, remove the chicken from the marinade (letting excess drip off) and place it in the pan.
      4 pieces chicken breasts, 2 tbsp olive oil
    4. Cook the chicken for about 5-6 minutes per side, until golden brown and cooked through with an internal temperature of 165°F (75°C). Flip once and see a well-browned crust forming.
    5. Once cooked, remove the chicken from the pan and let it rest for a few minutes. In the same pan, add a splash of water or chicken broth if needed, and cook until the sauce thickens slightly and becomes glossy. Scrape up any browned bits for flavor.
    6. Slice the rested chicken, arrange on plates, and spoon the citrus sauce over the top. Serve immediately.

    The best part? You won’t feel guilty about pulling out cold leftovers. Just a little squeeze of lemon before eating, and it’s like rediscovering it all over again. Sometimes I forget how simple dishes like this turn into my favorites—nothing fancy, just enough to remind me why I started cooking in the first place.

  • Patriotic Smoothie: A Morning Wake-Up Call with a Twist

    Patriotic Smoothie: A Morning Wake-Up Call with a Twist

    Starting with the Blueberries

    Most folks toss some berries into a smoothie. But I’ve been sneaking leftover blueberries from the night before into my morning blend. That burst of chilly, slightly wrinkled fruit makes the whole thing smell like picnic days and summer nights. It’s odd how that little bitterness from a berry you almost forgot about changes everything.

    Then the red — strawberries. Not the glossy, perfect kind. Real ones, with tiny seeds and a dirt smell when you crush them in your hand. When they hit the blender, they turn into this bright, almost neon pink sludge that gives a punch of sunny flavor.

    Finally, the white — take a deep breath of the vanilla yogurt mixed with a splash of milk. It’s like a secret handshake between breakfast and nostalgia. And honestly, that’s probably why I keep making this. Because it feels like a little rebellion—a simple way to celebrate a day that feels way bigger than a smoothie.

    Blueberry and Strawberry Smoothie with Vanilla Yogurt

    This smoothie combines blended blueberries, strawberries, and vanilla yogurt to create a thick, creamy beverage with vibrant colors and a balanced flavor profile. The ingredients are pureed until smooth, resulting in a cold, slightly pulpy texture with visible fruit pieces and a glossy finish.
    Prep Time 5 minutes
    Total Time 5 minutes
    Servings: 2
    Course: Main Course
    Cuisine: American
    Calories: 180

    Ingredients
      

    • 1 cup frozen blueberries preferably leftover from previous night
    • 1 cup fresh strawberries hulled and crushed
    • 1 cup vanilla yogurt full-fat or Greek style
    • 0.5 cup milk any type desired

    Equipment

    • Blender
    • Measuring cups and spoons

    Method
     

    1. Place the frozen blueberries into the blender pitcher, ensuring they are evenly distributed at the bottom.
    2. Add the crushed strawberries into the blender, layering them on top of the blueberries.
    3. Secure the lid on the blender and puree on high speed until the mixture is smooth and thick, about 30-40 seconds. You should see the ingredients fully combined with a glossy, slightly pulpy texture.
    4. Stop the blender and check the consistency; if desired, add a little more milk and blend briefly to thin slightly. The final blend should be uniformly colored with visible small fruit chunks and a smooth surface.
    5. Pour the smoothie into serving glasses, and optionally garnish with a few whole berries or a slice of strawberry for presentation.

    Sometimes, the best ideas are ones you don’t plan. Throwing together this red, white, and blue mess just to see if the leftovers could become something more. Turns out, it’s a surprisingly good way to start a holiday, or any day you want a little reminder that simple is sometimes better. Plus, not everything has to be perfect. It’s just eggs and berries and a splash of cream, really. But if you ask me, sometimes that’s the whole point.