Author: Theo Granger

  • Cheese-Laden Onion Rings For Your Inner Snack Nerd

    Cheese-Laden Onion Rings For Your Inner Snack Nerd

    I was recently half-watching a cooking show, when suddenly they deep-fried a giant onion ring and topped it with a drizzle of truffle oil. I paused. That idea stuck with me. So I decided to fill crispy onion rings with gooey mozzarella—because honestly, what’s more satisfying than cheesy molten pockets nestled inside crunchy, caramelized onion?

    This isn’t just about comfort. It’s about surprising your taste buds right now. The crispy batter gives a satisfying crunch, but the real magic is that cheesy stretch pulling apart mid-bite. Perfect for snack time or even a quick appetizer that makes you feel like a questionable gourmet.

    It’s simple enough to whip up between busy moments—and honestly, I think that’s what makes it addictive. No fancy tricks, just some good cheese, a good onion, and a little patience with the oven. Sometimes, slicing into these feels like uncovering a secret little treasure chest of melted cheese and crispy layers.

    Why I Love This Recipe (And You Will Too)

    • It’s a totally unexpected way to serve onions, turning them into cheesy, crunchy bites that aren’t boring.
    • They make late-night snacks feel fancy enough for guests to ask for seconds—even if you’re just craving guilty pleasure.
    • It’s a one-pan, hands-on kind of project that’s forgiving and fun, not a fussy mess.
    • The aroma of frying cheese and onions makes the whole house smell like a street fair.
    • Honestly, the melted mozzarella explosion never gets old. That’s worth making again and again.

    Thinking about the mess I’ll make just writing this out… someday I’ll stop being surprised how something so simple ends up being the best thing I’ve eaten all week.

    Cheesy Crispy Onion Rings filled with Mozzarella

    This dish features large onion rings that are battered and deep-fried until golden and crispy. The batter is filled with gooey mozzarella cheese, creating molten pockets inside the crunchy exterior. The final result is a savory, cheesy bite with a satisfying crunch and melty cheese pull.
    Prep Time 15 minutes
    Cook Time 10 minutes
    Total Time 25 minutes
    Servings: 4
    Course: Main Course
    Cuisine: American
    Calories: 280

    Ingredients
      

    • 2 large onions peeled and sliced into thick rings
    • 8 oz mozzarella cheese cut into 1-inch cubes
    • 1 1/2 cups all-purpose flour for batter coating
    • 1 cup cold water to create batter
    • 1 large egg lightly beaten
    • 1 tsp baking powder helps batter become crispy
    • 1 tsp salt
    • 2 cups panko breadcrumbs for extra crunch
    • oil for frying vegetable oil enough for deep frying

    Equipment

    • Deep-frying pan or Dutch oven
    • Mixing bowls

    Method
     

    1. Slice the onions into thick, rounds, making large rings and set aside.
    2. Prepare the mozzarella cubes by cutting them into 1-inch pieces; set aside to stuff into the onion rings later.
    3. In a mixing bowl, whisk together all-purpose flour, baking powder, and salt. Gradually add cold water and the beaten egg, stirring until the batter is smooth and slightly thickened.
    4. Line a shallow dish with panko breadcrumbs for coating the onion rings.
    5. Carefully stuff a cube of mozzarella into the center of each onion ring, pressing gently to secure it inside.
    6. Dip each stuffed onion ring into the batter, ensuring it’s evenly coated all around.
    7. Next, roll the coated onion rings in the panko breadcrumbs, pressing lightly so they adhere well.
    8. Heat vegetable oil in a deep-frying pan over medium-high heat until it reaches about 350°F (175°C); you can test by dropping a small piece of bread—if it sizzles and bubbles, it’s ready.
    9. Carefully drop the prepared onion rings into the hot oil, frying in batches to avoid overcrowding. Fry for about 3-4 minutes until golden brown and crispy, turning occasionally for even color.
    10. Remove the onion rings with a slotted spoon and drain on paper towels to remove excess oil, revealing a crispy, golden exterior.
    11. Serve immediately, allowing the molten mozzarella inside to be enjoyed with the crispy onion exterior.

    Notes

    For an extra touch, drizzle truffle oil over the onion rings before serving. Make sure the cheese is well-stuffed for gooey molten centers. Be careful when frying to prevent splatters and ensure safety.

    Maybe I need to stop thinking about how I’ll burn myself trying to get that perfect cheesy stretch every time. It’s a small miracle that the patience pays off and I get to experience those gooey moments. The crispy batter might be the real MVP, but the molten cheese always steals the show.

    Either way, these onion rings are proof that sometimes the craziest ideas—like stuffing them with cheese—are the ones worth trying. And honestly, I probably should’ve added a spicy dip or something. But for now, I’ll just leave it at that. Let’s see how long I can resist the urge to make an extra batch tonight.

  • Secret Snack Hack: Little Caesars Crazy Bread You Can Make at Home

    Secret Snack Hack: Little Caesars Crazy Bread You Can Make at Home

    I stumbled onto this crazy idea after rifling through my pantry and realizing how much I need to stop relying on frozen snacks. Crazy Bread popped into my head after a weird craving — that salty, cheesy, buttery smell that triggers childhood memories. Turns out, making it myself lets me control the crispiness and avoid the stuff I don’t want.

    It’s surprisingly easy for how iconic it feels. Dough, a bit of garlic butter, shredded cheese — toss it in the oven, turn around for a second, and bam. Reality check: I think I ate half the batch in a single sitting. It’s the perfect thing to keep around when life’s chaos feels too loud and bread sounds like the right answer.

    Why I Love This Recipe (And You Will Too)

    • It’s an easy fix for those ridiculous snack attacks.
    • Knowing exactly what’s in it makes me more chill about indulging.
    • The smell of toasted garlic butter makes everything feel a little more manageable.
    • It’s that lazy Sunday snack I didn’t know I needed until I made it.
    • Honestly, it’s just fun to mess around with dough and cheese and see what happens.

    So yeah, maybe it’s just bread but, at least today, it’s a tiny victory.

    Homemade Crazy Bread

    This dish features a soft, dough-based bread topped with garlic butter and shredded cheese, baked until golden and crispy. The process involves preparing the dough, spreading garlic butter, adding cheese, and baking to achieve a cheesy, buttery crust with a satisfying crunch and gooey interior.
    Prep Time 15 minutes
    Cook Time 12 minutes
    Total Time 27 minutes
    Servings: 4
    Course: Main Course
    Cuisine: American
    Calories: 250

    Ingredients
      

    • 1 package store-bought pizza dough or soft bread dough about 1 pound
    • 4 tablespoons unsalted butter melted
    • 2 cloves garlic minced
    • 1 cup shredded cheese cheddar or mozzarella blend
    • 1 pinch salt optional, for garlic butter

    Equipment

    • Mixing bowl
    • Baking sheet
    • Paddle or spoon for mixing
    • Basting brush

    Method
     

    1. Preheat your oven to 375°F (190°C). Lightly grease a baking sheet to prevent sticking.
    2. On a clean surface, gently stretch or roll the dough into a rectangular shape about ½ inch thick. This helps it bake evenly and forms a good base for toppings.
    3. In a small bowl, mix the melted butter with the minced garlic and a pinch of salt if desired. This aromatic garlic butter will soak into the dough and add flavor.
    4. Use a basting brush to evenly spread the garlic butter all over the dough’s surface, covering every corner for maximum flavor.
    5. Sprinkle the shredded cheese evenly over the coated dough, pressing down gently to help it adhere and distribute uniformly.
    6. Transfer the topped dough onto the prepared baking sheet. Bake in the preheated oven for about 12 minutes, or until the cheese is bubbly and golden brown, and the edges have crisped up nicely.
    7. Remove from oven and let it sit for a minute. Slice into strips or squares for easy sharing and savor the crisp, cheesy, buttery bread while it’s warm and inviting.

    Notes

    For extra flavor, sprinkle with dried herbs like oregano or parsley before baking.

    Sometimes, the simplest food makes the biggest mess in your head. Crazy Bread at home isn’t about striving for perfection, just trying to get that warm, cheesy pull without the drive-thru. I think I’ll keep experimenting with different cheese blends and herbs — or maybe just eat it plain and call it good.

    Anyhow, that smell is worth every minute. Or maybe I should go hide a few pieces before anyone notices.

  • The Hidden Power of Jewel-Studded Rice: More Than Just Color

    The Hidden Power of Jewel-Studded Rice: More Than Just Color

    Why I Love This Recipe (And You Will Too)

    Making Persian Jeweled Rice isn’t just about a pretty dinner plate. It’s about catching little moments of joy—like biting into a tender date paired with a burst of saffron and the crunch of pistachios. It’s surprising how a dish this vibrant can feel so grounding, kind of like reconnecting with an old recipe passed down or made up on the spot. Sometimes, the chaos of the world makes me crave something both celebratory and simple to throw together.

    And this dish is perfect for that. It’s easy enough to cook on a weeknight and special enough for when friends come over, no fancy fuss required. I love how each bite surprises you—fruit, nuts, saffron—layers of flavor that catch you off guard every time. It’s a reminder that food can be a tiny act of joy, even when the day’s a mess.

    Why I Love This Recipe (And You Will Too)

    • It’s a colorful, no-fuss way to brighten up any meal—especially when everything else feels dull.
    • The aroma of toasted nuts and saffron fills the kitchen and makes you pause; it’s almost nostalgic.
    • Fitting into busy lives but feeling fancy enough for weekends makes it my go-to.
    • Cooking it reminds me that simple ingredients—when combined consciously—can make magic.

    Maybe it’s just me, but I think food that looks like this makes even the wildest days seem a little more manageable. Or at least more colorful.

    Persian Jeweled Rice

    Persian Jeweled Rice is a vibrant and aromatic rice dish made by fluffing cooked saffron-infused rice and mixing in tender dried fruits, toasted nuts, and colorful candied vegetables. The final dish has a fluffy, slightly sticky texture with a jewel-toned appearance, combining sweet, savory, and crunchy elements in each bite.
    Prep Time 15 minutes
    Cook Time 30 minutes
    Total Time 45 minutes
    Servings: 4
    Course: Main Course
    Cuisine: Persian
    Calories: 250

    Ingredients
      

    • 1 cup basmati rice rinsed and soaked for 30 minutes
    • 1 pinch saffron threads crushed and steeped in hot water
    • 1 1/2 cups water
    • 2 tablespoons olive oil
    • 1/2 cup dried apricots chopped
    • 1/4 cup pistachios shelled and toasted
    • 1/4 cup candied orange peel chopped
    • 2 tablespoons honey
    • Salt to taste

    Equipment

    • Saucepan
    • Mixing bowl

    Method
     

    1. Drain the soaked rice and set aside. In a small bowl, steep the saffron threads in a few tablespoons of hot water until fragrant and bright yellow.
    2. Bring water to a boil in a saucepan, add a pinch of salt, and then stir in the rice. Cook until the rice is just tender and about half the water is absorbed, then drain and set aside.
    3. In a large mixing bowl, gently fluff the cooked rice with a fork. Drizzle the saffron water over the rice and fold gently to evenly distribute the color and aroma.
    4. In a skillet, heat the olive oil over medium heat, then add the chopped dried apricots and cook until slightly softened, about 2 minutes.
    5. Add the toasted pistachios and chopped candied orange peel to the skillet, and cook for another minute so the flavors meld together with a delicious aroma.
    6. Remove the skillet from heat and stir in the honey, coating the fruit and nuts evenly for a touch of sweetness.
    7. Gently fold the fruit and nut mixture into the saffron rice, mixing just enough to combine but keeping the grains fluffy and separate.
    8. Taste the rice and season with salt as needed, then transfer it to a serving dish. Garnish with extra toasted pistachios if desired.
    9. Serve the jeweled rice warm or at room temperature as a colorful and fragrant main or side dish.

    Notes

    Using fragrant saffron and fresh ingredients highlights the dish’s vibrant visual and flavor profile. To toast pistachios, spread them on a dry skillet over medium heat until golden and fragrant, then cool before chopping.

    Whenever I make this, I get a sudden urge to make an entire platter just for myself. Or maybe just because I want to see all those bright jewels glisten in the bowl again. Either way, it’s a small act of rebellion—breaking from plain rice to something that feels almost like a secret. And honestly, that’s enough for today.

  • Parmesan Garlic Bread Bites That Actually Save Dinner

    Parmesan Garlic Bread Bites That Actually Save Dinner

    Ever think about how a few pieces of bread can turn your whole kitchen into a ball of chaos? Like, I was craving something crispy and cheesy but didn’t want to open a whole bag of chips or wait for a complicated pizza. So I turned to garlic, Parmesan, and bread slices from the back of the fridge. It’s almost suspicious how these simple ingredients come together with such a satisfying crunch and a whiff of roasted garlic in the air.

    What got me hooked was how insanely fast this snack comes together. No proofing, no fancy techniques—just toss, bake, and enjoy. These bites are perfect for when you want to sneak something salty and crispy onto your plate while hiding from life for five minutes. Right now, I need easy, flavorful bites that don’t take a toll on my sanity.

    Why I Love This Recipe (And You Will Too)

    • They’re a lifesaver when I need a quick snack for work or movie night.
    • They make the house smell like I actually put effort into dinner, even if I didn’t.
    • Just enough cheese and garlic to give me that guilty pleasure without feeling heavy.
    • They’re totally customizable—add herbs or chili flakes if you’re feeling wild.
    • Honestly, I keep these in the freezer for those “what’s for dinner?” emergencies.

    Yeah, I get it. Sometimes the simplest ideas turn into the most satisfying moments. These bread bites are exactly that. Keep some on hand. Or don’t. Just don’t forget how easy it is to turn bread and cheese into a little moment of joy.

    Garlic Parmesan Bread Bites

    This dish consists of slices of bread topped with garlic and Parmesan cheese, then baked until crispy and golden. The final product has a crunchy exterior with tender bread inside, infused with flavorful roasted garlic and cheesy goodness.
    Prep Time 10 minutes
    Cook Time 15 minutes
    Total Time 25 minutes
    Servings: 4
    Course: Main Course
    Cuisine: American
    Calories: 150

    Ingredients
      

    • 4 slices bread slices day-old or crusty bread works well
    • 3 cloves garlic minced or finely chopped
    • 1/2 cup Parmesan cheese grated
    • 2 tablespoons olive oil extra virgin preferred
    • 1/2 teaspoon salt to taste
    • 1/4 teaspoon black pepper optional, freshly ground

    Equipment

    • Baking sheet
    • Mixing bowl

    Method
     

    1. Preheat your oven to 400°F (200°C) and line a baking sheet with parchment paper for easy cleanup.
    2. Arrange the bread slices on the prepared baking sheet in a single layer.
    3. Mix together the minced garlic, olive oil, salt, and black pepper in a small bowl until well combined.
    4. Spread the garlic and oil mixture evenly over each bread slice, covering the surface completely.
    5. Sprinkle the grated Parmesan cheese generously over the coated bread slices, pressing gently to adhere.
    6. Bake in the preheated oven for about 12-15 minutes, or until the edges are crispy and golden brown, and the cheese is bubbling.
    7. Remove from the oven and let cool slightly for a minute or two; the bites will be hot and crispy.
    8. Serve the garlic Parmesan bread bites warm as a crunchy, cheesy snack or side dish.

    Sometimes all I need is a handful of garlic bread bites and a quiet moment. Or a chaos-filled night with friends. Whatever. They just work, you know? No fuss, just flavor. That’s what counts right now.

  • The Secret to Crispy Parmesan Potatoes You Didn’t See Coming

    The Secret to Crispy Parmesan Potatoes You Didn’t See Coming

    I’ve been obsessed lately with the idea of crust that doubles as a flavor bomb. These Parmesan-coated potatoes are not just crispy; they smell of toasted cheese and caramelized edges. It’s like the kitchen suddenly smells like a fancy snack bar, but way easier to pull off.

    Honestly, I’m not big on complicated recipes these days. I want something that comes together quickly but still surprises your taste buds. No fancy ingredients, just good potatoes, real Parmesan, and a little olive oil. Perfect for a weeknight, or when you’re craving something richer than roasted potatoes.

    And right now, I’m thinking about how much I need a good crunch on a gloomy day. Sometimes, simple food like this reminds you that uncomplicated, honest flavors matter most.

    Why I Love This Recipe (And You Will Too)

    • It’s easy to throw together when I don’t want to think too much.
    • The Parmesan crust crisps up beautifully, giving a salty, cheesy flavor in every bite.
    • It somehow feels fancy enough for guests but simple enough for a solo dinner.
    • The smell of toasting cheese is irresistible and makes the whole house smell good.
    • Leftovers, if you have any, reheat surprisingly well without losing crunch.

    Sometimes it’s the simple things—like crispy Parmesan potatoes—that make a weekday feel special without trying too hard. Just a little bit of cheese, a little bit of patience, and suddenly dinner feels different.

    Parmesan-Crusted Potatoes

    This dish features small potatoes coated in a mixture of Parmesan cheese and olive oil, then baked until crispy and golden. The Parmesan forms a flavorful crust that adds a cheesy, toasted aroma and a crunchy texture to the tender potatoes.
    Prep Time 10 minutes
    Cook Time 30 minutes
    Total Time 40 minutes
    Servings: 4
    Course: Main Course
    Cuisine: Western
    Calories: 220

    Ingredients
      

    • 1.5 pounds small potatoes (such as baby Yukon Gold or red potatoes) halved or quartered if large
    • 0.75 cup grated Parmesan cheese freshly grated for best flavor
    • 2 tablespoons olive oil extra virgin preferred
    • to taste salt and freshly ground black pepper

    Equipment

    • Baking sheet
    • Mixing bowl
    • Chef’s knife
    • Cutting board
    • Grater

    Method
     

    1. Preheat your oven to 425°F (220°C). Line a baking sheet with parchment paper for easy cleanup.
    2. Wash and dry the potatoes thoroughly. Cut larger potatoes into halves or quarters to ensure they cook evenly.
      1.5 pounds small potatoes (such as baby Yukon Gold or red potatoes)
    3. In a large mixing bowl, toss the potatoes with olive oil until evenly coated. Season with salt and pepper to your taste.
      1.5 pounds small potatoes (such as baby Yukon Gold or red potatoes)
    4. Sprinkle the grated Parmesan cheese over the potatoes and gently toss again to coat each piece with cheese and oil, forming a crust-like coating.
      1.5 pounds small potatoes (such as baby Yukon Gold or red potatoes)
    5. Spread the coated potatoes in a single layer on the prepared baking sheet, ensuring they are not overcrowded for maximum crispness.
      1.5 pounds small potatoes (such as baby Yukon Gold or red potatoes)
    6. Bake in the preheated oven for about 25-30 minutes, until the potatoes are golden brown and the Parmesan crust is crispy and bubbling.
      1.5 pounds small potatoes (such as baby Yukon Gold or red potatoes)
    7. Remove the tray from the oven, let the potatoes cool slightly until they are firm and fragrant, with a crispy, cheesy crust.
      1.5 pounds small potatoes (such as baby Yukon Gold or red potatoes)
    8. Serve hot as a flavorful side dish or snack, enjoying the crunch and cheesy aroma with each bite.
      1.5 pounds small potatoes (such as baby Yukon Gold or red potatoes)

    What I keep thinking about is how easy it is to turn something as basic as potatoes into a little kitchen victory. There’s a weird comfort in that crunch, in that salty cheese snap. I probably shouldn’t admit I burned a batch trying to make it perfect the first time, but that is part of the charm, right?

    Anyway, I’m just gonna keep eating these and messing up in the kitchen. Sometimes, that’s all it takes to feel a little more grounded — a plate full of crispy, cheesy potatoes.

  • Loaded Breakfast Hash: A Morning Renaissance in One Pan

    Loaded Breakfast Hash: A Morning Renaissance in One Pan

    Cooking this feels like I’m rewriting the morning routine. No fancy tricks, just a skillet, some leftovers, a little cheese—suddenly breakfast feels like an act of rebellion. The sizzle of diced potatoes, crispy edges catching the light, makes me forget about the endless scramble of busy mornings.

    What I love about this dish isn’t just the mess-free charm. It’s how it stops time for a moment—bullets of bacon, caramelized onions, perfectly oozy eggs all layered with control. Especially now, when the world feels a little chaotic, having a plate that hits different is a small victory.

    Why I Love This Recipe (And You Will Too)

    • It’s honest, no-fuss comfort food that makes use of what you already have.
    • Every bite has a crispy-salty punch that keeps you coming back for more.
    • Perfect for those mornings when you want breakfast AND lunch.
    • It demands no plating skills—just throw everything together, and it magically works.
    • Honestly, it’s funny how something so simple can feel like a mini celebration.

    Maybe I should just keep this secret a little longer. Or maybe I’ll make it again tomorrow, see if it still feels this good.

    Loaded Breakfast Skillet

    This dish is a skillet-based breakfast that combines crispy diced potatoes, caramelized onions, smoky bacon, and runny eggs. The ingredients are cooked together in a single pan, creating a hearty, layered meal with textures ranging from crispy edges to soft, molten yolks.
    Prep Time 10 minutes
    Cook Time 15 minutes
    Total Time 25 minutes
    Servings: 2
    Course: Main Course
    Cuisine: American
    Calories: 550

    Ingredients
      

    • 2 medium potatoes diced
    • 4 slices bacon chopped
    • 1 large onion sliced
    • 4 eggs eggs for frying
    • 1 cup shredded cheese optional, for topping
    • to taste salt and pepper for seasoning

    Equipment

    • Skillet or frying pan
    • Spatula
    • Knife
    • Cutting board

    Method
     

    1. Heat the skillet over medium heat and add the chopped bacon. Cook until crispy, about 5 minutes, then remove and set aside.
    2. Add the diced potatoes to the bacon fat and spread them out evenly. Let cook undisturbed for a few minutes until the bottoms are golden and crispy.
    3. Stir in the sliced onions and cook with the potatoes, stirring occasionally, until the onions are caramelized and the potatoes are tender and golden, about 8-10 minutes.
    4. Create small wells in the potato mixture and crack the eggs into each well. Season with salt and pepper.
    5. Cover the skillet and cook until the eggs are just set, about 3-4 minutes. The whites should be firm, and the yolks still runny.
    6. Uncover, sprinkle the shredded cheese on top, and cook for an additional minute until melted and bubbly.
    7. Remove from heat, garnish with the cooked bacon, and serve hot straight from the skillet for a rustic presentation.

    Sometimes, I think about how straightforward food can bring a kind of chaos that feels right. Nothing fancy, just ingredients turning into something more than the sum of their parts. It’s like a little reminder that complexity isn’t always necessary.

    Anyway, if you’re tired of waking up to the same old—this might just shake things up. Or not. But I’ll probably be eating it again before anyone can say “breakfast update.”

  • The Secret Scent of Fall in Every Bite: Caramel Apple Empanadas

    The Secret Scent of Fall in Every Bite: Caramel Apple Empanadas

    When I first made these, I didn’t expect the smell to hit me so hard. Some recipes are forgettable, but this one? It’s like catching a whiff of grandma’s apple orchard on a late September day. Warm caramel, a hint of cinnamon, and the faint aroma of butter roasting apples—these are the smells that make your kitchen feel like a little fall festival.

    I had this moment mid-bake when I realized how perfect these are for suddenly chilly afternoons. It’s not just about the taste but that nostalgic punch—biting into something that reminds you of simpler days. Making these feels like stitching a tiny patch of childhood into today’s busy life, even if just for a few minutes.

    Why I love this recipe (And you will too):

    • It’s fast enough to throw together on a weekday but feels fancy enough to serve at a dinner party
    • The crispy edges and gooey caramel make both the hands and the psyche happy
    • Chopping apples and drizzling caramel is oddly satisfying—like a small act of self-care
    • They’re perfect for carving out a little moment of calm amid chaos

    Honestly, I keep thinking I might just start making these every weekend—because somehow, they really do taste like fall wrapped in a portable hand pie.

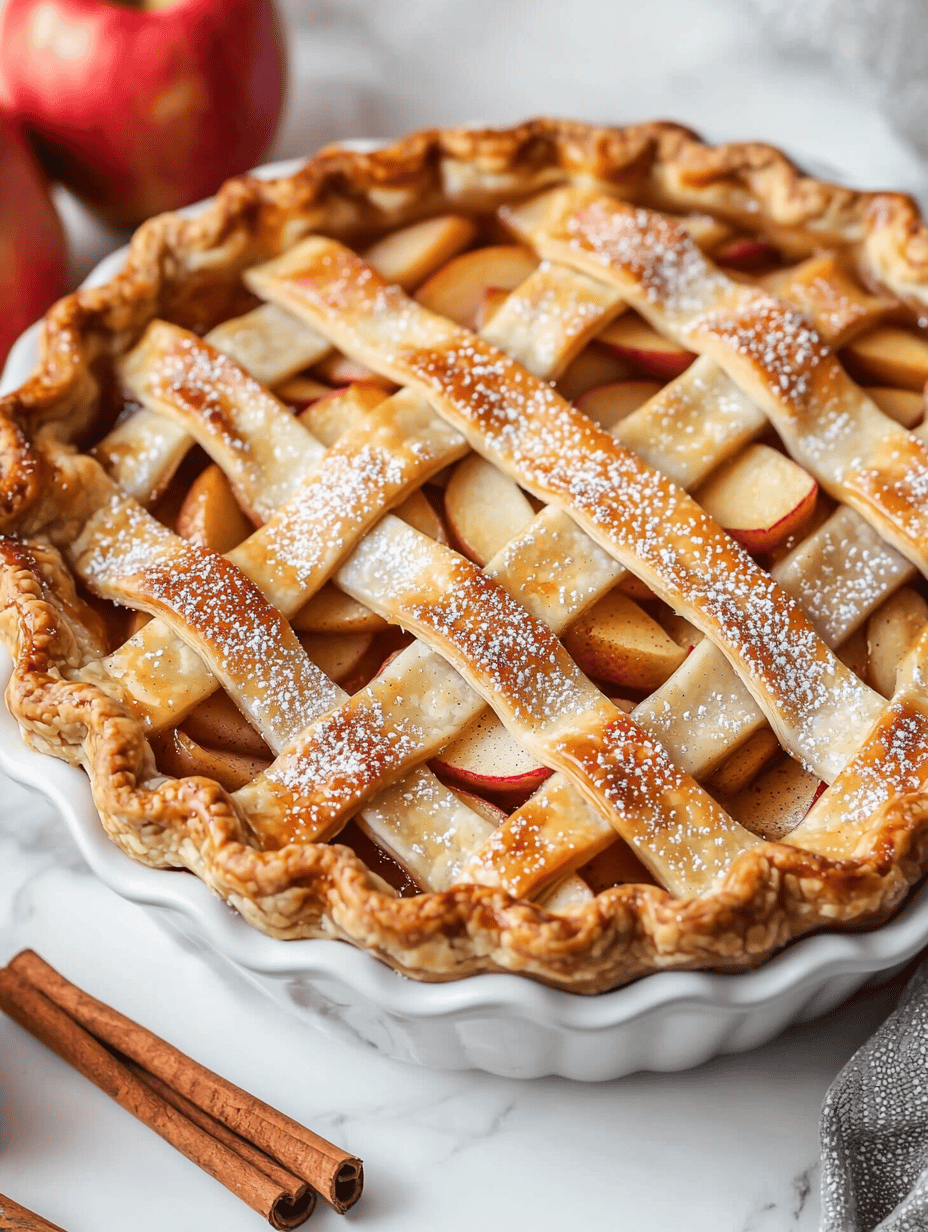
    Apple Cinnamon Hand Pies

    This dessert features flaky pastry filled with tender, spiced apples and a touch of caramel, baked until golden. The finished hand pies have a crisp crust with a juicy, cinnamon-scented filling that is both sweet and aromatic, perfect for fall-inspired treats.
    Prep Time 20 minutes
    Cook Time 35 minutes
    Total Time 55 minutes
    Servings: 8
    Course: Main Course
    Cuisine: American
    Calories: 250

    Ingredients
      

    • 2 cups all-purpose flour for the pastry dough
    • 1 cup cold unsalted butter cut into cubes
    • 1/4 cup ice water plus more if needed
    • 3 medium large apples peeled and diced
    • 1/2 cup brown sugar for the filling
    • 1 teaspoon ground cinnamon for flavor
    • 2 tablespoons caramel sauce for drizzling
    • 1 egg large egg beaten, for egg wash

    Equipment

    • Mixing bowls
    • Pastry cutter or knife

    Method
     

    1. Mix the flour and a pinch of salt in a large bowl. Add the cold butter cubes and use a pastry cutter or your fingers to blend until the mixture resembles coarse crumbs.
    2. Gradually pour in the ice water, a tablespoon at a time, mixing gently until the dough starts to come together. Stop adding water once the dough holds when pressed lightly.
    3. Shape the dough into a disk, wrap it in plastic wrap, and refrigerate for about 30 minutes to let the gluten relax.
    4. While the dough chills, prepare the filling: toss the diced apples with brown sugar and cinnamon until evenly coated.
    5. Preheat your oven to 400°F (200°C). Remove the dough from the fridge and roll it out on a lightly floured surface to about 1/8 inch thickness.
    6. Use a round cutter or a glass to cut out circles approximately 4 inches in diameter each.
    7. Spoon a tablespoon of apple filling onto one side of each dough circle, leaving a small border around the edge.
    8. Fold each circle over to enclose the filling, then crimp the edges with a fork to seal tightly.
    9. Place the assembled pies on a baking sheet lined with parchment paper. Brush the tops with beaten egg for a shiny, golden crust.
    10. Bake for about 20-25 minutes, or until the pies are golden brown and bubbly. Remove from the oven and let cool slightly.
    11. Drizzle caramel sauce over the warm pies before serving for an extra touch of sweetness and richness.

    Plus, the mess is pretty minimal and it’s all about flaky dough, spicy apples, and that slow cascade of caramel. Nothing fancy, but somehow it feels like a tiny celebration each time I bite into one. Maybe next time I’ll add a pinch of sea salt or a splash of bourbon. Always something to tweak, huh?

  • Cookies & Cream Cheesecake: The Lazy Person’s Dream Dessert

    Cookies & Cream Cheesecake: The Lazy Person’s Dream Dessert

    Ever think about how some desserts just happen to be perfect for those mornings when all you want to do is shove everything in a bowl and call it good? This cheesecake isn’t about fancy layers or perfect slices. It’s about broken cookies, melting chocolate, and that smell of vanilla and milk that makes you stop what you’re doing.

    What makes this one stand out right now? Well, cookies and cream isn’t just for ice cream anymore. It’s a nostalgic punch—kids’ snacks, late-night fridge raids, childhood summer patios. And this cheesecake? It combines all that ice-cream-inspired comfort with the richness of cream cheese. No-bake, no-fuss, just a mess of crushed cookies and creamy dreams.

    Every bite reminds me that sometimes simplicity wins. No pretenses, just the kind of dessert you want to inhale before you even realize you’re eating it. Like a crash course in comfort food, served cool and a little chaotic. Honestly, I think I should just keep a slice in the fridge forever.

    Why I Love This Recipe (And You Will Too)

    • It’s an instant mood lift, like opening a package of Oreos after a bad day.
    • Perfect for when you’re low on ingredients but still need a treat.
    • It’s easy to whip up, even if you’re not a pro baker.
    • It hits that nostalgic sweet spot that keeps sneaking into my dreams.
    • And honestly, I don’t think I’ll ever get tired of the way it melts in your mouth.

    Cookies and Cream No-Bake Cheesecake

    This no-bake cheesecake combines crushed cookies and melted chocolate with cream cheese to create a creamy, crumbly dessert. The mixture is pressed into a pan and chilled until set, resulting in a smooth, velvety texture with a crunchy cookie base and rich chocolate flavor.
    Prep Time 15 minutes
    Total Time 4 minutes
    Servings: 8
    Course: Main Course
    Cuisine: American
    Calories: 420

    Ingredients
      

    • 200 grams chocolate cookies crushed into small crumbs
    • 200 grams cream cheese softened
    • 100 grams granulated sugar optional, for added sweetness
    • 150 grams semi-sweet chocolate melted and slightly cooled
    • 1 teaspoon vanilla extract

    Equipment

    • Mixing bowl
    • 8-inch springform pan
    • Spatula
    • Measuring cups and spoons
    • Microwave or double boiler
    • Refrigerator

    Method
     

    1. Begin by crushing the cookies into fine crumbs using a zip-top bag and rolling pin or a food processor, then transfer to a mixing bowl.
    2. In a microwave-safe bowl, melt the semi-sweet chocolate in 30-second intervals, stirring between each, until smooth and glossy. Let it cool slightly.
    3. Using a hand or stand mixer, beat the softened cream cheese until creamy and smooth, about 2-3 minutes.
    4. Add sugar and vanilla extract to the cream cheese and mix until well combined and fluffy.
    5. Pour the melted chocolate into the cream cheese mixture, then gently fold until the mixture is uniform in color and texture.
    6. Mix the crushed cookies into the chocolate-cream cheese mixture, folding gently to evenly distribute the crumbs.
    7. Spread the mixture evenly into the bottom of an 8-inch springform pan, pressing it down gently with a spatula to create a firm base.
    8. Cover the pan with plastic wrap and refrigerate for at least 4 hours, or until the cheesecake is firm and chilled.
    9. Before serving, slice the cheesecake with a sharp knife, serving chilled to enjoy its creamy yet crumbly texture.

    Maybe next time I’ll try adding caramel swirls or swapping the cookies for something unexpected. Or maybe just more cookies, because clearly this is the kind of dessert that’s better a little messy. Anyway, it’s good enough to eat straight from the fridge at midnight. Or in the morning. Or whenever I forget I was supposed to be productive today.

  • Angel Food Cake: The Airiest Slice You Didn’t See Coming

    Angel Food Cake: The Airiest Slice You Didn’t See Coming

    I never realized how much I missed the crackly top of a freshly baked angel food cake until I tried baking one myself. It’s like watching a balloon slowly expand, then suddenly burst with a crack that echoes through the kitchen. No butter needed, just eggs, sugar, and a little patience.

    What’s wild is how the smell shifts as it bakes—the sweet, slightly toasted aroma mixed with fresh egg whites. It’s a quiet celebration of simplicity. Perfect for these days when I crave something light but with a surprising richness in the texture, not flavor.

    Right now, when desserts tend to lean overly complicated or too sweet, this one feels almost rebellious. Like sneaking a breath of fresh air between holiday desserts or slipping a cloud onto the dinner table without all the fuss.

    Why I Love This Recipe (And You Will Too)

    • It’s absurdly easy to adapt for whatever’s in your pantry – no butter, no fuss.
    • The airy texture makes it feel fancy but really, it’s just a good egg-whites showoff.
    • It’s a baking ritual I turn to when I want point-blank relief from complicated recipes.
    • Plus, the smell of vanilla and toasted sugar hanging around makes the house smell kind of like childhood.
    • It’s unexpectedly forgiving, even if you forget to fold or overmix a little. That’s life, right?

    At the end of the day, forgetting how simple good baking can be is sometimes okay. Like finding a moment of quiet in a noisy world—one fluffy slice at a time.

    Angel Food Cake

    Angel Food Cake is a light, airy dessert made primarily from egg whites and sugar, with no added fats like butter. It relies on whipped egg whites for volume, resulting in a fluffy, delicate crumb with a crackled, golden exterior. The final cake is soft, spongy, and cloud-like in texture with a crisp top.
    Prep Time 20 minutes
    Cook Time 35 minutes
    Total Time 55 minutes
    Servings: 8
    Course: Main Course
    Cuisine: American
    Calories: 170

    Ingredients
      

    • 1 1/2 cups granulated sugar divided
    • 9 large egg whites at room temperature
    • 1/2 teaspoon cream of tartar
    • 1 teaspoon vanilla extract
    • 1 1/2 cups cake flour sifted

    Equipment

    • Mixing bowls
    • Sifter
    • Hand or stand mixer
    • Loaf or tube pan

    Method
     

    1. Preheat your oven to 350°F (175°C) and position the rack in the middle. Sift the cake flour and half of the sugar together into a bowl to combine thoroughly.
    2. In a clean, large mixing bowl, beat the egg whites on medium speed until frothy, then add the cream of tartar. Continue beating until soft peaks form, which means the egg whites will hold a gentle, curved shape when you lift the beaters.
    3. Gradually add the remaining sugar a few tablespoons at a time while beating the egg whites, until stiff, glossy peaks form. The mixture should be thick and hold a firm peak when you lift the beaters.
    4. Sprinkle the sifted flour mixture over the whipped egg whites in three parts. Gently fold each addition in with a spatula, using a soft, sweeping motion to avoid deflating the meringue.
    5. Once fully combined, gently fold in the vanilla extract. The batter should be smooth and airy, with a delicate flow when lifted.
    6. Pour the batter into an ungreased tube pan or angel food cake pan, smoothing the top gently with a spatula. Do not tap or shake the pan to settle the batter, as this can deflate the air bubbles.
    7. Bake the cake in the preheated oven for about 35 minutes, until the top is golden and a toothpick inserted into the center comes out clean. You should see a crack forming and the cake expanding to fill the pan.
    8. Remove the cake from the oven and invert the pan onto a cooling rack. Let it cool completely upside down to prevent collapsing and to help maintain its tall, fluffy shape.
    9. Once cooled, gently run a knife around the edges of the pan to loosen the cake, then carefully remove it. It should be light, airy, and with a slight crackle on top.
    10. Slice and serve the angel food cake plain, or with fresh fruit or whipped cream for extra flavor and presentation. Enjoy the tender, cloud-like texture with each bite!

    Maybe I’ll just keep the cake back in that safe little corner of my mind for emergencies—like last-minute dinner guests or when I need a reminder that the simplest ingredients can still surprise me. Either way, it never lets me down.

  • The Unexpected Psychology of a Mug Chocolate Chip Cookie

    The Unexpected Psychology of a Mug Chocolate Chip Cookie

    I never thought a tiny ceramic mug could hold so much silent reassurance. When I feel bogged down, instead of a lengthy baking session, I reach for this. The smell of melting butter and chocolate chips in the microwave feels oddly comforting, like a small act of self-care that’s easy to overlook.

    This isn’t just about cramming a cookie into your face—it’s the quick rush of warm dough, gooey chocolate, and that shot of childhood nostalgia. Right now, with all the noise in the world, it’s a little reminder that some happiness is just a microwave beep away. It’s quick, it’s satisfying, and honestly, I kind of love how effortless it is to pull off in a moment of chaos.

    Why I Love This Recipe (And You Will Too)

    • It’s perfect when I need a sweet break but don’t want to commit to a whole batch of cookies.
    • The initial smell of melted chocolate and butter makes my apartment smell like I actually put effort into something.
    • It’s low pressure—no fancy skills or ingredients required.
    • Sometimes, just a single bubbling, warm bite is enough to make the day feel a little brighter.
    • Plus, it’s oddly satisfying to watch that tiny cookie puff up in the microwave.

    And I’ll admit, I’ve probably eaten half a dozen of these in one sitting. No shame. Just a silly little ritual I keep coming back to.

    Microwave Chocolate Chip Cookie in Mug

    This microwave mug cookie is a single-serving treat made by melting butter and sugar, then mixing in flour and chocolate chips to create a soft, gooey dough. The mixture is cooked briefly until it puffs up with a slightly crisp exterior and a warm, melty center. The final cookie is a compact, appealingly risen dessert with a tender, chewy texture.
    Prep Time 2 minutes
    Cook Time 1 minute
    Total Time 3 minutes
    Servings: 1
    Course: Main Course
    Calories: 250

    Ingredients
      

    • 2 tablespoons butter melted
    • 2 tablespoons granulated sugar
    • 1 pinch salt
    • 3 tablespoons all-purpose flour sifted if clumpy
    • 1/4 cup chocolate chips

    Equipment

    • Microwave-safe mug
    • Small mixing bowl

    Method
     

    1. Melt the butter in a small microwave-safe bowl or directly in the mug for about 20-30 seconds until smooth and shiny.
    2. Pour the melted butter into your mug and add the sugar and salt; stir well until the mixture is glossy and slightly thickened, about 30 seconds.
    3. Sift in the flour into the mug and mix thoroughly with a spoon until no streaks remain; the dough should be thick but pourable.
    4. Stir in the chocolate chips evenly into the batter, spreading them throughout the dough.
    5. Place the mug in the microwave and cook on high for about 60 seconds, watching until the dough puffs up and looks set around the edges.
    6. Carefully remove the mug from the microwave and let it sit for a minute; the cookie will settle slightly as it cools and the center remains gooey.
    7. Enjoy the warm cookie directly from the mug with a spoon, savoring the soft, gooey texture and melting chocolate.

    Notes

    Best enjoyed immediately while warm. You can customize with nuts or different chocolate types for variety.

    Maybe I should start adding sprinkles or sea salt. Or maybe I shouldn’t mess with perfection—or what I think is perfect in these tiny moments. Either way, this cookie in a mug keeps proving that sometimes, the best things are little, quick, and just a bit messy.