Many folks rush through grilling chicken, thinking it’s just about getting those grill marks and calling it a day. But what really makes the difference is giving that chicken enough rest after it hits the heat. I’ve learned this the hard way—cut into a hot breast too soon and it’s a dry, stringy mess.
Resting properly isn’t just about being patient; it’s about locking in those juices and letting the flavors settle. I used to overlook this step, ending up with chicken that was either overcooked or too dry, despite the marinade or seasoning. Now, I see it as the secret that turns a simple grilled breast into something worth savoring.
Focusing on the overlooked importance of proper resting time for grilled chicken breast to ensure juiciness and flavor retention.
The overlooked art of resting chicken
- Learning to rest the chicken properly transformed my grilling game—no more dry bites, just juicy, tender slices.
- Nothing beats the satisfaction of perfectly charred, smoky chicken that still stays moist inside; it’s my go-to for easy dinners.
- I used to rush the process, but now I cherish those quiet moments of patience, knowing the flavor deepens and the juices settle.
- Getting that initial sear right, then letting it rest, makes me proud—like I’ve cracked a secret everyone else overlooks.
- Every time I nail this, I feel a small surge of pride—like I’ve finally cracked how to make simple chicken truly special.
The story behind this recipe
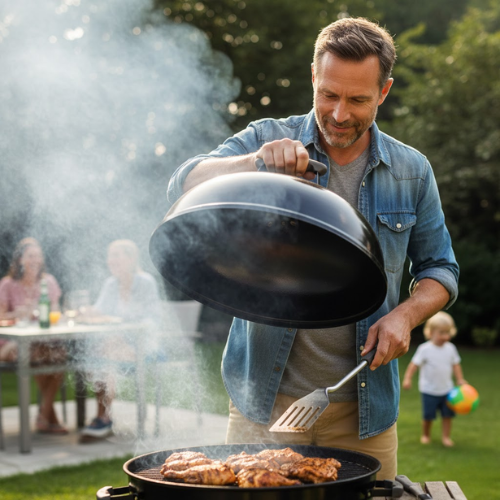
- One summer evening, I was grilling chicken for a small backyard dinner, and I realized I’d been rushing the process. I’d always thought that a quick sear was enough, but that night I decided to slow down and pay attention to the resting step. The difference was startling—juicier, more flavorful chicken that held onto its smoky aroma better.
- That moment made me rethink my whole approach to grilling chicken—it’s not just about the grill marks or speed, but about patience and understanding how heat and rest work together. Since then, I’ve made it a point to give each piece of chicken that extra few minutes off the heat, and it’s transformed my results completely.
- heading: The art of patience in grilling
Historical and Cultural Roots
- Ancient civilizations, like the Romans and Greeks, favored grilled poultry, often seasoned with herbs and fermented sauces, showing how long humans have appreciated smoky flavors.
- The technique of grilling chicken over open flames dates back thousands of years, but it was only in the 20th century that gas and charcoal grills became household staples.
- In many cultures, grilled chicken is more than just food; it’s a social event—cooking over fire, sharing stories, and celebrating community around a simple, smoky meal.
Ingredient breakdown
- Chicken breast: I prefer skinless, boneless breasts—they cook quickly and stay tender. If yours is thicker on one end, pound it flat for even cooking.
- Olive oil: I use extra-virgin because it adds a fruity, smoky aroma. For a lighter option, try avocado oil, which won’t burn at high heat.
- Salt: I like kosher salt for its clean, slightly crunchy finish. Too much salt can overpower, so season generously but judiciously.
- Black pepper: Freshly cracked pepper gives a sharp bite and aromatic heat. Skip pre-ground pepper for a more vibrant flavor.
- Lemon juice: Brightens everything with a zesty punch—squeeze over the chicken right after grilling for that fresh, tangy hit. Skip if you prefer a milder flavor.
- Herbs (thyme or rosemary): I add fresh sprigs for a fragrant, earthy aroma. Dried herbs work too but lack that vibrant fresh scent.
- Garlic (optional): Minced garlic adds a pungent, savory kick. If you dislike it, a sprinkle of smoked paprika can deliver a smoky sweetness instead.
Spotlight on key ingredients
Chicken breast:
- I prefer skinless, boneless breasts—they cook quickly and stay tender. If yours is thicker on one end, pound it flat for even cooking.
- Olive oil: I use extra-virgin because it adds a fruity, smoky aroma. For a lighter option, try avocado oil, which won’t burn at high heat.
- Salt: I like kosher salt for its clean, slightly crunchy finish. Too much salt can overpower, so season generously but judiciously.
Lemon juice:
- Black pepper: Freshly cracked pepper gives a sharp bite and aromatic heat. Skip pre-ground pepper for a more vibrant flavor.
- Brightens everything with a zesty punch—squeeze over the chicken right after grilling for that fresh, tangy hit. Skip if you prefer a milder flavor.
Notes for ingredient swaps
- Dairy-Free: Skip butter or creamy marinades—use oil or citrus for moisture. Less richness, more bright tang.
- Low-Sodium: Use less salt or a salt substitute to control sodium levels. Flavors will be milder, so season more thoughtfully.
- Herb Variations: Swap thyme or rosemary for cilantro or basil for a fresh, aromatic twist. Fresh herbs make a bigger impact.
- Oil Choices: Replace olive oil with avocado or grapeseed oil for a neutral, high-heat option. Slightly less fruity aroma.
- Lemon Alternatives: Use lime or orange juice for different citrus brightness. The flavor shifts subtly but keeps that zesty punch.
- Pepper Options: Swap black pepper for smoked paprika or cayenne for a smoky or spicy kick. Adds depth or heat, depending on your mood.
- Sweetener: If using a marinade with honey or sugar, substitute with agave or maple syrup for a different sweetness profile. Slightly different aroma and consistency.
Equipment & Tools
- Grill (charcoal or gas): Provides even, high heat for searing and cooking.
- Tongs: Turns and moves chicken without piercing the meat.
- Meat thermometer: Ensures accurate doneness without overcooking.
- Brush with oil: Prevents sticking and helps achieve a nice sear.
- Plate or tray for resting: Allows juices to redistribute and keeps chicken warm.
Step-by-step guide to grilling
- Equipment & Tools: Gather a grill (charcoal or gas), tongs for flipping, a meat thermometer, and a brush for oil. Use a sturdy plate or tray for resting.
- Pat the chicken breasts dry with paper towels—moisture on the surface can hinder that perfect sear. Season generously with salt and pepper on both sides.
- Preheat your grill to medium-high heat, around 200°C (390°F). Oil the grates lightly to prevent sticking. Get it hot enough that a few seconds after oiling, it shimmers.
- Place the chicken breasts on the grill, presentation side down first. Sear for about 4-5 minutes, until grill marks are deep and caramelized. Do not move them too early.
- Flip the chicken breasts. Reduce heat slightly if flare-ups occur. Grill for another 4-5 minutes, watching for an even color, and avoid overcooking.
- Check for doneness by inserting a meat thermometer into the thickest part. Aim for 65°C (149°F). If not there, cover loosely and continue grilling in 1-minute bursts.
- When the chicken hits the target temp and juices run clear, remove from grill. If surface is unevenly browned, a quick 30-second high heat sear can help.
- Resting & Finishing: Transfer to a plate and loosely tent with foil. Let rest for 5-8 minutes. This step keeps juices from escaping when sliced. Slice against the grain to serve.
Transfer the chicken to a resting plate, tent loosely with foil, and let sit for 5-8 minutes. Slice against the grain and serve.
How to Know It’s Done
- Color: Deep golden grill marks, not blackened or uneven.
- Juices: Clear and slightly runny, not pink or bloody when pierced.
- Temperature: Probe reads 65°C (149°F) at the thickest part.
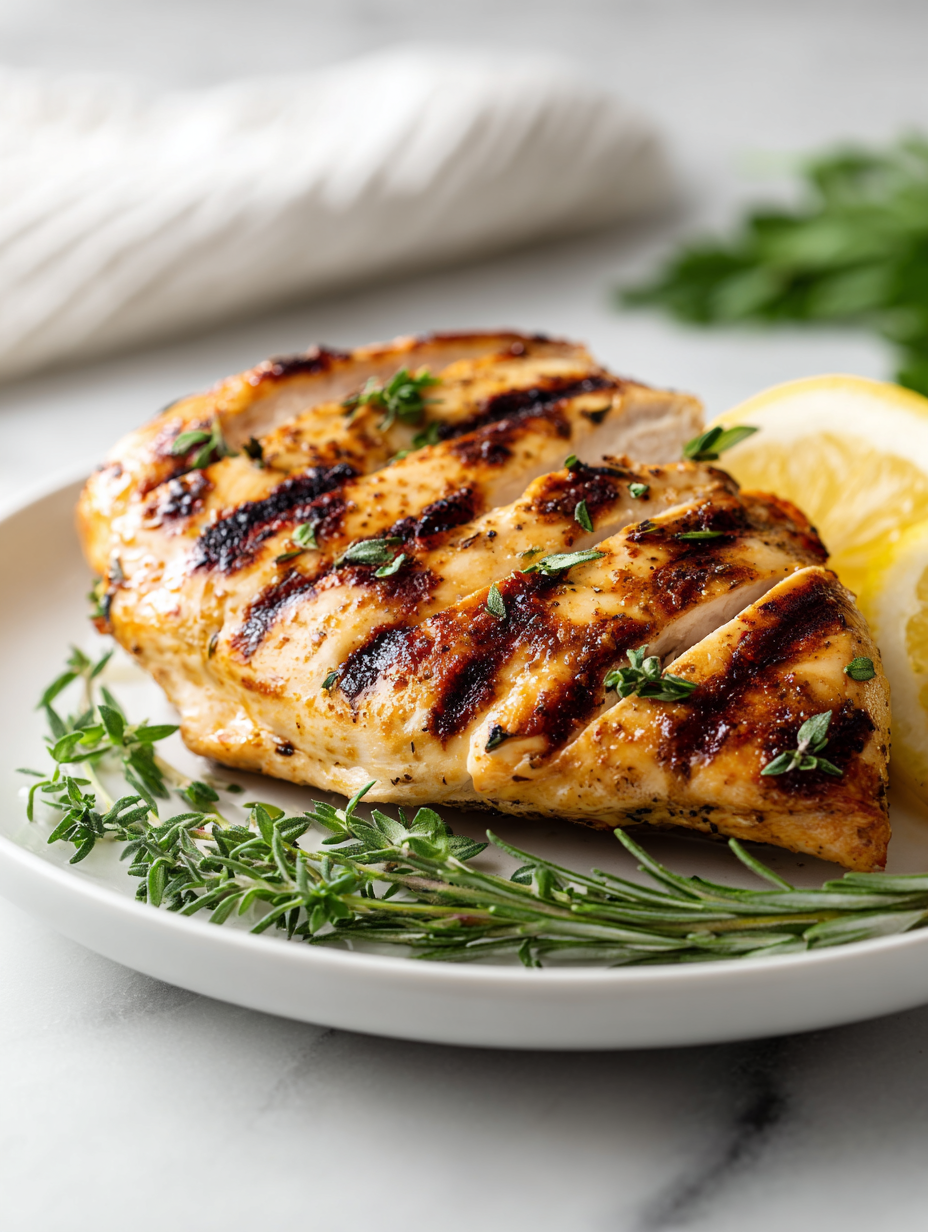
Perfectly Rested Grilled Chicken Breast
Ingredients
Equipment
Method
- Pat the chicken breasts dry with paper towels, then season generously with salt and pepper on both sides. This helps the seasonings adhere and promotes a good sear.
- Preheat your grill to medium-high heat until it shimmers slightly, indicating it’s hot enough to sear. Lightly brush the grates with oil to prevent sticking.
- Place the chicken breasts on the grill, presentation side down first, making contact with the hot grates. Sear for about 4-5 minutes, until deep golden grill marks form and the meat releases easily.
- Flip the chicken breasts using tongs, then cook for another 4-5 minutes, adjusting heat if flare-ups occur. Look for even color and avoid overcooking.
- Check the internal temperature by inserting a meat thermometer into the thickest part; it should read around 65°C (149°F). If needed, continue grilling in short bursts until this temperature is reached.
- Once cooked, transfer the chicken to a plate or tray and loosely tent with foil. Let it rest for 5-8 minutes, allowing the juices to redistribute and ensuring moist slices.
- Optional: Squeeze fresh lemon juice over the rested chicken for a zesty finish, then slice against the grain to serve.
Pro tips for perfect grilled chicken
- Bolded Mini-Head: Use high heat for a quick sear to lock in juices and develop a smoky crust.
- Bolded Mini-Head: Keep the chicken at room temperature for 15 minutes before grilling for even cooking.
- Bolded Mini-Head: Press down gently with tongs after placing to ensure contact and even grill marks.
- Bolded Mini-Head: If flare-ups occur, move the chicken to cooler spots on the grill to prevent charring.
- Bolded Mini-Head: Use a meat thermometer to avoid overcooking—aim for 65°C (149°F) in the thickest part.
- Bolded Mini-Head: Rest the grilled chicken for at least 5 minutes to allow juices to redistribute and stay moist.
- Bolded Mini-Head: Finish with a squeeze of lemon or a sprinkle of herbs for a fresh, bright flavor contrast.
Common mistakes and how to fix them
- FORGOT to monitor internal temp → use a thermometer for perfect doneness.
- DUMPED marinade directly on chicken → pat dry before grilling for better sear.
- OVER-TORCHED the chicken → adjust heat and watch for deep golden color.
- UNDER-resting the chicken → let it rest 5-8 minutes for juicier slices.
Quick fixes and pantry swaps
- When chicken sticks, splash water on the grate to prevent tearing the meat.
- If chicken is undercooked, patch with a quick 2-minute sear over high heat.
- Dumped too much oil? Wipe excess with a paper towel before grilling again.
- Over-torched the surface? Shield with a piece of foil and lower the heat.
- When in doubt, rescue with a quick 5-second rest to let juices settle.
Prep, store, and reheat tips
- Marinate or season the chicken breasts up to a day in advance; keep covered in the fridge for intensified flavor and easier prep.
- For best results, store cooked grilled chicken in an airtight container in the fridge for up to 3 days; the meat remains juicy and flavorful if kept properly sealed.
- Reheat gently in a covered skillet over low heat or in the oven at 160°C (320°F) until warmed through, about 10 minutes—look for a slight shimmer on the surface and a warm aroma.
- Frozen cooked chicken can last up to 2 months; defrost in the fridge overnight, then reheat as above for tender, evenly heated leftovers.
- Note: reheating may slightly diminish juiciness; a splash of broth or a dab of butter can revive moisture and aroma.
Top questions about grilled chicken
1. How do I know when chicken is perfectly cooked?
Look for an internal temperature of 65°C (149°F) for juicy, safely cooked chicken. Juices should run clear when pierced.
2. How hot should my grill be for chicken?
Preheat your grill to medium-high, around 200°C (390°F). It should shimmer slightly and be hot enough to sear immediately.
3. Why is resting my chicken important?
Let the chicken rest, tented loosely with foil, for about 5-8 minutes after grilling. This keeps it juicy when sliced.
4. Can I tell if chicken is done without a thermometer?
Use a meat thermometer to avoid overcooking or undercooking. Insert into the thickest part for best accuracy.
5. Should I dry the chicken before grilling?
Pat the chicken dry before seasoning and grilling. Excess moisture prevents a good sear and can cause sticking.
6. What happens if I overcook the chicken?
Overcooking makes chicken tough and dry. Keep an eye on the internal temp and remove from heat as soon as it hits 65°C (149°F).
7. How many times should I flip the chicken?
Use tongs to flip the chicken to avoid piercing and losing juices. Flip only once if possible for better sear.
8. Can I prepare the chicken in advance?
Marinate ahead of time for at least 30 minutes or up to 24 hours. It enhances flavor and keeps the meat moist.
9. How long can I keep grilled chicken in the fridge?
Store cooked chicken in an airtight container in the fridge for up to 3 days. Reheat gently until warm and fragrant.
10. What if my chicken sticks to the grill?
If chicken sticks, splash water on the hot grates or use a gentle scraper. To prevent sticking, oil the grates lightly before heating.
Taking that extra moment to rest the grilled chicken really makes all the difference. Juices settle, and the meat stays tender, not dry or stringy. It’s such a simple step that elevates the entire meal.
This recipe isn’t just about the technique; it’s about trusting the process and enjoying the straightforward flavors of good, honest chicken. Sometimes, it’s these small, overlooked details that turn a good dinner into a memorable one.
Hi, I’m Theo Granger, the voice and recipe creator behind Boldly Overseasoning.
If you believe salt is not the enemy, spices should be generous, and flavor should never whisper when it can sing, then you are absolutely in the right place. Boldly Overseasoning is my unapologetic celebration of big flavor, confident cooking, and trusting your instincts in the kitchen. I created this space for people who are done with bland food and ready to cook with courage.

Leave a Reply