After the holidays or a big roast, leftover turkey can feel like a bit of a burden, but I’ve found a way to turn it into something warm and comforting. These turkey cheese roll ups are my go-to for a quick, cozy snack that feels like a little hug after a long day. They’re surprisingly simple, but the cheesy melt combined with savory turkey makes them feel indulgent without any fuss.
What I love most about this recipe is how adaptable it is—hide some veggies inside, switch up the cheese, or even add a dash of mustard for a tangy kick. It’s honestly just a good excuse to make the most of leftovers in a way that’s satisfying and a little unexpected. Plus, they’re perfect for a quick lunch or a lazy dinner when you want something warm, cheesy, and made with ingredients already in your fridge.
Focusing on the unexpected joy of transforming leftover turkey into a cozy, cheesy snack that feels like a warm hug after a busy day.
The story behind this recipe
This recipe came together on a hectic afternoon when I was rummaging through the fridge, hunting for something warm and quick. I remembered how my grandma used to roll up deli meats with cheese for an easy snack, but I wanted to make it a bit more special with leftover turkey. It’s funny how a simple idea like this can turn into a little moment of comfort in the middle of chaos. Now, it’s become my go-to for a cozy, satisfying bite that uses what I already have and feels like a small, cheesy hug.
Ingredient breakdown: key components
- Turkey: I like using leftover roasted turkey because it’s already flavorful and moist; just dice it small so it rolls easily. Swap with cooked chicken if turkey’s not available, but expect a milder taste.
- Cheese: I prefer a melty, mild cheese like mozzarella or a blend of cheddar and Monterey Jack; it oozes beautifully when hot. For a sharper flavor, swap in provolone or fontina, but keep it creamy for that perfect melt.
- Tortillas: Soft flour tortillas are my go-to—they roll smoothly and hold everything together. If you want a bit of a smoky twist, try corn tortillas, but they’re a little more fragile.
- Herbs & Spices: Fresh parsley or thyme add a bright, herbal note that cuts through the richness. Dried herbs work fine, but use a little less since their flavor is more concentrated.
- Spread & Seasoning: A smear of creamy Dijon or a light layer of mayonnaise helps everything stick and adds a slight tang. If you’re out, a quick swipe of softened butter works, but it’s less punchy.
- Optional Extras: Thinly sliced pickles or a dash of hot sauce can add some zing. Keep it simple or go bold, but don’t overload—balance is key.
- Cooking Fat: A touch of butter or olive oil in the pan helps with browning and gives a crisp edge. Skip if you’re grilling for a smoky flavor, but watch carefully so it doesn’t burn.
Spotlight on key ingredients
Turkey:
- I prefer leftover roasted turkey for its rich, savory flavor and moist texture; dice small for easy rolling. Swap with cooked chicken if turkey’s scarce, but expect a milder taste.
- Cheese: Melty cheeses like mozzarella or a cheddar blend create that gooey, indulgent layer. Sharp provolone or fontina can add complexity, but aim for a cheese that melts smoothly and oozes when warm.
Cheese:
- It’s the star of that creamy, stretchy melt. When warm, it should stretch and drip slightly, coating every bite with richness. For a tangy twist, try a smoked gouda or a pepper jack for a subtle spice kick.
- ingredient
Notes for ingredient swaps
- Dairy-Free: Swap cheese for dairy-free cheese or hummus. Expect less gooeyness but still flavorful.
- Low-Sodium: Use reduced-salt turkey and cheese to cut down on salt without losing flavor.
- Vegan: Replace turkey with marinated tofu strips or tempeh, and use vegan cheese for similar melt and flavor.
- Gluten-Free: Opt for corn tortillas instead of flour, which add a slightly different texture and flavor.
- Spicy: Add a dash of hot sauce or sliced jalapeños inside for a fiery kick that wakes up the palate.
Equipment & Tools
- Skillet: For cooking and crisping the roll-ups evenly.
- Spatula: To flip and press the roll-ups gently.
- Knife: For slicing if desired and preparing ingredients.
- Cutting board: To chop herbs and dice turkey.
- Grater: To shred cheese easily.
Step-by-step guide to turkey roll ups
- Gather all ingredients: leftover turkey, cheese, tortillas, herbs, spreads, optional extras. Have everything within arm’s reach.
- Prep the filling: dice the turkey small, grate your cheese, chop herbs finely. Set aside.
- Warm a skillet: heat over medium (around 160°C / 320°F) for about 2 minutes until hot but not smoking.
- Assemble the roll-ups: lay a tortilla flat, spread a thin layer of spread or butter, sprinkle cheese and herbs, then evenly distribute turkey in a line down the center.
- Roll tightly: fold in the sides, then roll from one end to the other, pressing gently to secure. Repeat for all tortillas.
- Cook the roll-ups: place seam side down in the skillet. Cook for 3-4 minutes, until golden brown and cheese starts to melt, pressing slightly with a spatula.
- Flip carefully: cook another 2-3 minutes until both sides are crispy and cheese is oozing slightly.
- Check doneness: cheese should be melted and the exterior golden and crisp. If not, cook for an extra minute per side.
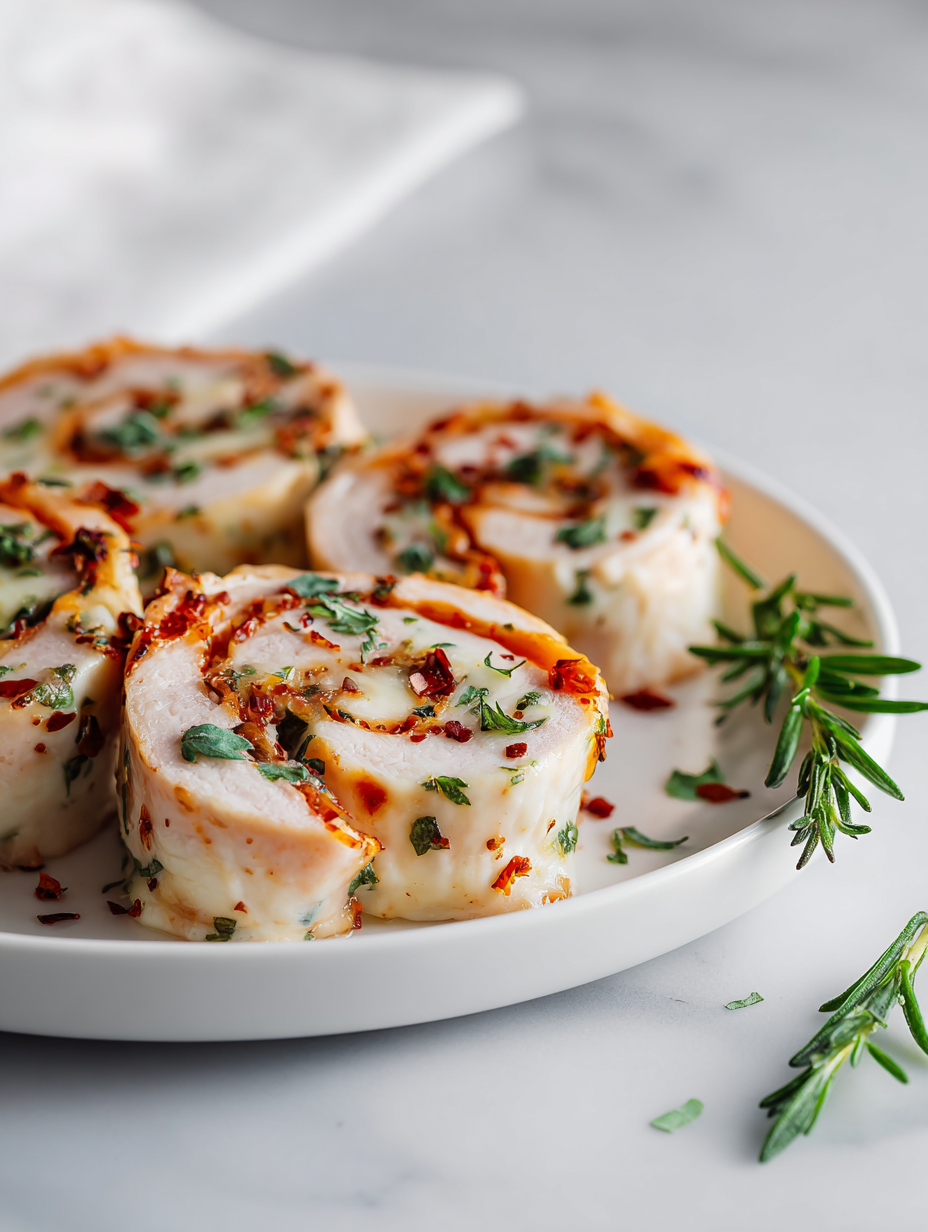
- Rest briefly: transfer to a plate, let sit for 1-2 minutes to settle. Slice if desired, serve warm.
Transfer to a plate, let rest 1-2 minutes to settle. Slice into halves or thirds for easier eating. Serve immediately, maybe with a side salad or pickles.
How to Know It’s Done
- Cheese is fully melted and oozes when sliced.
- Tortilla edges are crisp and golden.
- Internal temperature reaches about 74°C / 165°F for safe reheating.
Turkey Cheese Roll Ups
Ingredients
Equipment
Method
- Gather all ingredients: diced turkey, shredded cheese, tortillas, spread, and herbs. Have everything ready on your workspace.
- Dice the leftover turkey into small pieces, grate or prepare your cheese, and chop the herbs finely. Set aside to make assembly easier.
- Warm a skillet over medium heat until hot, about 2 minutes. This helps crisp the tortillas evenly.
- Spread a thin layer of butter or mayonnaise on each tortilla to help the cheese stick and add flavor.
- Sprinkle a generous layer of shredded cheese over the spread, then evenly distribute the chopped herbs on top.
- Line the center of each tortilla with diced turkey, spreading it in a neat line for easy rolling.
- Roll each tortilla tightly from one end to the other, pressing gently to seal the edges and keep the filling contained.
- Place the roll-ups seam side down in the hot skillet in a single layer. Cook for about 3-4 minutes until the bottom is golden brown and crispy.
- Gently flip each roll-up with a spatula and cook for another 2-3 minutes until the second side is golden and the cheese inside is melted and gooey.
- Check that the exterior is crispy and the cheese is bubbly. Let the roll-ups rest for a minute to settle the cheese before slicing or serving.
- Serve the warm, crispy roll-ups whole or sliced into halves or thirds, perfect for enjoying immediately with a side salad or pickles.
Pro tips for perfect roll ups
- Bolded mini-head: Use medium heat to prevent burning the tortillas and cheese, around 160°C / 320°F.
- Bolded mini-head: Warm the skillet thoroughly before adding roll-ups to get an even, golden crust.
- Bolded mini-head: Press gently with a spatula when cooking to help cheese melt evenly and form a crispy exterior.
- Bolded mini-head: Keep an eye on the edges; when they turn golden and crisp, it’s time to flip for even cooking.
- Bolded mini-head: Rest the cooked roll-ups for a minute before slicing—this helps the cheese set and keeps everything together.
- Bolded mini-head: If cheese starts to leak excessively, lower the heat slightly to control melting and prevent burning.
- Bolded mini-head: For extra crispiness, finish in a hot oven (200°C / 390°F) for 2-3 minutes after skillet cooking.
Common mistakes and how to fix them
- FORGOT to check if the tortilla was heated enough, leading to tears. Warm slightly before filling.
- DUMPED the filling into the pan directly, causing uneven cooking. Use a small spatula for gentle handling.
- OVER-TORCHED the sides, making them bitter. Keep heat medium and watch closely, flipping as needed.
- FAILED to let the roll-ups rest before slicing, causing cheese to ooze out. Rest for 1-2 minutes after cooking.
Quick fixes and pantry swaps
- If the roll-up cracks, warm the tortilla slightly to make it more pliable.
- Splash a little water in the pan if cheese isn’t melting fast enough.
- Patch burnt edges with a quick scrape and flip to unburned side.
- Shield overcooked sides with foil and lower heat to prevent further charring.
- When cheese oozes out excessively, reduce heat and cook a bit longer for a crisp exterior.
Prep, store, and reheat tips
- Prep the turkey and cheese: Dice the turkey and grate the cheese ahead, storing in separate airtight containers in the fridge for up to 24 hours. The flavors meld better after a short rest.
- Assemble in advance: You can assemble the roll-ups up to 2 hours before baking or frying. Keep them covered in the fridge to prevent drying out while the flavors meld.
- Storage: Leftover roll-ups can be stored in an airtight container in the fridge for up to 2 days. Reheat in a hot skillet or oven until cheese is bubbly and exterior is crispy, about 5-7 minutes. The sensory cue is a warm, cheesy aroma and a slight shimmer of melted cheese.
- Reheating tips: For best results, reheat in a 180°C / 350°F oven, checking for crispiness and meltiness. Avoid microwave reheating to keep the texture crispy and avoid sogginess.
Top questions about Turkey Cheese Roll Ups
1. Can I use chicken instead of turkey?
Use leftover cooked turkey for the best flavor and moisture. You can substitute with cooked chicken, but expect a milder taste and less richness.
2. What kind of cheese works best?
Cheese should be melty and gooey when hot. Mozzarella, cheddar blend, or Monterey Jack work well. For a sharper taste, try provolone or fontina.
3. How hot should I cook them?
A warm skillet around 160°C / 320°F is ideal. Cook for about 3-4 minutes per side until the edges are crispy and cheese melts.
4. Should I let them rest before cutting?
Wrap the roll-ups tightly and let them rest for a minute after cooking. This helps the cheese set and prevents ooze when slicing.
5. Can I use corn tortillas?
Use flour tortillas for a soft, pliable wrap. Corn tortillas add a smoky flavor but are more fragile—warm them slightly before filling.
6. How long do leftovers last?
Store leftovers in an airtight container in the fridge for up to 2 days. Reheat in a skillet or oven until crispy and cheese is bubbly.
7. Can I make it spicy?
Add a dash of hot sauce or sliced jalapeños inside for extra zing. Keep fillings balanced to avoid overwhelming the roll-up.
8. Any tips for flipping without breaking?
Use a small spatula to flip and press the roll-ups gently. Keep the heat medium to prevent burning the tortillas.
9. What if the tortillas tear?
If the tortillas tear, warm them slightly to make them more flexible. Keep the heat controlled to prevent charring.
10. How can I make them crispier?
For extra crispiness, finish in a hot oven (about 200°C / 390°F) for 2-3 minutes after skillet cooking.
These turkey cheese roll ups are more than just a way to use leftovers. They’re a reminder that simple ingredients can turn into something unexpectedly comforting and satisfying. Sometimes, a quick, cheesy bite is all you need to make a busy day feel a little more manageable.
In the end, it’s about the joy of taking familiar flavors and transforming them into something cozy and warm. No matter how many times I make these, they always feel like a small, imperfect celebration of comfort in everyday life.

Hi, I’m Theo Granger, a former line cook and unapologetic flavor maximalist from New Orleans. I believe there are two types of people in this world: those who season their food, and those who LIVE to season their food. This blog is for the latter.