Making crispy paneer cubes isn’t just about tossing cheese in spice and frying. It’s about mastering that perfect golden crust that stays crisp, even when tossed into a sticky stir-fry or a fresh salad. I’ve fussed over this for years, trying to get that balance between a firm bite and tender interior, without ending up with soggy, greasy messes.
This recipe came from a messy weekend experiment, where I finally nailed down a method that works every time—no fuss, no fussiness. It’s my go-to for when I want that satisfying crunch and a burst of flavor in every bite. Plus, it’s surprisingly forgiving, so even if you’re new to paneer, you can get it right with a little attention to the coating and frying steps.
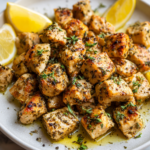
Focusing on the overlooked art of making the crispiest, most flavorful paneer cubes that hold up through stir-fries and salads, turning humble cheese into a standout bite.
The story behind this recipe
- I first stumbled upon this technique during a rushed weekend, when I needed something quick but satisfying. The idea of crispy, golden paneer that could stand up to stir-fries came from a failed attempt at deep-frying regular cheese that just turned greasy. It was a messy kitchen moment, but I learned that the secret was a simple, well-seasoned coating that crisps up without fuss.
- Ever since, I’ve kept tweaking this recipe, trying to get that perfect crunch—just enough bite, not too brittle. It’s become a bit of a comfort in my cooking routine, especially when I want something hearty but fast. Now, I always keep a batch in the fridge for those surprise guests or a quick lunch.
- heading
- story_type
Key Ingredients Breakdown
- Paneer: I prefer firm, non-crumbly paneer—look for the kind that’s dense and holds its shape. Softer varieties tend to fall apart during frying, so choose a block that feels slightly rubbery to the touch.
- Cornstarch or arrowroot: I always double coat with cornstarch for that extra crispy shell—it’s the secret to a crackly exterior that stays crisp. Skip this if you’re short on time, but the texture won’t be quite as satisfying.
- Oil: I use neutral oil with a high smoke point, like sunflower or canola. When it shimmers and starts to crackle, I know it’s ready. Don’t overcrowd the pan, or the temperature drops and the coating gets soggy.
- Spices: I like a simple mix of turmeric, chili powder, and salt—adds flavor without overpowering the paneer. Freshly ground spices give a brighter, more vibrant aroma as they hit the hot oil, so don’t skimp on grinding just before frying.
- Optional marinade: I sometimes toss the paneer cubes in a splash of lemon juice and a pinch of salt before coating—gives a subtle tang that cuts through the richness. If you prefer milder flavor, skip the marinade, but don’t forget to pat the cubes dry afterward.
- Water: I keep the paneer dry before coating; excess moisture makes the crust soggy. Just a quick pat with paper towels is enough, especially if your paneer is slightly damp from refrigeration.
- Herbs or toppings: I love finishing with chopped cilantro or a squeeze of lime—brightens up the richness. These are added after frying for fresh, contrasting flavor bursts.
Spotlight on key ingredients
Paneer:
- I prefer firm, non-crumbly paneer—look for the kind that’s dense and holds its shape. Softer varieties tend to fall apart during frying, so choose a block that feels slightly rubbery to the touch.
- Cornstarch or arrowroot: I always double coat with cornstarch for that extra crispy shell—it’s the secret to a crackly exterior that stays crisp. Skip this if you’re short on time, but the texture won’t be quite as satisfying.
Spices & Oil:
- Oil: I use neutral oil with a high smoke point, like sunflower or canola. When it shimmers and starts to crackle, I know it’s ready. Don’t overcrowd the pan, or the temperature drops and the coating gets soggy.
- Spices: I like a simple mix of turmeric, chili powder, and salt—adds flavor without overpowering the paneer. Freshly ground spices give a brighter, more vibrant aroma as they hit the hot oil, so don’t skimp on grinding just before frying.
Notes for ingredient swaps
- Dairy-Free: Use firm tofu instead of paneer for a similar texture, but expect a slightly softer bite and milder flavor.
- Gluten-Free: Swap cornstarch with rice flour for a lighter crispiness, though it might be a tad less crackly.
- Low-Oil: Bake the coated paneer at 200°C (392°F) for 15-20 minutes to reduce oil, but the crunch will be subtler.
- Spice Variations: Add a pinch of garam masala to the coating for warmth, or skip chili for milder flavor.
- Herb Boost: Toss with chopped fresh mint or cilantro after frying for a fresh, aromatic finish, skipping dried herbs.
- Lemon Brightness: Squeeze fresh lemon juice over hot paneer for a zesty kick, or skip for a more neutral flavor.
- Salt Adjustment: Use sea salt or Himalayan salt for a more complex mineral note, but reduce the amount slightly to avoid overpowering.
Equipment & Tools
- Sharp knife: Cut paneer into even cubes.
- Mixing bowl: Combine coating ingredients.
- Deep frying pan or wok: Fry paneer evenly and efficiently.
- Slotted spoon: Remove fried paneer and drain oil.
- Paper towels: Drain excess oil from fried cubes.
Step-by-step guide to paneer cubes
- Equipment & Tools: Prepare a sharp knife for cutting paneer, a mixing bowl for coating, a deep frying pan or wok, and a slotted spoon for frying. Have paper towels ready for draining.
- Cut the paneer into 1-inch cubes. Pat them dry with a paper towel to remove excess moisture, which helps crisping.
- In a bowl, combine 1/4 cup cornstarch, 1/4 teaspoon turmeric, 1/2 teaspoon chili powder, and 1/2 teaspoon salt. Mix well.
- Toss the paneer cubes in the spice mixture until evenly coated. If using a marinade (optional), toss cubes with lemon juice and salt first, then coat with the spice mix.
- Heat about 2 inches of oil in the pan over medium heat (around 180°C/356°F). When shimmering, gently add coated paneer cubes in batches to avoid overcrowding.
- Fry for 2-3 minutes, turning occasionally, until golden brown and crispy. You should hear a consistent crackle. Adjust heat if browning too fast or slow.
- Use a slotted spoon to transfer the fried paneer to paper towels. Let drain for 1-2 minutes to remove excess oil. Repeat with remaining cubes.
- Rest the fried paneer for 2 minutes. Optionally, toss with chopped herbs or a squeeze of lime for added flavor.
- Finishing: Serve immediately for maximum crispness. For salads or stir-fries, add the cubes last, just before serving to keep crunch intact.
- Checkpoints & How to Know It’s Done: The crust should be deep golden and crackly, not pale or soggy. The interior should be firm but tender, not spongy. The oil should shimmer and crackle when adding paneer.
Let the fried paneer rest for 2 minutes to firm up. Serve immediately for crispiness, garnished with herbs or lime if desired. For salads or stir-fries, add just before serving to keep texture lively.
How to Know It’s Done
- Crust is deep golden and crackly.
- Paneer feels firm but tender inside.
- Oil crackles when paneer is added.
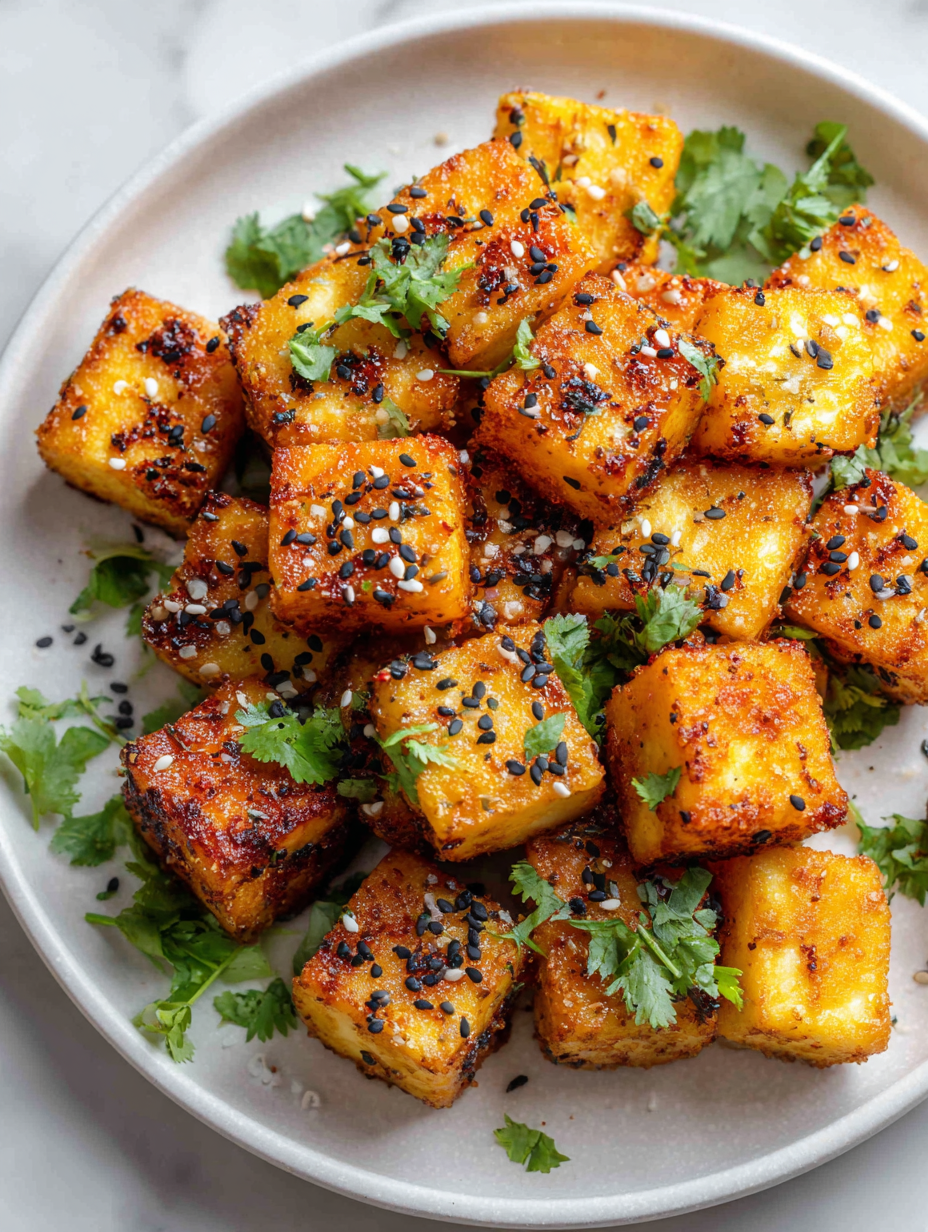
Crispy Fried Paneer Cubes
Ingredients
Equipment
Method
- Start by cutting the paneer into neat 1-inch cubes with a sharp knife, then pat them dry with a paper towel to remove any excess moisture.
- In a mixing bowl, combine the cornstarch, turmeric, chili powder, and salt to create a seasoned coating.
- Toss the paneer cubes gently in the spice mixture, ensuring each piece is evenly coated with a crackly layer of the seasoned cornstarch.
- Heat about 2 inches of oil in a deep frying pan or wok over medium heat until shimmering and just beginning to crackle, around 180°C (356°F).
- Gently add the coated paneer cubes in small batches, being careful not to overcrowd the pan so the oil temperature stays steady.
- Fry the paneer for 2-3 minutes, turning occasionally with a slotted spoon, until they turn deep golden brown and the crust crackles loudly.
- Use a slotted spoon to transfer the fried paneer to paper towels, allowing excess oil to drain for a minute or two.
- Repeat the frying process with remaining batches, maintaining the temperature for consistent crispness.
- Once all the paneer is fried, let it rest for a couple of minutes to set the crust, then serve immediately for maximum crunch, garnished with herbs or a squeeze of lime if desired.
Notes
Pro tips for crispy paneer
- Coating: Use a double layer of cornstarch for a shell that crackles and stays crisp even when tossed in sauces.
- Heat Check: Wait until oil shimmers and just begins to crackle before adding paneer; this ensures a quick, crispy fry.
- Batch Frying: Cook in small batches to prevent temperature drops and maintain a consistent crispness.
- Gentle Handling: Drop paneer cubes gently into hot oil to avoid breaking the crust and causing splatters.
- Timing: Fry for exactly 2-3 minutes until deep golden and crackly; over-frying can make the paneer tough.
- Drain Well: Use a slotted spoon and let excess oil drip off to keep the crust crisp and avoid greasy bites.
- Rest Briefly: Let fried paneer sit for a minute on paper towels—this helps set the crust and keeps it crunchier longer.
Common mistakes and how to fix them
- FORGOT to dry paneer before coating → results in soggy crust, pat dry thoroughly.
- DUMPED too much oil in pan → causes splattering and greasy paneer, use enough but not excessive.
- OVER-TORCHED the oil → burns spices, cook on medium heat and watch color.
- UNDERESTIMATED frying time → undercooked interior, fry until golden and crisp, about 2-3 mins.
Fast fixes for crispy paneer
- When oil shimmers, splash in a tiny piece of paneer to test if ready.
- If coating is clumpy, dump and start fresh with dry paneer and fresh coating.
- Splash water on hot oil to calm splatters—shimmering crackle will stop for a second.
- Patch soggy crust by turning up heat briefly, then reduce to finish crisping.
- Shield burnt spices by removing from heat immediately and starting with fresh oil.
Prep, store, and reheat tips
- You can prep the paneer cubes a day ahead by coating and refrigerating them in an airtight container; the coating stays crisp longer if kept dry.
- Store fried paneer in an airtight container at room temperature for up to 2 hours for best crunch; refrigerate for up to 24 hours, but expect some loss of crispness.
- Refrigerated fried paneer tends to become slightly softer; reheat in a hot oven at 180°C (356°F) for 5-7 minutes until crispy and hot to the touch, with a fragrant crackle.
- Avoid freezing freshly fried paneer, as the texture can become soggy upon thawing. If frozen, reheat directly from frozen, but expect some moisture and sogginess.
Top questions about paneer cubes
1. What type of paneer works best?
Use firm, non-crumbly paneer that feels dense and slightly rubbery. Softer varieties tend to fall apart when frying.
2. How do I prevent soggy paneer?
Keep the paneer dry before coating; excess moisture makes the crust soggy. Pat cubes with paper towels.
3. How do I know when the oil is ready?
Fry in hot oil (around 180°C/356°F) until deep golden and crackly, about 2-3 minutes per batch.
4. How should I drain the fried paneer?
Use a slotted spoon to drain excess oil and let the cubes rest on paper towels for a minute to set the crust.
5. Can I bake instead of fry?
Yes, you can bake the coated paneer at 200°C (392°F) for 15-20 minutes for a less oily version.
6. How long can I keep fried paneer?
You can store fried paneer in an airtight container at room temperature for 2 hours or refrigerate for up to 24 hours.
7. How do I reheat fried paneer?
Reheat in a hot oven at 180°C (356°F) for 5-7 minutes until crisp and fragrant. Expect some loss of crunch.
8. Should I add anything after frying?
Add a squeeze of lemon or chopped herbs after frying for a fresh burst of flavor that complements the richness.
9. What oil is best for frying paneer?
Use neutral oils like sunflower or canola for frying, which have high smoke points and a mild flavor.
10. What if the coating isn’t sticking well?
If the coating clumps, discard and start fresh with dry paneer and fresh coating mixture to ensure crispness.
Frying these paneer cubes is a small act of kitchen rebellion—crisp, golden, and unpolished in all the right ways. It’s a reminder that good food often comes from simple, honest techniques and a bit of patience.
Once you get the hang of that crackling exterior, every bite feels like a little victory. No fuss, just a humble cheese transformed into something a little more special, right in your own kitchen.

Hi, I’m Theo Granger, a former line cook and unapologetic flavor maximalist from New Orleans. I believe there are two types of people in this world: those who season their food, and those who LIVE to season their food. This blog is for the latter.