This isn’t about fancy toppings or complicated layers. It’s about the sweet, vanilla-scented chaos of poking holes into cake and watching Oreo crumbs spill out like tiny treasures. I accidentally discovered this after a long day, craving something sweet that wouldn’t demand a full hour of decoration or precision.
What makes this special right now is how it’s perfect for the chaos of life — no frosting pots or piping bags, just a single box of cake mix, some Oreos, and a little patience. It feels nostalgic, but also kind of rebellious. Like, who says you need 20 steps to get a dessert that tastes like victory?
Something about the soft cake soaked in sweet milk, crunchy bits of Oreos peeking through — that’s pure comfort. And honestly, the messier the better. I’m pretty sure this recipe sneaked its way into my weekly rotation because it’s wildly forgiving, and anyway, I need a reason to keep Oreos around.
Why I Love This Recipe (And You Will Too)
- It’s effortless but feels indulgent—perfect for last-minute cravings.
- Appeals to that childhood joy of Oreos mixed into anything sweet.
- Brings together ingredients I usually stock—no special trips required.
- It gets better overnight, so I can just forget about it and come back to a ready dessert.
- It’s surprisingly satisfying, even if you’re not a baker.
Sometimes, I think the best recipes are the ones that find you when you’re not really looking, and this one? It definitely did.
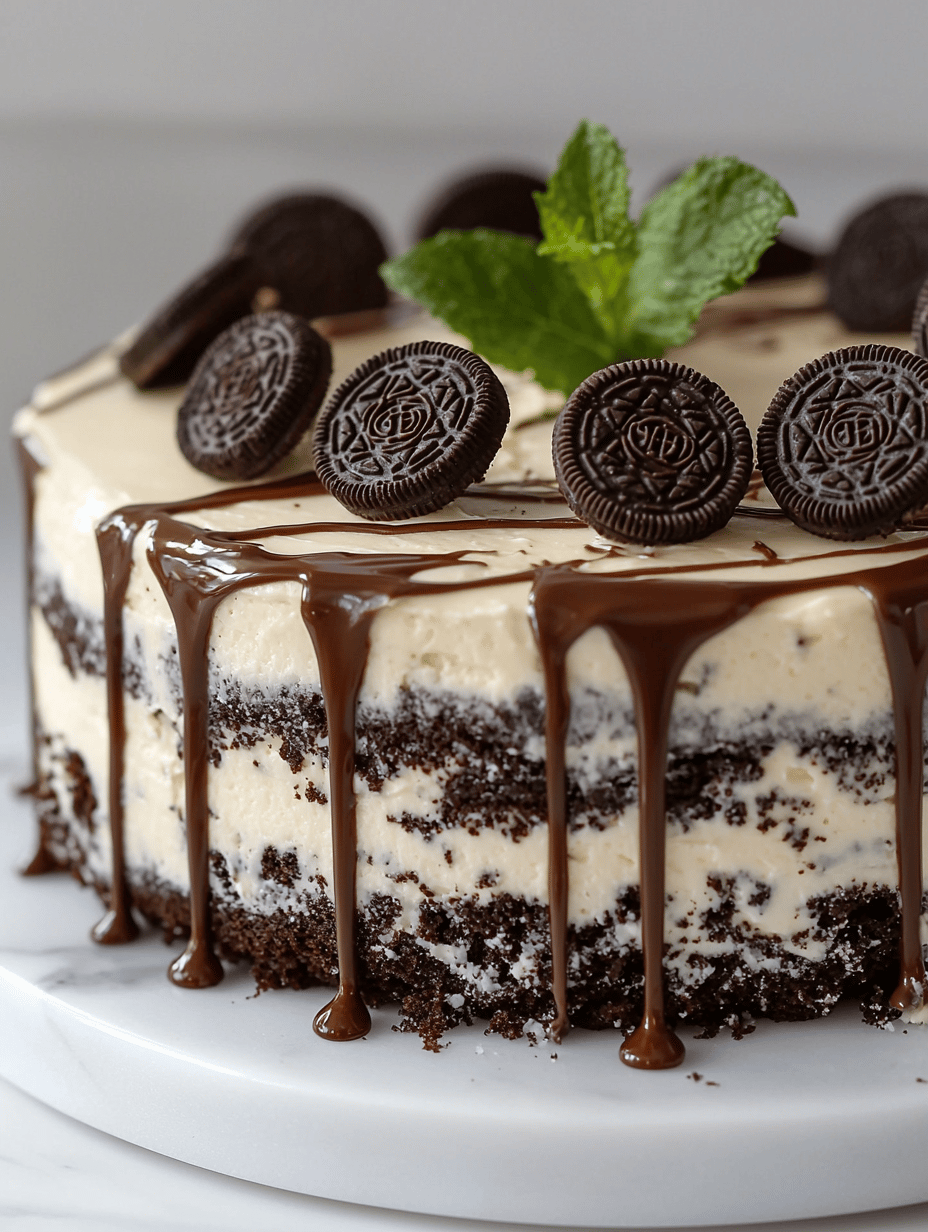
Oreo-Stuffed Vanilla Cake Poke
Ingredients
Equipment
Method
- Preheat your oven to the temperature specified on your cake mix box and grease your cake pan to prevent sticking.
- Mix the vanilla cake batter according to the package instructions using your whisk or mixer until smooth and slightly bubbly—this helps the batter relax and bake evenly.
- Pour the batter into your prepared cake pan and smooth the top with a spatula for an even surface.
- Bake the cake until the edges are golden and a toothpick inserted in the center comes out clean—usually about 25-30 minutes. Let it cool in the pan for 10 minutes, then transfer to a wire rack to cool completely.
- Once cooled, use a straw or skewer to poke holes all over the surface of the cake, spacing them evenly. This creates channels for the milk to soak in.
- Crush the Oreos into small, crumbly pieces—this can be done by placing them in a plastic bag and gently smashing with a rolling pin or using a food processor.
- Sprinkle the crushed Oreos generously over the surface and into the holes of the cake, pressing gently to embed them into the batter.
- Pour sweetened milk over the cake, making sure it soaks into the holes and helps the cake become moist and flavorful.
- Let the cake sit for at least 2 hours or overnight in the refrigerator—this allows all the flavors to meld and the cake to become cuddly and rich.
- Serve slices with extra Oreo crumbs if desired—this dish is all about a messy, indulgent experience.
Honestly, I keep wondering if next time I should skip the frosting altogether and just sprinkle more Oreos on top. Or maybe I need to try adding a handful of mini chocolate chips. Whatever happens, I know this is going to be the go-to for those evenings when I want something sweet but don’t want to clean up the whole kitchen. Or think too much. That’s the real magic — low effort, big reward.

Hi, I’m Theo Granger, the voice and recipe creator behind Boldly Overseasoning.
If you believe salt is not the enemy, spices should be generous, and flavor should never whisper when it can sing, then you are absolutely in the right place. Boldly Overseasoning is my unapologetic celebration of big flavor, confident cooking, and trusting your instincts in the kitchen. I created this space for people who are done with bland food and ready to cook with courage.


Leave a Reply