Category: Side Dishes

  • Mozzarella Stuffed Crispy Baked Onion Rings: A Surprise Inside

    Mozzarella Stuffed Crispy Baked Onion Rings: A Surprise Inside

    I found myself obsessing over onion rings recently, but not in the way most people do. Instead of just crunch and grease, I started thinking about what could make them more interesting — like hiding something gooey inside. Suddenly, mozzarella cheese became the star of the show, melting into each crispy bite. Weird idea, right? But honestly, it works.

    There’s a satisfying moment when you bite into one and get that crispy crunch, then a little pull of melted cheese stretches out. Not to mention, this isn’t just about snack time. It’s a way to surprise someone, or even yourself, with something comforting yet slightly unexpected. Plus, it’s baked — so it feels a lot less guilty than frying.

    Why I Love This Recipe (And You Will Too)

    • You get a perfect combo of crispy, cheesy, sweet onion flavor — without the grease overload.
    • It’s a fun, slightly fancy twist on a classic that’s easy to pull together.
    • Great for parties but also a perfect snack for those lazy weekends.
    • It makes simple onion rings feel like a little victory.
    • I like how cheesy surprises can turn a regular snack into something memorable.

    Sometimes I think food is about little details — like that unexpectedly melty string of cheese right in the middle. These might be simple to make, but they remind me that a tiny twist can totally change what you expect from an everyday snack.

    Cheesy Baked Onion Rings

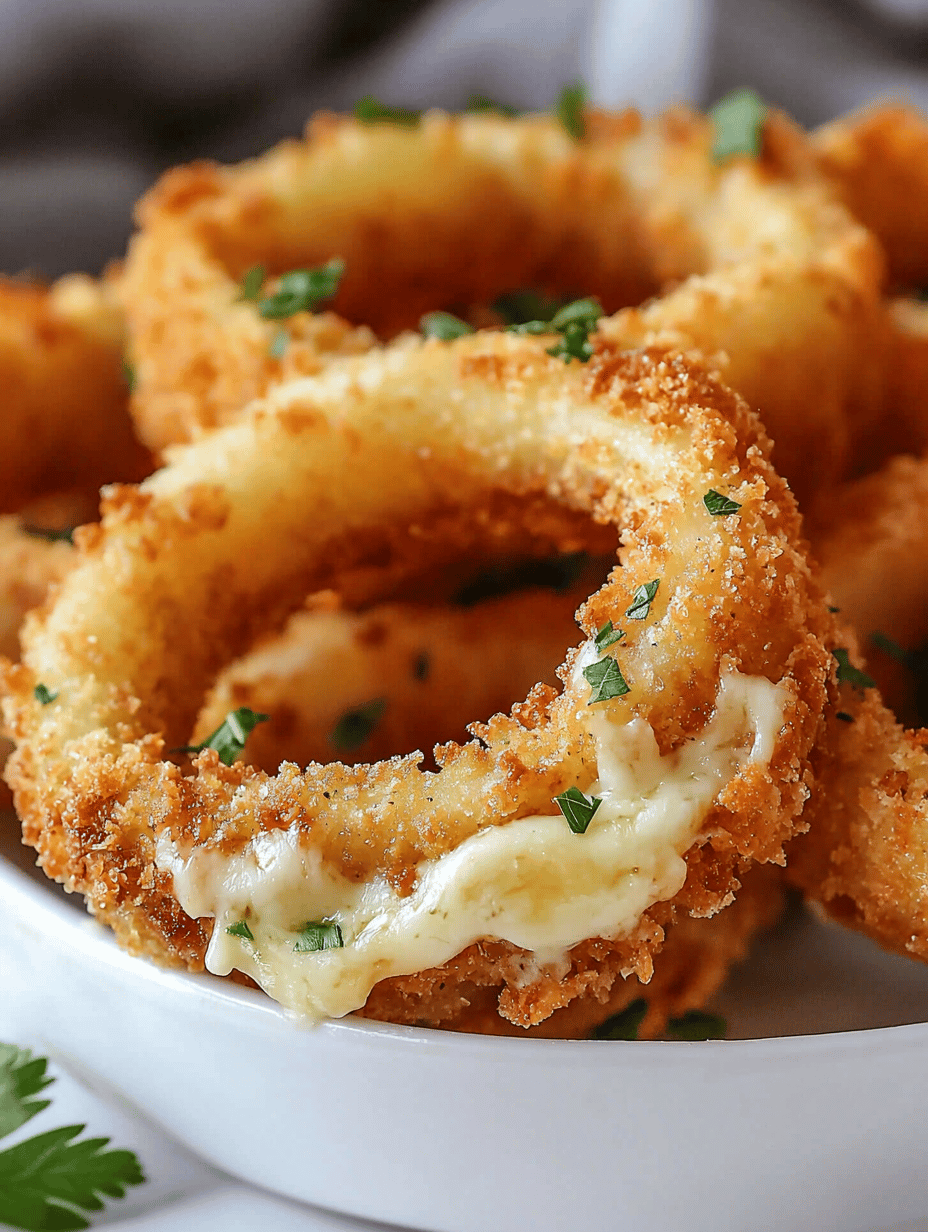
    This dish features onion rings filled with melted mozzarella cheese, coated in a crispy breading, and baked until golden. The final texture combines a crunchy exterior with gooey cheese inside, providing a visually appealing and satisfying snack.
    Prep Time 15 minutes
    Cook Time 20 minutes
    Total Time 35 minutes
    Servings: 4
    Course: Main Course
    Cuisine: American
    Calories: 350

    Ingredients
      

    • 2 large yellow onions peeled and sliced into rings
    • 8 slices mozzarella cheese cut into small sticks
    • 1 cup all-purpose flour
    • 2 large eggs beaten
    • 2 cups panko breadcrumbs
    • 1 teaspoon paprika optional for seasoning
    • to taste salt and pepper for seasoning
    • spray cooking spray for coating the baking sheet

    Equipment

    • Baking sheet
    • Mixing bowls

    Method
     

    1. Preheat your oven to 400°F (200°C) and lightly spray a baking sheet with cooking spray.
    2. Separate the onion slices into individual rings and set aside. Prepare the mozzarella cheese sticks by cutting the slices into small, manageable pieces.
    3. Set up your breading station: place the flour in a shallow dish, beat the eggs in a second dish, and combine panko breadcrumbs with paprika, salt, and pepper in a third dish.
    4. Dip each onion ring into the flour, ensuring an even coating, then into the beaten eggs, and finally coat thoroughly with the seasoned panko breadcrumbs. While breading, insert a small piece of mozzarella into the center of the onion ring before sealing it with the breadcrumbs.
    5. Arrange the coated onion rings on the prepared baking sheet, cheese side up, leaving a bit of space between each. Spray lightly with cooking spray to help them crisp nicely.
    6. Bake in the preheated oven for about 15-20 minutes, or until the coating is golden brown and crispy. Keep an eye on them to prevent burning and ensure the cheese inside melts thoroughly.
    7. Remove the onion rings from the oven and let them cool slightly before serving. The cheese inside will be gooey and stretchy, creating a delightful surprise with every bite.

    Honestly, I forget how much I love the chaos of new ideas in the kitchen until I try something like this and realize food doesn’t always have to be perfect. Just flavorful, crunchy, cheesy, and maybe a little weird — in the best way.

    And knowing that I can make something that kind of surprises me keeps cooking fun. Whether it’s for a quick snack or a little something extra for friends, these onion rings keep that creative spark alive.

  • Why I’m Obsessed with Persian Jeweled Rice (And You Will Be Too)

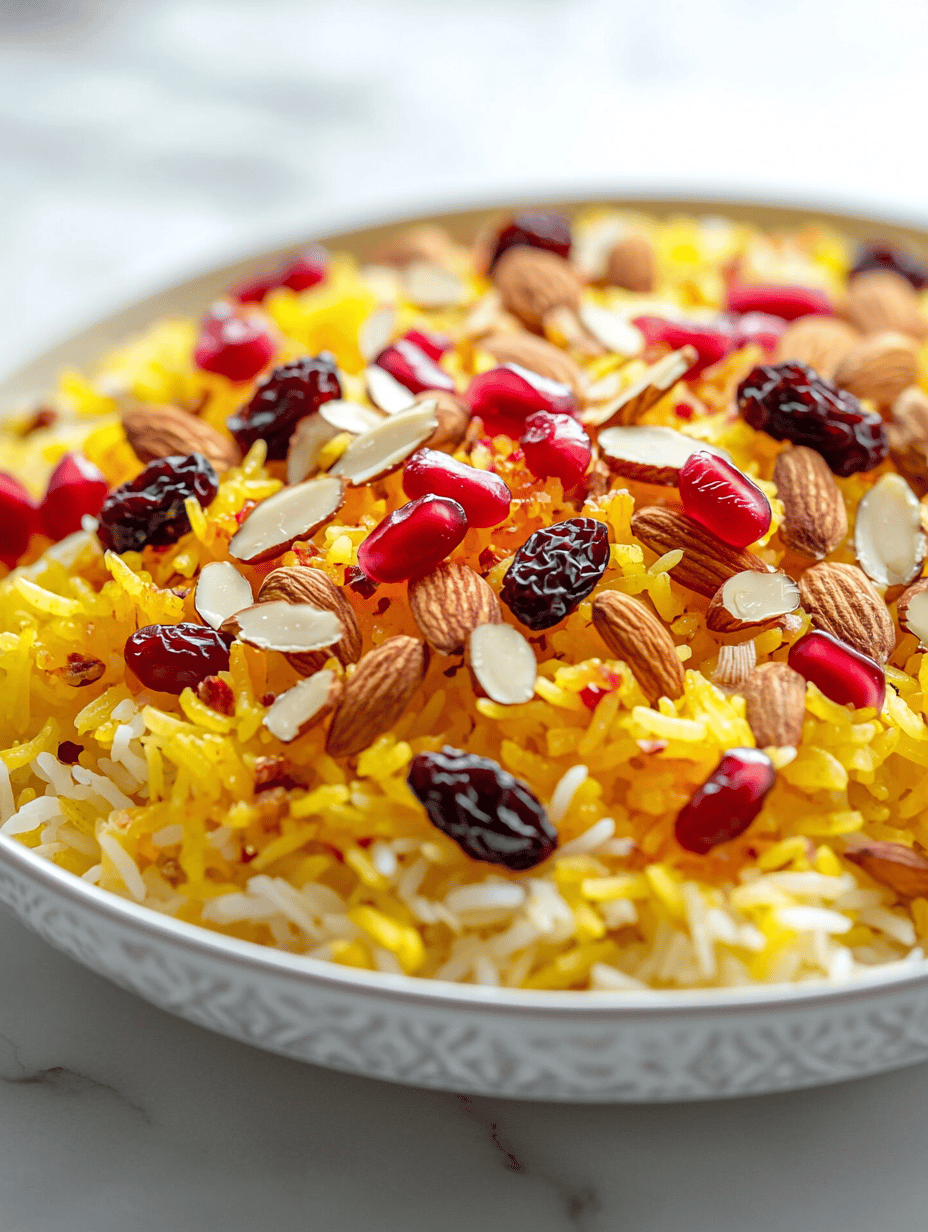
    Why I’m Obsessed with Persian Jeweled Rice (And You Will Be Too)

    Ever paused in the middle of cooking and not just smelled, but actually *felt* the aroma shift? That burst of saffron and angelic sweetness from dried fruits, mixed with the gentle crunch of toasted almonds, somehow vibrates right through your nose. It sounds weird to say, but I swear, there’s a moment when you realize it’s not just rice—that it’s a celebration packed into every grain.

    This dish is catching on again, and honestly, I think it’s because it’s a little rebellion on your regular weeknight. A splash of turmeric, the pop of jewel-toned jewel-hued fruits—bright, unexpected, like a little secret you get to keep. Once you peel back that layer of sweet and savory, it’s perfect for a cozy dinner or an accidental fancy brunch.

    Why I Love This Recipe (And You Will Too)

    • It turns plain rice into something colorful and spontaneous, not just a side.
    • Perfect for days when you want a little celebration, even if nobody’s watching.
    • It reminds me of childhood holidays, but it feels fresh and modern.
    • Yes, it’s gorgeous enough for a feast but simple enough to make when you’re already overwhelmed.
    • Plus, the smell? That’s worth every second of prep.

    Sometimes I think about how food quietly rewires your brain—like, the way that smell pulls you back to good times, weird family moments, lazy weekends. This rice is that for me. And maybe it’ll be that for you, too, or maybe just a funny story about how you tried to add too many pomegranate seeds and went overboard. Either way, it’s a good one to keep in your back pocket.

    Saffron and Dried Fruit Pilaf

    This dish is a fragrant rice pilaf cooked with saffron, toasted almonds, and dried fruits, creating a vibrant, aromatic, and textured side or main course. The rice is simmered until tender, absorbing the colorful flavors and contrasting textures of sweetness and crunch, resulting in a visually appealing and flavorful dish.
    Prep Time 10 minutes
    Cook Time 25 minutes
    Total Time 35 minutes
    Servings: 4
    Course: Main Course
    Cuisine: Mediterranean
    Calories: 250

    Ingredients
      

    • 1 cup long-grain rice rinsed until water runs clear
    • 1 pinch saffron threads soaked in warm water
    • 1.5 cups chicken or vegetable broth hot
    • 1/4 cup dried apricots chopped
    • 1/4 cup dried cranberries or currants
    • 1/4 cup toasted almonds sliced or chopped
    • 1 tablespoon olive oil or butter
    • 1 small onion finely chopped
    • 0.5 teaspoon turmeric powder

    Equipment

    • Saucepan with lid
    • Toasting pan

    Method
     

    1. Heat a tablespoon of olive oil or butter in a large saucepan over medium heat. Add the finely chopped onion and cook, stirring occasionally, until translucent and fragrant, about 3-4 minutes.
    2. Add the rinsed rice to the saucepan and stir to coat each grain with the fat. Cook for 1-2 minutes until the rice starts to turn slightly translucent and smells nutty.
    3. Stir in the turmeric powder and soaked saffron (including the soaking water) to give the rice a bright golden hue and aromatic depth. Cook for another minute until the mixture is fragrant.
    4. Pour in the hot broth, stirring gently. Bring the mixture to a gentle boil, then reduce the heat to low, cover, and let simmer for about 15 minutes, or until the rice is tender and has absorbed most of the liquid.
    5. While the rice cooks, toast the sliced almonds in a dry pan over medium heat until golden brown and fragrant, about 3-4 minutes. Set aside.
    6. Once the rice is cooked, gently fluff it with a fork to separate the grains. Fold in the chopped dried apricots and dried cranberries, then sprinkle with the toasted almonds for added crunch.
    7. Serve the rice warm, garnished with additional almonds or dried fruits if desired. Enjoy the colorful, aromatic blend of flavors and textures.

    Notes

    For extra richness, add a pat of butter at the end. Adjust the sweetness by more or fewer dried fruits as preferred.

    Anyway, I’ll stop before I start reminiscing about Persian markets and sunny afternoons. But I’ll tell you—this rice has an honesty to it. No fuss, just a handful of ingredients and a little bit of patience. And a whole lot of color and flavor. Cheers to that.

  • Parmesan Garlic Bread Bites That Make You Feel Like You’re Sneaking Stolen Pieces from the Kitchen

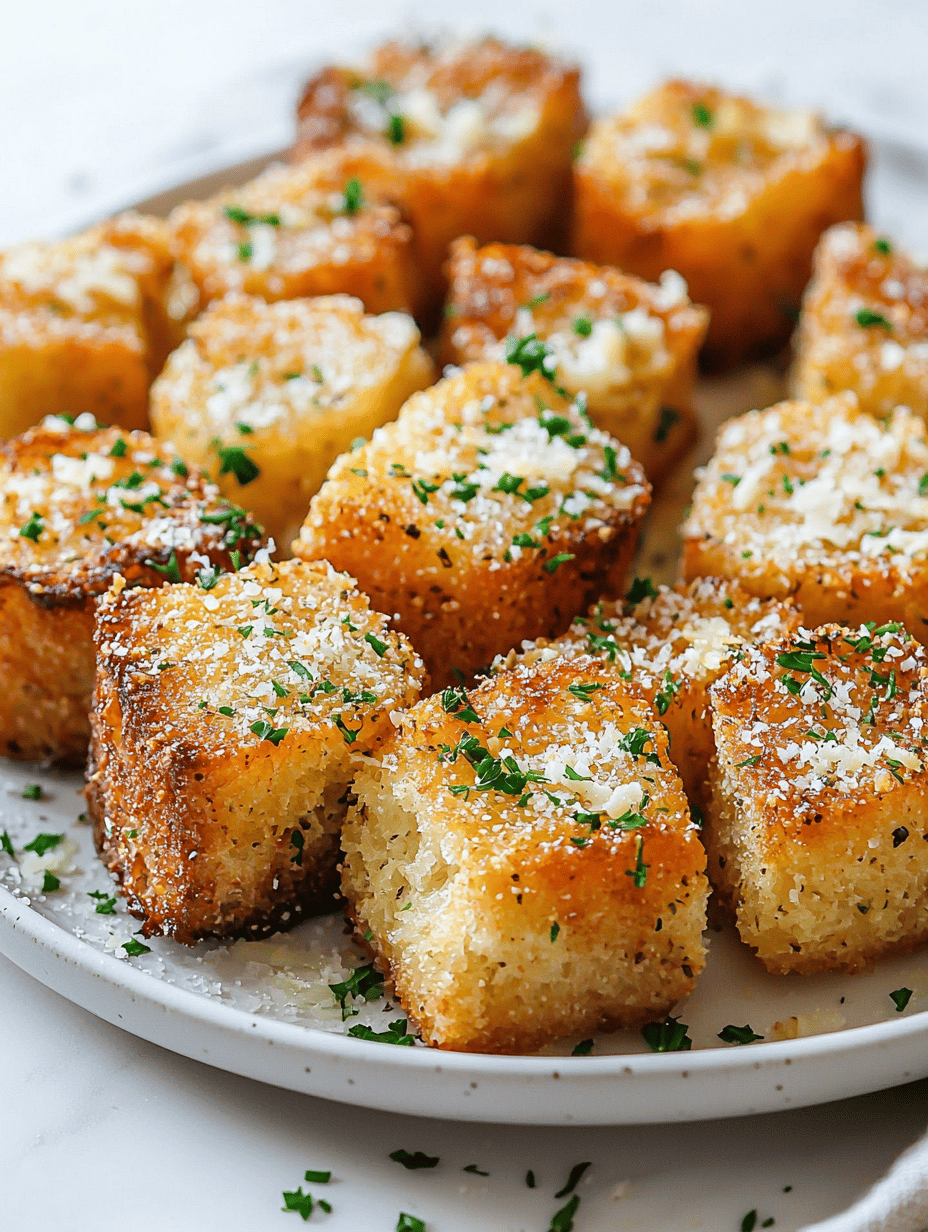
    Parmesan Garlic Bread Bites That Make You Feel Like You’re Sneaking Stolen Pieces from the Kitchen

    Usually I think of bread as a side, something you dunk or spread on. Today, I realized it can be the main event if you cut the fat and go straight for those blistered edges and melted garlic butter. It’s like stealing a snack right off the pan, only it’s totally okay because you made it.

    Cooking these bites is almost meditative. The garlic sizzles in butter, filling the kitchen with that sharp, toasted scent that makes the house feel cozier than it is outside. I swear, the way the Parmesan crisps up on top—crunchy but still cheesy—it’s a small miracle of texture and flavor.

    Right now, these bites feel especially necessary. No fuss, no plates to wash, but still a little indulgence. Perfect for last-minute get-togethers or when you just need to sneak a treat before anyone notices. Sometimes, simple wins, and this one might just be my new favorite snack.

    Why I Love This Recipe (And You Will Too)

    • They’re quick enough to whip up when you’re craving something satisfying.
    • The combination of crispy edges and gooey garlic inside feels like comfort and rebellion all at once.
    • They make the house smell incredible, like something secret and delicious.
    • No fancy ingredients—just pantry staples and a little bit of effort.
    • They’re perfect for single servings or sharing with friends (or just keeping all to yourself, no judgment).

    Honestly, I keep thinking about that leftover cheese crust—might just make a snack out of it tomorrow morning.

    Garlic Parmesan Bread Bites

    These garlic Parmesan bread bites are made by toasting chunks of bread in a skillet with garlic butter until crispy edges develop and cheese melts on top. The dish features a combination of crunchy, cheesy, and buttery textures with a fragrant garlic aroma, presented as small, flavorful morsels. They are quick to prepare and perfect as a satisfying snack or appetizer.
    Prep Time 5 minutes
    Cook Time 10 minutes
    Total Time 15 minutes
    Servings: 4
    Course: Main Course
    Cuisine: American
    Calories: 220

    Ingredients
      

    • 4 slices bread slices preferably crusty bread cut into chunks
    • 3 tablespoons unsalted butter melted
    • 2 cloves garlic minced
    • 2 tablespoons Parmesan cheese grated

    Equipment

    • Skillet or frying pan
    • Spatula or tongs

    Method
     

    1. Cut the bread into bite-sized chunks and set aside.
    2. Heat the skillet over medium heat and melt the butter, allowing it to sizzle gently and become fragrant.
    3. Add the minced garlic to the skillet and cook for about 30 seconds, stirring constantly until the garlic is golden and releases a toasted aroma.
    4. Place the bread chunks into the skillet, tossing or turning them to coat evenly with the garlic butter.
    5. Cook the bread, stirring occasionally, until the edges are golden brown and crispy, about 5 minutes.
    6. Sprinkle the grated Parmesan cheese over the bread and cook for another 1-2 minutes until the cheese melts and forms a crust.
    7. Remove the skillet from the heat and transfer the garlic Parmesan bread bites to a serving plate.
    8. Serve immediately while still warm, allowing the crispy edges, fragrant garlic, and cheesy topping to be fully appreciated.

    Sometimes, the best recipes are the ones that make you forget about fancy presentation and just deliver on that craving. No need to overthink these bites—they’re all about that straightforward, cheesy, garlicky bite that hits the spot. Or sneaks past your better judgment, maybe.

    There’s a kind of satisfaction in knowing a simple snack can be so wildly addictive. I’ll probably be making these weekly now. Who knew that crunchy Parmesan bits could be so… essential?

  • The Hidden Science Behind Crazy Bread’s Perfect Crust

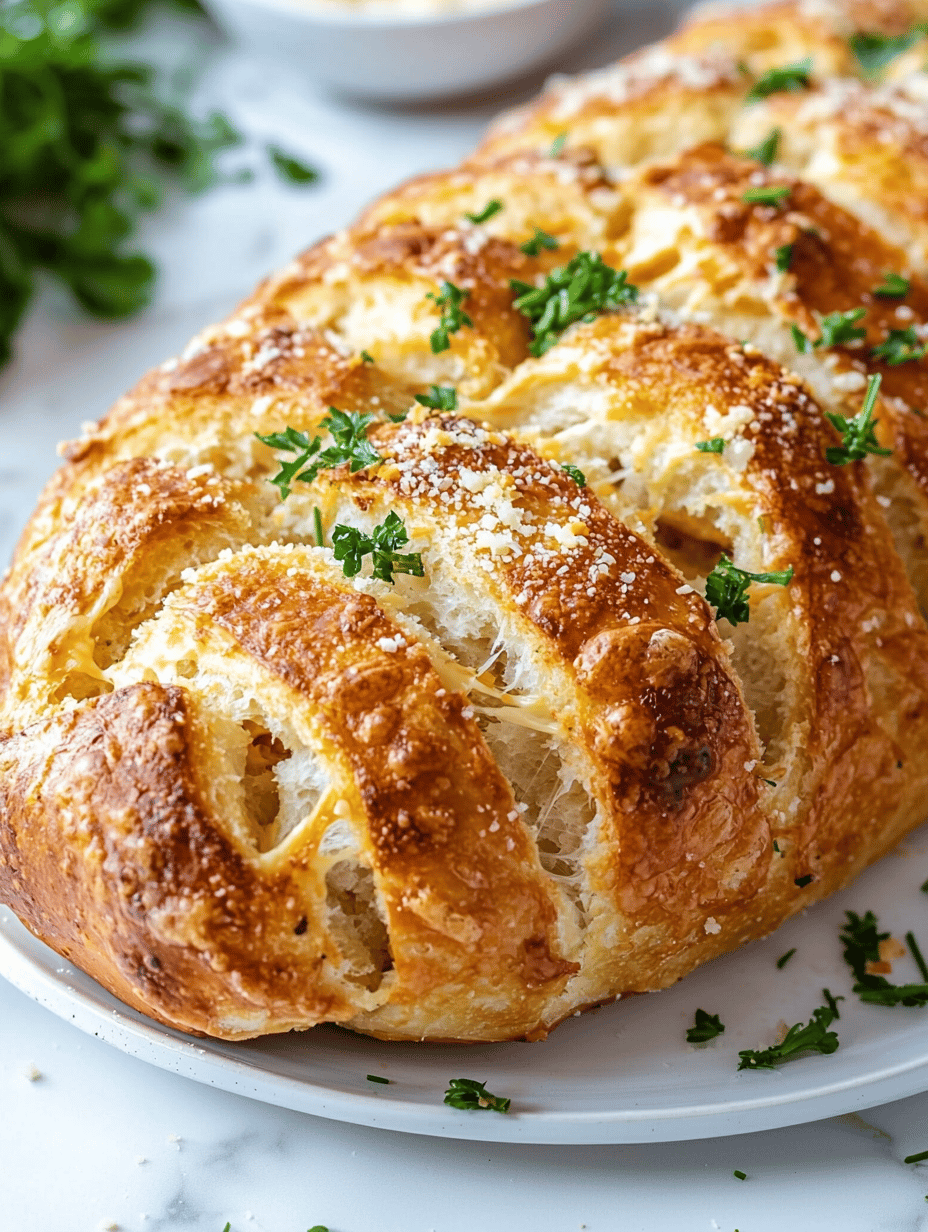
    The Hidden Science Behind Crazy Bread’s Perfect Crust

    I never thought about bread’s microbiome until I started baking this stuff. It’s like the yeast is having its own little party inside the dough, releasing tiny gas bubbles that give that addictive crispy edge. I’ve always just eaten bread, never really paid attention to what makes it crackle so satisfyingly with each bite.

    Now, that smell—garlic butter mingling with fresh bread and just a hint of that fake-cheese aroma from Little Caesars—makes me pause. It’s a familiar kitchen soundtrack I can’t shake, especially when I’m craving comfort that’s neither complicated nor fancy. It’s weird how this cheesy, garlicky mess is what I turned to after a long week, somehow feeling like a small act of rebellion and a treat all at once.

    Right now, with everyone sharing viral clips of homemade copycats, I just wanted to find a way to make a version that truly feels like mine. No fancy ingredients, no trickery—just old-school nostalgia with a bit more crust. Sometimes you just need those salty, airy bites to remind you that simple things are the best.

    Why I Love This Recipe (And You Will Too)

    • It’s quick — no need to fuss with dough rising for hours.
    • The garlic butter swirl makes the apartment smell incredible.
    • Crust that’s chewy on the inside, crispy on the outside—perfect for tearing apart.
    • Ideal for those nights when all you want is something cheesy and easy.
    • Turns an ordinary snack into a mini celebration.

    It’s funny how something so simple can bring back a flood of memories, and now I can’t see how I ever ate bread without thinking about the science behind it.

    Garlic Butter Cheesy Bread

    This cheesy garlic bread is made by layering garlic-infused butter over bread dough, then baking it until golden and crispy on the outside with a chewy interior. The result is a crusty, cheesy, garlicky loaf with a tender crumb and an irresistible aroma.
    Prep Time 10 minutes
    Cook Time 15 minutes
    Total Time 25 minutes
    Servings: 4
    Course: Main Course
    Cuisine: American
    Calories: 250

    Ingredients
      

    • 1 batch store-bought bread dough or prepared dough about 1 pound
    • 4 cloves garlic minced
    • 1/4 cup unsalted butter melted
    • 1 cup shredded mozzarella cheese
    • 2 tablespoons parmesan cheese optional
    • 1 teaspoon dried oregano
    • to taste salt

    Equipment

    • Mixing bowl
    • Baking sheet

    Method
     

    1. Preheat your oven to 375°F (190°C). Lightly grease a baking sheet or line it with parchment paper.
    2. Mince the garlic cloves finely until fragrant and set aside.
    3. In a small bowl, combine the melted butter with the minced garlic and a pinch of salt. Stir well to create a fragrant garlic butter mixture.
    4. Divide the dough in half and shape each piece into a flat oval or rectangle, about 1/2 inch thick.
    5. Brush each piece of dough generously with the garlic butter, ensuring to cover the entire surface.
    6. Sprinkle shredded mozzarella evenly over the buttered dough, followed by parmesan cheese and a pinch of dried oregano for flavor.
    7. Place the sheet in the oven and bake for about 12-15 minutes, or until the bread is golden brown and cheese is bubbling.
    8. Remove from oven and let cool slightly for 2-3 minutes. Slice into strips or squares for serving.
    9. Enjoy the warm, crispy-on-the-outside, chewy-on-the-inside cheesy garlic bread while it’s hot and gooey.

    Notes

    For extra flavor, add crushed red pepper flakes or chopped fresh herbs before baking.

    Honestly, I could just keep eating these forever and still wonder why I didn’t try this sooner. Maybe I’ll tinker with different garlic mixes or sprinkle some herbs on top next time. Whatever happens, I know these will always be the accidental highlight of my week.

    Or maybe I’ll just eat all of them and pretend I’m a bread scientist for a day. No matter what, I’ll keep coming back to this easy, flaky, cheesy masterpiece. That’s enough for now, anyway.

  • Parmesan-Crusted Potatoes That Make Me Feel Like a Kid Again

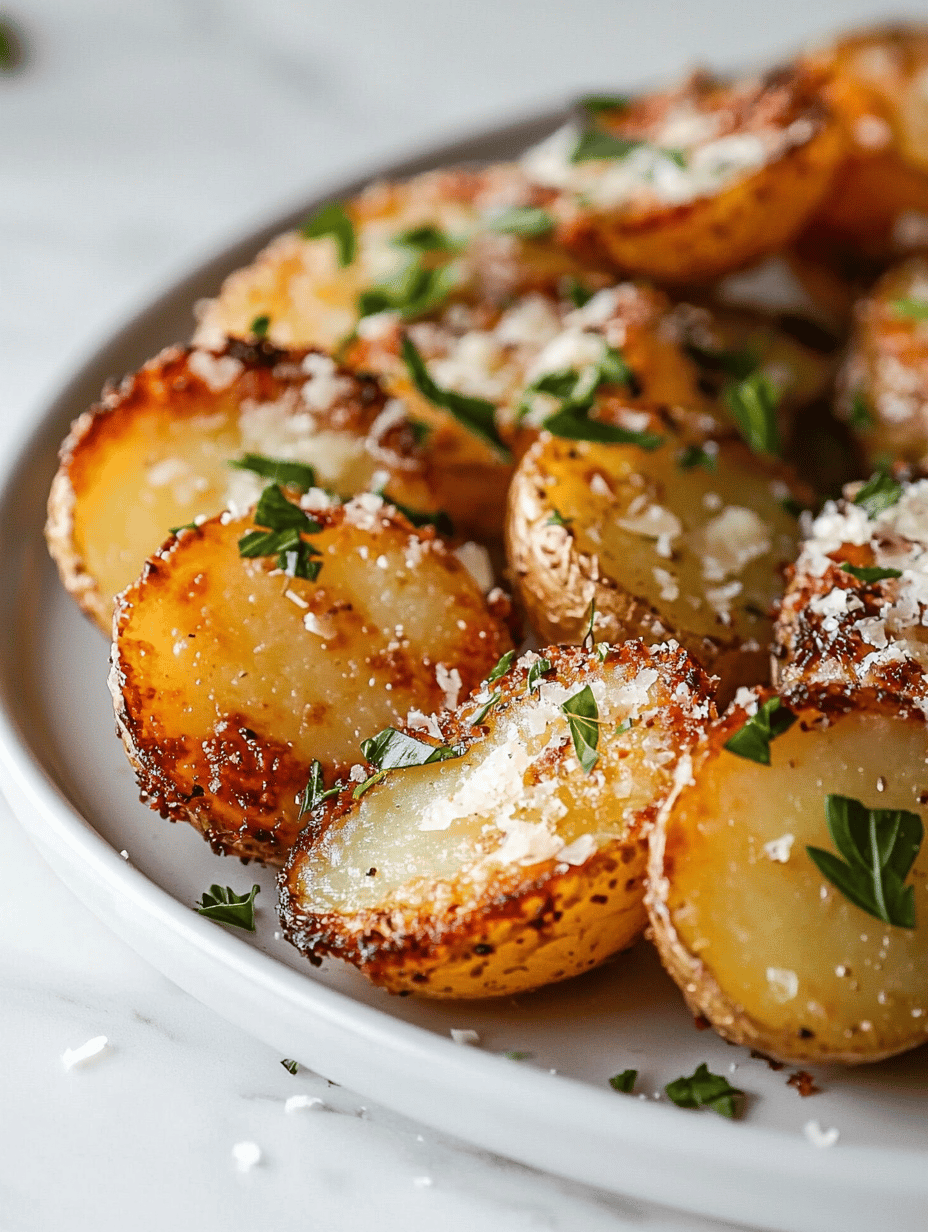
    Parmesan-Crusted Potatoes That Make Me Feel Like a Kid Again

    It’s the crispy sound that gets me first. That crackling as I slide the tray into the oven, and the scent of browned cheese mingling with melted butter, fills the kitchen with a kind of nostalgia I didn’t know I needed. These aren’t your typical roasted potatoes; the Parmesan crust isn’t just a topping, it’s a crunchy armor that transforms humble spuds into something special.

    What surprises me most is how easy this is to throw together on a weeknight. No fancy ingredients, just Parmesan, some herbs, and patience. It’s the kind of dish that makes the mundane feel like a small celebration. Plus, the way the cheese turns golden and crispy—every bite a little bite of magic—never gets old.

    Right now, it feels perfect for cozy nights at home or even a quick dinner before chaos hits. I keep thinking how much my kids would love the crunch, how it would sneak into their school lunch boxes, and how it’s one of those accidental treasures in dinner routines. Sometimes, food just sticks with you.

    Why I Love This Recipe (And You Will Too)

    • The irresistible aroma when it comes out of the oven makes the house smell like a bakery.
    • It’s crazy simple but feels like a special treat every time.
    • Perfect for both weeknights and lazy weekends, no fuss, just flavor.
    • The crispy Parmesan crust is oddly comforting, like a savory blankie for potatoes.
    • It’s one of those surprises—everyone always asks for seconds.

    Parmesan-Crusted Roasted Potatoes

    This dish features small potatoes roasted until tender with a crispy Parmesan cheese crust. The cheese forms a golden, crunchy exterior that encases the soft, fluffy interior, offering a satisfying contrast in texture. The recipe involves roasting and finishing with a Parmesan crust for a flavorful, visually appealing side dish.
    Prep Time 10 minutes
    Cook Time 35 minutes
    Total Time 45 minutes
    Servings: 4
    Course: Main Course
    Cuisine: American
    Calories: 250

    Ingredients
      

    • 1 ½ lbs small potatoes halved
    • 2 tablespoons olive oil
    • ¾ cup Parmesan cheese finely grated
    • 1 teaspoon dried herbs such as thyme or rosemary, optional
    • to taste salt and pepper

    Equipment

    • Baking sheet
    • Mixing bowl
    • Grater
    • Parchment paper

    Method
     

    1. Preheat your oven to 425°F (220°C). Line a baking sheet with parchment paper for easy cleanup and even roasting.
    2. Halve the small potatoes to ensure they cook quickly and develop a crispy exterior. If the potatoes are larger, quarter them for even baking.
    3. In a mixing bowl, toss the halved potatoes with olive oil, salt, pepper, and dried herbs until they are evenly coated.
    4. Spread the potatoes out in a single layer on the prepared baking sheet, making sure they aren’t crowded so they can roast evenly.
    5. Roast the potatoes in the oven for about 25-30 minutes, or until they are tender inside and golden around the edges. Shake the pan halfway through for even cooking.
    6. While the potatoes roast, grate the Parmesan cheese finely and combine it in a small bowl with a little additional dried herbs if desired.
    7. Once the potatoes are roasted and crispy, sprinkle the grated Parmesan mixture generously over the hot potatoes while they are still on the baking sheet.
    8. Return the baking sheet to the oven for an additional 3-5 minutes, or until the Parmesan cheese is melted, bubbly, and golden brown, forming a crisp crust.
    9. Remove from the oven, let the potatoes cool slightly for a couple of minutes, then transfer to a serving dish.
    10. Serve hot, with the crispy Parmesan crust providing a savory contrast to the tender interior. Enjoy the crunchy texture and rich flavor with your favorite main course.

    Cooking it makes me wonder why I don’t do it more often. It’s just potatoes, sure, but the crunch, the cheese, the undeniably good smell—those little things matter. Sometimes, I think about how I can turn the simplest ingredients into something memorable. Maybe that’s why this dish keeps showing up on my table. Or maybe I just want the crunch that makes me smile without even trying.

  • Loaded Breakfast Hash: The Midnight Snack You Didn’t Know You Needed

    Loaded Breakfast Hash: The Midnight Snack You Didn’t Know You Needed

    I started craving this after a dream about late-night diners and the smell of browned potatoes mixed with sizzling bacon. It’s not your typical morning breakfast—more like a secret menu item you’d stumble onto during a sleepover. There’s something about the way the crispy potatoes soak up everything salty and cheesy that lingers long after you’ve finished eating.

    This dish feels like an accidental remix of the breakfast I grew up with—super indulgent but honestly kind of rebellious. It’s perfect for those mornings when you wake up with a strange hankering for something that’s hearty enough to keep you from thinking about lunch. Also, it’s a great excuse to use up those random leftover ingredients lurking in your fridge.

    Why I Love This Recipe (And You Will Too)

    • It’s brutally simple but hits all the right spots—crispy taters, melty cheese, savory eggs.
    • Perfect for lazy weekends or a noise-filled family brunch.
    • It’s forgiving—you can add or skip things, and it still works.
    • It reminds me how comforting leftovers can be if you just pile them high with a few extras.
    • Plus, the smell alone might make your neighbors start peeking in.

    Honestly, I keep pretending I’m too busy for breakfast but then end up making this at midnight just because. It’s chaotic but also a reminder that some of the best meals are the ones when you’re just winging it.

    Crispy Potato and Bacon Hash with Cheese and Eggs

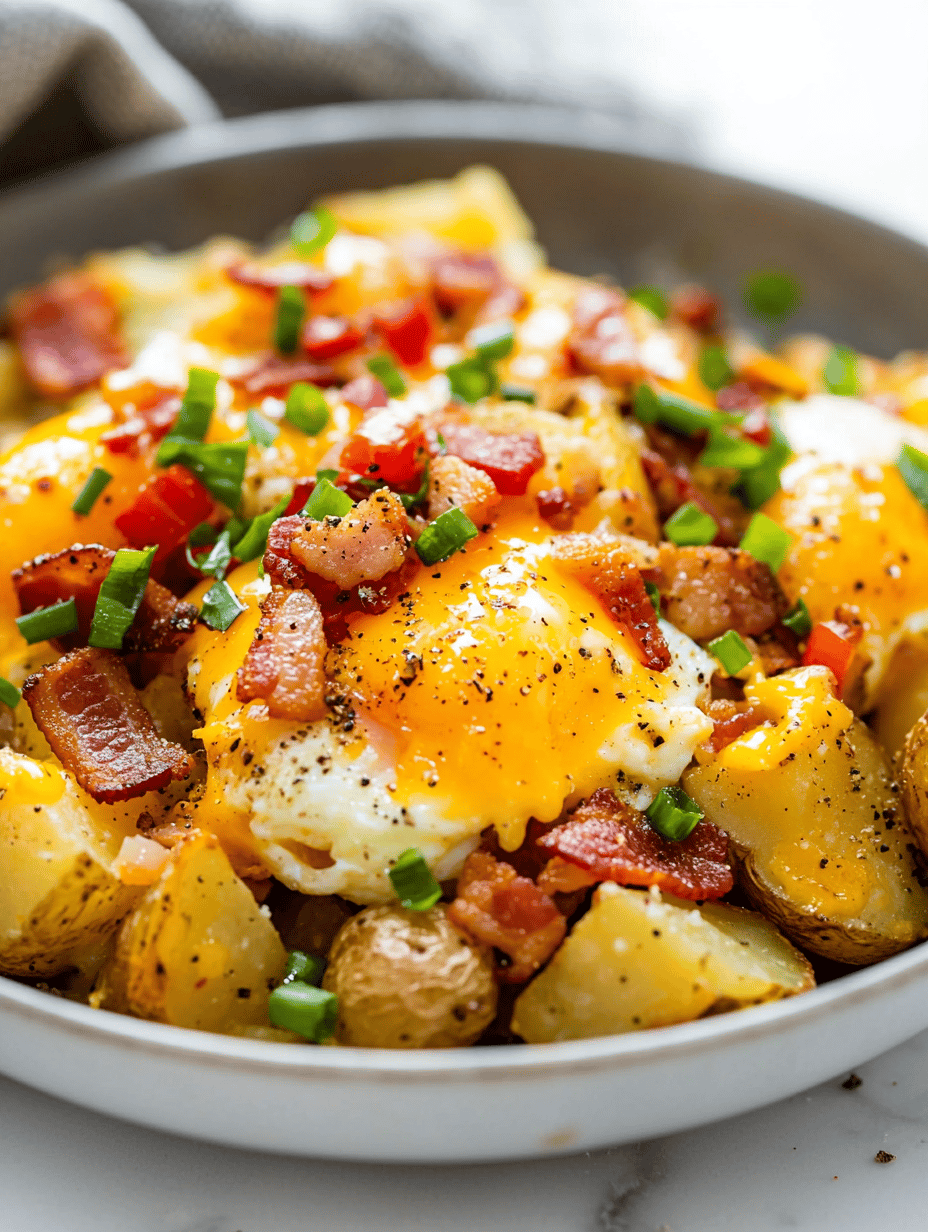
    This dish combines diced potatoes fried until crispy with sizzling bacon, topped with melted cheese and cooked eggs. The potatoes develop a golden crust, while the interior remains tender, and the eggs are cooked to your preferred doneness, creating a hearty, savory meal with contrasting textures.
    Prep Time 10 minutes
    Cook Time 20 minutes
    Total Time 30 minutes
    Servings: 4
    Course: Main Course
    Cuisine: Comfort Food
    Calories: 520

    Ingredients
      

    • 4 cups diced potatoes preferably medium-sized
    • 6 slices bacon cut into bite-sized pieces
    • 1 cup shredded cheese cheddar or your preferred melting cheese
    • 4 large eggs for frying or scrambling
    • to taste salt and pepper
    • 1 tablespoon oil for frying potatoes and bacon

    Equipment

    • Large skillet or frying pan
    • Spatula or wooden spoon

    Method
     

    1. Heat the oil in a large skillet over medium-high heat, then add the diced potatoes. Spread them out in a single layer and cook, occasionally stirring, until they are golden brown and crispy on the outside, about 8-10 minutes.
    2. Add the bacon pieces to the skillet and continue cooking, stirring regularly, until the bacon is sizzling and crispy, about 5-7 minutes. The potatoes will absorb some of the bacon fat, adding flavor.
    3. Sprinkle the shredded cheese evenly over the hot potato and bacon mixture. Cover the skillet briefly to allow the cheese to melt, creating a gooey layer on top.
    4. In a separate pan or right in the same skillet, crack the eggs directly onto the mixture or cook them separately if you prefer sunny side up. Cook until the whites are set and the yolks reach your desired doneness, about 3-4 minutes.
    5. Season the dish with salt and freshly ground pepper to taste. If cooking the eggs separately, transfer the hash to serving plates and top with the eggs.
    6. Serve hot straight from the skillet, allowing the crispy textures and melted cheese to be enjoyed with each bite. Dig in and savor the hearty, savory flavors.

    There’s a weird satisfaction in knowing I don’t have to overthink this. Just throw stuff in a pan and see what happens. No fuss, no fussing, just a pile of everything I like best—simple and satisfying. Maybe tomorrow I’ll add some hot sauce or a drizzle of sour cream… or maybe I’ll just leave it as is, staring at the leftovers like they’re a little treasure.

  • The Unlikely Art of Baked Potato Chips That Actually Taste Like Potatoes

    The Unlikely Art of Baked Potato Chips That Actually Taste Like Potatoes

    I started craving something crispy but wanted it to still kinda taste like real potatoes. No overwhelming salt or weird industrial flavors—just that familiar starchy smell and a gentle crunch. Turns out, oven-baked potato chips can do that if you watch for the right thickness and baking time.

    What caught me off guard is how quick they are to make. No messing with overly complicated fryers or greasy splatters. Just potatoes, some oil, and a sprinkle of salt, and I was staring at a snack that wasn’t just empty crunch but actually satisfying.

    Why I Love This Recipe (And You Will Too)

    • It’s honest, simple, no faux flavoring, just real potato taste.
    • Perfect for a sudden snack attack or last-minute party wants.
    • It makes me feel like I’m fighting snack food chaos with a little craft.
    • Plus, I can tweak the seasoning, from spicy paprika to cheesy herbs, whenever I want.
    • Honestly, it’s kind of a tiny rebellion in the snack aisle we all need sometimes.

    Maybe it’s just me, but I like my chips to taste like something I actually recognize. Been thinking about how something so simple can surprise you. And yeah, I’ll keep trying different potatoes, see if I can chase that perfect potato crunch someday.

    Oven-Baked Potato Chips

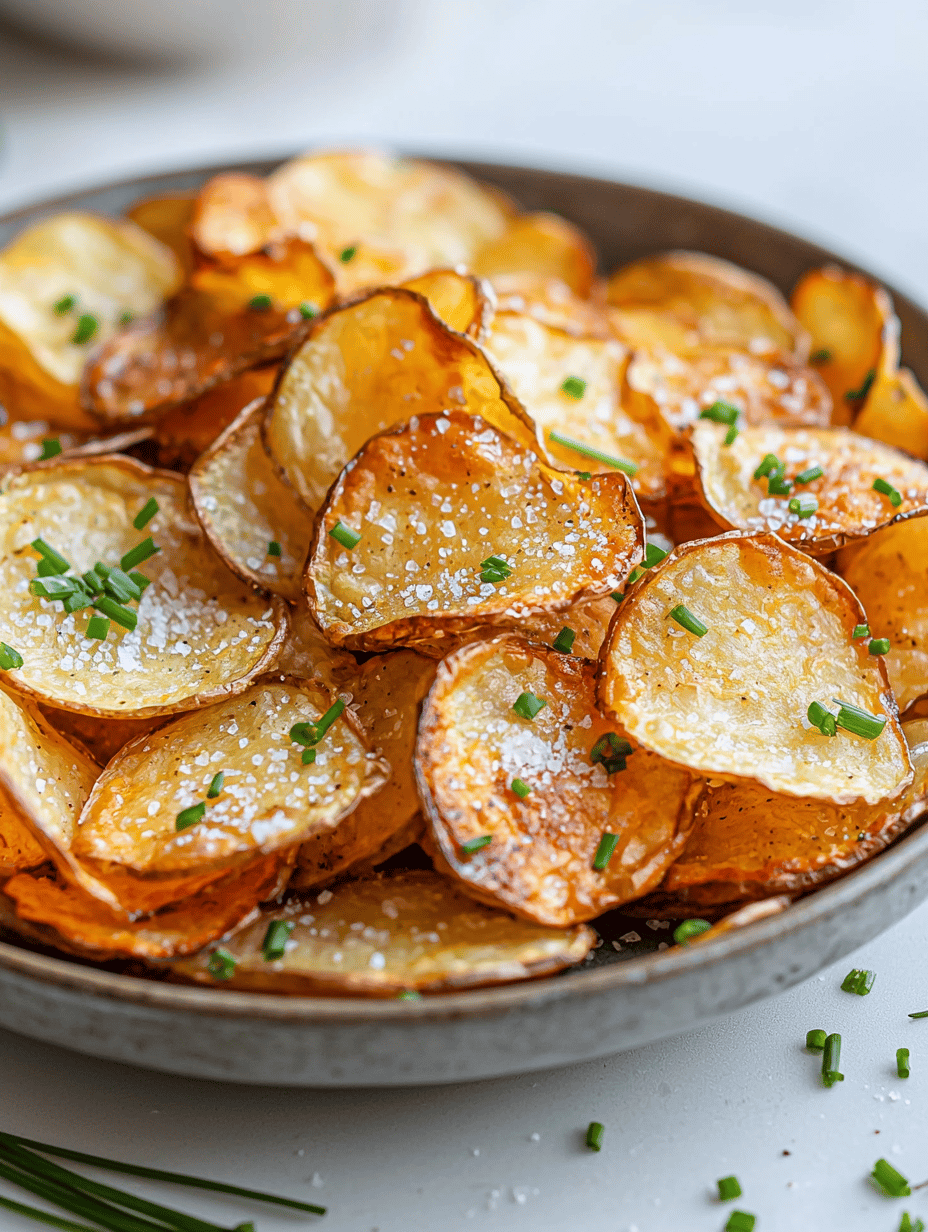
    This dish features thinly sliced potatoes baked until crispy to create homemade potato chips. The main ingredients are potatoes and oil, resulting in a crunchy texture with a golden appearance. The baking method avoids frying, producing a light but satisfying snack.
    Prep Time 10 minutes
    Cook Time 20 minutes
    Total Time 30 minutes
    Servings: 4
    Course: Main Course
    Cuisine: American
    Calories: 150

    Ingredients
      

    • 4 medium potatoes Russet or Yukon Gold recommended
    • 1 tablespoon vegetable oil any neutral oil works
    • to taste salt preferably fine sea salt

    Equipment

    • Mandoline or sharp knife
    • Baking sheet
    • Parchment paper
    • Large mixing bowl

    Method
     

    1. Preheat your oven to 400°F (200°C) and line a baking sheet with parchment paper.
    2. Wash the potatoes thoroughly, then use a mandoline or sharp knife to slice them very thin—about 1/16 inch thick or less for maximum crunch.
    3. Transfer the sliced potatoes to a large mixing bowl, then drizzle with the vegetable oil. Gently toss to evenly coat each slice with oil—this will help them crisp up in the oven.
    4. Spread the oiled potato slices in a single layer on the prepared baking sheet, making sure they do not overlap for even baking.
    5. Bake in the preheated oven for about 15-20 minutes, watching closely near the end. The chips should turn golden brown and become crispy around the edges, with a satisfying crackle when you lift them.
    6. Remove the baking sheet from the oven and let the chips cool for a few minutes—this will help them firm up and become even crunchier.
    7. Sprinkle the warm chips with salt to taste; toss gently to distribute evenly.
    8. Enjoy your homemade oven-baked potato chips immediately for the best crunch, or store in an airtight container for later snacking.

    There’s a strange comfort in knowing exactly what’s in these chips. No weird additives, just the potato and whatever seasoning I decide to toss on top. Makes me wonder why we ever settle for store-bought stuff that’s just pretend.

    Honestly, I’m probably going to make these again when I need a quick snack or to impress a friend who shows up unannounced. It’s like, taste the potato, feel the crunch, and maybe have a little moment of quiet satisfaction.

  • Secretly Comforting Potato Bunny Croquettes That Will Surprise You

    Secretly Comforting Potato Bunny Croquettes That Will Surprise You

    Ever think about how certain snacks tap into childhood memories but also work as adult comfort food? These potato bunny croquettes do exactly that. The moment you bite in, you catch a whiff of toasted butter and fried potato, a smell so nostalgic it sneaks up on you. It’s like rediscovering a forgotten favorite, but with a little modern twist.

    What truly matters right now is how these little bites fit into chaos and calm alike. Perfect for lazy weekends or unexpected guests, they’re quick to whip up but feel fancy enough to impress. I love how the crispy shell gives way to that creamy, fluffy inside — it’s like a tiny pocket of joy you didn’t see coming.

    Why I Love This Recipe (And You Will Too)

    • They remind me of those afternoons watching cartoons, best eaten with a little ketchup on the side.
    • This recipe is forgiving — you can jazz up the filling or keep it simple, no stress.
    • They make for a good snack, a side, or a stand-in for actual bunny-shaped comfort in a snack form.
    • Cooking them always feels a bit like a secret mission — crunchy on the outside, velvety inside.
    • Honestly, once you make these, you’ll find excuses to turn any boring moment into a potato croquette session.

    Potato Bunny Croquettes

    These potato bunny croquettes are small, fried bites with a crispy exterior and a creamy, fluffy interior made from mashed potatoes. Their golden-brown crust is achieved through shallow frying, while the inside remains tender and smooth, often shaped into adorable bunny forms for a playful presentation.
    Prep Time 20 minutes
    Cook Time 10 minutes
    Total Time 30 minutes
    Servings: 4
    Course: Main Course
    Cuisine: International
    Calories: 150

    Ingredients
      

    • 3 cups mashed potatoes ideally cooled and smooth
    • 1 cup all-purpose flour
    • 1 large egg beaten
    • 0.5 cup bread crumbs plus extra for coating
    • to taste salt and pepper adjust to preference
    • 0.5 cup vegetable oil for frying

    Equipment

    • Pot
    • Mixing bowl
    • Fork ormasher
    • Baking sheet or plate
    • Frying pan or deep fryer
    • Slotted spoon

    Method
     

    1. Transfer the cooled mashed potatoes to a mixing bowl and season with salt and pepper, mixing well to evenly distribute the seasoning.
    2. Add the beaten egg to the mashed potatoes and gently fold it in until the mixture is cohesive and slightly sticky.
    3. Scoop a portion of the mixture and shape it into a small oval or bunny head shape with your hands, smoothing the surface.
    4. Dredge the shaped croquette in flour, ensuring all sides are lightly coated to help the egg wash and bread crumbs adhere.
    5. Dip the floured croquette into the beaten egg, then roll it in bread crumbs until fully coated, pressing gently to adhere.
    6. Repeat the shaping and coating process for the remaining mixture, placing the prepared croquettes on a plate or tray.
    7. Heat vegetable oil in a frying pan over medium heat until shimmering and hot enough for frying, approximately 350°F (175°C).
    8. Gently place the croquettes into the hot oil, cooking in batches if necessary to avoid overcrowding, and fry until golden brown and crispy, about 3-4 minutes per side.
    9. Use a slotted spoon to remove the croquettes from the oil once they are evenly golden and crispy, and drain on paper towels to remove excess oil.
    10. Arrange the fried croquettes on a serving plate and serve immediately for the best crispiness and flavor.

    Notes

    Feel free to enhance the filling with grated cheese or finely chopped herbs for extra flavor. Shaping the croquettes into bunny forms adds a fun, decorative touch—they can be simple ovals or more detailed shapes if desired.

    Maybe I’ll keep some in the freezer for the days I need a quick escape. Or just because I couldn’t resist shaping them into bunnies. Either way, they’re weirdly satisfying. Nothing fancy, just simple, honest comfort fitting into whatever chaos today brings.

  • One Ingredient That Turns Ordinary Fries into Outback’s Cheesy Wonderland

    One Ingredient That Turns Ordinary Fries into Outback’s Cheesy Wonderland

    Ever notice how the smell of melted cheese on crispy potatoes can make a room feel cozier? I’ve been obsessing over how just a handful of ingredients can transform plain fries into something almost addictive. It’s not about complex sauces or fancy toppings—just the kind of simple comfort you crave after a long day.

    What’s surprising is how close you can get to Outback’s famous Aussie Cheese Fries with a few kitchen shortcuts. No need to run out or order takeout. Lately, I’ve been sneaking this into movie nights or lazy weekends. It’s weirdly satisfying watching everyone reach for seconds without ever leaving your sofa.

    Why I Love This Recipe (And You Will Too)

    • the smell of bubbling cheese makes the whole house smell like a cozy pub
    • it’s fast—no complicated steps, just melting cheese and crunchy fries
    • you can customize the cheese blend or add bacon bits if you’re feeling fancy
    • it’s honestly just a good excuse to eat cheese straight from the pan
    • it’s one of those recipes that sneaks into your regular rotation

    Guess I should’ve called it a secret weapon or life hack. Either way, this stuff is dangerous in the best way—hard to stop at just one plate.

    Cheesy Crispy Potatoes

    This dish features crispy roasted potato wedges topped with melted, bubbly cheese, combining crunchy textures with cheesy richness. The preparation involves roasting potatoes until golden and then broiling them with a cheese mixture until bubbling and browned, resulting in a golden, cheesy, and crisp final appearance.
    Prep Time 10 minutes
    Cook Time 20 minutes
    Total Time 30 minutes
    Servings: 4
    Course: Main Course
    Cuisine: American
    Calories: 350

    Ingredients
      

    • 4 large potatoes Russet or Yukon Gold recommended, sliced into wedges
    • 2 tablespoons olive oil for tossing potatoes
    • 1 teaspoon salt adjust to taste
    • 1/2 teaspoon black pepper freshly ground preferred
    • 1 cup shredded cheese cheddar, mozzarella, or a blend
    • 1 tablespoon butter melted, for brushing

    Equipment

    • Baking sheet
    • Cooking brush

    Method
     

    1. Preheat the oven to 425°F (220°C). Line a baking sheet with parchment paper for easy cleanup.
    2. Wash and dry the potatoes, then cut them into evenly sized wedges for uniform roasting.
    3. Toss the potato wedges with olive oil, salt, and black pepper until evenly coated. Arrange them in a single layer on the prepared baking sheet.
    4. Roast the potatoes in the oven for about 20 minutes, flipping once halfway through, until they are golden brown and crispy around the edges.
    5. Remove the baking sheet from the oven and increase the oven temperature to broil. Drizzle melted butter over the hot potatoes for extra crispness and flavor.
    6. Sprinkle the shredded cheese evenly over the hot, crispy potatoes. Return the sheet to the oven, broiling until the cheese is melted, bubbly, and slightly browned, about 2-4 minutes.
    7. Remove the cheesy potatoes from the oven and let sit for a minute to settle. Serve immediately for the best gooey, crispy contrast.

    Maybe I’ll try tossing some jalapeños into the cheese next time. Or just smother everything in extra cheese cause why not. Anyway, it’s messy, it’s cheesy, and it’s perfect.

  • Cheesy Pepperoni Pizza Bombs: The Snack No One Saw Coming

    Cheesy Pepperoni Pizza Bombs: The Snack No One Saw Coming

    I stumbled upon this idea while trying to clear out my fridge—just a handful of pepperoni, some cheese, and leftover pizza dough. It felt like being a kid sneaking snacks before dinner, but surprisingly, these little bombs have become my go-to when I want something crispy, cheesy, and totally addictive.

    They smell like a pepperoni pizza yet have this crispy exterior that crunches in a way that makes you forget about forks and plates. Honestly, it’s kind of wild how quick they come together. No fancy ingredients, no complicated steps—just a messy, glorious handful of warm, cheesy pockets.

    Right now, they matter because everyone’s looking for small bites they can crush easily, especially when hosting or just avoiding cooking big meals after a long day. It’s like pizza, but portable, more satisfying, and honestly a little messier—my kind of meal.

    Why I Love This Recipe (And You Will Too)

    • It’s perfect for random fridge cleanouts—no waste, all flavor.
    • The crunch of the dough combined with gooey cheese is totally satisfying.
    • It’s messy and fun, reminds me of sneaking snacks as a kid.
    • Makes a perfect finger-food for casual get-togethers or lazy nights alone.
    • It’s simple enough to whip up without thinking twice, but impressive enough to share (if you want).

    Cheesy Pepperoni Bites

    These pepperoni and cheese-filled dough pockets are made by assembling small portions of leftover pizza dough with slices of pepperoni and cheese, then baking them until golden and crispy. They develop a crunchy exterior with a gooey, cheesy interior, resembling miniature stuffed pastries with a savory flavor.
    Prep Time 10 minutes
    Cook Time 15 minutes
    Total Time 25 minutes
    Servings: 4
    Course: Main Course
    Cuisine: American
    Calories: 210

    Ingredients
      

    • 1 cup pizza dough store-bought or homemade, softened
    • 1/2 cup shredded cheese mozzarella or a blend
    • 8 slices pepperoni slices preferably small or thin slices

    Equipment

    • Baking sheet
    • Rolling pin

    Method
     

    1. Preheat your oven to 375°F (190°C) and line a baking sheet with parchment paper to prevent sticking.
    2. Roll out the pizza dough on a lightly floured surface until it’s about 1/8 inch thick, then cut it into 8 small squares with a sharp knife or pizza cutter.
    3. Place a slice of pepperoni in the center of each dough square, then sprinkle a pinch of shredded cheese over the pepperoni.
    4. Fold each square in half over the filling to form a triangle, then pinch the edges tightly together to seal in the cheese and pepperoni.
    5. Arrange the sealed pockets on the prepared baking sheet, with the sealed side down to help them stay closed during baking.
    6. Bake in the preheated oven for about 15 minutes, or until the pockets are puffed up and golden brown on top, with crispy edges.
    7. Remove from the oven and allow to cool slightly before serving. These bites should have a crunchy exterior and a cheesy, savory filling inside.

    Honestly, sometimes I make these just to have something quick and cheesy on hand. They’re not pretty, but who cares? They’re just really good at being exactly what you want in the moment. And weirdly satisfying to eat one after another, no regrets.