Category: Desserts

  • Double Chocolate Easter Cookies That Secretly Taste Like Fudge

    Double Chocolate Easter Cookies That Secretly Taste Like Fudge

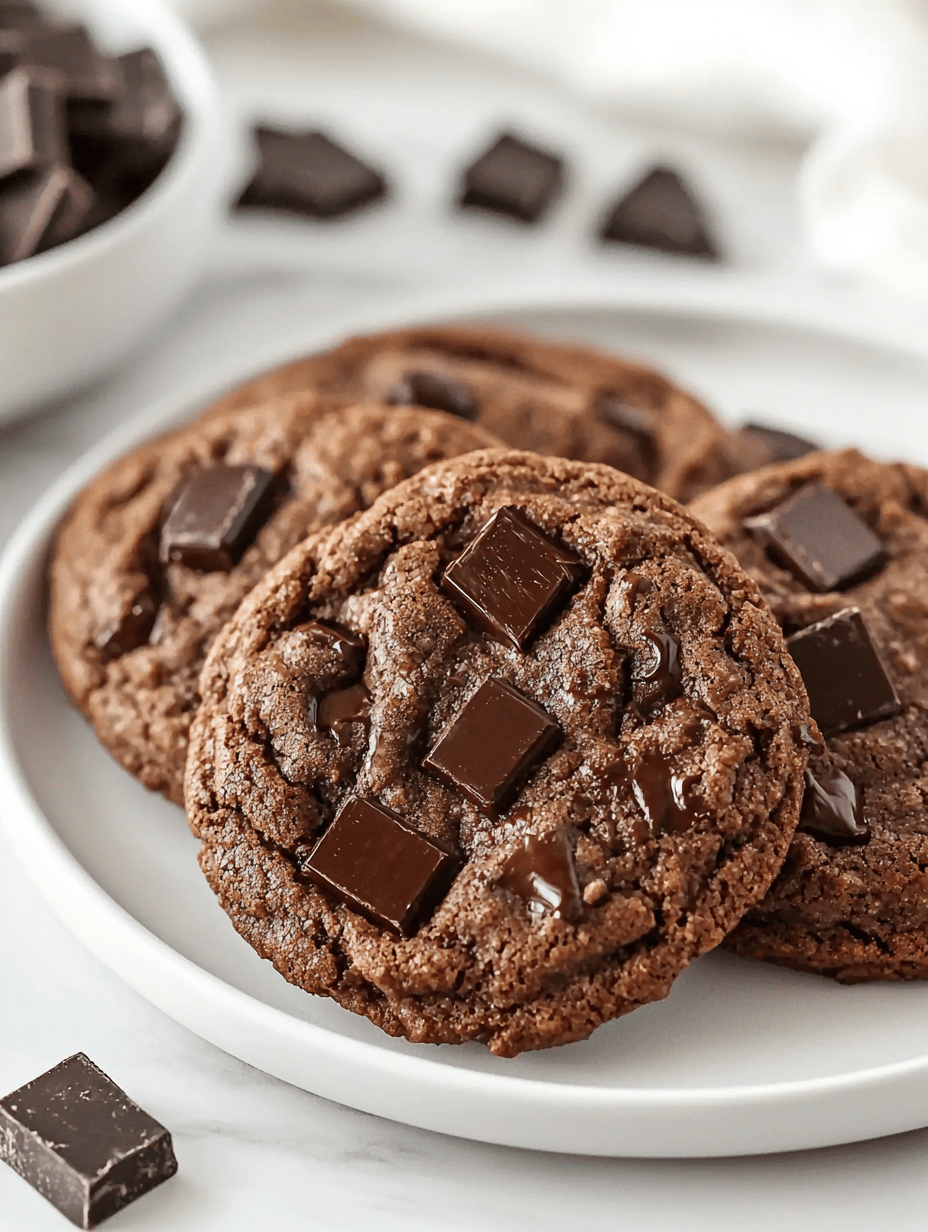
    I never expected the key to these cookies to be the splash of espresso powder I tossed in. It sounds odd, but it amplifies the cocoa’s richness, almost gives it a little depth you don’t see coming. The dough smells like melted dark chocolate and a hint of roasted coffee, and the texture? Crispy edges with a gooey center that reminded me of brownie batter.

    This season feels like a sweet, messy celebration made for chocolate lovers. And these cookies—baking in the oven—bring a sense of ordinary chaos. No fuss, just a tray of dark, shiny cookies waiting to be devoured. It’s the kind of treat that’s perfect for sneaking a handful after the kids are asleep or sharing during a lazy brunch.

    Why I Love This Recipe (And You Will Too)

    • It’s simple enough to make last-minute, but feels fancy enough to impress at Easter brunch.
    • The addition of espresso makes the chocolate taste more intense without tasting coffee-ly.
    • They remind me of my grandma’s fudge—only in cookie form, which is kinda dangerous.
    • This recipe is my way of sneaking extra chocolate into my day, no shame.
    • Plus, you can freeze the dough and bake just a few—perfect for whenever those chocolate cravings hit.

    It’s not about perfection, just a little bit of chocolate chaos on a cookie sheet.

    Chocolate Espresso Cookies

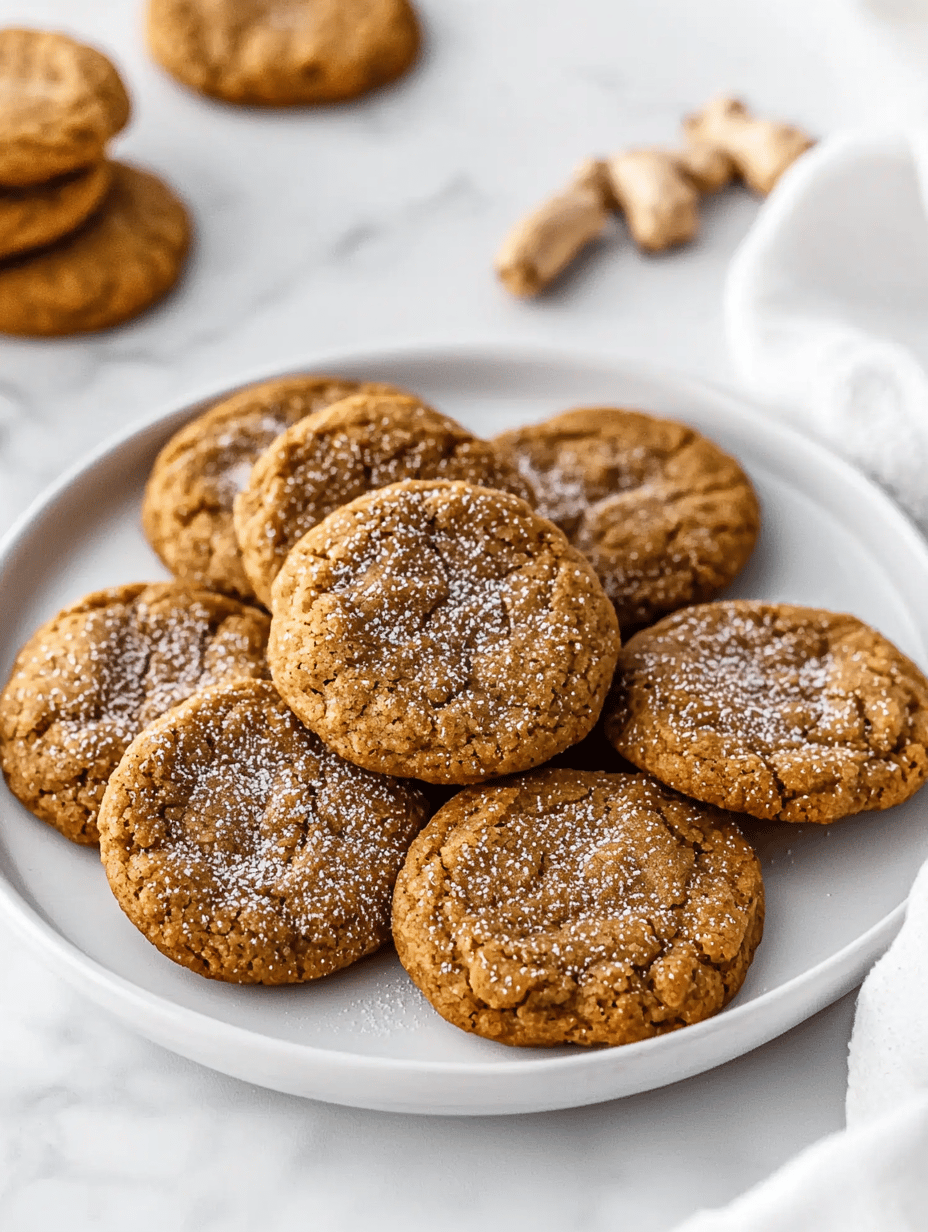
    These cookies feature a rich cocoa flavor enhanced by a splash of espresso powder, resulting in a deep, intense chocolate taste. The dough is mixed until smooth, then baked to achieve crispy edges with a gooey, brownie-batter-like center. The final cookies are shiny, dark, and slightly crackled on top, with a texture that balances crunch and chewiness.
    Prep Time 15 minutes
    Cook Time 12 minutes
    Total Time 27 minutes
    Servings: 24
    Course: Main Course
    Cuisine: American
    Calories: 150

    Ingredients
      

    • 1 cup unsweetened cocoa powder preferably Dutch-processed
    • 1/2 teaspoon espresso powder instant variety
    • 1 cup granulated sugar
    • 1/2 cup brown sugar packed
    • 1/2 cup unsalted butter melted and cooled slightly
    • 2 large eggs
    • 1 1/2 cups all-purpose flour
    • 1/2 teaspoon baking powder
    • 1/4 teaspoon salt
    • 1/2 cup semi-sweet chocolate chips optional, for extra chocolatey bites

    Equipment

    • Mixing bowls
    • Whisk
    • Baking sheet
    • Parchment paper
    • Cooling rack

    Method
     

    1. Preheat your oven to 350°F (175°C) and line a baking sheet with parchment paper to prevent sticking.
    2. In a large mixing bowl, whisk together the cocoa powder, espresso powder, granulated sugar, and brown sugar until well combined. This helps evenly distribute the powders and creates a smooth base.
      1 cup unsweetened cocoa powder, 1/2 teaspoon espresso powder, 1 cup granulated sugar, 1/2 cup brown sugar
    3. Add the melted butter to the dry mixture and whisk until it forms a thick, chocolatey paste with a glossy appearance.
      1/2 cup unsalted butter
    4. Beat in the eggs one at a time, mixing well after each addition until the batter is smooth and slightly shiny.
      2 large eggs
    5. In a separate bowl, sift together the flour, baking powder, and salt to ensure there are no lumps.
      1 1/2 cups all-purpose flour, 1/2 teaspoon baking powder, 1/4 teaspoon salt
    6. Gradually fold the dry ingredients into the wet mixture using a spatula, mixing just until combined. Be careful not to overmix to keep the cookies tender.
    7. Stir in the chocolate chips if using, distributing them evenly throughout the dough.
      1/2 cup semi-sweet chocolate chips
    8. Scoop rounded tablespoon-sized portions of dough onto the prepared baking sheet, spacing them about 2 inches apart to allow for spreading.
    9. Bake for 10 to 12 minutes, or until the edges are crispy and the centers look slightly soft but set. The aroma of chocolate and coffee will fill your kitchen.
    10. Remove the cookies from the oven and let them cool on the baking sheet for about 5 minutes, which helps them firm up around the edges.
    11. Transfer the cookies to a wire rack to cool completely — they will be shiny, crackled on top, with a soft, gooey center.
    12. Enjoy these rich, chocolatey cookies with a glass of milk or your favorite coffee!

    Notes

    You can freeze the dough for later baking. Store baked cookies in an airtight container for up to a week.

    Honestly, sometimes I wonder if I should just keep a jar of this dough in the freezer. Will probably do that next time. Anyway, these cookies are here to stay for a while. They just feel right—rich, a touch messy, and always worth the cleanup.

  • Cannoli Poke Cake: The Dessert I Didn’t Know I Needed

    Cannoli Poke Cake: The Dessert I Didn’t Know I Needed

    Weirdly, I started making this cake because I ran out of puff pastry for my usual cannoli shells. Instead, I grabbed a box of vanilla cake mix and a jar of ricotta. That tangy, creamy middle just refused to go away — suddenly, I was layering it into something totally different but somehow familiar.

    There’s something oddly satisfying about poking holes in soft cake and watching the ricotta mixture seep in. It’s like a little secret explosion of flavor with every forkful. This is the kind of dessert that sneaks up on you—not just a quick sweet, but something a bit more personal, a bit more layered.

    Why I love this recipe (and you will too):

    • It turns a simple box cake into something indulgent with minimal effort, perfect for lazy weekdays or last-minute guests.
    • The smell of cinnamon, sugar, and coffee-infused ricotta makes the house smell festive without all the fuss.
    • It’s nostalgic — reminds me of childhood birthday parties, but with a grown-up twist.
    • Flexibility — add chocolate chips, orange zest, or even pistachios if you want to spice it up.
    • It’s just weird enough to be memorable but familiar enough to feel like a treat you could make anytime.

    Sometimes I think the best desserts are the ones that surprise you mid-bite. This one, I swear, might be my new go-to for unexpected moments.

    Ricotta Layered Cake with Cinnamon and Coffee

    This dessert features a soft vanilla cake that is poked with holes and infused with a creamy, tangy ricotta mixture flavored with cinnamon and coffee. The cake is assembled by layering the ricotta filling into the cake, resulting in a moist, tender texture with bursts of flavor in every bite.
    Prep Time 15 minutes
    Cook Time 30 minutes
    Total Time 45 minutes
    Servings: 8
    Course: Main Course
    Cuisine: American
    Calories: 350

    Ingredients
      

    • 1 box vanilla cake mix
    • 1 cup ricotta cheese full-fat preferred
    • 1/4 cup granulated sugar
    • 1 teaspoon ground cinnamon
    • 1 tablespoon instant coffee powder dissolved in 1 tablespoon hot water
    • 2 eggs large eggs
    • Powdered sugar for dusting

    Equipment

    • Mixing bowls
    • Fork or skewer
    • Spatula
    • Cake pan
    • Cooling rack

    Method
     

    1. Preheat your oven to 350°F (175°C). Grease a cake pan and set aside.
    2. Mix the vanilla cake batter according to the package instructions until smooth and lump-free.
    3. Pour the batter into the prepared cake pan and spread evenly with a spatula.
    4. Bake the cake for about 25-30 minutes, or until a toothpick inserted into the center comes out clean. Let it cool completely on a wire rack.
    5. While the cake cools, dissolve the instant coffee powder in 1 tablespoon hot water and let it cool.
    6. In a mixing bowl, combine ricotta cheese, granulated sugar, ground cinnamon, eggs, and the cooled coffee mixture. Whisk until smooth and creamy, with no lumps.
    7. Use a skewer or fork to poke holes all over the cooled cake—about one inch apart—so that the ricotta mixture can seep in.
    8. Pour the ricotta filling evenly over the cake, allowing it to soak into the holes and spread across the surface.
    9. Let the assembled cake sit for at least 30 minutes to allow the flavors to meld and the ricotta to set slightly.
    10. Dust the top lightly with powdered sugar for a finishing touch. Slice and serve to reveal the moist, layered interior.
    11. Enjoy this creamy, soft cake with hints of cinnamon and coffee in every bite.

    Honestly, I probably shouldn’t keep a slice around. It’s addictive, weirdly filling, and all that cheesy ricotta. But then again, what’s life without a little surprise on your plate? I’ll probably just keep thinking about that next bite for a while.

  • Red Velvet Cupcakes That Smell Like Childhood Smirks and Old Photo Albums

    Red Velvet Cupcakes That Smell Like Childhood Smirks and Old Photo Albums

    Ever notice how certain baked goods carry a specific scent that pulls you right back to some quiet, unremarkable afternoon from long ago? These cupcakes aren’t just about that vivid red hue or the cocoa whisper—they smell like the vintage perfume bottle your grandma kept tucked in her bedside drawer, warm with a hint of vanilla and the slightest dusting of cocoa powder.

    This isn’t about perfect Instagram shots or swoon-worthy glaze. It’s about the small, chaotic moments of trying to stack cupcakes without frosting sliding off—yet somehow still ending up with a handful of crumbs and frosting smudges on the table. Because right now, there’s something about the comfort of a classic recipe with a twist, perfect for daylight picnics or late-night snack attacks.

    Why I Love This Recipe (And You Will Too)

    • You get a hint of nostalgia, even if you’ve never made a cupcake before.
    • The smell alone makes the whole kitchen feel like a cozy secret.
    • It’s a simple, fun bake that doesn’t demand fancy tools or ingredients.
    • Perfect for when you want something sweet but also a little unpredictable.
    • And honestly, it’s a reminder that sometimes baking should be messy and imperfect. Just like life.

    So maybe this is less about the cupcake and more about the feeling of pulling something from the oven, small enough to carry a memory in your palm.

    Chocolate Vanilla Cupcakes

    These cupcakes are baked treats with a tender crumb, featuring a subtle cocoa aroma and hints of vanilla. They use standard mixing methods, combining dry and wet ingredients for a smooth batter, resulting in a moist, airy texture with a light golden appearance. The final cupcakes display a slight domed top and a delicate crumb that’s easy to slice or bite into.
    Prep Time 15 minutes
    Cook Time 20 minutes
    Total Time 35 minutes
    Servings: 12
    Course: Main Course
    Calories: 210

    Ingredients
      

    • 1 ½ cups all-purpose flour sifted
    • 1 cup granulated sugar
    • ½ cup unsweetened cocoa powder preferably sifted
    • 1 ½ teaspoons baking powder
    • ½ teaspoon salt
    • 2 large eggs at room temperature
    • ½ cup vegetable oil
    • 2 teaspoons vanilla extract
    • 1 cup milk any kind, warm slightly if refrigerated

    Equipment

    • Mixing bowls
    • Cupcake or muffin tin
    • Paper cupcake liners
    • Whisk
    • Spatula
    • Cooling rack

    Method
     

    1. Preheat your oven to 350°F (175°C) and line a cupcake tin with paper liners to prepare for baking.
    2. In a large mixing bowl, sift together the flour, cocoa powder, baking powder, and salt to combine evenly. The sifting helps avoid lumps and ensures a smooth batter.
    3. In a separate bowl, whisk the eggs and sugar until the mixture becomes slightly pale and thickens, about 2-3 minutes, with a gentle whiff of sweetness.
    4. Pour in the vegetable oil and vanilla extract into the egg mixture, then whisk until fully combined and smooth, with a glossy appearance.
    5. Gradually add the warm milk to the wet ingredients, whisking gently to incorporate without splashing, creating a smooth, slightly runny batter.
    6. Slowly fold the dry ingredients into the wet mixture using a spatula, mixing gently until just combined; avoid overmixing to keep the cupcakes light.
    7. Divide the batter evenly among the cupcake liners, filling each about two-thirds full to give room for rising and a rounded top.
    8. Place the tray in the oven and bake for 20 minutes, or until the tops are springy to the touch and a toothpick inserted in the center comes out clean.
    9. Remove the cupcakes from the oven and let them cool in the tin for 5 minutes, then transfer to a wire rack to cool completely, which helps prevent sogginess.
    10. Once cooled, these cupcakes reveal a tender crumb with a slight bounce and a light, even color on top, ready to be frosted or enjoyed as is.

    Notes

    For extra flavor, fold in chocolate chips or a swirl of your favorite frosting. These cupcakes store well in an airtight container for up to 2 days.

    There’s something oddly satisfying about biting into a cupcake that’s both vivid in color and surprisingly tender inside. Maybe it’s the cocoa or that whisper of vanilla. Or maybe it’s just the fact that baked goods always seem to hide a little magic in the crumbs.

    Whatever the reason, these little treats are there to remind us that sometimes the simplest things make the biggest stir. And honestly, I’ll probably be up at midnight scraping the last of the frosting off my plate—again.

  • The Surprise Comfort of Puffy Japanese Cheesecake

    The Surprise Comfort of Puffy Japanese Cheesecake

    Midnight baking sessions have this weird way of making me forget the world. This time, I was craving something impossibly soft, almost like a cloud with a slight tang of cream cheese—turns out, Japanese Cheesecake is the secret. It’s not just fluff; it’s the smell of heated milk and sugar, mingling in the oven, that draws me in.

    There’s something so unexpectedly calming about the way it rises. No heavy crust, just that delicate jiggle when you tap the pan. Perfect to throw together on a cloudy Sunday, when the house feels still and quiet, waiting for a little something sweet. And, no joke, it always reminds me of those tiny bakeries in Tokyo I once wandered into—simple, honest, and kind of magical.

    Right now, as everyone hunts for comfort desserts that are easy but special, this cake feels like a small rebellion—no complicated frosting, just pure, airy goodness. I’ve made it a dozen times, usually when the fridge is almost empty but I want to feel like I’ve made something worth remembering. Maybe it’s the way it makes my apartment smell, or how it feels like tiny, sweet victory.

    Why I Love This Recipe (And You Will Too)

    • It’s a real life cheat code—quick to mix, faster to bake, and it looks fancy enough for guests.
    • The texture is wild—so airy and light, if you close your eyes, it’s like biting into a cake made of clouds.
    • It’s forgiving, even if your egg whites are a little less stiff—trust me on that one.
    • Perfect for lazy weekends or impromptu brunches, especially when you want something you can toss together without fuss.
    • It smells incredible while baking, and the moment you slice into it, that spongy, shiny top reveals itself—no Instagram filter needed.

    I dunno, maybe I’m rambling, but this cake keeps me grounded. It’s simple, honest, and somehow reminds me that sometimes, the best things come in the softest packages.

    Japanese Cheesecake

    This Japanese Cheesecake is a light, airy dessert with a delicate, cloud-like texture achieved through whipped egg whites and a cream cheese batter. It is baked gently to create a softly jiggly, golden top with a tender crumb inside, offering a melt-in-your-mouth experience with subtle tang from the cream cheese.
    Prep Time 20 minutes
    Cook Time 50 minutes
    Total Time 1 hour 10 minutes
    Servings: 8
    Course: Main Course
    Cuisine: Japanese
    Calories: 250

    Ingredients
      

    • 200 g cream cheese softened
    • 50 g unsalted butter melted
    • 100 ml milk heated until warm
    • 60 g cake flour sifted
    • 10 g cornstarch sifted
    • 6 large eggs separated
    • 100 g caster sugar divided
    • 1/2 tsp cream of tartar optional, stabilizes egg whites

    Equipment

    • Mixing bowls
    • Whisk
    • Sifter
    • Loaf or cake pan
    • Rubber spatula
    • Baking paper

    Method
     

    1. Preheat your oven to 160°C (320°F). Line a 20cm (8-inch) cake pan with parchment paper, ensuring enough overhang for easy removal.
    2. Combine softened cream cheese and melted butter in a bowl, whisking until smooth and creamy with no lumps. Add warm milk gradually and mix until fully incorporated.
    3. Sift the cake flour and cornstarch into the cream cheese mixture, folding gently with a spatula until smooth. Set aside.
    4. Separate the eggs, placing yolks in a small bowl and whites in a clean mixing bowl. Add half of the caster sugar to the yolks and whisk until pale and thick.
    5. Whisk the egg whites with cream of tartar until soft peaks form, then gradually add the remaining sugar while continuing to whisk until stiff, glossy peaks are achieved.
    6. Gently fold a small amount of whipped egg whites into the cream cheese batter to lighten it, then carefully fold in the remaining egg whites until just combined, being gentle to retain air.
    7. Pour the batter into the prepared pan and give it a gentle tap on the counter to release air bubbles. Smooth the top with a spatula.
    8. Bake in the preheated oven for about 50 minutes, or until the top is golden and the cake has a slight jiggle in the center when gently shaken.
    9. Remove the cake from the oven and let it cool in the pan for 10 minutes, then carefully lift it out using the parchment paper and transfer to a wire rack to cool completely. The cake should be soft, airy, and slightly jiggly in the center.
    10. Slice gently to reveal a tender, cloud-like crumb with a shiny, slightly puffy surface. Serve at room temperature and enjoy its melt-in-your-mouth texture.

    Some nights, I just want dessert that’s almost a secret. Silky, airy, and ridiculously satisfying in a way that sneaks up on you. Just about the best kind of quiet joy there is.

  • Red Velvet Strawberry Cheesecake That Changes How You Think About Holiday Sweets

    Red Velvet Strawberry Cheesecake That Changes How You Think About Holiday Sweets

    I never thought I’d be obsessed with a cheesecake that smells like a bakery’s secret back room—rich butter and vanilla mingling with sweet, ripe strawberries. It’s not just about flavor, but that subtle waft of cocoa that sneaks in and then lingers, almost like a whisper. I made this on a whim last weekend, and suddenly everything else seemed dull in comparison.

    This dessert isn’t just for parties or special occasions, though. It hits harder when you’re craving a little chaos, a sweetness that feels almost rebellious in the middle of April. It’s like a reminder that dessert can be both nostalgic and wild at the same time.

    Why I Love This Recipe (And You Will Too)

    • It’s surprisingly easy but feels wildly impressive. No one needs to know how simple it is.
    • The strawberry topping makes it smell like spring even if it’s snowing outside.
    • It combines that deep, earthy cocoa with fluffy, tangy cream cheese—utterly addicting.
    • Fits perfectly into my chaotic schedule—no need for fuss, but still feels fancy.
    • It’s a reminder that a little pink goes a long way when it comes to comfort.

    Honestly, I started making it just because I had strawberries and leftover cream cheese. Now I kind of want to turn it into a weekly ritual. Might even start calling it my accidental masterpiece.

    Strawberry Cocoa Cheesecake

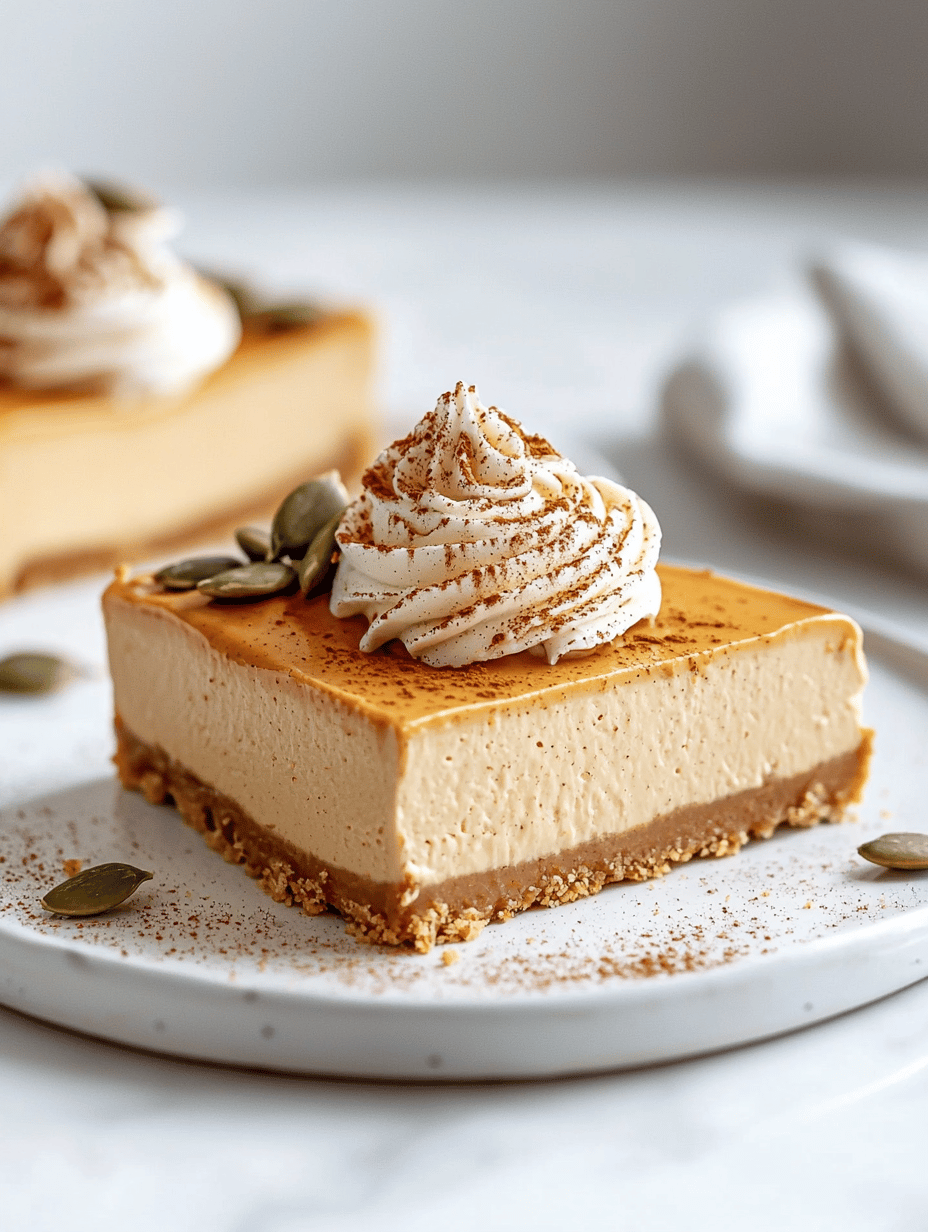
    This cheesecake combines a creamy, tangy cheese filling with a rich cocoa undertone and a fresh strawberry topping. It is baked until set with a smooth, dense texture and topped with bright, juicy strawberries to add a vibrant contrast. The final appearance is a luscious, multi-layered dessert with a glossy fruit topping.
    Prep Time 20 minutes
    Cook Time 1 hour
    Total Time 1 hour 20 minutes
    Servings: 8
    Course: Main Course
    Cuisine: American
    Calories: 420

    Ingredients
      

    • 200 g graham cracker crumbs for crust
    • 100 g unsalted butter melted
    • 500 g cream cheese softened
    • 150 g sugar granulated
    • 3 large eggs room temperature
    • 2 tbsp unsweetened cocoa powder sifted
    • 1 tsp vanilla extract
    • 250 g fresh strawberries hulled and sliced
    • 2 tbsp sugar for strawberries

    Equipment

    • Springform pan
    • Mixing bowls
    • Electric mixer
    • Spatula
    • Saucepan
    • Strawberry knife
    • Baking sheet

    Method
     

    1. Combine graham cracker crumbs and melted butter in a bowl until evenly coated, then press the mixture into the bottom of a springform pan to form an even crust. Chill in the refrigerator for 15 minutes to set.
    2. In a large mixing bowl, beat the softened cream cheese and sugar with an electric mixer until smooth and creamy, about 2-3 minutes. The mixture should be free of lumps and slightly fluffy.
    3. Add eggs one at a time, beating gently after each addition to incorporate completely, which helps build a smooth, cohesive batter.
    4. Mix in the cocoa powder and vanilla extract until fully combined, giving the batter a deep, chocolate color and rich aroma.
    5. Pour the cream cheese batter over the chilled crust and smooth the top with a spatula for an even surface. Place the pan in a preheated oven at 160°C (320°F) and bake for about 60 minutes, until the edges are set but the center still slightly jiggles.
    6. Remove the cheesecake from the oven and let it cool completely on a wire rack. Once cooled, refrigerate for at least 4 hours or overnight to fully set.
    7. While the cheesecake is chilling, prepare the strawberry topping by tossing sliced strawberries with sugar in a bowl. Let them macerate for about 15 minutes until juicy and fragrant.
    8. Arrange the macerated strawberries evenly on top of the chilled cheesecake. Lightly press them into the surface for a plush, inviting look.
    9. Slice into pieces and serve immediately, enjoying the contrast of creamy filling, rich cocoa, and fresh, sweet strawberries.

    The best part? It feels like a little surprise every time I cut into it. Maybe I’m just weird, but this cake makes me slow down and savor. Plus, it looks prettier than you’d expect, which counts for a lot when life feels busy.

    Anyway, now I’m just sitting here thinking maybe I should add a splash of balsamic a la strawberries and cream. Or not. Who knows. Probably just gonna eat the rest and stay surprised.

  • Funnel Cake: The Surprising Comfort of Fridge-Ready Crisps

    Funnel Cake: The Surprising Comfort of Fridge-Ready Crisps

    Most people think of funnel cake as a fairground treat, a swirled cloud of sweet fat on a paper plate. But what if I told you it’s also the unexpected hero of last-minute snacks, made with ingredients already chilling in your fridge? No need to stand in line or get out the deep-fryer; this version is more about the chill, the messy, the impulsive moments of baking.

    There’s a certain magic watching the batter turn golden and crispy while you’re folding laundry or listening to a podcast. The aroma—the warm smell of vanilla and fried sugar—floats readily through my apartment, no special occasion needed. Right now, it’s perfect. Something about these crispy ribbons feels urgent and kind of rebellious, like a snack you can toss together and forget about for a bit.

    Why I Love This Recipe (And You Will Too)

    • It’s a serious upgrade from ordering takeout when you want something sweet but don’t want the hassle.
    • All the ingredients are probably already in your fridge, so no extra trips to the store.
    • It’s chaos-friendly, forgiving, and easy to tweak.
    • There’s something oddly satisfying about turning a sloshy batter into perfect crunchy spirals on demand.
    • Best of all, it reminds me that sometimes the best comfort foods are the simplest—maybe even the most spontaneous.

    Anyway, I probably shouldn’t get too sentimental about fried dough. But yeah. It feels good to turn what’s in the fridge into something that makes you smile, even in the chaos of a day.

    No-Fry Funnel Cake Bites

    This recipe transforms simple pantry ingredients into crispy, golden ribbons of batter that resemble miniature funnel cake bites. The batter is cooked on the stovetop until bubbling and crispy, resulting in an airy, slightly chewy final texture with a delightful crunch.
    Prep Time 10 minutes
    Cook Time 15 minutes
    Total Time 25 minutes
    Servings: 4
    Course: Main Course
    Cuisine: American
    Calories: 250

    Ingredients
      

    • 1 cup all-purpose flour sifted
    • 1 cup milk
    • 2 large eggs beaten
    • 1 teaspoon vanilla extract
    • 2 tablespoons granulated sugar
    • 1/2 teaspoon baking powder
    • pinch salt
    • 2 tablespoons vegetable oil for batter and frying

    Equipment

    • Mixing bowl
    • Whisk
    • Frying pan or skillet
    • Slotted Spoon or Tongs
    • Paper towels

    Method
     

    1. Whisk together the flour, sugar, baking powder, and salt in a mixing bowl until evenly combined.
    2. In a separate bowl, beat the eggs and then stir in the milk, vanilla, and vegetable oil until smooth and cohesive.
    3. Pour the wet ingredients into the dry ingredients and stir gently until just combined; do not overmix to keep the batter light.
    4. Heat a lightly oiled skillet or frying pan over medium heat until shimmering but not smoking.
    5. Pour a thin stream of batter into the pan, creating a spiral or ribbon shape, or simply flowing into random shapes—these will turn into crispy, irregular bites.
    6. Allow the batter to cook until bubbling and golden around the edges, about 2–3 minutes.
    7. Use a slotted spoon or tongs to carefully flip each piece, cooking for another 1–2 minutes until evenly golden and crispy.
    8. Transfer the cooked crispy ribbons to paper towels to drain excess oil and keep them crispy.
    9. Repeat the pouring and cooking process with the remaining batter, adjusting heat as necessary to prevent burning.
    10. Serve the funnel cake bites warm, optionally sprinkled with powdered sugar or drizzled with honey for extra sweetness.

    Notes

    Make sure to keep an eye on the temperature to achieve crispy but not burnt bites. The batter should be poured in thin ribbons for maximum crunch and visual appeal.

    So, here I am, still thinking about how the best foods don’t have to be fancy or planned. Sometimes they just happen in the kitchen, a little messy, a little reckless. Maybe that’s where the magic lives. Or maybe I just like the smell of sugar in the air.

  • The Surprising Charm of Cotton Candy Cookies

    The Surprising Charm of Cotton Candy Cookies

    Ever thought about capturing the scent of carnival nights in a cookie? This isn’t about making a sugary treat that sticks to your fingers. It’s about recreating that fleeting moment of pink and blue spun sugar—the sweet aroma that hits your nose first, followed by a melt-in-your-mouth crunch.

    I stumbled across this idea when I was trying to find a way to bring my childhood back without the sticky mess. Cookies that taste like a carnival ride in your mouth. Honestly, that’s what got me hooked. It’s wild how a few simple ingredients can take you straight back in time, even if just for a few bites.

    Right now, with everything feeling fast and chaotic, I think we all crave a little whimsy. These cookies aren’t just fun, they’re a tiny rebellion against the daily grind. Nothing fancy—just sugar, butter, and a sprinkle of 2024 nostalgia. Maybe that’s enough to make a shelf life of stress a little more bearable.

    Why I Love This Recipe (And You Will Too)

    • Because it makes ordinary ingredients feel magical for a moment.
    • It’s perfect for sharing at parties, and honestly, for sneaking a few bites when no one’s looking.
    • They remind me of summer fairs, but easy enough to whip up anytime.
    • No pastry skills needed, just a love for the weird and wonderful.
    • It’s chaos in the best way—sweet, crunchy, and totally unexpected.

    Sometimes it’s about chasing that fleeting, beautiful weirdness. Even if it doesn’t last, these cookies definitely leave a smile lingering.

    Carnival-Inspired Spun Sugar Cookies

    These cookies are crafted to emulate the fleeting aroma and crunchy texture of spun carnival sugar, using simple ingredients like sugar, butter, and food coloring. The baking process creates a crisp, golden exterior with a slightly chewy center, resembling whimsical candy treats. They are fun, colorful, and evoke a sense of childhood nostalgia.
    Prep Time 15 minutes
    Cook Time 10 minutes
    Total Time 25 minutes
    Servings: 12
    Course: Main Course
    Cuisine: fusion
    Calories: 150

    Ingredients
      

    • 1 cup unsalted butter softened
    • 1 cup granulated sugar
    • 2 cups all-purpose flour sifted
    • 1 teaspoon vanilla extract
    • few drops food coloring (pink and blue) separate bowls
    • optional sprinkles or colored sugar

    Equipment

    • Mixing bowls
    • Baking sheet

    Method
     

    1. Preheat your oven to 350°F (175°C) and line a baking sheet with parchment paper.
    2. Cream together the softened butter and granulated sugar in a mixing bowl until the mixture is light and fluffy, about 2-3 minutes. You’ll notice it becomes pale and slightly voluminous.
    3. Mix in the vanilla extract to the creamed butter and sugar, blending well for another 30 seconds. The aroma will become fragrant and inviting.
    4. Gradually add the sifted flour to the wet ingredients, stirring gently until the dough just comes together and is soft but manageable.
    5. Divide the dough into two portions. Tint one with pink food coloring and the other with blue, kneading each briefly until the color is evenly distributed.
    6. Roll each colored dough into a log about 1.5 inches in diameter. Wrap in plastic wrap and chill in the refrigerator for about 10 minutes to firm up.
    7. Once chilled, use a sharp knife to slice each log into 1/4-inch thick rounds. Arrange these slices on your prepared baking sheet, leaving space between each.
    8. If desired, sprinkle the tops with colorful sprinkles or a pinch of colored sugar for extra whimsy.
    9. Bake the cookies in the preheated oven for 8-10 minutes, or until the edges turn golden brown and crisp. You’ll hear a gentle bubbling sound as they bake, and the aroma will be sweet and candy-like.
    10. Remove the cookies from the oven and let them cool on the baking sheet for a few minutes before transferring to a wire rack. They will firm up as they cool, developing a delightful crunch.
    11. Once cooled, enjoy these colorful, candy-inspired cookies that capture the whimsy and crunch of carnival spun sugar. Share with friends or keep them as a fun, nostalgic treat!

    Notes

    For more vibrant colors, add a few more drops of food coloring. Store cookies in an airtight container at room temperature for up to a week.

    So maybe I’ll just keep these in the jar. Or stack them in a box labeled ‘magic.’ It’s not about perfect recipes—it’s about moments worth stealing. And honestly, these cookies? They’re a little bit of joy I didn’t see coming.

  • Easter M&M Cookies That Make You Smile Every Time

    Easter M&M Cookies That Make You Smile Every Time

    Filling a tray with these cookies feels almost rebellious. Not because they’re complicated or fancy, but because of that sudden burst of tiny chocolate explosions when the M&Ms crack just right. It’s like a moment of simple chaos—unpredictably sweet and a little satisfying.

    I started making these because I wanted something nostalgic that also felt a little unexpected. No fancy ingredients, just colorful candies and a classic cookie dough. They’re perfect for when the house is quiet or when a messy handful of happiness is needed.

    Why I Love This Recipe (And You Will Too)

    • It’s an easy, no-fuss bake that feels like a cheat but isn’t.
    • The smell of melting butter mixed with vanilla and pastel colors crunching? Pure joy.
    • They’re unpretentious but somehow still special—perfect for a quick treat or a last-minute gift.
    • Fresh out of the oven, the edges are just a tad caramelized, and that crackle when you bite into them is addictive.

    Honestly, I think these cookies are the kind that sneak into your week without fanfare and then stick around longer than you’d admit.

    Colorful M&M Cookies

    These cookies are made with a simple cookie dough that is mixed with colorful M&Ms, then baked until golden with crunchy edges. The result is a chewy, melt-in-your-mouth treat dotted with bursts of candy sweetness and a slightly crackled surface.
    Prep Time 15 minutes
    Cook Time 10 minutes
    Total Time 25 minutes
    Servings: 24
    Course: Main Course
    Cuisine: American
    Calories: 150

    Ingredients
      

    • 1 cup unsalted butter softened
    • 1 cup granulated sugar
    • 1 cup brown sugar packed
    • 2 large eggs
    • 2 teaspoons vanilla extract
    • 3 cups all-purpose flour
    • 1 teaspoon baking soda
    • 1/2 teaspoon salt
    • 1 cup M&Ms candy colorful chocolate candies

    Equipment

    • Mixing bowls
    • Baking sheet

    Method
     

    1. Preheat your oven to 350°F (175°C) and line a baking sheet with parchment paper.
    2. In a large bowl, beat together softened butter, granulated sugar, and brown sugar until the mixture is creamy and light, about 2-3 minutes. It should be fluffy and slightly pale.
    3. Add the eggs one at a time, mixing well after each addition. Then stir in the vanilla extract until combined. The mixture should be smooth and glossy.
    4. In a separate bowl, whisk together the all-purpose flour, baking soda, and salt. Gradually add the dry ingredients into the wet mixture, mixing on low speed or folding until just combined. The dough will be thick and slightly sticky.
    5. Gently fold in the colorful M&Ms candies, distributing them evenly throughout the dough. This step will ensure the candies are visible and evenly spread.
    6. Using a tablespoon or cookie scoop, drop generous spoonfuls of dough onto the prepared baking sheet, spacing them about 2 inches apart to allow for spreading.
    7. Bake in the preheated oven for 9-11 minutes, or until the edges are golden brown and the centers appear set but soft. The top should crack slightly and smell wonderfully sweet.
    8. Remove the cookies from the oven and let them cool on the baking sheet for 5 minutes; then transfer them to a wire rack to cool completely. The cookies will firm up as they cool.
    9. Once cooled, enjoy these chewy, crunchy-edged cookies filled with colorful bursts of chocolate. Serve with a glass of milk or store in an airtight container for later.

    Sometimes I wonder if I’d ever get tired of cookies like these. Probably not. They’re the kind of treat that doesn’t ask much but gives back a lot. Maybe tomorrow I’ll toss in some pretzels or switch out the M&Ms for something unexpected.

    Whatever happens, there’s always a cookie jar. Or a moment where you realize, yeah, I needed this today.

  • Easter Madeleines That Smell Like Spring’s First Rain

    Easter Madeleines That Smell Like Spring’s First Rain

    Why I Love This Recipe (And You Will Too)

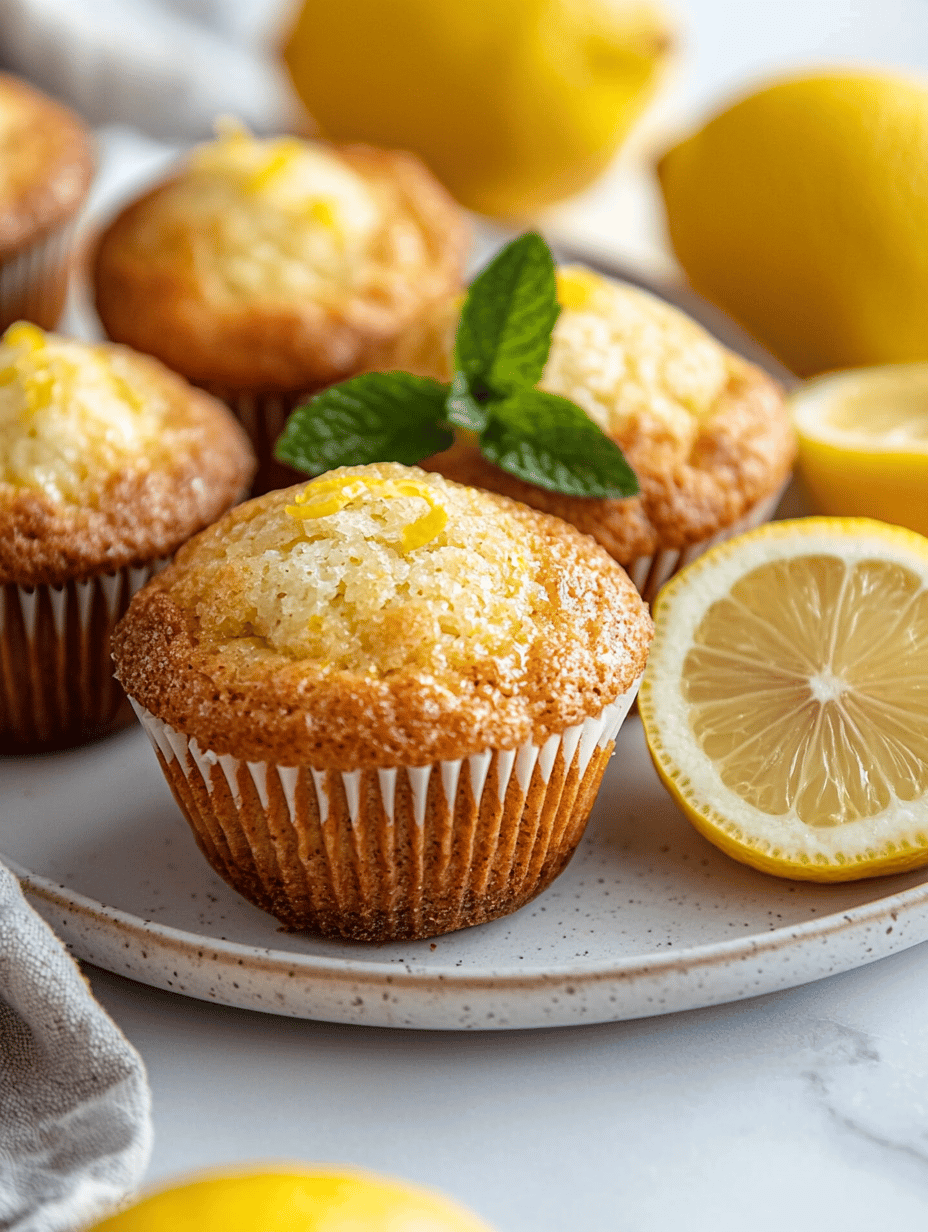
    I’ve never thought about madeleines this way before, but baking them during spring is like catching a whiff of that first rain after months of drought. The smell of lemon zest mingling with a hint of vanilla makes the kitchen feel alive. It’s weird how something so tiny can hold onto the scent of new beginnings.

    These madeleines are not just pretty—they’re the kind of treat that sneaks into your routine, catches you off guard. Perfect for Easter, but more than that, a reminder that simple things—like a quick burst of orange or a crack of cinnamon—can quickly shift a whole morning. Just me? Maybe. But I’m useless without something to hold onto on busy days.

    Wouldn’t it be wild if cake could really wrap you in a moment of calm? Yeah, probably not. But these little guys make that possible—small, fragrant, and honestly kind of addictive. Like, you bake one batch, and suddenly it’s a whole mood. Anyway, figuring out how to keep them fresh might be my next challenge.

    Why I Love This Recipe (And You Will Too)

    • The aroma is so much better than I expected—bright citrus with a buttery undertone, like a sunny rainstorm.
    • They’re easy enough for a weekday treat but special enough to pull out for guests or family.
    • They make my kitchen smell like Easter without needing a ton of effort.
    • Small, portable bites that don’t get stale fast, so I snack on them all week.

    Lemon and Vanilla Madeleines

    These madeleines are petite, shell-shaped sponge cakes with a tender, airy crumb and a slight crisp exterior. They are flavored with lemon zest and vanilla, resulting in a fragrant treat that has a delicate texture and a golden-brown finish.
    Prep Time 15 minutes
    Cook Time 10 minutes
    Total Time 25 minutes
    Servings: 12
    Course: Main Course
    Cuisine: French
    Calories: 120

    Ingredients
      

    • 1 cups all-purpose flour sifted
    • 1/2 cup granulated sugar
    • 1 stick unsalted butter melted and cooled slightly
    • 2 large eggs at room temperature
    • 1 teaspoon vanilla extract
    • 1 teaspoon grated lemon zest
    • pinch salt

    Equipment

    • Madeleine pan
    • Mixing bowls
    • Whisk
    • Rubber spatula
    • Measuring cups and spoons
    • Fine sieve

    Method
     

    1. Preheat your oven to 375°F (190°C) and generously grease your madeleine pan or brush it with softened butter.
    2. Sift the all-purpose flour into a bowl to remove lumps and set aside.
    3. In a mixing bowl, whisk together the eggs and sugar until the mixture is light, slightly thickened, and has a pale yellow color, about 3 minutes.
    4. Slowly pour in the melted butter while whisking gently to incorporate fully and create a smooth batter.
    5. Stir in the vanilla extract and lemon zest, mixing just until evenly distributed.
    6. Gently fold in the sifted flour and salt with a spatula, mixing until just combined without overworking the batter. It will be slightly runny.
    7. Spoon or pipe the batter into the prepared madeleine mold, filling each cavity about three-quarters full.
    8. Bake for 8-10 minutes, or until the madeleines are golden around the edges and a toothpick inserted into the center comes out clean.
    9. Remove the madeleines from the oven and allow them to cool in the pan for a few minutes before gently popping them out onto a wire rack.
    10. Let the madeleines cool completely before serving to achieve the perfect tender crumb and slightly crispy exterior.

    Notes

    For best flavor, let the madeleines sit for a few hours to develop their aroma before eating. They are best enjoyed fresh but can be stored in an airtight container for up to 2 days.

    Honestly, I keep thinking about how these little cakes somehow make the season feel just right—like a quiet, sweet pause. Maybe I just need more rain in my life or more baked goods that smell like it. Either way, they’re staying in my rotation.

    Now I just have to figure out how many I can eat before the weekend…

  • Lemon Cake Balls: A Unexpected Bright Spot for Your Afternoon Cravings

    Lemon Cake Balls: A Unexpected Bright Spot for Your Afternoon Cravings

    I once caught myself sniffing a lemon slice just to air out how sharp that citrus smell is, like an instant wake-up call. Turns out, blending that zest into cake balls isn’t just about upping the flavor, it’s about the surprise of that bright, almost tart aroma sneaking up when you bite in. It’s like a moment of being caught off guard by fresh air in your mouth.

    This recipe suddenly feels more relevant than ever. We’re stuck in a season where comfort food is nice but sometimes, you need that jolt of something zingy, almost rebellious. Plus, these lemon cake balls are tiny, manageable bursts. No knife required, just your fingers and a craving for something a little different.

    They’re perfect for when you want a quick treat that’s not just sweet but lively and almost cheeky. I’m telling you, this stuff matters right now, even if just as a little reminder that dessert doesn’t always have to be heavy or complex. Sometimes, it’s the small, punchy bites that save your day.

    Why I Love This Recipe (And You Will Too)

    • It’s ridiculously simple but feels fancy enough to make you look like a pro.
    • The aroma of lemon zest while mixing is an instant mood lifter.
    • There’s no rolling or icing fuss—just chill, roll, and go.
    • Sometimes, I need a quick hit of brightness, and these fit perfectly into that need.
    • They remind me that the little things matter, especially when they taste this good.

    I mean, these are basically the snacks I want on hand all summer—bright, fresh, and not too serious.

    Lemon Cake Balls

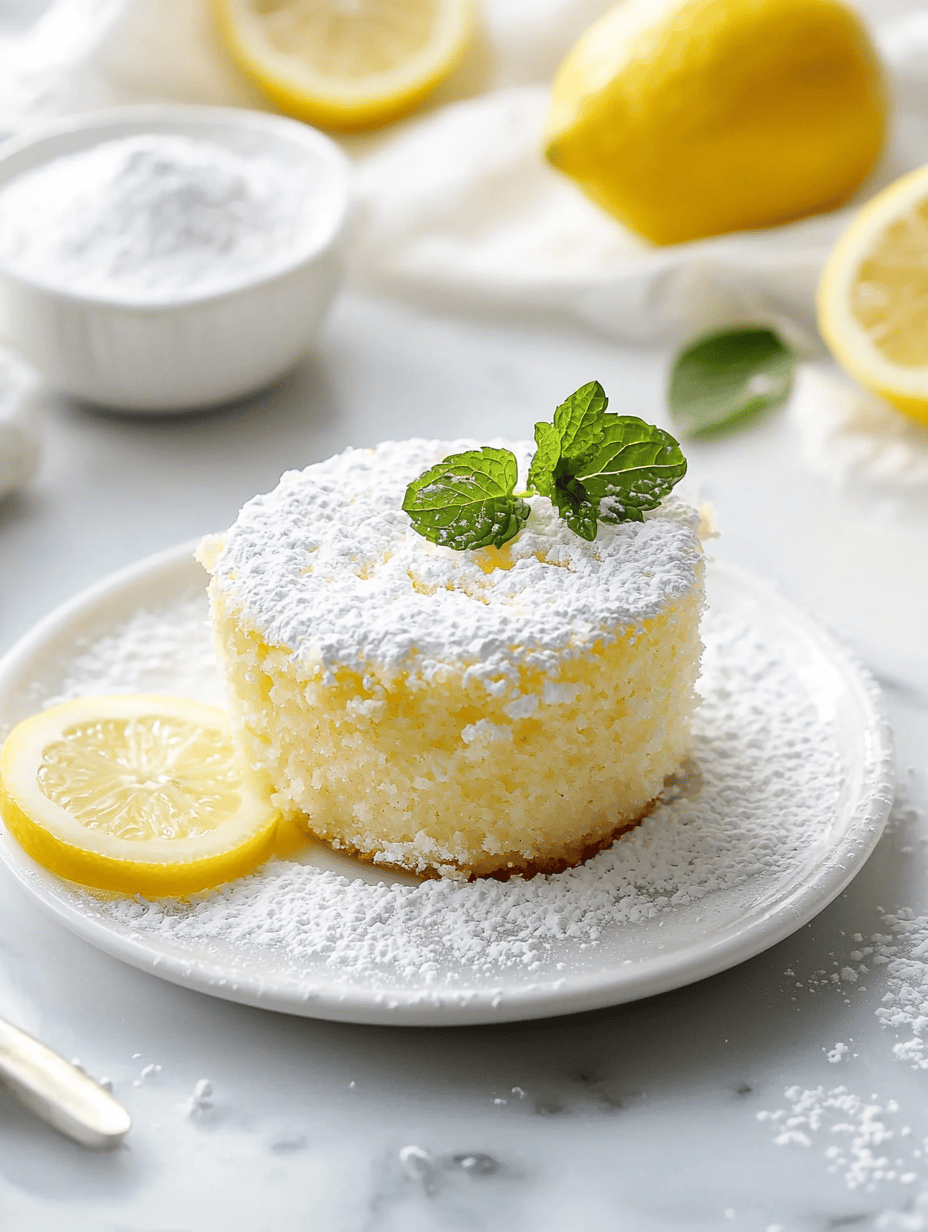
    Lemon cake balls are small, bite-sized treats made from crumbled lemon-flavored cake mixed with frosting, then rolled into spheres. The mixture is chilled and shaped, resulting in a firm, moist interior with a bright, citrusy aroma and a smooth outer surface.
    Prep Time 20 minutes
    Cook Time 10 minutes
    Total Time 30 minutes
    Servings: 12
    Course: Main Course
    Cuisine: American
    Calories: 120

    Ingredients
      

    • 1 box lemon-flavored cake mix
    • 1/2 cup lemon frosting store-bought or homemade
    • 1 teaspoon lemon zest freshly grated
    • 2 cups powdered sugar for coating, optional
    • Chilled chocolate or white melting wafers for coating, optional

    Equipment

    • Mixing bowl
    • Baking sheet
    • Parchment paper
    • Stand mixer or hand mixer
    • Measuring cups and spoons
    • Cooling rack

    Method
     

    1. Preheat your oven according to the cake mix package instructions, then bake the lemon-flavored cake in a prepared pan until golden and a toothpick inserted comes out clean. Let the cake cool completely on a wire rack.
    2. Crumble the cooled cake into a large mixing bowl until it resembles fine crumbs, using your fingers or a fork.
    3. Add the lemon frosting and lemon zest to the cake crumbs, then use a spoon or your hands to mix until well combined and dough-like.
    4. Shape the mixture into 1 to 1.5-inch balls using your hands, pressing gently to ensure they hold together. Place each ball on a parchment-lined baking sheet.
    5. Place the baking sheet in the refrigerator or freezer to chill for at least 30 minutes, helping the balls firm up.
    6. Melt the chocolate or white melting wafers in a microwave-safe bowl in 30-second intervals, stirring until smooth.
    7. Using a fork or skewer, dip each chilled cake ball into the melted chocolate, allowing excess to drip off. Place the coated balls back on the parchment-lined sheet.
    8. Optional: Toss the dipped balls in powdered sugar for an extra touch, then let them set at room temperature or in the fridge until the coating is firm.
    9. Once the chocolate coating is set and firm, transfer the lemon cake balls to a serving tray.
    10. Enjoy these bright, citrusy bites immediately or store them in an airtight container in the fridge for up to a week.

    Notes

    For an extra zesty flavor, sprinkle additional lemon zest on top before the coating sets. To make them more indulgent, drizzle with melted white chocolate after coating.

    And then I probably end up eating too many in one sitting. That’s just how these things go.