Cooking turkey cutlets on the stovetop can be a bit daunting if you’re craving that deep, smoky char. It’s one of those tricks I picked up when I lived in a city apartment with no grill, but still wanted that grilled flavor. Turns out, a good cast-iron pan and a few simple steps can mimic that outdoor experience pretty well.
There’s something satisfying about getting that crust just right—crackling and caramelized, with a juicy interior. It’s a quick weeknight win that feels a little indulgent, even if it’s just turkey and heat. Plus, it’s a great way to make a lean protein taste bold, without the fuss of marinating overnight.
Focusing on how to achieve a smoky, charred exterior on turkey cutlets without a grill, using just a stovetop and pan, for those craving that grilled flavor in winter or urban apartments.
Achieving Smoky Perfection Indoors
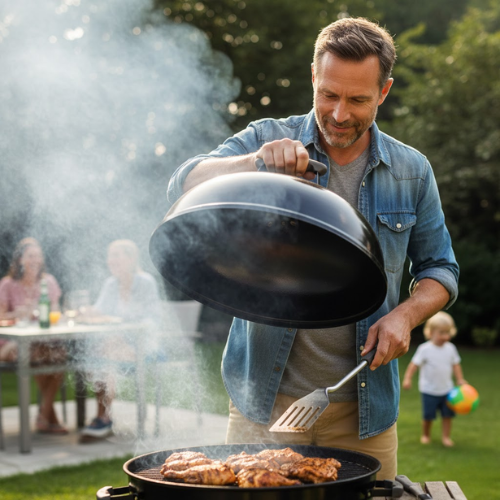
- Cooking these cutlets makes me think of summer barbecues, even when it’s freezing outside.
- I love how the smell of searing turkey instantly fills the kitchen with smoky nostalgia.
- Getting that perfect char feels like a small victory—like I’ve cracked a secret of outdoor grilling.
- There’s a quiet pride in turning a simple cut of turkey into something with serious flavor.
- Nothing beats that juicy, caramelized crust that feels both indulgent and surprisingly easy to achieve.
The story behind this recipe
- This recipe came together when I was trying to mimic that smoky, grilled flavor during winter, indoors. I didn’t want to give up on the quick, juicy appeal of turkey cutlets, but I craved that charred, caramelized crust you get from an outdoor grill. Experimenting with my cast-iron pan and a high heat, I found a way to make it happen without any fancy equipment.
- Cooking these reminds me of my early days in a tiny apartment, where I had to get creative. It’s become a go-to when I want something fast, flavorful, and a little nostalgic for summer barbecues. It’s simple, honest, and makes me appreciate how a few good techniques can turn plain turkey into something special.
- heading
- story_type
History and Fun Facts
- This technique mimics outdoor grilling by using high heat and a cast-iron pan, a trick I learned from backyard chefs in the city.
- Turkey cutlets became popular in American kitchens in the 20th century as a quick, lean protein option for busy households.
- The smoky flavor achieved here is a nod to traditional Southern barbecue methods, adapted for indoor stovetop use.
- Using a cast-iron skillet for searing adds a layer of history, as this cookware has been a kitchen staple for centuries, prized for its heat retention.
- This recipe celebrates the versatility of turkey, a meat often overshadowed by chicken but capable of delivering rich, satisfying flavor when properly cooked.
Key Ingredients and Tips
- Turkey breast: I prefer boneless, skinless cutlets—they cook quickly and stay juicy if not overdone. Swap with chicken for a milder flavor, but turkey has that richer, slightly gamy note.
- Olive oil: I use a good extra-virgin splash for that fruity aroma and to help the crust form. If you want a higher smoke point, switch to avocado oil—it won’t burn as easily at high heat.
- Garlic powder: I like it for an even, mellow garlic note that doesn’t burn. Fresh garlic can be great but tends to burn faster, so use sparingly or add later in cooking.
- Smoked paprika: It gives that deep, smoky flavor that mimics outdoor grilling. If you don’t have it, use chipotle powder for heat and smoke, but adjust to taste.
- Lemon juice: Brightens everything with a zesty kick and helps balance the richness. Skip if you prefer a more neutral flavor, but I think it keeps the turkey lively.
- Salt & pepper: Basic, but crucial. I season generously—don’t be shy—because it builds the flavor from the inside out. Adjust to your taste, but don’t skimp on salt.
- Optional herbs (thyme or rosemary): I toss in a sprig or two for subtle, fragrant background notes. Fresh herbs are best, but dried works in a pinch—just use half as much.
Spotlight on key ingredients
Turkey breast:
- I prefer boneless, skinless cutlets—they cook quickly and stay juicy if not overdone. Swap with chicken for a milder flavor, but turkey has that richer, slightly gamy note.
- Olive oil: I use a good extra-virgin splash for that fruity aroma and to help the crust form. If you want a higher smoke point, switch to avocado oil—it won’t burn as easily at high heat.
- Smoked paprika: It gives that deep, smoky flavor that mimics outdoor grilling. If you don’t have it, use chipotle powder for heat and smoke, but adjust to taste.
Olive oil:
- Lemon juice: Brightens everything with a zesty kick and helps balance the richness. Skip if you prefer a more neutral flavor, but I think it keeps the turkey lively.
- Salt & pepper: Basic, but crucial. I season generously—don’t be shy—because it builds the flavor from the inside out. Adjust to your taste, but don’t skimp on salt.
- Optional herbs (thyme or rosemary): I toss in a sprig or two for subtle, fragrant background notes. Fresh herbs are best, but dried works in a pinch—just use half as much.
Notes for ingredient swaps
- Turkey breast: I prefer boneless, skinless cutlets—they cook quickly and stay juicy if not overdone. Swap with chicken for a milder flavor, but turkey has that richer, slightly gamy note.
- Olive oil: I use a good extra-virgin splash for that fruity aroma and to help the crust form. If you want a higher smoke point, switch to avocado oil—it won’t burn as easily at high heat.
- Garlic powder: I like it for an even, mellow garlic note that doesn’t burn. Fresh garlic can be great but tends to burn faster, so use sparingly or add later in cooking.
- Smoked paprika: It gives that deep, smoky flavor that mimics outdoor grilling. If you don’t have it, use chipotle powder for heat and smoke, but adjust to taste.
- Lemon juice: Brightens everything with a zesty kick and helps balance the richness. Skip if you prefer a more neutral flavor, but I think it keeps the turkey lively.
- Salt & pepper: Basic, but crucial. I season generously—don’t be shy—because it builds the flavor from the inside out. Adjust to your taste, but don’t skimp on salt.
- Optional herbs (thyme or rosemary): I toss in a sprig or two for subtle, fragrant background notes. Fresh herbs are best, but dried works in a pinch—just use half as much.
Equipment & Tools
- Cast-iron skillet: Provides even, high heat for a smoky crust.
- Tongs: Turns the cutlets without piercing, preserving juices.
- Meat thermometer: Ensures accurate internal temperature for safety and juiciness.
- Paper towels: Patting dry to promote browning.
Step-by-step guide to grilling
- Gather your equipment: a sturdy cast-iron skillet, tongs, a meat thermometer, and a paper towel-lined plate for resting.
- Pat the turkey cutlets dry with paper towels—moisture prevents that sought-after sear. Season generously with salt, pepper, and smoked paprika on both sides.
- Preheat your skillet over high heat until it’s just starting to shimmer—about 250°C (480°F). Add a splash of olive oil, swirling to coat.
- Place the cutlets in the hot skillet gently. You should hear a loud sizzle. Don’t overcrowd; work in batches if needed.
- Sear each side for about 2-3 minutes, flipping once, until deep golden brown and slightly charred. Use tongs to handle, avoiding piercing the meat.
- a. Check the internal temperature with a meat thermometer—aim for 74°C (165°F) for safe, juicy turkey. b. Look for a crust that’s dark and caramelized. c. Smell the smoky aroma filling the kitchen.
- If the cutlets start to burn before reaching temp, lower the heat slightly or reduce oil. If they’re not browning, increase heat for a minute or two.
- Remove from heat and transfer to a plate. Cover loosely with foil and let rest for 5 minutes to redistribute juices.
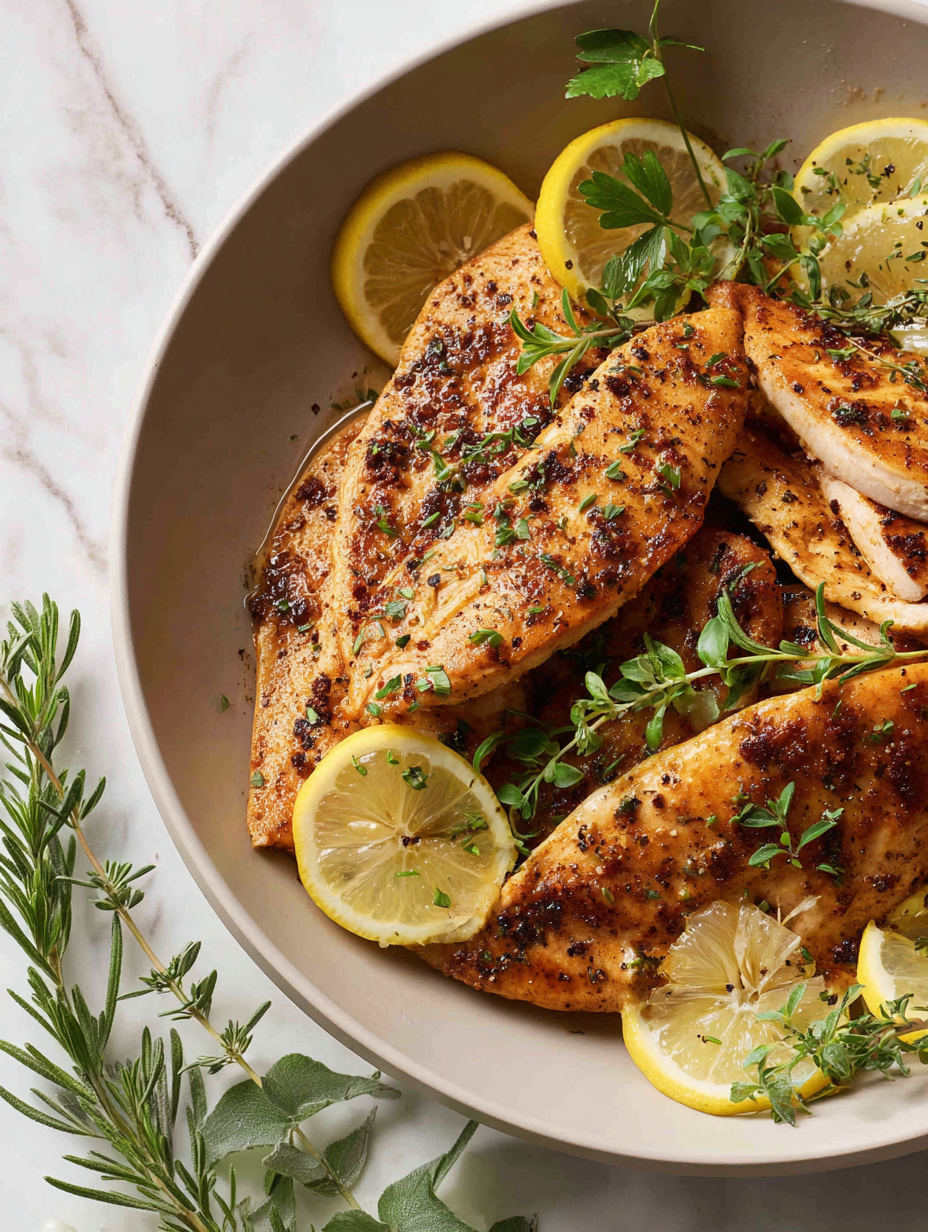
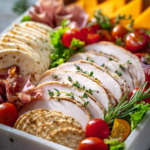
- Slice and serve immediately, drizzled with a squeeze of lemon for brightness and a sprinkle of fresh herbs if desired.
Let the cutlets rest for 5 minutes under loose foil. Slice against the grain, plate, and finish with a squeeze of lemon and fresh herbs if desired.
How to Know It’s Done
- Probe temp reaches 74°C (165°F).
- Crust is deep golden and slightly charred.
- Juices run clear when cut, with no pink remaining.
Stovetop Smoked Turkey Cutlets
Ingredients
Equipment
Method
- Pat the turkey cutlets dry with paper towels to remove excess moisture, which helps achieve a crisp crust. Season both sides generously with salt, pepper, smoked paprika, and garlic powder.
- Preheat your cast-iron skillet over high heat until it’s just starting to shimmer, and add a splash of olive oil, swirling it to coat the bottom evenly. The oil should begin to smoke lightly, indicating a hot surface.
- Carefully place the seasoned turkey cutlets in the hot skillet, ensuring they sit flat without overcrowding. You should hear a loud sizzle as the meat makes contact with the pan.
- Sear each side for about 2-3 minutes, flipping once with tongs, until the crust is deep golden brown and slightly charred. Watch for a crackling sound and a rich smoky aroma filling the kitchen.
- Check the internal temperature with a meat thermometer; it should read 74°C (165°F). If the crust is darkening too quickly, reduce the heat slightly to prevent burning.
- Once the desired temperature is reached and the crust is nicely charred, transfer the cutlets to a plate. Squeeze fresh lemon juice over them to add brightness, and sprinkle with optional herbs for extra fragrance.
- Let the turkey rest for 5 minutes, loosely covered with foil. Resting allows the juices to redistribute, ensuring moist and flavorful meat.
- Slice against the grain, serve immediately, and enjoy the juicy, smoky crust with a tender interior—just like outdoor grilled turkey, but made indoors.
Top Tips for Perfect Grilled-Style Turkey
- sear: Make sure your pan is very hot—almost smoking—before adding the turkey to get that deep, smoky crust.
- Dry thoroughly: Pat the cutlets completely dry; moisture is the enemy of browning and will cause steaming instead of searing.
- Oil wisely: Use just enough oil to coat the surface; too much can cause splattering and prevent that crisp crust.
- Avoid overcrowding: Give each cutlet space in the pan; overcrowding drops the temperature and leads to steaming, not searing.
- Flip carefully: Use tongs to flip once, gently, to maintain the crust and avoid piercing the meat, which lets juices escape.
- Check temperature: Use a meat thermometer and aim for 74°C (165°F)—nothing beats that for juicy, safe turkey.
- Rest properly: Let the cutlets rest uncovered for 5 minutes after cooking; this helps juices redistribute and keeps them moist.
Common mistakes and how to fix them
- FORGOT to preheat pan → Always heat your skillet until shimmering before adding turkey.
- DUMPED seasoning → Season generously, but taste and adjust to avoid overpowering.
- OVER-TORCHED crust → Reduce heat if crust burns before meat reaches temperature.
- MISSED resting step → Rest meat for 5 minutes to retain juices and finish cooking.
Quick kitchen fixes
- If the crust isn’t crispy enough, splash a little water in the pan and crank the heat for 30 seconds.
- When the turkey sticks, patch with a gentle shake or lift with tongs—don’t force it to release.
- Splash a bit of oil if the pan starts to smoke excessively—reduce heat immediately to prevent burning.
- DUMPED seasoning? Rinse lightly and start fresh with a more balanced spice mix for even flavor.
- When in doubt, shield delicate parts with foil briefly to prevent over-charring while finishing cooking.
Prep, store, and reheat tips
- Marinate the turkey cutlets with spices and oil up to 2 hours ahead; the flavors deepen and the meat becomes more tender, with a smoky aroma developing as they sit.
- Store cooked cutlets in an airtight container in the fridge for up to 3 days. The surface may darken slightly, but the inside stays juicy and flavorful.
- Reheat gently in a warm skillet over low heat, covered, until just heated through—watch for moisture loss, which can make the crust less crisp.
- For freezing, wrap individual cutlets tightly in plastic wrap and store up to 1 month. Thaw overnight in the fridge for best results.
- Reheating from frozen? Defrost fully in the fridge first, then follow the gentle reheat process. The smoky flavor may soften slightly with longer storage.
Top questions about grilled turkey cutlets
1. How do I get a smoky crust without a grill?
Use a cast-iron skillet heated until very hot, around 250°C (480°F). It creates that smoky, charred exterior.
2. Why isn’t my turkey crusty enough?
Pat the turkey dry thoroughly before seasoning and searing; moisture prevents a good crust.
3. How long should I cook the cutlets?
Sear the turkey for about 2-3 minutes per side; look for deep golden color and a crackling sound.
4. How do I know when the turkey is done?
Use a meat thermometer to check for 74°C (165°F) inside. Juices should run clear, not pink.
5. Should I rest the turkey after cooking?
Finish with a squeeze of lemon and let rest for 5 minutes; this keeps the meat juicy and flavorful.
6. Can I substitute the oil?
Replace olive oil with avocado oil for higher smoke point, or use butter for a richer flavor.
7. What other proteins can I use?
Use chicken breasts or pork cutlets if turkey isn’t available; they sear similarly but have different flavors.
8. How much seasoning should I use?
Season generously with salt, pepper, and smoked paprika; adjust to taste for maximum flavor.
9. How should I reheat leftovers?
Reheat in a covered skillet over low heat for about 5 minutes, until warmed through and still juicy.
10. What if my crust isn’t crispy?
If the crust isn’t crispy enough, splash a little water and increase heat for quick crisping.
Cooking these turkey cutlets with that smoky sear brings a simple pleasure—something grounding about that charred exterior and juicy inside. It’s a process that feels honest, almost primal, in the way it transforms a lean protein into something deeply flavorful. When I make these, I remember that good flavor is often just a few good techniques away.
In a season where quick, satisfying dinners matter more than ever, this recipe offers a little bit of comfort and a lot of flavor. It’s about making the most of what you’ve got, turning everyday ingredients into something memorable—without fuss or fancy equipment. That smoky, caramelized crust stays with you long after the last bite.
Hi, I’m Theo Granger, the voice and recipe creator behind Boldly Overseasoning.
If you believe salt is not the enemy, spices should be generous, and flavor should never whisper when it can sing, then you are absolutely in the right place. Boldly Overseasoning is my unapologetic celebration of big flavor, confident cooking, and trusting your instincts in the kitchen. I created this space for people who are done with bland food and ready to cook with courage.


Leave a Reply