There’s something almost meditative about gently cooking eggs over low heat, slowly coaxing out their creamy, custardy side. It’s a process that demands patience but rewards you with a texture so smooth it’s like spooning in a little cloud of comfort. I’ve found that rushing this step turns the eggs rubbery and dulls their gentle sweetness.
This method isn’t just about making breakfast; it’s about giving eggs the time they deserve. It’s a quiet moment in the morning where you can focus on the simple magic of heat and patience. When done right, each bite feels like a warm hug, soft and rich, with a subtle, buttery flavor that wakes up your senses.
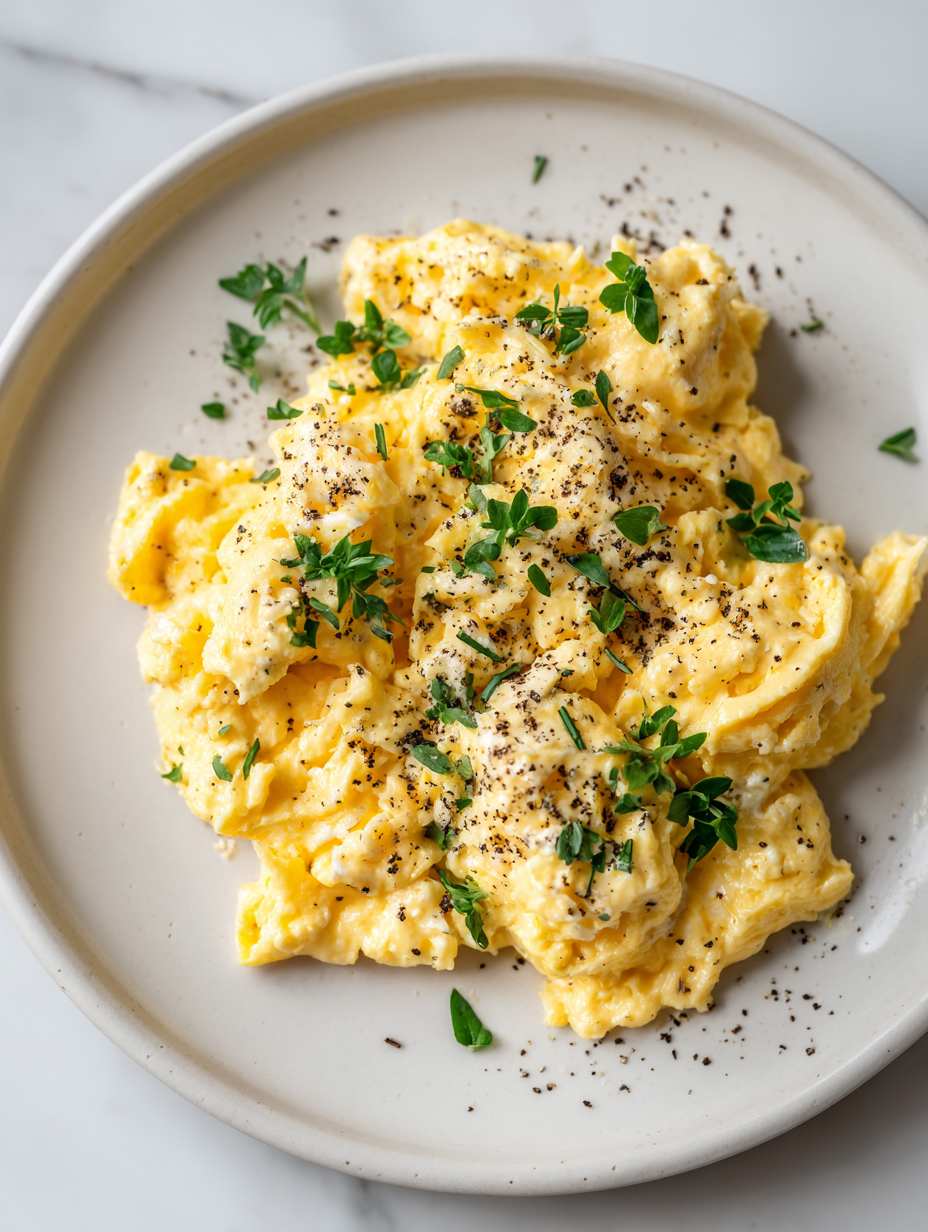
Focusing on the gentle, slow-cooked method to achieve the creamiest, most custardy scrambled eggs, like a breakfast custard in the making.
The art of slow-cooked eggs
- There’s a quiet joy in perfectly soft, fluffy eggs, like a gentle morning hug in every bite.
- I get a rush of pride when I master the slow, creamy texture — it feels like breakfast triumph.
- Sometimes, I crave the nostalgia of those weekend mornings, scrambled eggs smothered in melted cheese, simple and comforting.
- A chaotic morning turns calm when I focus on just stirring and watching the eggs turn silky, forgetting the clock.
- There’s relief in knowing I can make a restaurant-quality scramble at home, just by paying attention to heat and patience.
The story behind this recipe
- My inspiration for perfect scrambled eggs came during a chaotic weekend morning. I wanted something simple yet luxurious, with a texture that melts in your mouth. After experimenting with different heat levels and stirring techniques, I discovered that patience and gentle heat made all the difference.
- There’s a quiet satisfaction in turning humble eggs into something creamy and indulgent. It’s a reminder that good things often come from slow, mindful cooking — a small act of care that transforms breakfast into a moment of calm.
- heading
- The story behind this recipe
Historical tidbits about scrambled eggs
- The idea of gently cooking eggs to achieve a custard-like texture dates back to French culinary techniques of the 19th century, emphasizing patience and low heat.
- Scrambled eggs have been a breakfast staple across many cultures, but the slow, gentle method gained popularity in classic French bâtard cuisine.
- In the early 20th century, chefs began experimenting with heat control and stirring techniques, leading to the modern, creamy scramble beloved today.
- The term ‘scrambled’ originated from the visual of eggs being stirred or ‘scrambled’ in a pan, but technique-wise, slow cooking was a game-changer.
Ingredient breakdown: key components
- Fresh eggs: I always crack open bright, clean eggs with a slightly runny yolk—smooth and rich, they make all the difference. If yours are older, expect a more rubbery scramble.
- Butter: I use plenty of butter—sizzle it until it’s just starting to foam and smell nutty. Swap for olive oil if you want a lighter touch, but it won’t have that lush mouthfeel.
- Salt: A pinch of sea salt elevates the eggs’ natural sweetness. Add it at the end if you prefer a cleaner taste, or earlier for more even seasoning.
- Cream or milk: A splash of heavy cream makes the texture extra velvety, but whole milk works too—just keep the eggs moist and tender. Skip if you prefer a lighter scramble.
- Pepper: Freshly cracked black pepper adds a subtle bite. Wait until after cooking to keep the flavor bright and avoid overcooking the pepper’s sharpness.
- Optional herbs: Chives or parsley give a fresh, green note. Add just before serving—don’t cook them too long or they’ll lose their brightness.
- Cheese: A little grated cheddar or feta melts into the eggs, adding richness. Use sparingly if you want to keep the scramble light—more cheese makes it decadent.
Spotlight on key ingredients
Eggs:
- Fresh eggs: I look for bright, clean shells with a slightly runny yolk—rich and smooth, they melt perfectly. Older eggs tend to be rubberier, less tender.
- Butter: I use plenty of butter—wait until it’s just foaming and smelling nutty. Swap for olive oil if you want a lighter touch, but it won’t have that lush, melting quality.
Salt:
- Butter: The magic starts with butter—sizzle it until it’s just turning golden and fragrant. It creates that silky mouthfeel. Olive oil can work, but it won’t give the same richness.
- A pinch of sea salt enhances the eggs’ natural sweetness. Add it at the end to keep the flavor clean, or earlier if you want evenly seasoned eggs—just don’t overdo it.
Notes for ingredient swaps
- Dairy-Free: Use coconut milk or a splash of olive oil instead of butter for a different richness and a hint of flavor. Expect a slightly different texture and less creaminess.
- Lower-Sodium: Skip the added salt or use a salt substitute like potassium chloride. The eggs will taste a bit more delicate, but still satisfying.
- Vegan: Try silken tofu blended until smooth in place of eggs. It won’t have the same fluffy rise but offers a creamy, protein-rich alternative.
- Herb Boost: Fresh chives or parsley can be swapped with dill or basil for a different aromatic punch, adding freshness and brightness.
- Cheese Variations: Swap cheddar for feta, goat cheese, or nutritional yeast. Each will bring a unique salty, tangy, or umami flavor to your scramble.
- Milk Alternatives: Whole milk can be replaced with almond, oat, or soy milk. Expect a slightly thinner, lighter scramble with less richness.
- Pepper Sub: Use white pepper for a milder, subtler heat or a pinch of cayenne for a smoky kick. Adjust to your spice tolerance.
Equipment & Tools
- Non-stick skillet: To cook eggs evenly without sticking
- Silicone spatula: For gentle, continuous stirring
- Small mixing bowl: To whisk eggs and seasonings
- Fork: For breaking yolks and initial whisking
Step-by-step guide to perfect scrambled eggs
- Gather your equipment: a non-stick skillet, a silicone spatula, a small mixing bowl, and a fork. The non-stick pan helps keep the eggs smooth, spatula for gentle stirring, bowl for whisking, fork for breaking yolks.
- Crack 3 large eggs into the bowl. Whisk thoroughly with a fork until the yolks and whites are fully combined, about 20 seconds. Season with a pinch of salt and pepper if desired.
- Place the skillet over very low heat (~80°C / 175°F). Add 1 tablespoon of butter. Wait until it melts and just begins to foam, releasing a nutty aroma—this is your cue to start.
- Pour the eggs into the skillet. Let them sit undisturbed for about 10 seconds, then gently push the eggs from the edges toward the center with your spatula. Keep the heat low.
- Continue stirring slowly and gently, scraping the bottom and sides of the pan. Every 15-20 seconds, let the eggs sit for a moment for gentle curds to form—about 3-4 minutes total.
- Check the eggs: they should look moist, slightly runny but not raw. If they start to look dry or crackle loudly, lower the heat further or remove from heat momentarily.
- Once the eggs are softly curdled, glossy, and just set—remove from heat. The residual heat will finish cooking them in the next minute.
- Transfer the eggs to a plate or bowl. Let them rest for 30 seconds to settle. Taste and adjust seasoning if needed, then serve immediately for best texture.
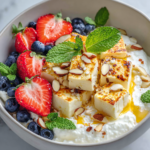
Serve immediately, optionally garnish with fresh herbs. Rest eggs for 30 seconds to settle before plating, ensuring a creamy texture.
How to Know It’s Done
- Eggs are softly curdled, glossy, and moist, not dry or rubbery.
- No crackling sounds; eggs look creamy and slightly runny at the center.
- A gentle jiggle in the pan confirms they are just set, not overcooked.
Slow-Cooked Creamy Scrambled Eggs
Ingredients
Equipment
Method
- Crack the eggs into a small mixing bowl and whisk thoroughly with a fork until the yolks and whites are fully combined, creating a smooth, uniform mixture.
- Place a non-stick skillet over very low heat, around 80°C (175°F). Add a tablespoon of butter and wait until it melts, just starting to foam and smell nutty.
- Pour the whisked eggs into the skillet. Let them sit undisturbed for about 10 seconds, allowing the edges to start setting slightly.
- Gently push the eggs from the edges toward the center with your silicone spatula, stirring slowly and continuously. Keep the heat very low to prevent rapid cooking and curdling.
- Continue stirring gently every 10-15 seconds, allowing the eggs to form soft, glossy curds. The mixture should look moist and slightly runny, about 3-4 minutes in total.
- Add a splash of heavy cream if desired, stirring it in gently for extra velvety richness. Remove the skillet from heat just before the eggs are fully set, as residual warmth will finish the cooking process.
- Season with a pinch of sea salt and freshly cracked black pepper to taste. Give a final gentle stir to distribute the seasonings evenly.
- Transfer the creamy scrambled eggs to a plate or bowl immediately. Let them rest for about 30 seconds to settle and finish cooking with residual heat.
- Enjoy your luxuriously soft, custard-like scrambled eggs while warm, garnished with extra herbs if desired.
Pro tips for perfect scrambled eggs
- Bolded tip: Keep the heat very low—around 80°C / 175°F—to gently coax out creaminess without scrambling too quickly.
- Bolded tip: Use fresh eggs—bright, clean shells, slightly runny yolk—for a silky, custardy texture that melts in your mouth.
- Bolded tip: Stir slowly and constantly—gentle movement prevents curdling and creates those soft, fluffy egg folds.
- Bolded tip: Add a small knob of butter just as eggs start to set—this adds richness and a velvety finish.
- Bolded tip: Remove eggs from heat slightly before they’re fully done—they’ll cook through with residual warmth for perfect softness.
- Bolded tip: Finish with a pinch of salt and freshly cracked pepper—season at the end to keep flavors bright and fresh.
- Bolded tip: Serve immediately—timing is everything for that just-set, creamy texture that’s impossible to replicate later.
Common mistakes and how to fix them
- FORGOT to lower heat → eggs turn rubbery, fix by reducing heat immediately.
- DUMPED all eggs in at once → stir gently from the start for creamy curds.
- OVER-TORCHED eggs → remove pan early, residual heat finishes cooking eggs softly.
- SKIPPED seasoning step → taste and season eggs after cooking for best flavor.
Quick fixes and pantry swaps
- When eggs look rubbery, splash cold water in the pan to stop cooking instantly.
- If eggs stick, patch with a quick swirl of oil or butter before stirring again.
- Splash a tiny bit of milk or water if eggs turn dry—shimmering surface indicates moisture.
- DUMPED in too much salt? Rinse eggs briefly under cold water to tone down saltiness.
- Overcooked eggs? Shield with a damp paper towel and gently reheat for softness.
Prep, store, and reheat tips
- You can whisk the eggs with salt and pepper the night before; keep refrigerated for up to 12 hours, ensuring they stay fresh and ready to cook.
- Pre-measured butter or oil can be kept at room temperature for quick melting when ready to cook, saving precious time in the morning.
- Store any grated cheese separately in an airtight container in the fridge; it keeps well for 3-4 days and adds richness when melted into eggs.
- Cooked scrambled eggs can be stored in an airtight container in the fridge for up to 2 days; reheat gently over low heat, watching for texture change and avoiding dryness.
- Reheating eggs can sometimes make them rubbery; to prevent this, add a splash of milk or water before warming and stir gently until heated through, about 30 seconds in the microwave or low stovetop heat.
Top questions about perfect scrambled eggs
1. Why do my eggs turn out rubbery?
Use fresh eggs with bright yolks for the best custard-like texture. Older eggs tend to be rubberier and less tender.
2. What’s the best heat level for fluffy eggs?
Cook eggs over very low heat, around 80°C (175°F), stirring constantly for a creamy, soft scramble.
3. Should I add butter before or after cooking?
Add butter right at the start when the pan is just melting and foaming, to create a silky finish.
4. When should I salt my eggs?
Season eggs with salt and pepper after cooking to keep flavors bright and avoid over-seasoning.
5. How long should I whisk the eggs?
Whisk eggs thoroughly until yolks and whites are fully combined, about 20 seconds, for even cooking.
6. When should I take the eggs off the heat?
Remove eggs from heat slightly before they’re fully set; residual warmth finishes the cooking process.
7. How quickly should I serve scrambled eggs?
Serve eggs immediately for the best creamy, custardy texture. They tend to dry out when reheated.
8. What tools are best for making scrambled eggs?
Use a non-stick skillet and a silicone spatula to stir gently and prevent sticking or overcooking.
9. Can I skip the cream in scrambled eggs?
Adding a splash of cream makes eggs extra velvety, but whole milk works if you prefer lighter eggs.
10. How should I store and reheat leftover scrambled eggs?
Refrigerate cooked eggs in an airtight container for up to 2 days. Reheat gently over low heat with a splash of water or milk.
There’s something oddly comforting about that soft, custardy texture of well-made scrambled eggs. It’s a simple pleasure that feels like a quiet victory in the morning rush. When done right, each bite is a gentle reminder to slow down and savor the small moments.
In the end, it’s about paying attention—letting heat and patience do their work. These eggs aren’t just breakfast; they’re a small act of care that can set the tone for a calm, thoughtful day.

Hi, I’m Theo Granger, the voice and recipe creator behind Boldly Overseasoning.
If you believe salt is not the enemy, spices should be generous, and flavor should never whisper when it can sing, then you are absolutely in the right place. Boldly Overseasoning is my unapologetic celebration of big flavor, confident cooking, and trusting your instincts in the kitchen. I created this space for people who are done with bland food and ready to cook with courage.


Leave a Reply